All Around the World Boys’ Room
 We’ve been working on decorating the room that Charlie and Jamie share for months now, and it’s finally done! I think it turned out so well! (I sort of want to just go stand in the doorway and enjoy it’s finished-ness. Am I the only one who does that?)
My husband, Ray, has this ever-growing collection of vintage globes, and since we’ve run out of room for them elsewhere, we thought they’d make a great jumping-off point for the decor in our boys’ room. We added maps to the theme because there are some amazing kid-friendly ones, and what mom could resist making her child’s room as educational as it is fun? The boys love their new room, and I’m hoping that it can grow with them for a few years!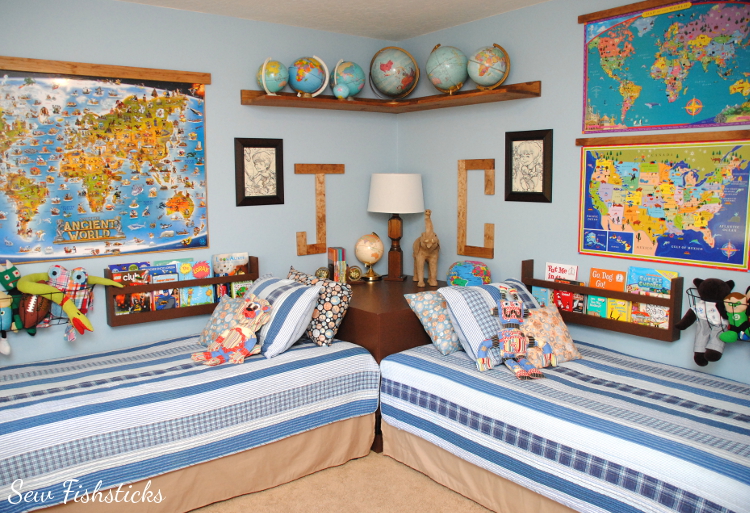 Ray and I worked together on the wood-building in here. He did the majority of the construction work while I did the sanding, painting and staining, and we did the final installation together. Ray’s such a great sport when I start throwing ideas out at him or emailing him Pinterest links.
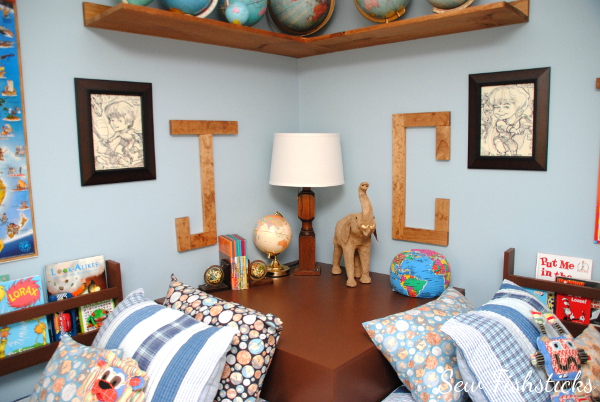 The huge box in the corner between the two beds is just painted MDF. (I think it’s so funny that it’s enormous and takes up a ton of room, but the room is so much more wide open with this layout than it was before when we had the two beds side by side.) The giant letters are simple 1x3s, cut at Lowes, sanded and stained by me, then assembled with metal braces and hung with D-ring picture hangers. (I used a whole lot of D-ring picture hangers in this room!) The caricatures that we had done of the boys at our local education store last year make perfect wall art in this corner. (Except for the frames, they were free!)
Each of the boys got a wall-mounted book rack above the bed, plus hanging stuffed-animal storage. Those are just window-box wire baskets from Lowes. The book racks were made using a modified version of these plans from Ana White: Flat Wall Book Shelves. Ours are obviously a lot simpler, but they work well in this room. 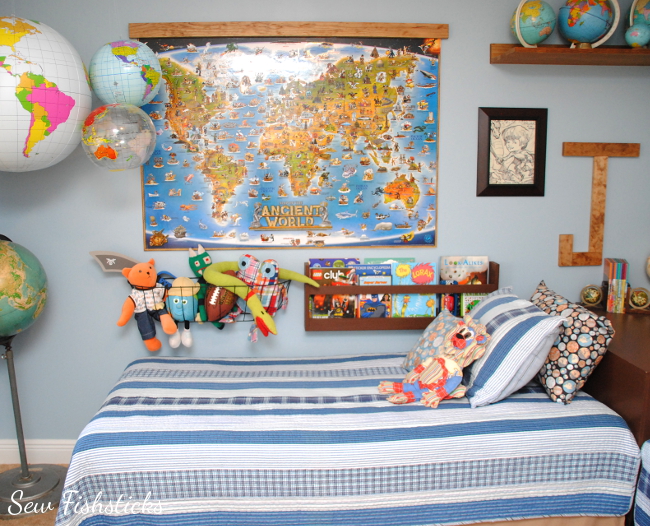 The maps mounted over each bed were a bigger project than I originally thought they would be, but so worth the extra work. Lesson learned: doing a bit of research before jumping into a project will save you lots of work and a few dollars later!
  On Charlie’s side of the room, we added a row of time zone clocks.
 Seven-year-old Jamie had this great idea for the clocks. Instead of putting the cities under the clocks, he asked if we could put framed pictures of our loved ones who live in those time zones under them. How cool is that? And, he’s seven! I went a tiny step further and printed the pictures on top of maps of their cities. (This might be my favorite thing in the whole room.)
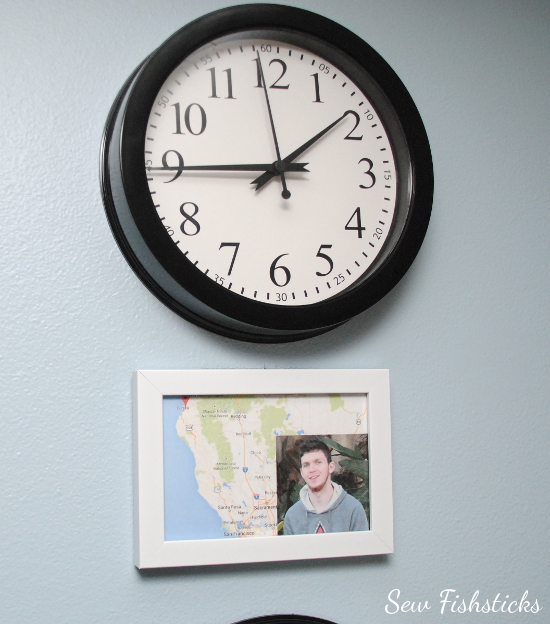 The clocks are simple $5 ones from Target. They’re perfect for little ones who are learning to tell time, though, because they have the numbers printed for the minutes, as well as the hours.
Back on Jamie’s side of the room, is our hanging feature. I like the added interest that you get by hanging something from the ceiling in a room, in kids’ rooms especially. When we were tossing around ideas, we considered disassembling some of the globes we have that are in poorer shape and constructing a mobile of sorts. In the end, though, since this room will be inhabited by little boys who just can’t resist the urge to bat around something hanging from the ceiling, we went with soft and safe inflatable globes instead.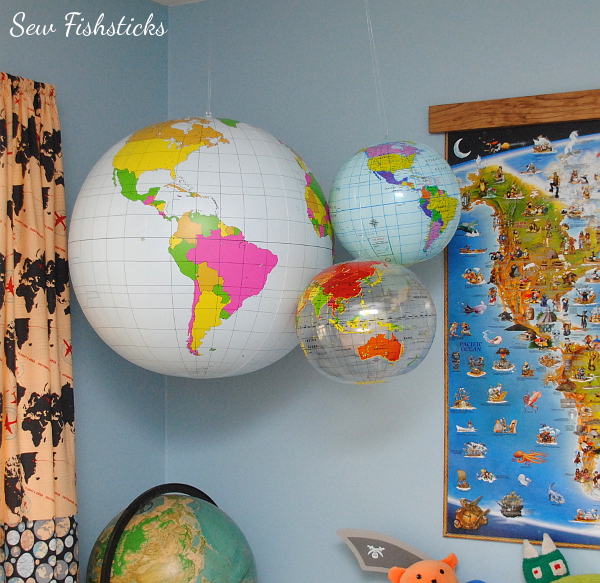 I was on the hunt for fabrics for this room for quite some time, so when I ran across the Detour fabric line by Bo Bunny for Riley Blake, I was thrilled! Isn’t it absolutely perfect for this room! Perfect! And, my sweet friends at Riley Blake Designs were so kind to send us enough for curtains, pillows and a great little framed bulletin board.
 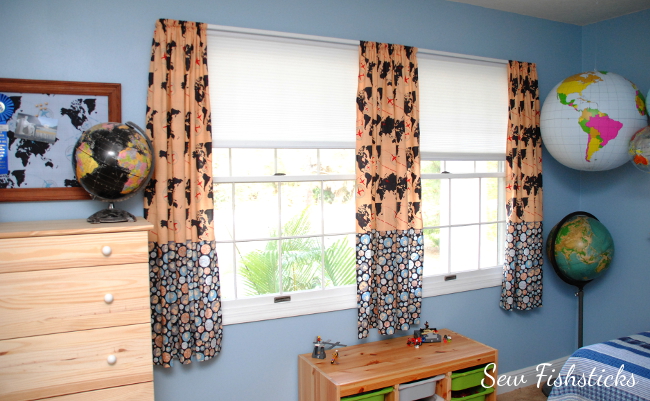 I love how adding a few simple handmade items in coordinating fabrics pulls a room together. I knew if I was going to get this room done before my boys went away to college, I need to forego making the quilts myself, so I purchased the quilts from Overstock.com and threw in some accent pillows instead.
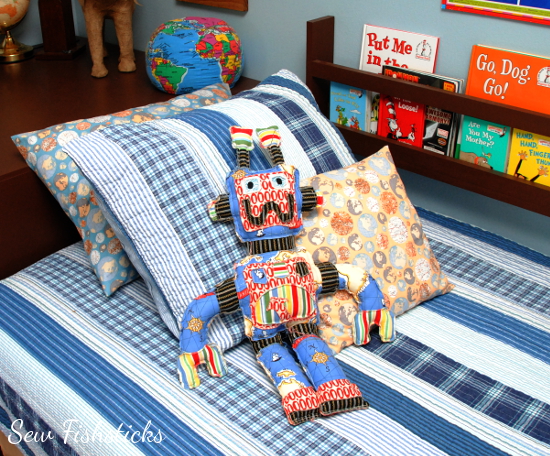 On the opposite side of the room are the boys’ dressers. They’re simple, unfinished Tarva chests from IKEA that I may decide to stain or paint at some point, but for now natural works.
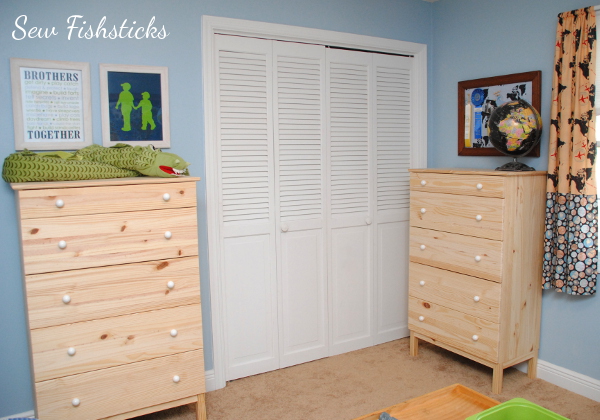 The artwork over Charlie’s dresser is a set of framed printables from Willow Lane Prints.
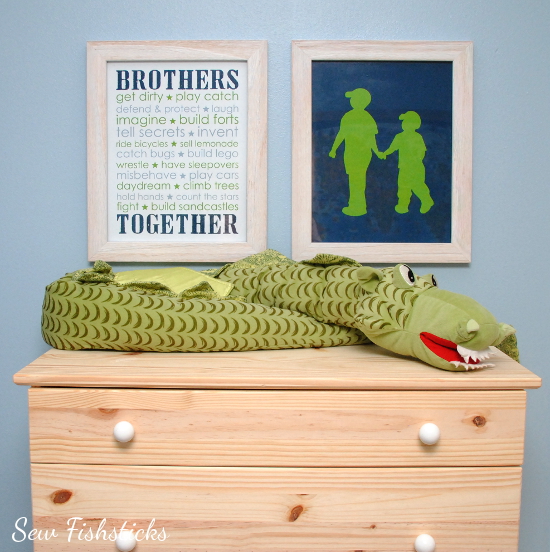 And, over Jamie’s dresser is the framed fabric bulletin board that I mentioned earlier. I’ll have a tutorial for it right here tomorrow! It’s a super quick and really simple project that adds a great little splash of fun to a room — a great practical way to feature a favorite fabric.
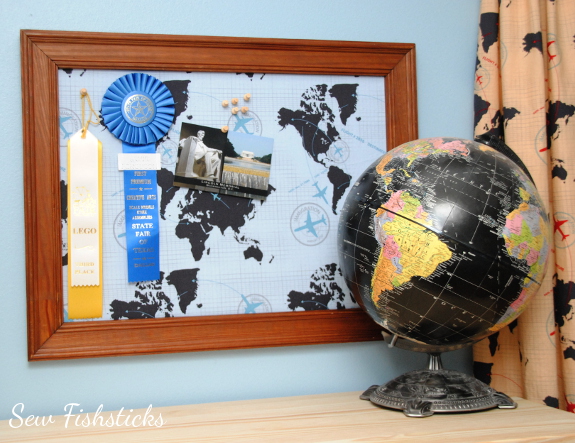 Here’s one last peek at our Around the World Boys’ Room on the way out the door!
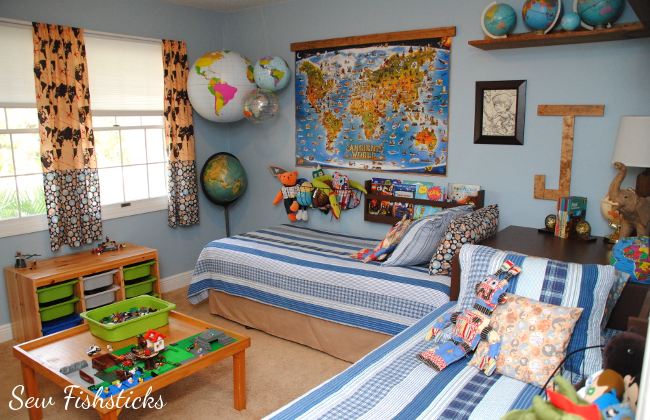 What do you think? Have you decorated a child’s room with a specific theme? Our teenage son’s room is up next here, and he’s asked for us to use steam punk inspired decor!
The Wonky House Quilt Block Tutorial
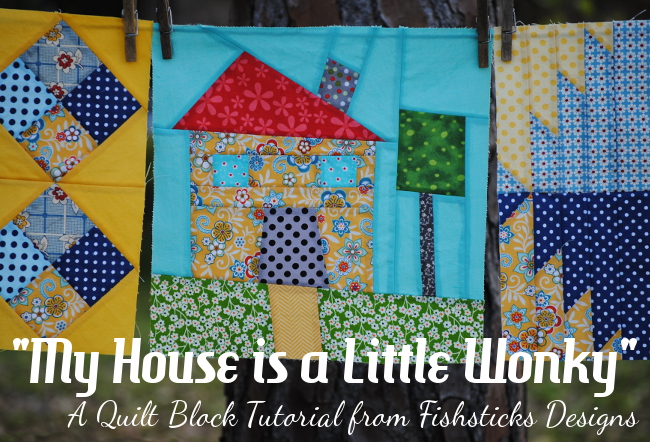 Welcome to the Fishsticks Designs Blog’s first quilt block tutorial! I am so excited about getting to be a part of the Around the Block Round Robin at Patchwork Posse! When Becky asked me if I’d like to join in by sharing my favorite quilt block, I knew right away what block that would be. I’m calling it the “My House is a Little Wonky” Block.
I love the whimsical nature of wonky house blocks, and the fact that they’re perfect in their imperfection. This block has no picky corners to be aligned perfectly, and it lets you use your imagination a bit. My husband retired from the Air Force about eight years ago after 20 (“and a half!” he would add) years, and we’ve lived in a lot of houses. With each move, I immediately started decorating to turn our house into our home. One of the things all of that decorating taught me, is that no house is ever perfectly straight . . . ever. It’s not really visible from the outside or with a casual glance, sometimes you even have to climb up into those dark corners to find out that the walls are slightly crooked, but they always are. I think there’s a little life lesson in that. In spite of how we might look from the outside or at a casual glance, we’re all a little wonky, just like our houses. It’s a good thing, too. If we weren’t, life would be far too boring!
Ready to get started? The tutorial for this freezer-paper-pieced block looks really long, but I promise this block is not hard to assemble at all. I’ll walk you through every step!
You’ll need a few things before you get started. First, you’ll want to print this color template for your house block: Color Template. Be sure when you print that you’ve chosen to print at full-size or 100%. You may have to save the file to your computer to print it. (There’s a black and white template shown below, too. Don’t worry about printing it right now, but you may need it later: Black & White Template.) In addition to your regular quilting supplies, since this is a freezer-paper-pieced block, you’ll need some freezer paper. (Iron Man is totally optional, however. When you live in a house with little boys, and you walk away from your supplies, you often come back to find tiny visitors.)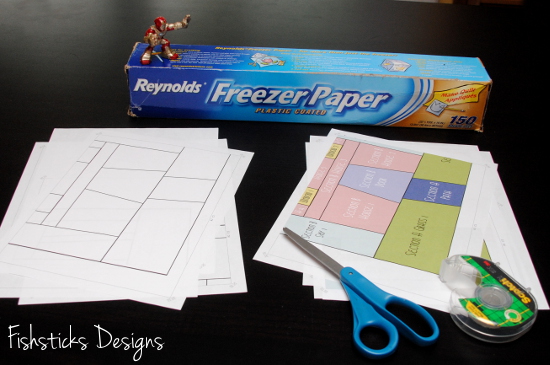 To assemble your color template, just trim the 1/2″ margin off of the left hand side of the bottom right corner page.
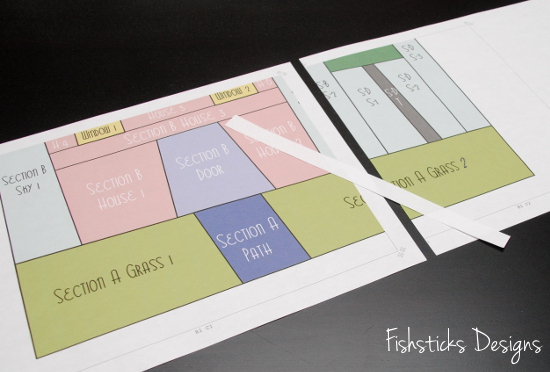 Overlap the bottom right corner page with the bottom left corner page. Line everything up and tape it in place.
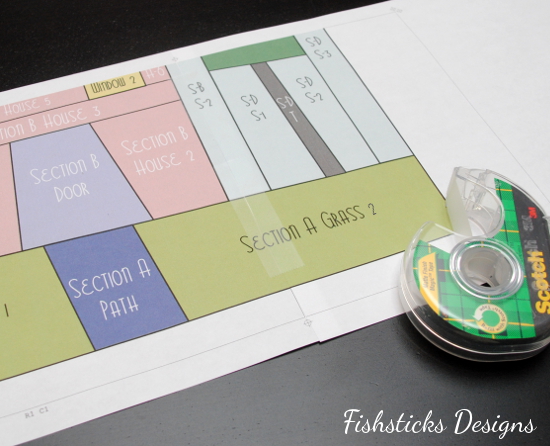 Piece the top two pages together in the same manner, and then tape all four pieces together.
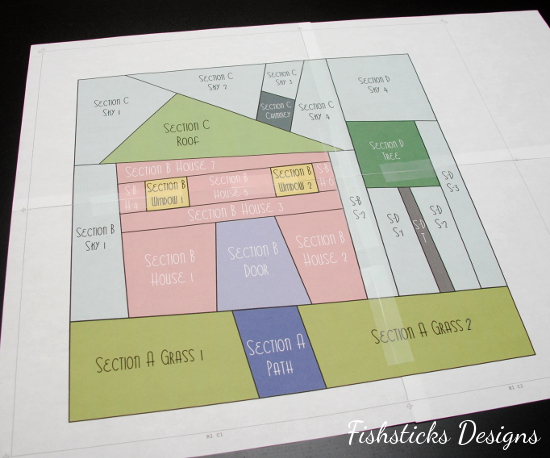 Check to make sure that your template measures 12 1/2″ square before moving on.
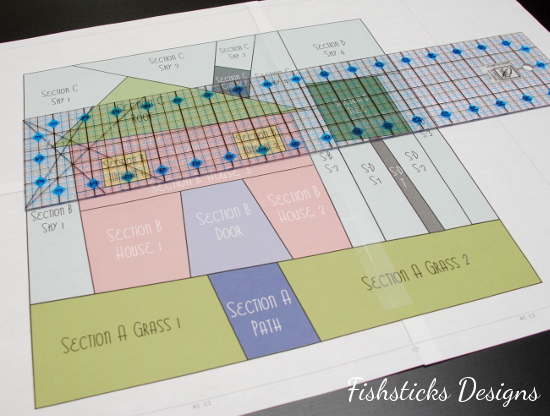 Cut a piece of freezer paper slightly bigger than your template and place it shiny side down/matte side up on top of your template. (If you find that it’s too difficult to see through the freezer paper, you can print the black and white template for tracing instead.)
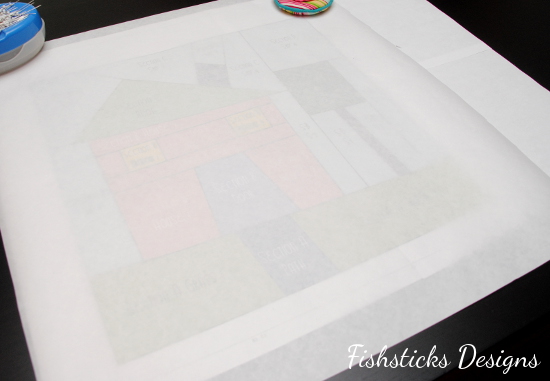 Using a pencil and straight edge, trace the template onto the matte side of the freezer paper.
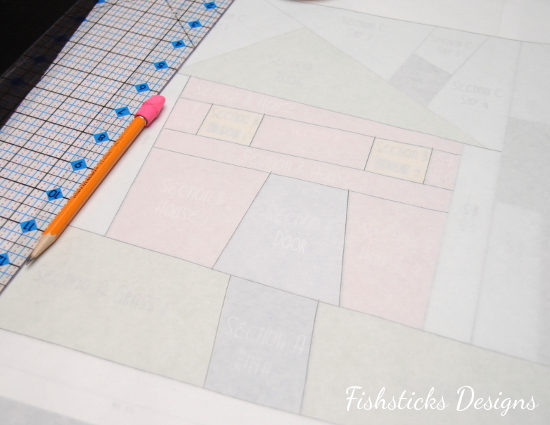 Use the color template to label all of the pieces. You’ll see that the block is divided into four sections, and the colors are labeled from left to right and from the bottom up. Using abbreviations will help this part to go faster.
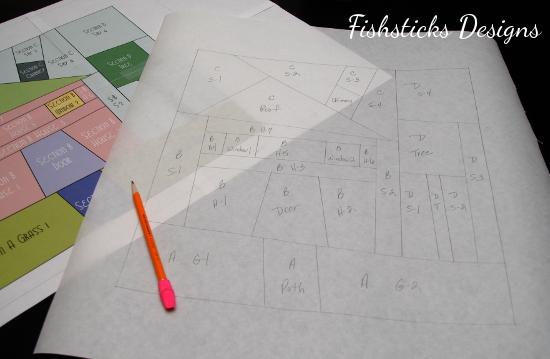 Choose your fabrics! This is a great time to use up tiny scraps. They are perfect for windows, doors, chimney, etc.
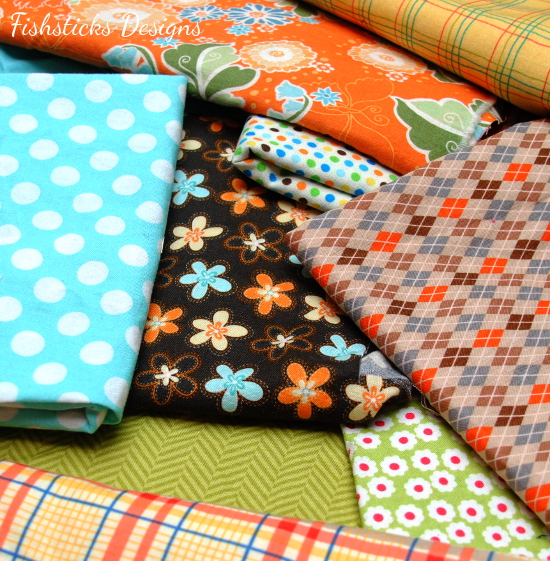 Cut your freezer paper template into pieces.
 Separate the template pieces into colors/fabrics.
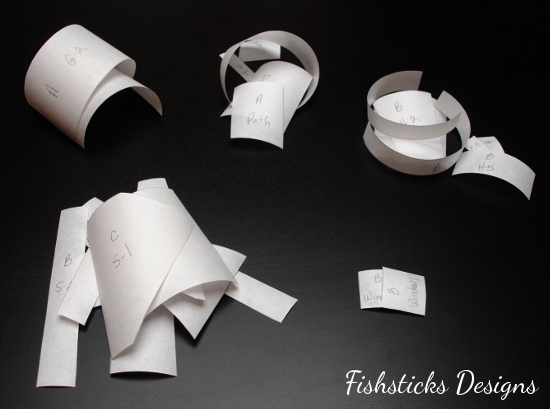 Now the fun part starts! Position one of your template pieces on the fabric you’ve chosen for it with at least 1/4″ margin all the way around. Be sure that you’ve placed the template on the right side of the fabric with the shiny side of the freezer paper down. With your iron set to cotton/no steam, press the template onto the fabric. The coating on the shiny of the freezer paper will melt and the template will temporarily stick to the fabric.
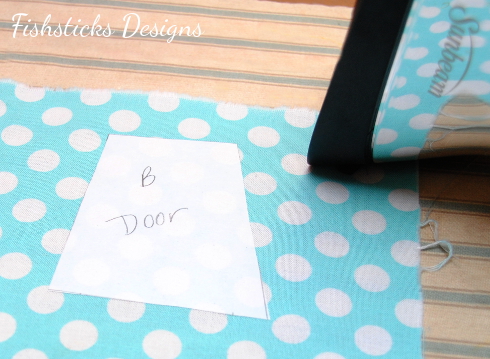 To add your 1/4″ seam allowance, place your clear quilting ruler on top of your template/fabric piece. Line the 1/4″ marking up with the edge of the template so that the ruler overlaps the template, as shown.
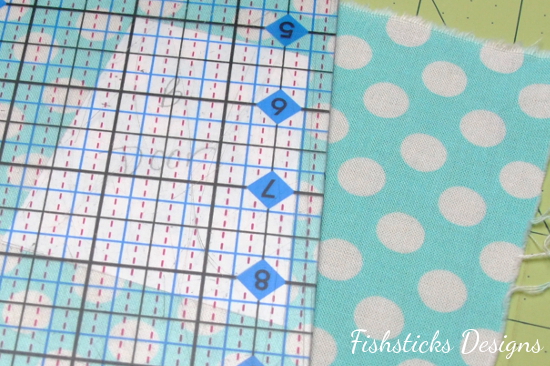 Run your rotary cutter down the edge of the ruler to trim away the excess fabric, leaving the 1/4″ seam allowance outside the template.
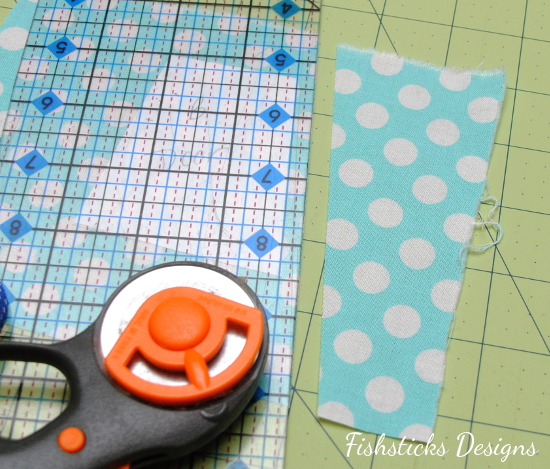 Cut each side of your fabric in the same manner so that you have a finished fabric piece with the template still attached and a 1/4″ seam allowance all the way around it. (Don’t take your templates off yet!)
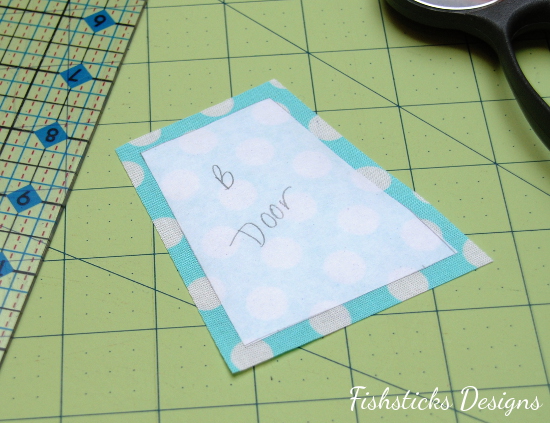 Where you have multiple templates for one piece of fabric, you can iron them all on at once, but be very careful to make sure you have 1/2″ (1/4″ times two) between all of the pieces. It’s best to put more than that, just in case.
 Continue ironing your templates onto your fabric and using your ruler and rotary cutter to trim away the excess fabric leaving 1/4″ seam allowance all the way around each template. Once you’re finished, separate them all into their individual sections.
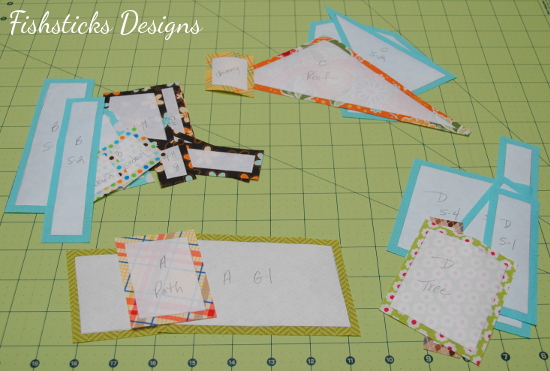 The remaining pictures will walk you through the order in which to assemble your pieces. Remove the templates as you get to each piece. Stitch the pieces together using 1/4″ seam allowance and press your seams (open or to one side, whichever you prefer) before moving on to the next fabric piece.
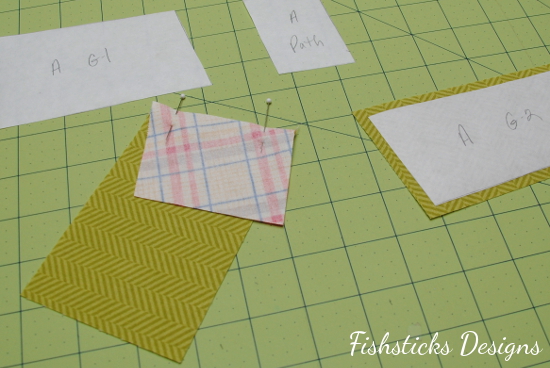 Start by sewing the Section 1 grass pieces to either side of the path.
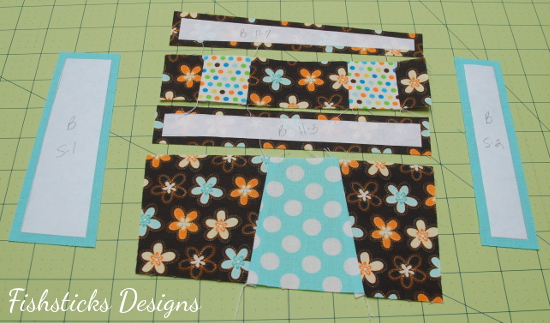
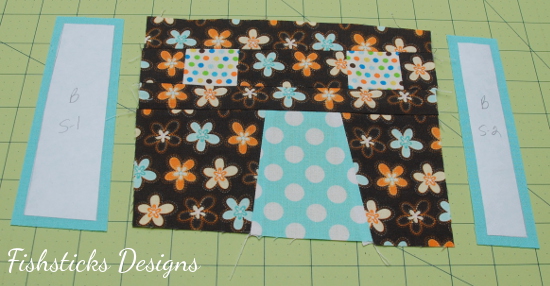
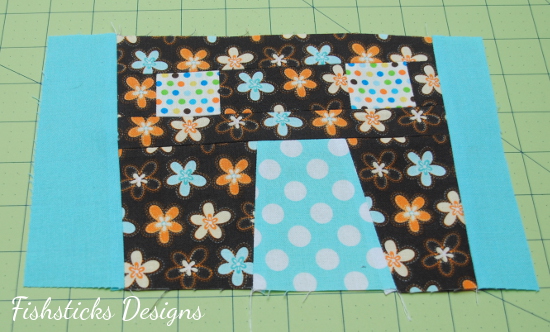
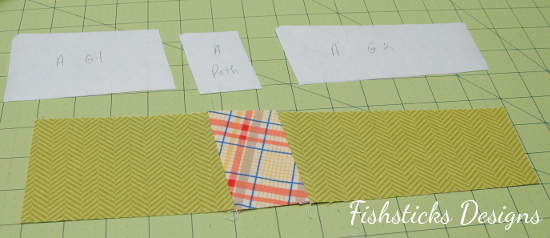 Assemble Section 2 next — the house, including doors and windows.
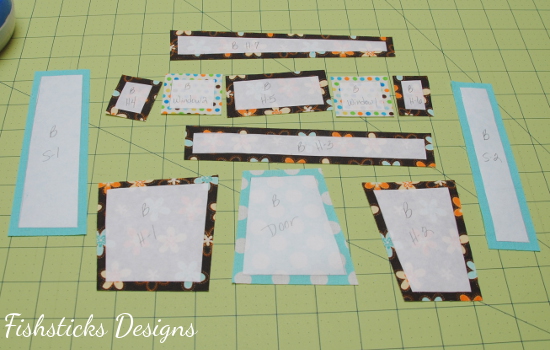
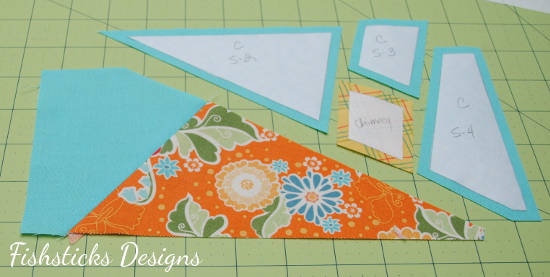
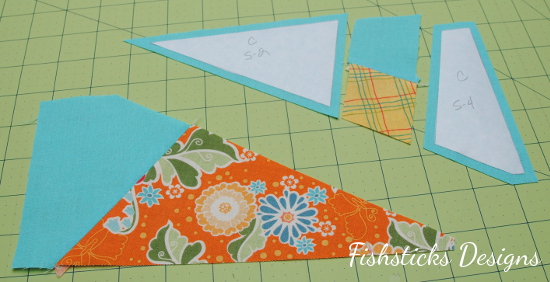
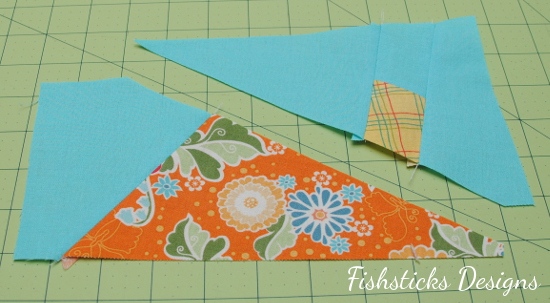
 Move onto Section 3 which includes the roof, chimney and sky pieces.
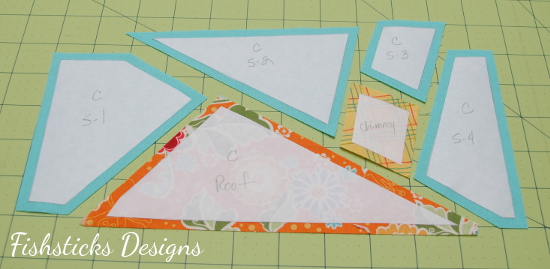
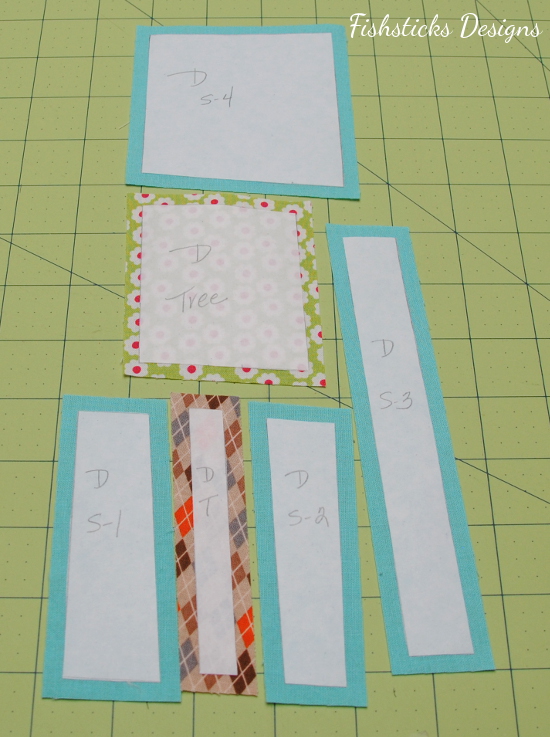
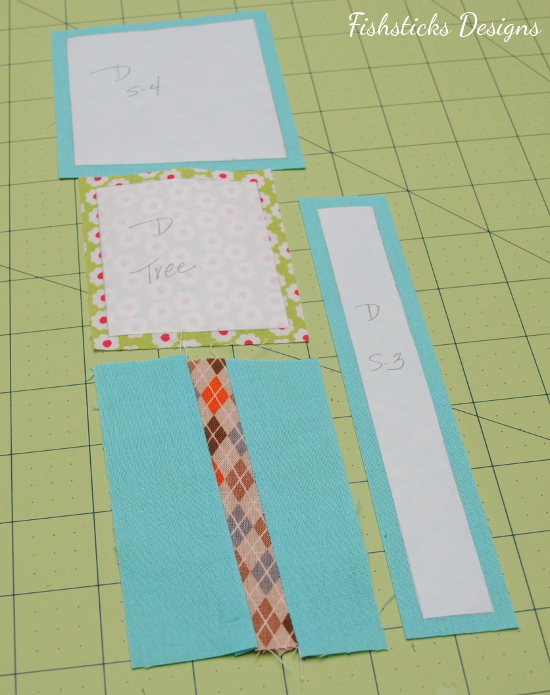
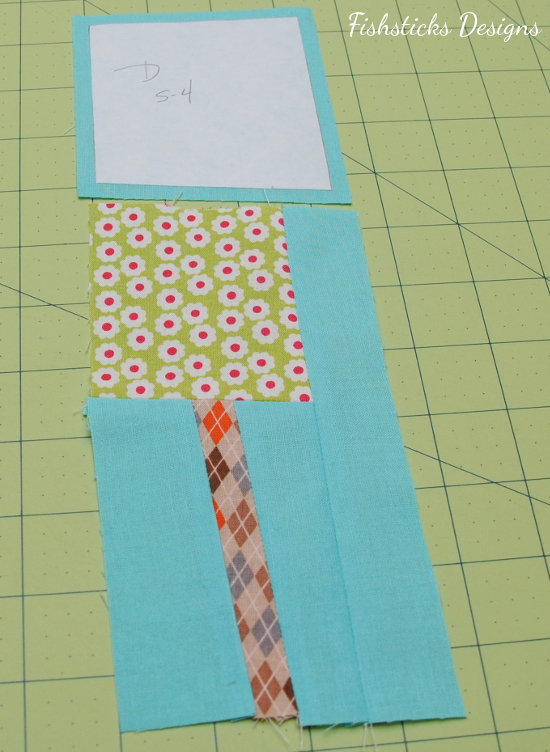
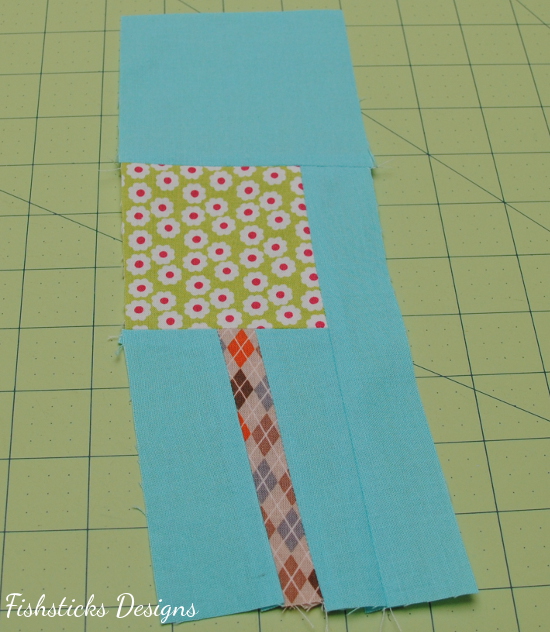
 Finally, sew the Section 4 tree pieces together.
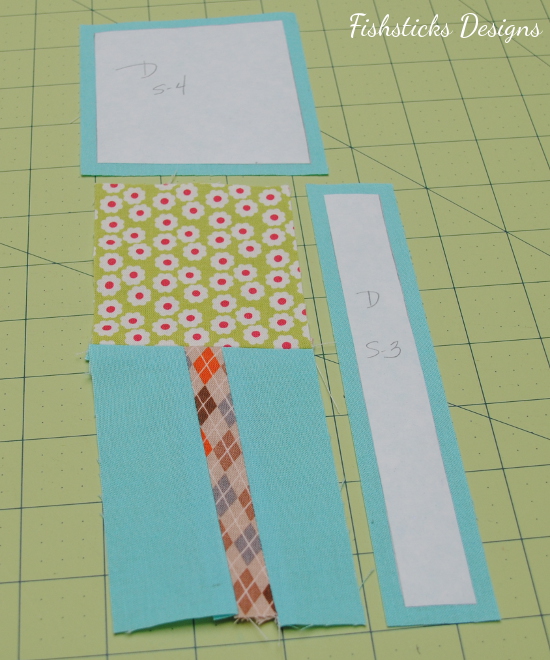
 Now you’re ready to sew your sections together!
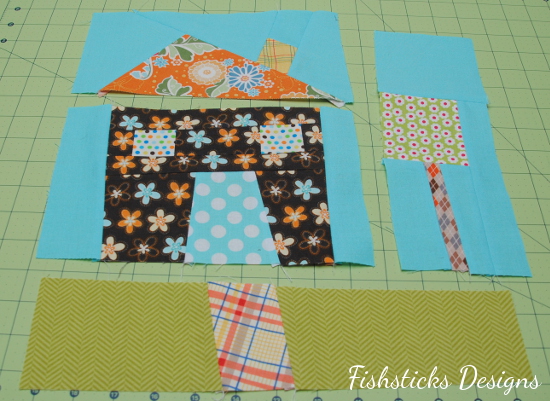


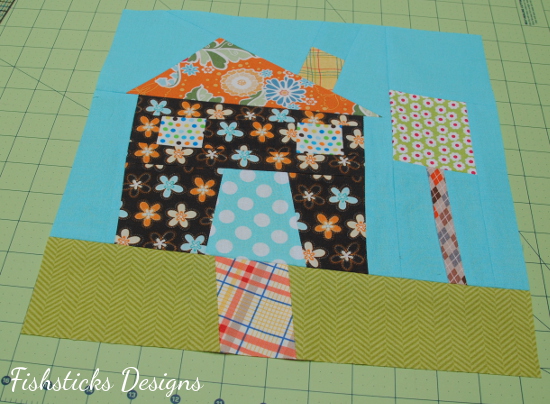 Almost done! Just square your block up to 12 1/2″ and admire your work. That wasn’t hard at all, right?
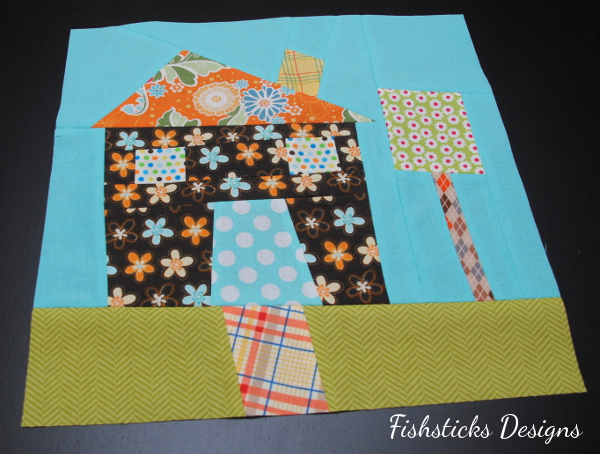 I can’t wait to see your finished blocks! I’ve been having such a great time sewing along myself. Want to see my blocks so far? I love how they’re coming together!
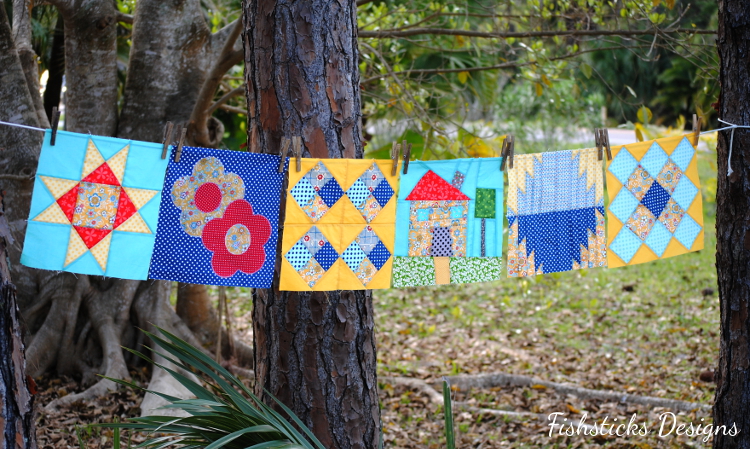
The Perfect Pattern Parcel #1

Oh, how I love finding opportunities for creative people like you and me to exercise our skills and give to others! Have you heard about the Perfect Pattern Parcel? Here’s what the founders have to say about this ingenious new program:
About PPP: Put together two entrepreneurial makers driven by their internal voices and one self-taught hacker with an “if you build it, they will come” mentality, and Perfect Pattern Parcel was born. We are passionate about supporting independent designers in their craft and fostering a community of makers to grow. Our mission is to offer high-quality pdf sewing patterns written by indie designers while supporting children’s education.

About Parcel #1: Pattern Parcel #1 includes sewing patterns for women that are modern classics, featuring both flattering silhouettes and garments that are comfortable to wear. From a new little black dress to weekend play wear, the patterns in Parcel #1 have got you covered. One of the patterns included in this first Pattern Parcel is the Lady Skater from Kitschy Coo, and I chose to sew a peplum top version for me!
  I found the instructions for turning the Lady Skater dress into a peplum-style top on the Kitschy Coo blog right here: Lady Skater Peplum. I adore the flattering fit of this top. (I texted a picture to my 24-year-old daughter to ask her opinion, and she said, “Super freaking cute!” She also suggested that I should wear it with leggings, but … um … my rear end requires complete coverage when it comes to leggings. Skinny jeans work just fine!) Speaking of my most well-endowed feature, my 16-year-old daughter/photographer insisted that you needed to see the back of the top.
 And, then she said, “You should spin around,” and since I never quite know what to do with myself when someone’s taking my picture, I did!
 The basics of the Perfect Pattern Parcel? You get an amazing set of patterns, all designed by awesome independent designers, and a portion of your purchase price goes to charity. The coolest thing, though? You get to decide what you’re going to pay, even what portion goes to the designers, the charity and PPP. Decide what you pay, give to charity and get patterns … could you possibly ask for more?

One Little Minute
SeamstressErin Designs
One Girl Circus
casa crafty
the quirky peach
Kadiddlehopper
Sew Caroline
Groovybabyandmama
Fishsticks Designs <<< Me!
the Brodrick blog
verypurpleperson
sew a straight line
Adventures in Dressmaking
true bias
Idle Fancy
La Pantigana
Crafterhours
Boy, Oh Boy, Oh Boy Crafts
Max California
YoSaMi
la inglesita
Diary of a Chainstitcher
four square walls
Lauren Dahl
Sewbon
mingo & grace
Dandelion Drift
VeryShannon
Sanae Ishida
buzzmills
Sew Jereli
Figgy’s
Froo & Boo
a happy stitch
Disaster in a Dress
Things for Boys
mama says sew
sew Amy sew
Sew Busy Lizzy
Made With Moxie
imagine gnats
Around the Block with Patchwork Posse: Block #5
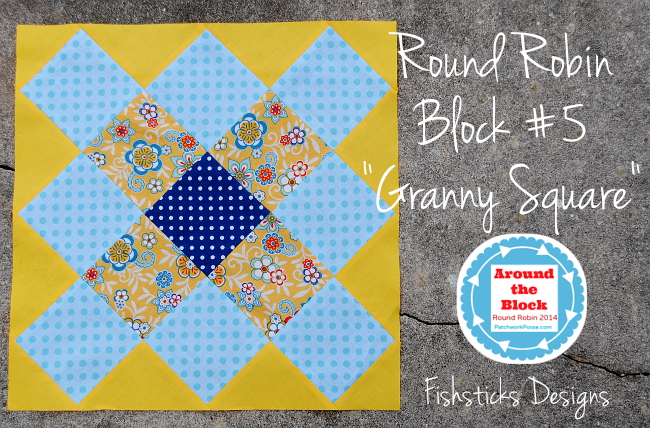 This week’s Around the Block Round Robin block is The Granny Square from Elizabeth at Simple Simon and Company! I love the classic look of it. Granny squares bring to mind thoughts of simpler times, don’t they? And, the unusual way that this block is assembled is pretty cool.
One of the reasons that I really like this block is that I’m actually in the process of teaching myself how to crochet granny squares! I’ve always wanted a big granny square afghan, and I love having a project that I can pick up for a few minutes here and there without having to figure out where I am. I’m starting with a toss pillow for now to see how it goes. Here’s a little peek at the pile that I have done so far. More on that later, when I’ve actually finished the pillow. 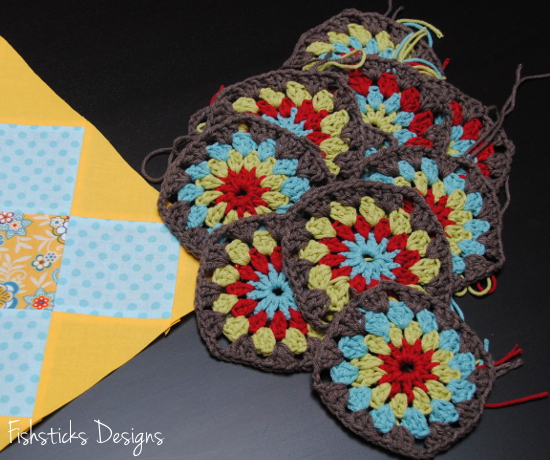 My Granny Square Block has a little baby brother because I was one of the first to sew it up, and there was a mistake in the sizing. (It’s all fixed now, so everyone else should be good to go!) I thought it a bit ironic that Becky shared this link on the Patchwork Posse Facebook Page yesterday: 52+ Projects for Orphan Quilt Blocks. I’ll be scrolling through to see if any ideas jump out at me … I’ve developed quite the collection of orphan blocks! Anyone have a favorite project to share?
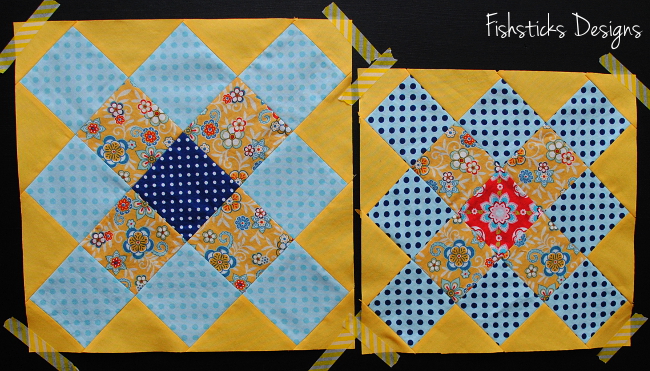
Huge PDF Pattern Updates are on the Way!
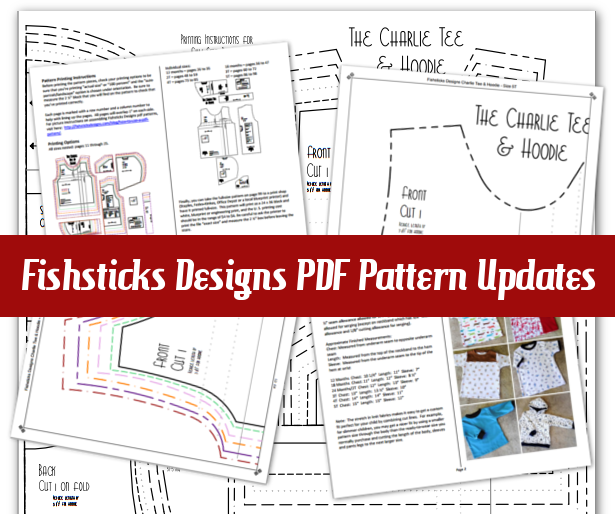 Some huge Fishsticks Designs PDF pattern updates are on the way! If you already love your Fishsticks Designs patterns, though, don’t worry! I’m not taking away anything that you’re already using. I’m just adding a list of things that I think will add to your enjoyment and do away with some frustrations.
I’ll be working through all of my patterns over the next six weeks or so. (It’s a really involved process, and I still need to work on new patterns, so it’s going to take a bit of time!) If you’ve already purchased the pattern, you will receive a free update. If you purchased through the main Fishsticks Designs Pattern Store, Fishsticks on Etsy or Fishsticks at Craftsy, you’ll receive your updated pattern automatically. If you purchased from another retailer, you may have to email us with your proof of purchase, but I’m hoping to be able to work with each of them to get you the update automatically, too. You’ll be able to find a regularly-updated list of all the completed patterns, as well as details about when you can expect your pattern right here: Fishsticks Designs PDF Pattern Updates.
On to the changes! I’ve been listening to your feedback, and I hope that you appreciate everything that I’ve done. The first thing that you’ll likely notice is that while I didn’t change the instruction layout for my patterns, I did add a simple line separating the columns. Many first-time users told me that the layout was a bit confusing because they weren’t sure whether they were supposed to go up and down the columns or across. This little change helps your eye to fall exactly where it should as you go through each step.
Also, in the directions section, just before the sewing instructions, you’ll find a note that directs you to the page that contains your printing instructions.
And, once you flip to that page, here’s what you’ll see: Here’s where you’ll find the biggest change! First, you’ll see that you still have the option of printing all of the sizes nested on 8 1/2″ x 11″ (or A4) pages which you’ll continue to assemble and cut out according to my directions page: How to Assemble a Fishsticks Designs PDF Pattern.
 There are two changes that you’ll see in the nested patterns. First is that I’ve added color-coding to the original coding which uses dots and dashes. The dots and dashes are still there, though, so that you can choose to print in color or in black and white.
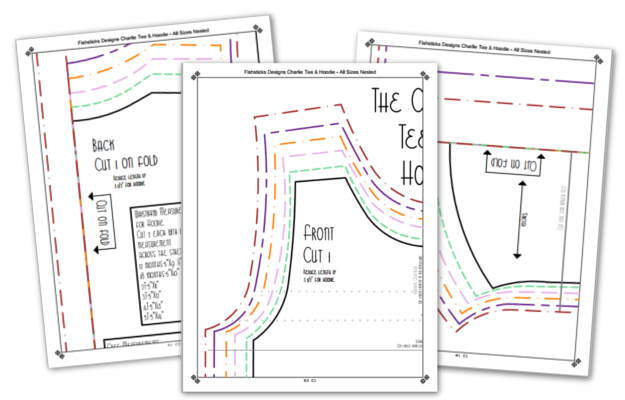 The second change is that I’ve increased the size of that original 1″ test block to 2 1/2″. This gives you a more consistent measurement, and it’s easier to find!
 The next printing option is where my testers have been most excited — individual sizes! Here, you’ll find the page numbers that you need to print for just the size that you want to sew.
 These patterns print black and white with a series of dots and dashes, and go together in the same manner as the nested pattern. In some cases, when a pattern contains multiple designs, those will be separated out, as well.
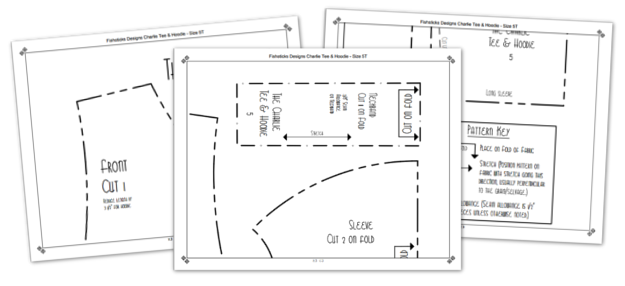 To make it simple for you to double-check that you have the right pages, each pattern page has a header at the top which contains the pattern name, the size you’re printing, and the design within that pattern, if applicable.
 You’ll also find that each of the pattern pieces in the individual sizes have the name of the pattern and the size printed on them — a really good thing for when pieces get mixed up or misplaced!
 The final printing option (and the last big change) is one that will allow you to take the file to a local print shop and print the whole pattern sheet, just like the one that you would receive if you ordered a paper pattern.
 This option is great for those of you who hate cutting and taping, especially for those of you overseas who don’t want to have to wait for a paper pattern! At the top of the full-size pattern, you’ll find permission to print individual copies, along with basic printing instructions.
  Several of my testers volunteered to take The Tank pattern to local print shops in their area last week, and they all had a really easy time when they were armed with a little bit of information. First, it’s best to download the whole pattern to a flash drive, take it into the print shop and ask them to print the page number that you need. Be sure to let them know the finished size, ask for it to be black and white and be emphatic about printing the file 100% or actual size. Also, double-check that 2 1/2″ block before you leave the print shop, just in case. The cost for most patterns should run between $3 and $7, based on the size. Everyone who tested it out was able to have their pattern printed while they waited. Good choices for printing included Staples, Office Depot, Fedex-Kinkos and local blueprint printers.
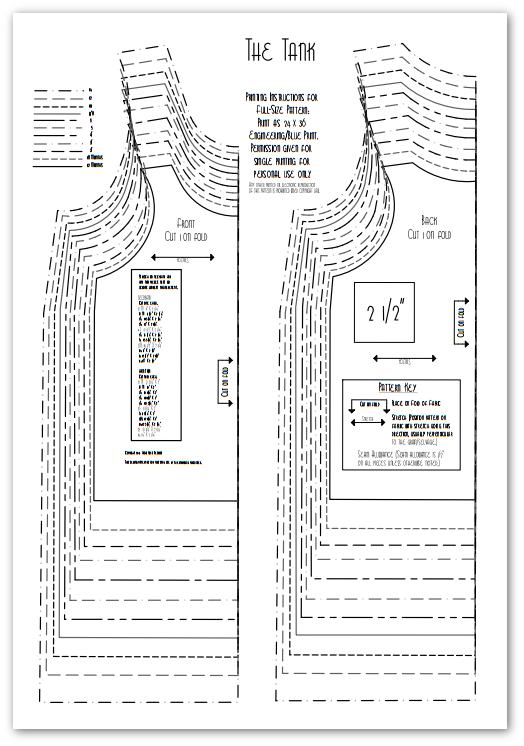 Whew! I think that’s all for right now. I can’t wait to hear what you think of all the updates! I want you to continue loving my patterns, and I want to do everything I can to help you sew beautiful, practical things for you and your children, whether you’re brand new to sewing or have a lifetime of experience!
The Updated FREE Tank & The Red Carpet Awards!
 I’m nearly bubbling over with excitement here! I have several new things to share with you over the next week or so, and I can’t wait to hear what you think about each of them! Today brings the first two announcements on the list: the re-release of the FREE Fishsticks Designs The Tank pattern (now in sizes 12 months to 14) and two nominations for Fishsticks patterns in the PDF Pattern Designers Red Carpet Awards!
If you’ve never joined the PDF Pattern Promotion and Sales Group on Facebook, I encourage you to take a few minutes to head over right now and check it out. You’ll find over 10,000 sewists who are devoted to supporting independent pattern designers and encouraging each other in their sewing endeavors. Many of your favorite designers are there, too, joining in the discussion, sharing their latest patterns, promoting their sales, helping out with questions and more! This week, the group moderators have announced nominees for the first ever PDF Pattern Designers Red Carpet Awards in conjunction with a HUGE giveaway, and all you have to do to have a chance of winning is go vote!
Two of my patterns were nominated: the Charlie Tee & Hoodie and the Runaround Pants, and I’d love if you’d vote for them! To read more about the giveaway and to vote, just click the banner below:
 As my little way of joining in the celebration, I’ve revised my free The Tank pattern, adding big kid sizes and incorporating a big change that is coming soon to all of my PDF patterns.
 The Tank pattern is designed to be sewn with cotton and cotton blend knits — jersey, interlock or ribbed knits in the body and interlock or ribbing for the neckband and armholes.
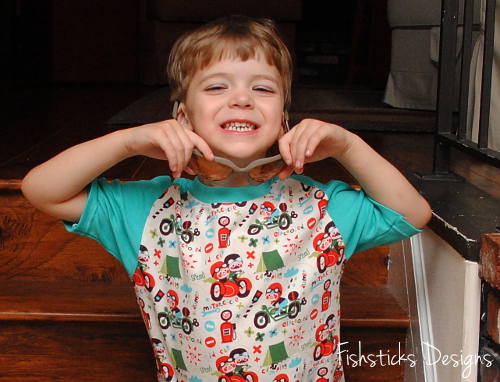
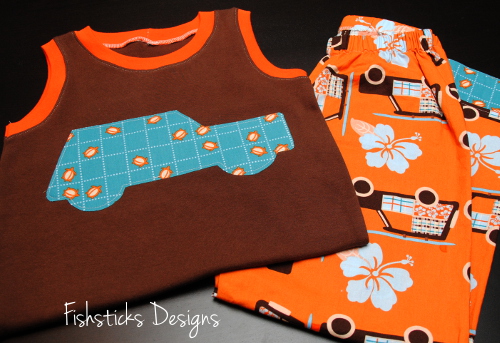
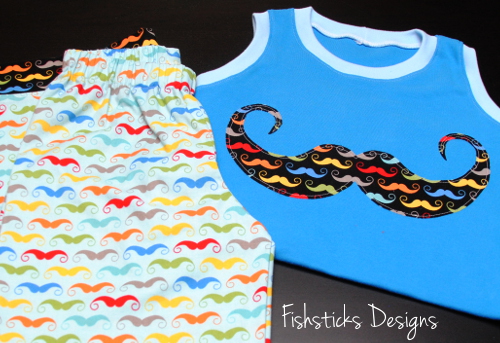
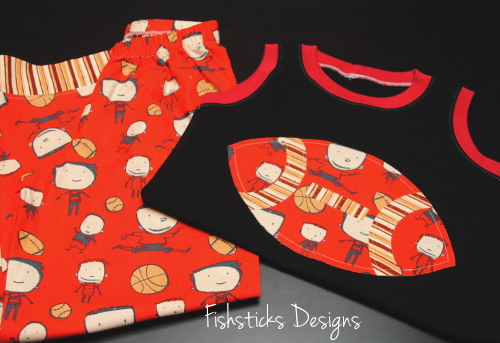
 The fit is narrower and longer than a standard tee, making it great for layering, but still perfect for wearing on its own. It also makes a great PJ top when paired with woven or knit lounge pants. (If you haven’t already, be sure to check out the appliqued tanks that I made for my seven-year-old last month!) Or, you can match it up with Undercover Bottoms Boxer Briefs for the perfect little boys’ undies set.
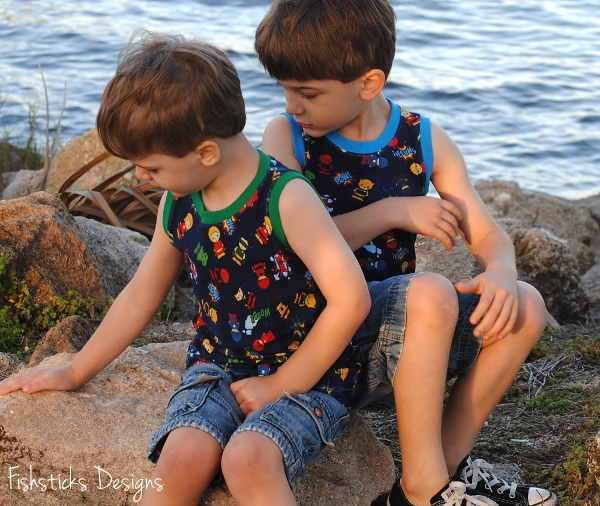 A little aside from the pattern itself, isn’t that the cutest fabric? My boys LOVE it! It came from a custom fabric group that you can find right here: Fabric Stache. If you’re looking for great knits with prints that you can’t find just anywhere, go visit! (They’re doing sew-alongs every other week right now with my knit patterns, too.)
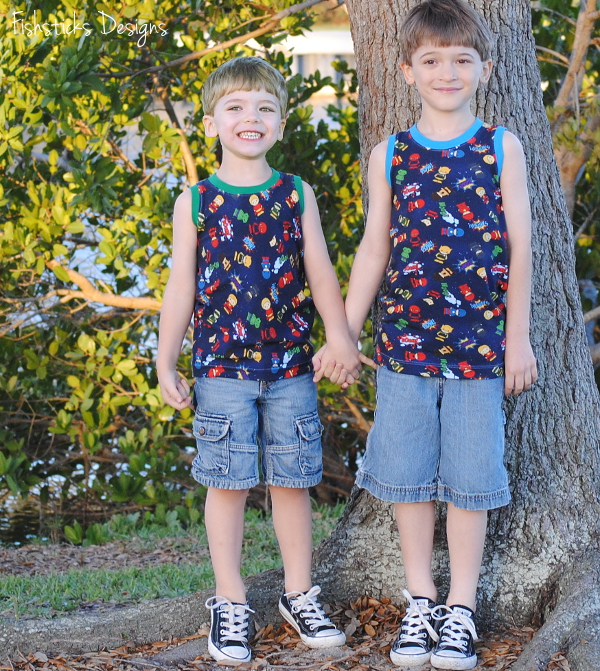 Back to the subject at hand, to download the pattern, just click right here: The Tank Pattern. I’ll be back tomorrow with my next announcement, but if you’re already familiar with my PDF patterns, you’ll figure it out really quickly by scrolling through The Tank pattern!
I just have one, no, two last pictures to share before I wrap up this post. Because we live in Florida, tanks work well for us almost year-round. My little Florida babies, though, thought that they were going to freeze to death when I dragged them out to take pictures last week . . . in 65 degree weather! The “freezing cold” weather, however, did not stop them from insisting that I follow through with the promise of frozen yogurt after our photo session!
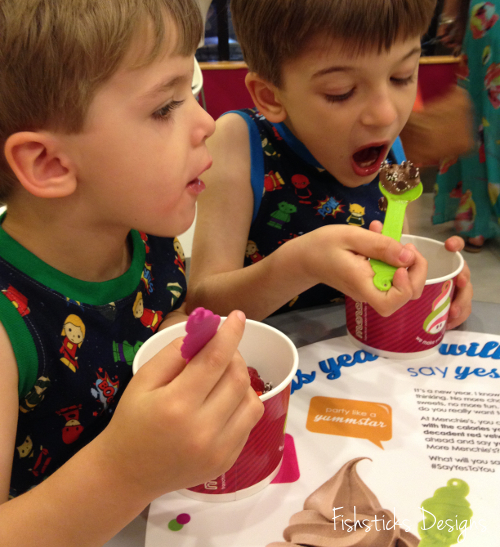
Operation Pajama Drawer: Wrap Up & Winner!
I had such a great time sewing pajamas for my boys last month, and I love that they get to wear mama-made jammies every night now! Here’s what I accomplished (just click on the images for more information):
For Charlie:


For Jamie:
For both boys:

Ten pairs of pajamas done! Woo-hoo! And, you guys accomplished some great PJ-sewing, too. Be sure to click over to the Fishsticks Designs Flickr Group and check out the jammies.
On to the winner! There were a total of 17 entries, and random.org chose Entry #3 as the winner:
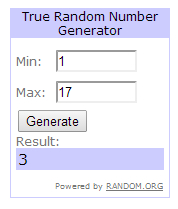
Huge congratulations to Ann who modified Rockin’ the Raglan into a Valentine’s nightgown for her granddaughter, Matilda! Is she not the sweetest?

Operation Pajama Drawer: A Sort of Long Time Ago …
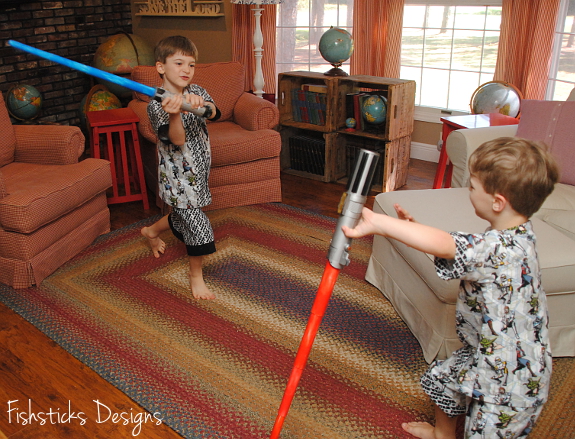
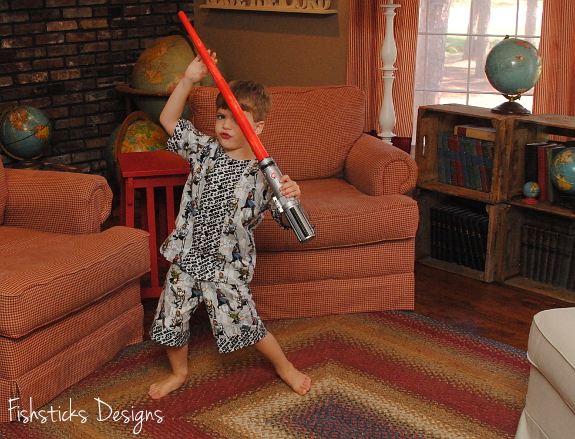
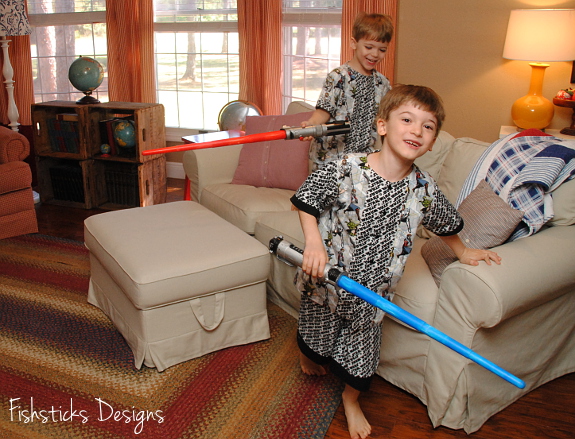
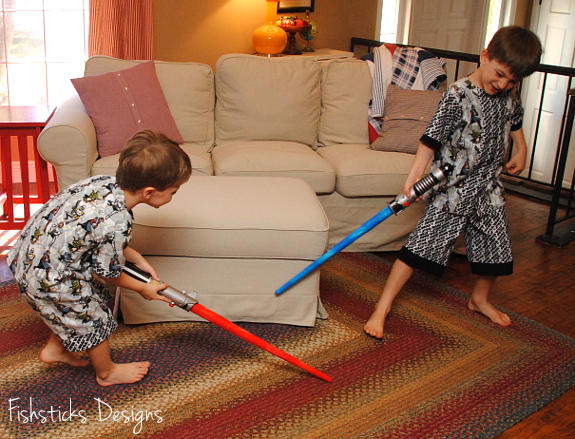
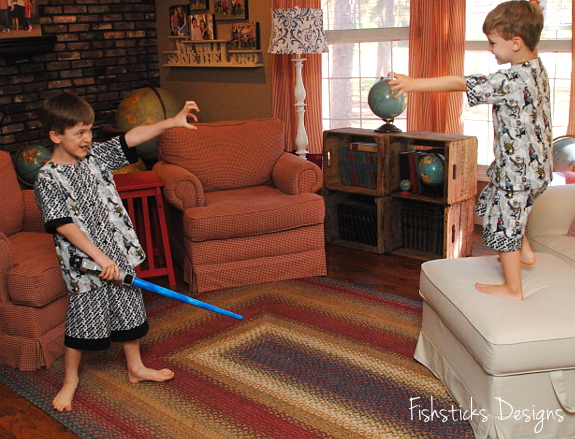
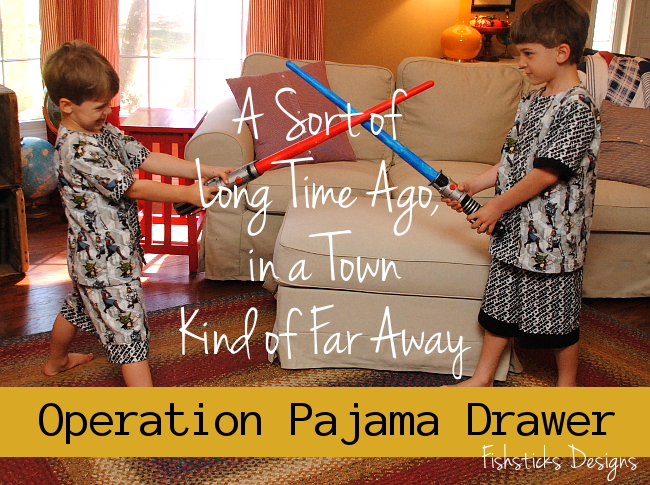 A sort of long time ago, in a town kind of far away, a sewing momma bought some Star Wars fabric for her two Younglings. The fabric went into hiding for a time, though, and these little ones waited and waited and waited. Then one day, the fabric reappeared, and the momma went to work transforming it into the perfect sleepwear for two tiny Jedis-in-training.
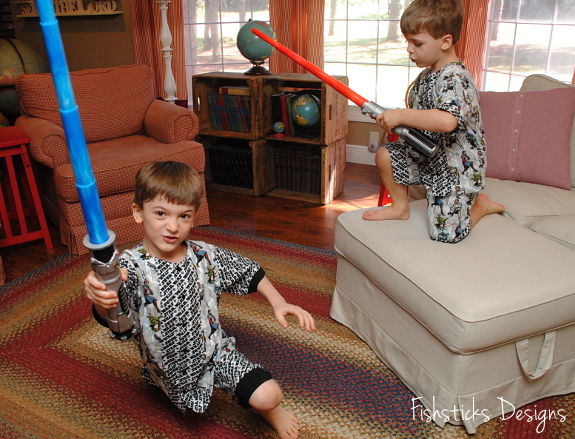
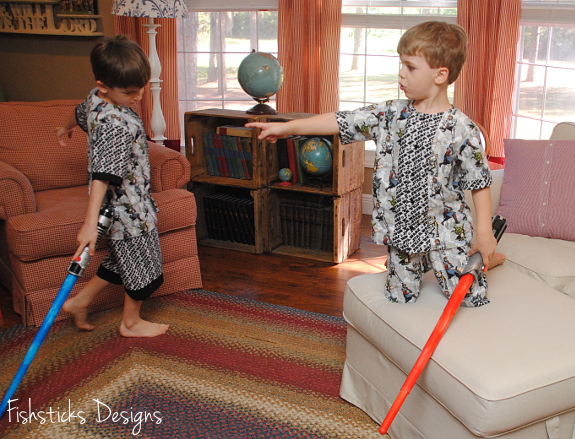
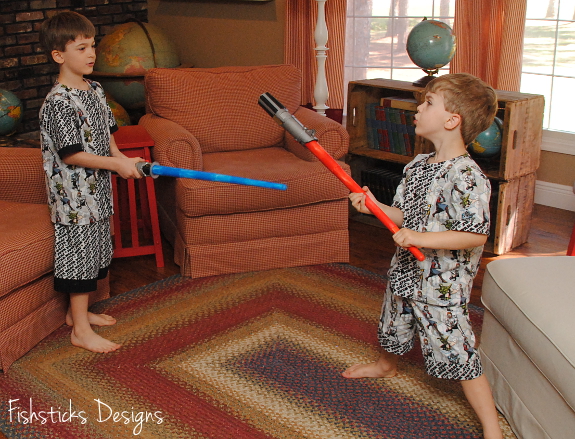
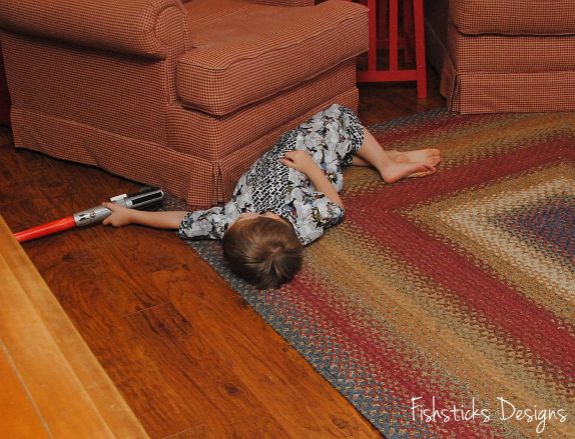
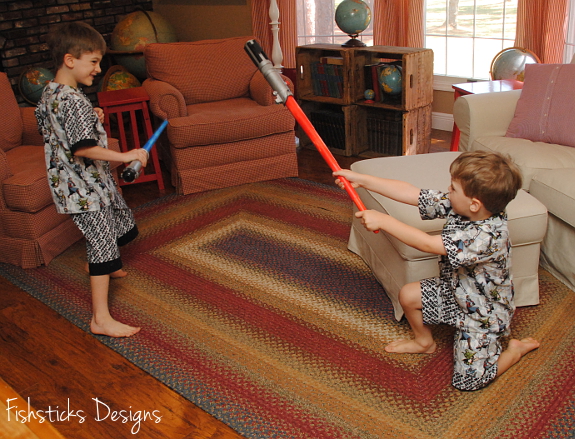
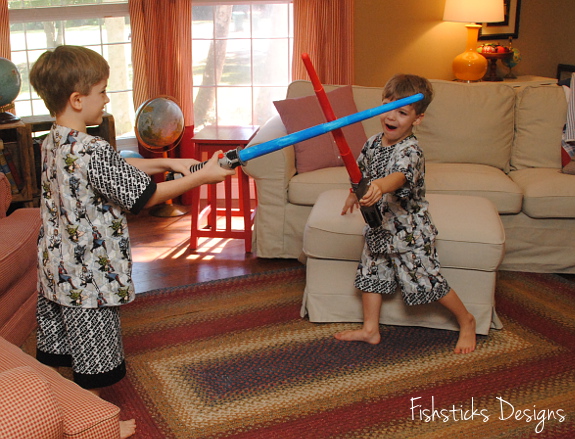
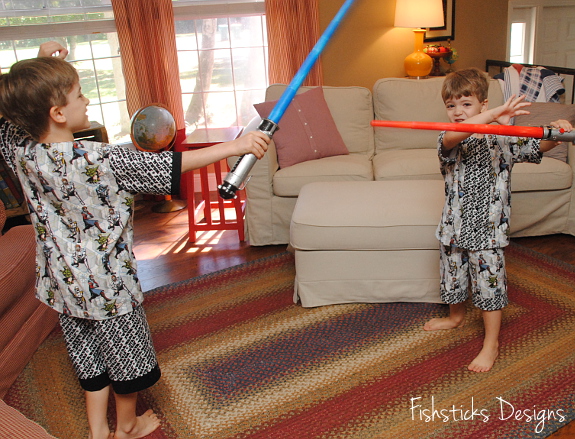
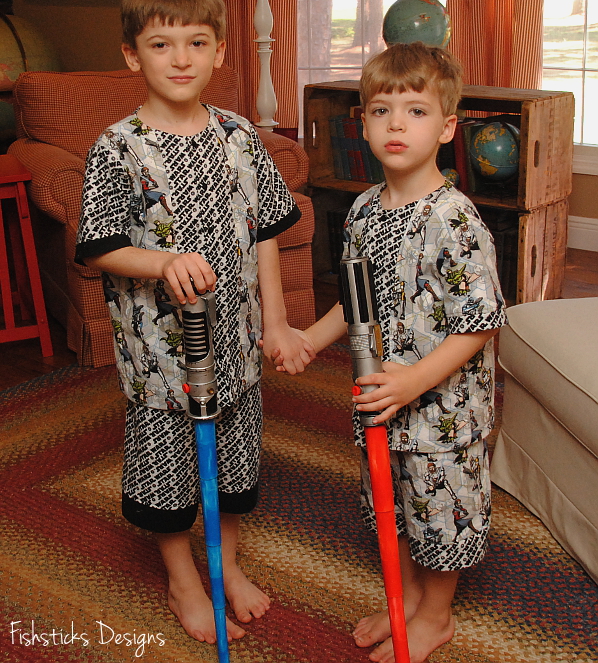 Clothed in their new Pajama Party PJs, with their lightsabers close at hand, the Younglings fell fast asleep, and dreamed of days ahead when they would be called to action in defending their living room, backyard and perhaps someday, the whole galaxy, from evil.
And with that final task complete, Operation Pajama Drawer drew to a close, and this busy momma breathed a sigh of relief. Her boys no longer had to dress in unsightly, ill-fitting jammies. Instead, each night, they chose from pajama drawers overflowing with handmade PJs, sewn with love.
–
Whew! This was such a busy sewing month! Thank you so much for sticking with me and sewing along! Remember that you still have until midnight eastern tonight (2/28) to add your pajama pictures to the Fishsticks Designs Flickr Group for a chance to win a great prize! I’ll be doing a little wrap-up and announcing the winner on Sunday evening.
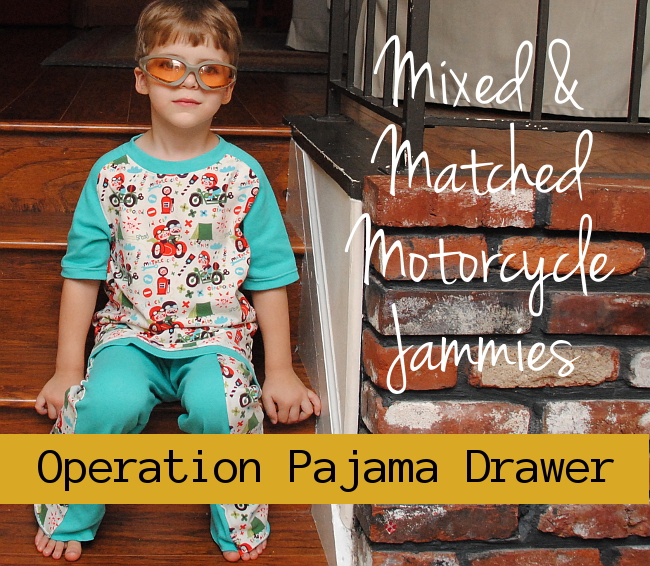
Operation Pajama Drawer: Mixed & Matched Motorcycle Jammies
 The month is over tomorrow! Are you finishing up PJs right now? You have until midnight eastern on 2/28 to add your photos to the Fishsticks Designs Flickr Group for a chance to win that $35 gift card to Simplifi Fabric!
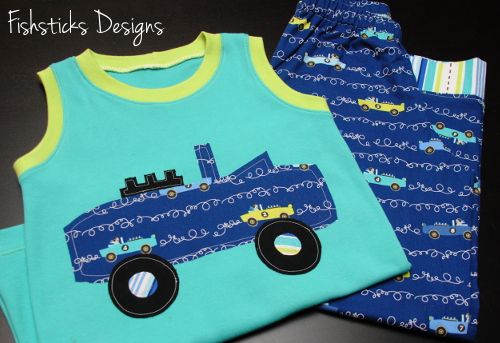
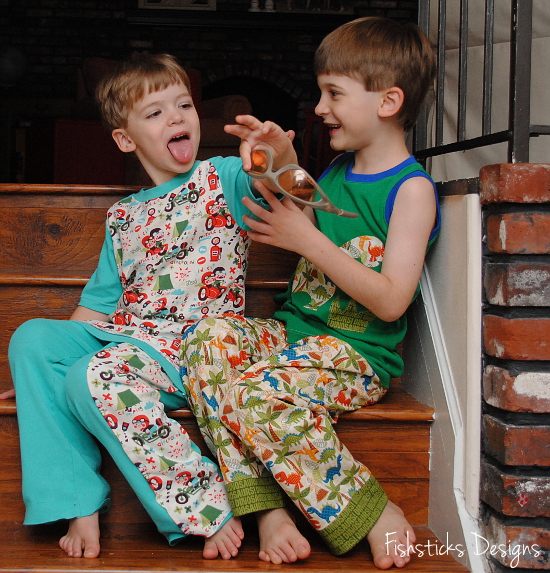
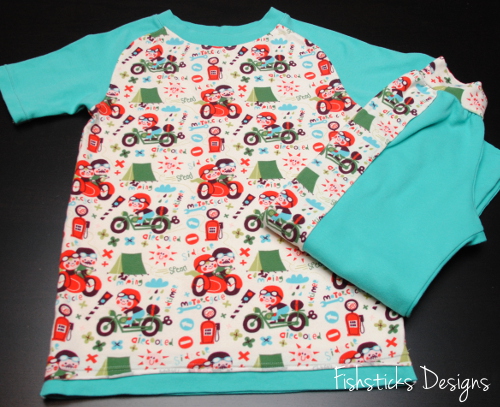 This last pair of Operation Pajama Drawer knit jammies for Charlie is a mixture of several of my patterns. I started out with the Patrick Curved Raglan and added the Runaround Pants, but because I love the curled jersey edges on the Runaround Pants, I replaced the traditional hem on the Patrick with the raw-edge hem from the Downtown V-Neck. (I really should have cut the shirt a little shorter to make up for the different hem . . . it ended up really long! More growing room, right?)
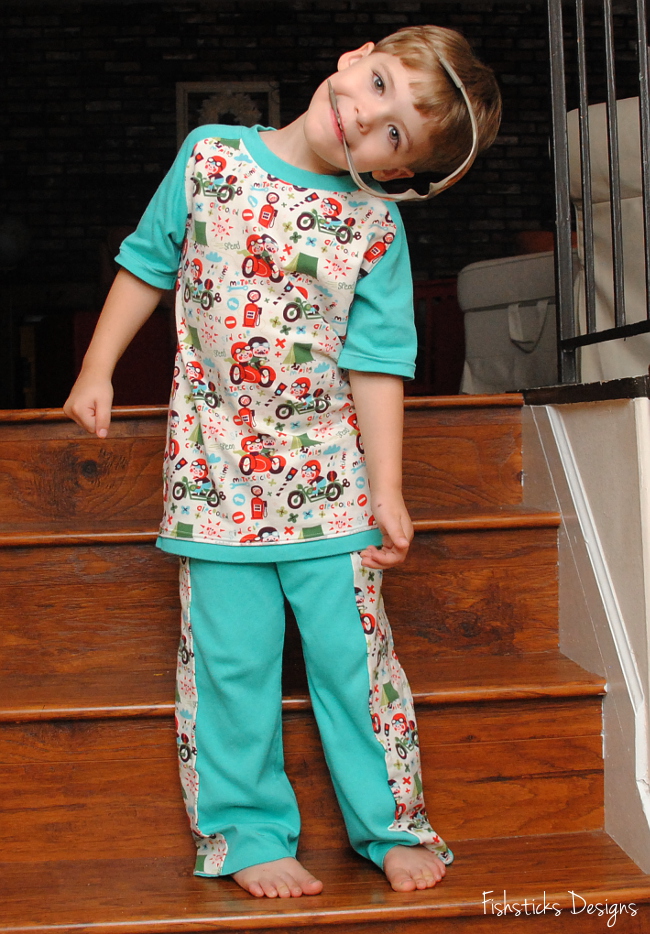
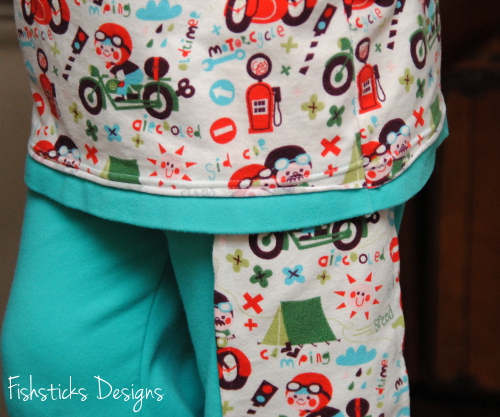 Apparently, modeling pictures of pajamas with motorcycles require the wearing of goggles.
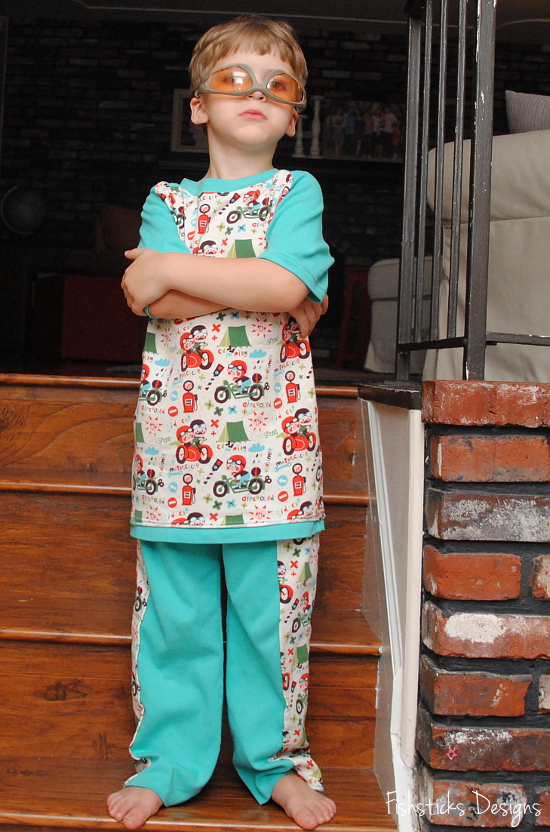
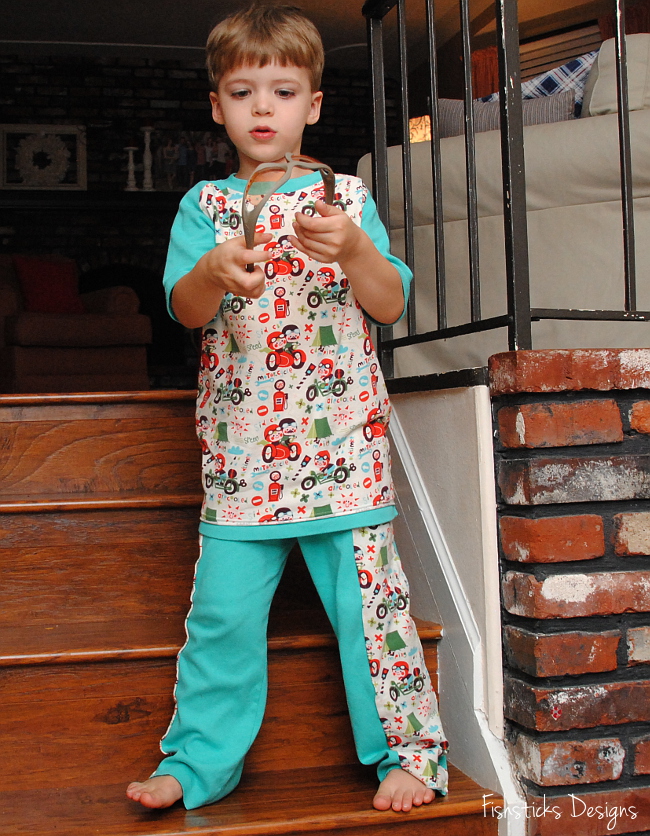
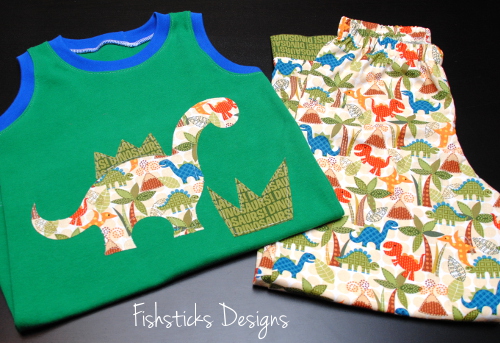
 A strange thing happened as we were finishing up these pictures. Jamie asked to put on his dinosaur jammies and join in! Maybe he’s getting over his why-do-you-have-to-take-my-picture-all-the-time phase? Or maybe he just wanted to share in the post-modeling
 bribery reward of a lollipop?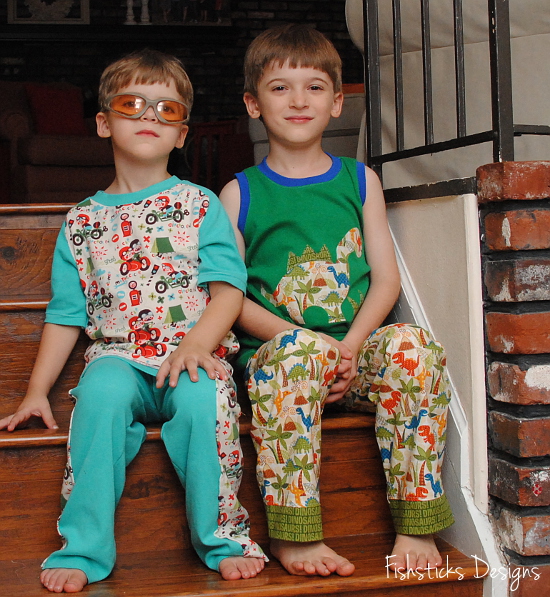
 I’ll be back with my last two pairs of pajamas tomorrow! I can’t wait to see all of your finished PJs!
Around the Block with Patchwork Posse: Block #4
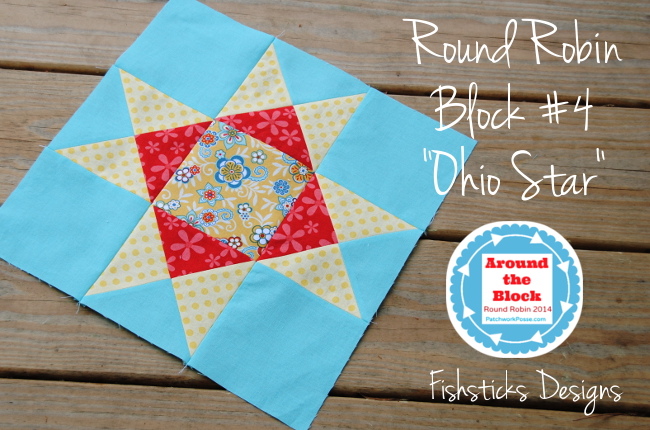 Whee! I finished this week’s Around the Block Round Robin block the same day as the post! I’m thankful that it was a quick one since I have three more pairs of PJs to finish and share before Friday. This week’s Ohio Star Block tutorial was shared by Tessa from The Sewing Chick. I so appreciate her simple instructions for sewing the four quarter-triangle blocks! They were a breeze!
Back to work on jammies now . . . and a little bit of a surprise for next week.


