Following Jesus
Little Embroidered Hoop Ornaments ~ A Tutorial
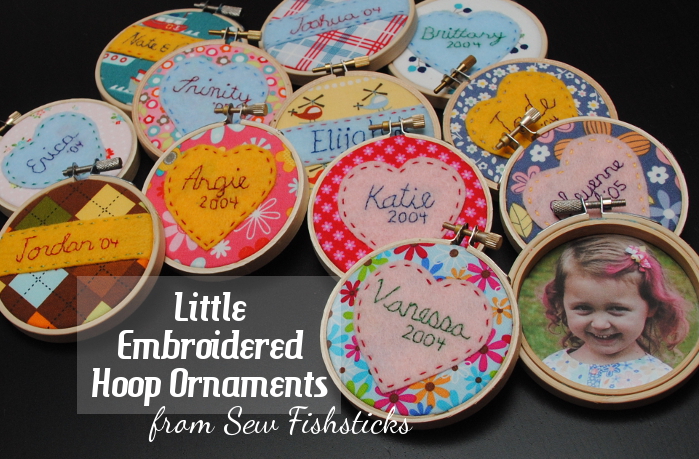 This is my favorite of the projects that I completed this Christmas because these ornaments hold such special meaning for our family! I’m so excited to share it with you! A little over eleven years ago, my husband and I attended an orientation meeting for prospective foster parents here in Florida. We had four children at the time, ranging in age from 13 to 4. Since Florida only allows foster families to have a total of five children in their homes, we wondered if we really could make a difference. We felt like God was calling us to do this, though, so we began the process to become a foster family. We were licensed in June of 2004, and our first placement – a newborn baby girl, straight from the hospital – arrived a day later. That little one stayed with us just a few months, but she became a forever part of our family’s history. She was followed by twelve more little ones, all age 6 and under who came into our home for long and short periods of time, each one finding a forever place in our hearts as we poured ourselves into their lives and their families’ lives while working together to support them through reunification or placement with relatives. In November of 2006, we said good-bye to our last foster daughter, just weeks before we left for a new job in Texas.
Christmas 2013 Advent Activities
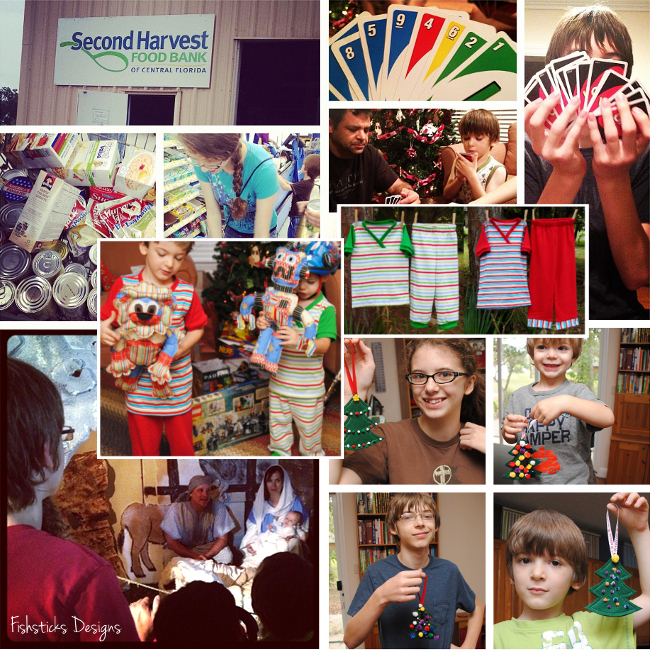 I’ve sort of made a tradition of sharing my list of Advent activities each year to help inspire you to make your own. I’m a bit late this year, but you know what? As busy moms, sometimes things just don’t happen on a perfect time schedule. That doesn’t mean, though, that we can’t find time to make memories with our children and teach them about the important things in life while we’re doing it. The season of Advent is the perfect time to slow down a bit and do just that!
On to this year’s list:
1. Decorate the Christmas Tree
2. Make Handmade Cards for Grandparents
3. Check Out Christmas Books from the Library
4. Make Ornaments
5. Visit the Zoo
6. Attend the City Christmas Tree Lighting
7. Act in a Christmas Play
8. Visit a Craft Show
9. Shop for the Local Food Pantry
10. Enjoy a Family Game Night
11. Shop for Toys for Children in Need
12. Bake Cookies Together
13. Walk Through a Living Nativity
14. Watch a Christmas Parade
15. Host a Cookie Exchange
16. Shop for Sibling Christmas Gifts
17. Drive around Town to See the Christmas Lights
18. Ring the Salvation Army Bell
19. Have Ice Cream in PJs at a Local Ice Cream Parlor
20. Visit Family Out of Town for the Weekend
21. Eat Out for Dinner
22. Go Caroling
23. Watch Christmas Movies Late into the Night
24. Bake a Birthday Cake for Jesus and Sleep in New Christmas Pajamas
We’re very flexible with our list. Other opportunities will likely pop up during the month and plans will change. I keep this list handy in case I need to switch out activities before the kids pull them from their pockets each day. 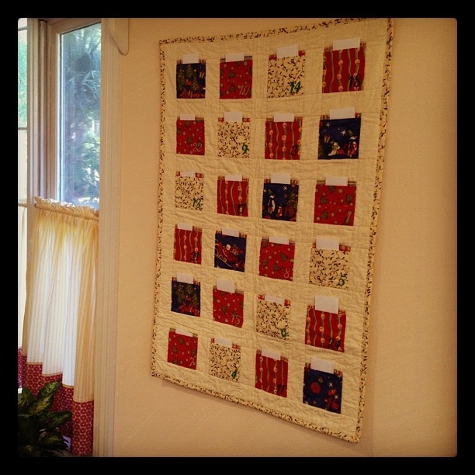
I would love to hear what your favorite activities for Advent are! And, I’m on the hunt for a great Christmas ornament project, too. Do you have any suggestions?
Our Loss
 Thank you so much to all of you who shared in the excitement of the news that we were expecting our seventh baby. We were so thrilled. Sadly, last Friday, just shy of 13 weeks, I miscarried that little one. It’s been an emotional week of ups and downs, but I’m doing well. I’ve been surrounded by the love of friends and family, reminded of how blessed I am even in such a difficult time. After a few days of recovery, my husband and I made the decision that it was best for me to continue with my plans for Market next week. Everyone is different when it comes to dealing with early pregnancy loss. I have a need to keep my hands busy and having something constructive to focus on has been very healing for me.
I’m going to share a bit of the story and some of my feelings in the following paragraphs. I totally understand, though, if it’s too much, and you’d rather just skip the rest. I have a tendency myself to avoid things that might make me cry. Things will be back to normal here soon.
Miscarriage is such a difficult subject to discuss. Many, including myself, deal with it in silence for the most part. This is our sixth pregnancy loss, and each has its own story. A positive pregnancy test is so full of joy and excitement for all of us, but when you’ve experienced a loss in the past, it’s met with a measure of caution, as well. Because of our past losses, we keep our pregnancies just between my husband and I until I start feeling those familiar strong pregnancy symptoms. In the past, that has been our sign that the pregnancy is healthy and will continue without a problem. That wasn’t the case this time. I had just breathed that sigh of relief to be past the high risk 12-week mark. I was allowing myself to really dream of who this little person would be. Our conversation was full of guesses as to gender and suggestions of names. We’d started the process of gathering the baby items that we’d loaned out to loved ones. We were chatting with our little ones about their new little brother or sister. I was even feeling those little occasional baby flutters. The bleeding came on suddenly and without warning. I was in the middle of a photoshoot for a new set of patterns — I’m so thankful that I had decided to do it here in my own backyard. Within a few hours, it was all over. Traumatic is the best word that I can find to describe it.
Like everyone who has walked this path, I wondered if there was anything that I could have done to change what happened. I’m thankful that I’m confident in my knowledge that nothing comes as a surprise to God. It’s not easy, but I’ve been able to see glimpses of His hand in all of this, even through my anger that He would allow this to happen to us . . . again. If you’re walking this path right now, I think it’s okay to be angry. Don’t hold onto that anger too long — it’ll take over — but if you’re like me, it helps to yell at God like a two-year-old having a temper tantrum. Sharing your real feelings is part of having real relationship. He’ll still love you and still draw you back to Him . . . even if you refuse to pick up a Bible for a week. He’ll send along friends to share His word or sneak in a song that speaks to your heart.
If you happen to have a friend or loved one who has recently experienced a pregnancy loss, my advice is to offer your prayers, do something practical or just loving, but be understanding. If she doesn’t want to see you and chat, don’t take it personally. If she’s like me, she doesn’t like for other people to see her cry. We’ve had meals and snacks provided by friends all week. We’ve received cards, notes, emails, texts, Facebook messages. The flowers that you see above were hand-delivered by two very dear blogging friends along with chocolate a few days after I came home from the hospital. (As a quick side note, I am so blessed to work in the fabric/sewing/blogging industry. I am overwhelmed with the outpouring of kindness and support that I’ve received from the people that I work with and alongside. This industry is truly one with heart.) Every message, meal and gift helped to lift us and get us through.
Even just being willing to pretend like everything is normal can be a blessing. I had an appointment to get my hair done on Tuesday, and I really couldn’t reschedule it. I texted my hairdresser on Monday evening, told her what had happened and asked her to tell me everything that she wanted to tell me via text so that we could just act like nothing was out of the ordinary on Tuesday morning. Since it was my first time leaving the security of my own home, it was so nice to just join in the everyday busy salon conversation. It’s amazing how encouraging it can be to just experience normalcy for a bit.
I have quite a bit of work to get done over the next few days, but I’m being kind to myself and not worrying about getting everything finished. Things may not end up being quite the way I had expected them to be, and that’s okay. If you happen to run into me at Market or anywhere else, please feel free to act as if everything is normal. I promise that I’ll appreciate it. If you ask me how I’m doing, I can’t promise that I won’t fight back tears, but chances are I’ll be just fine. I’ll probably say that I’m doing okay. Really, I’m sad, but joyful, too. When I run across the co-sleeper in the garage or my youngest asks again about the baby coming, the sadness comes crashing back in on me. My dreams of getting to know the baby that I was expecting are not going to happen. I can’t change that. In spite of that, though, I am so blessed with so much, and for that, I can find joy in the midst of my sorrow.
Coming in 2014 . . .
 It’s been almost two weeks since I’ve blogged! Eeek! I’ve actually been struggling to keep up with everything lately. My days are currently ruled by all-day nausea and the overwhelming need to just take a nap! There’s a really exciting reason for that, though!
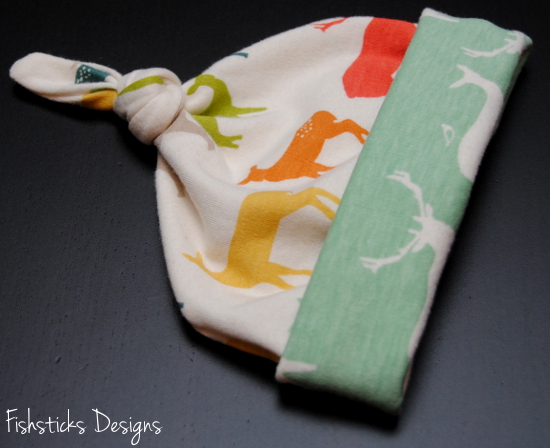 Someone with tiny fingers . . .
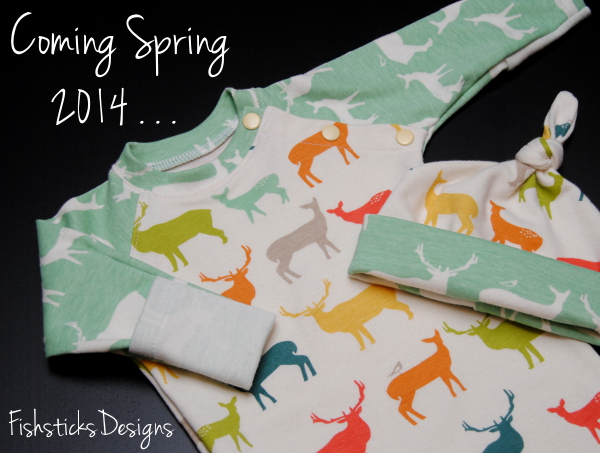
 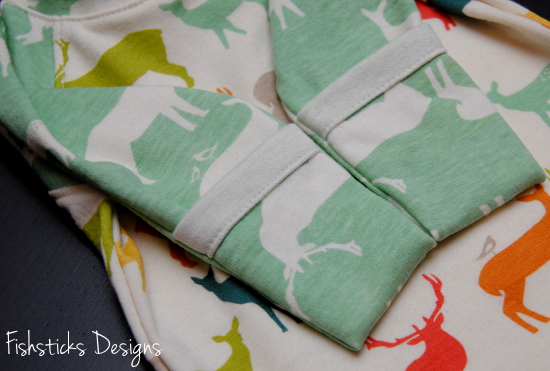 . . . and tiny toes will be joining our family in the spring of 2014!
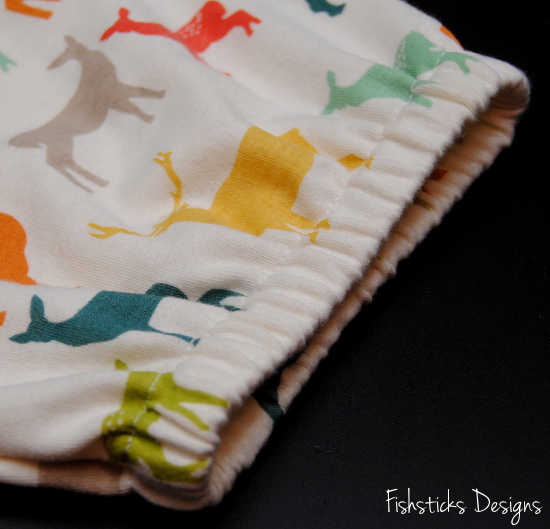 Since Hopeful Threads is hosting a Create Hope Designs sew-along this month, I couldn’t resist sewing up a Watered With Love Layette Set for Baby #7 in this sweet organic cotton interlock from Birch Fabrics.
 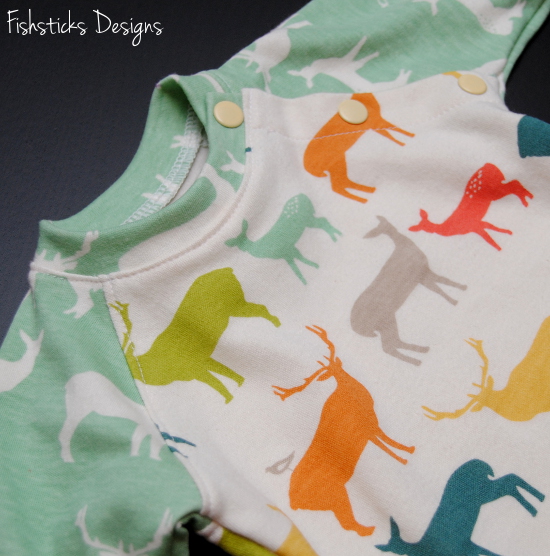 I’m hoping that this will be the first of many outfits that I get to sew (and knit) for this little one! Right now, though, I have five weeks until Quilt Market, and I’m so far behind! If you don’t see me around here as much as usual, at least you’ll know why. (I’m probably sneaking off to eat something strange that I’ve been craving . . . like mashed potatoes . . . for breakfast.)
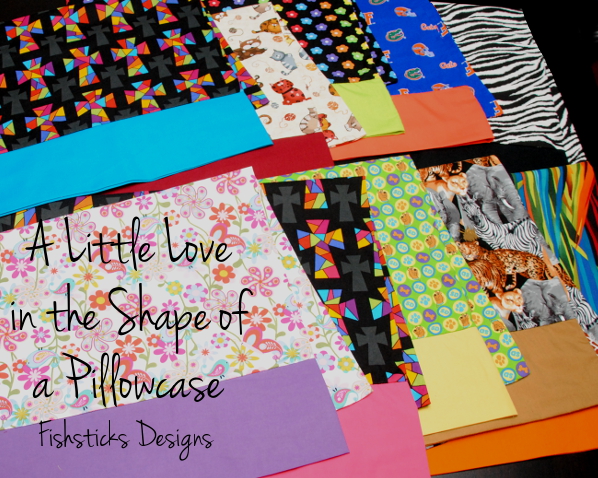
A Little Love in the Shape of a Pillowcase
 My oldest daughter and her husband (Katie’s mom & dad) are house parents at a children’s home here in Florida. Right now, their house is home to ten teenage girls. I know many of you just took a deep breath at that thought, but I have to tell you that these two LOVE their job and can’t imagine doing anything else. The girls that they live with are just like other teen girls. They’re beautiful. They’re funny. They’re caring. (They adore Katie!) Some love sports. Some love video games. Some love art. They’re all amazing girls with bright futures ahead of them. Like every person in this world, though, they need to know that people care about them. I think that their house parents, along with the rest of the staff at the children’s home, do an amazing job of that, but I’ve had this idea for a while that maybe I could sew something for each one.
All of you who sew know that when you sew a gift with love for someone, that finished gift reminds the receiver of how much you care about them each time they use it. I really wanted to do that for these girls. Like many of you, though, my schedule is crazy busy. I’d put this on the back burner until a few weeks ago when I was reading about Simple Simon & Company’s Skirting the Issue project. I saw that they were sewing pillowcases to give and thought, “Pillowcases! That is perfect!” I can personalize them for each girl, she can use her pillowcase for as long as she wants, and she can take it with her wherever she goes! So, I called my daughter, and we put this plan in motion! Each girl shared her favorite colors or animal or character or sports team or whatever she wanted me to know about her likes, and I used those to choose the fabrics. All of the fabrics came from Joann Fabrics locally, and I used my own 9 1/2 Minute Pillowcase Tutorial to sew them up.
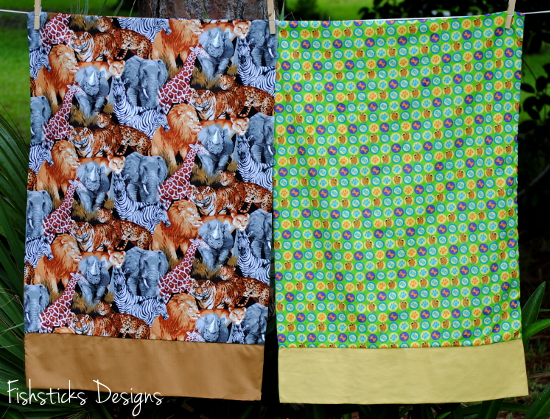
Lions & Scooby Doo
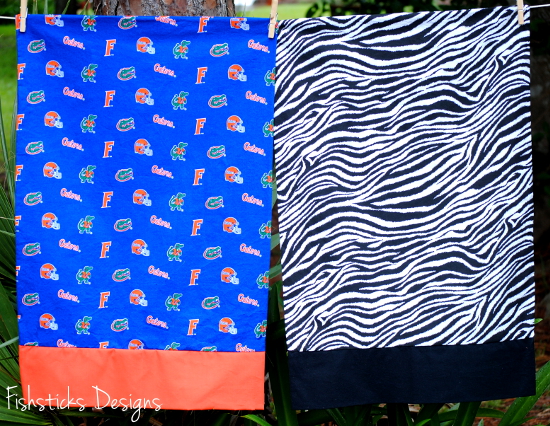
Florida Gators & Zebra Stripes
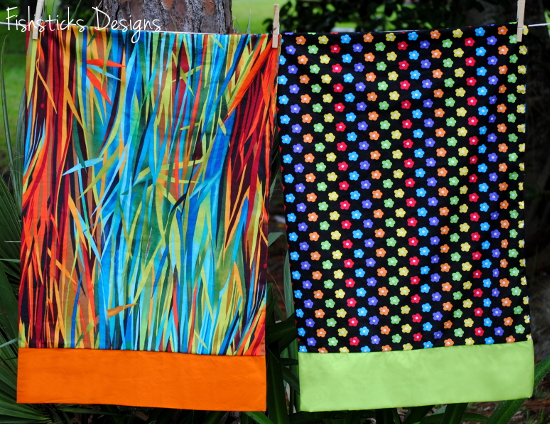
Jamaican Colors & Lime Green and Black

Crosses
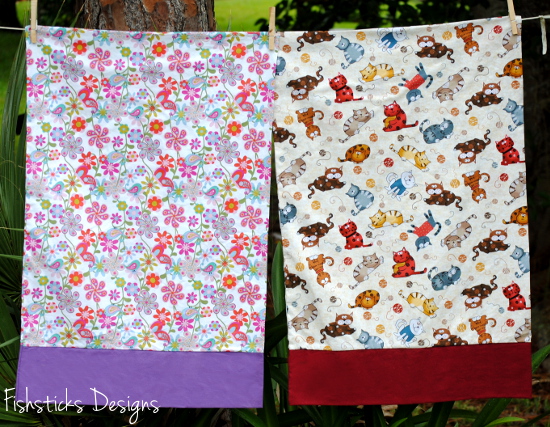
Pink and Purple & Cats
Once I had all the pillowcases done, I thought they needed fun packaging . . . and chocolate. I folded each one and slid it into a clear zippered bag with a few goodies, and I added some ribbon to make it pretty.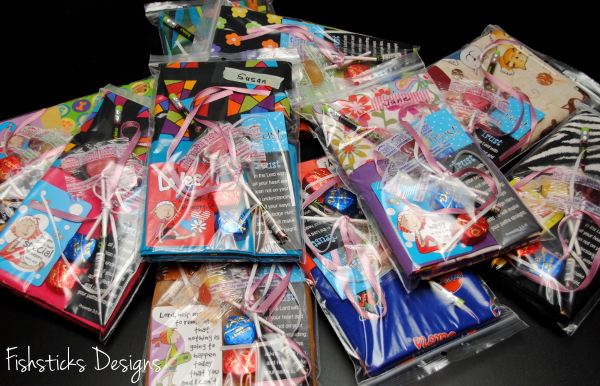 Then I added each girl’s name on a washi tape label. (I did use the girls’ real names on the finished packaging — these are not their real names.) Much more fun than just the pillowcase, right?
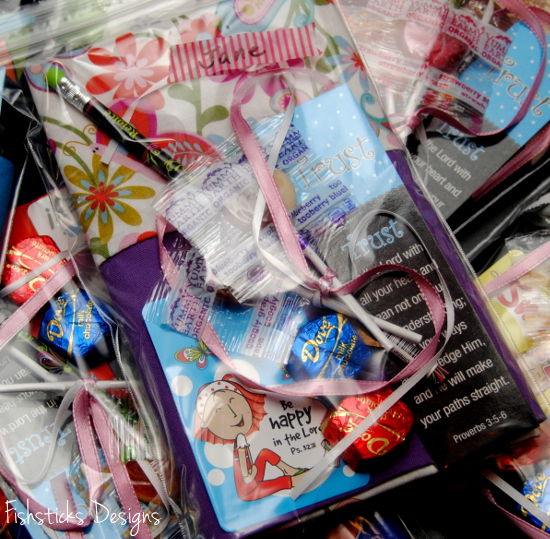 Now they’re all ready to deliver to their new owners! I hope that these amazing girls enjoy them, and that they provide a little reminder that someone cares about them and is praying for them wherever life might take them in the years ahead.
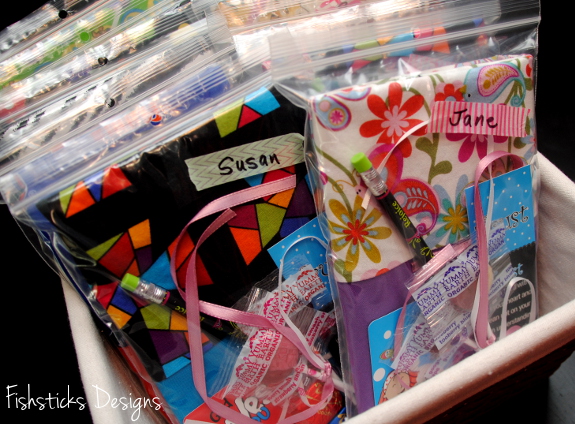
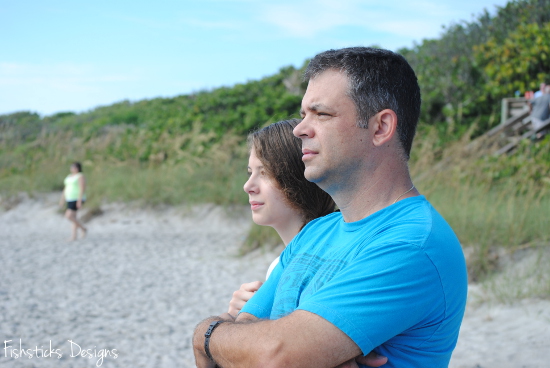
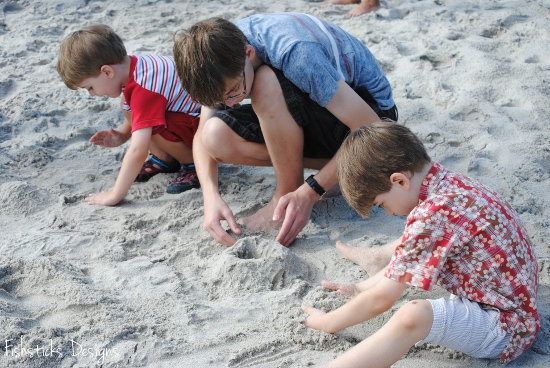
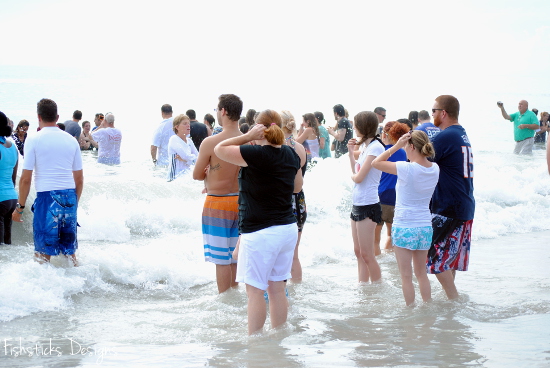
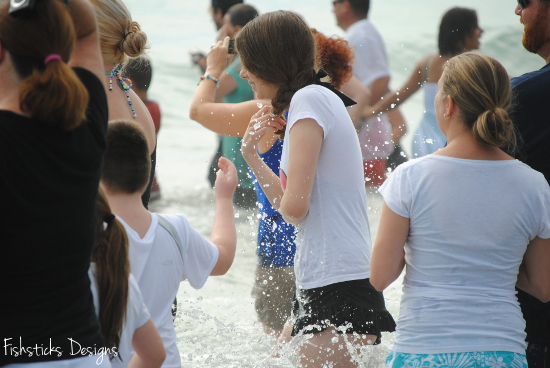
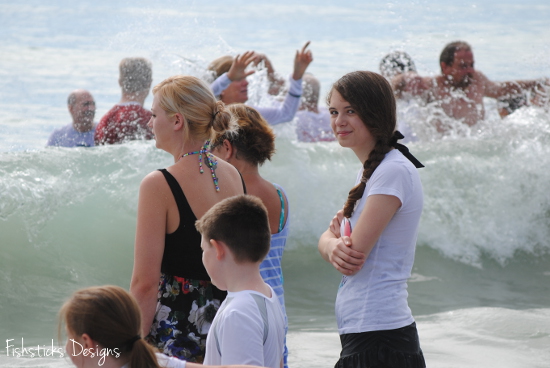
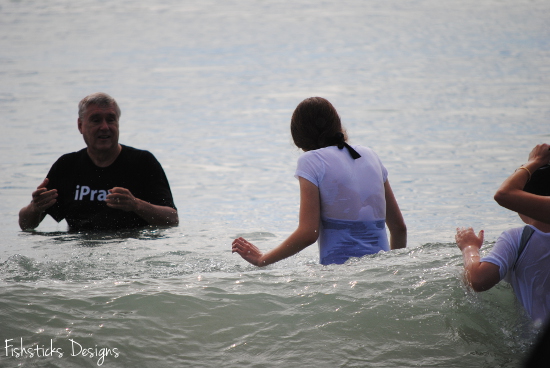
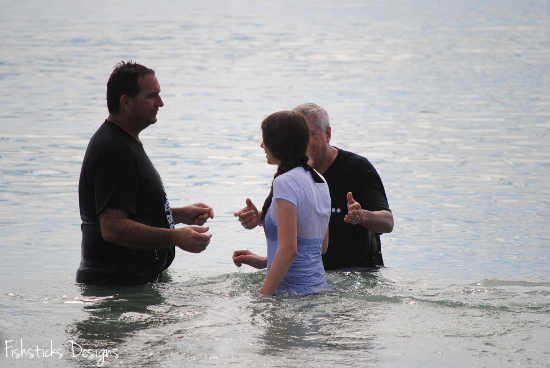
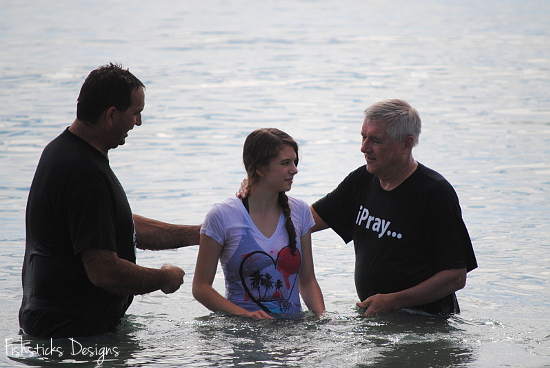
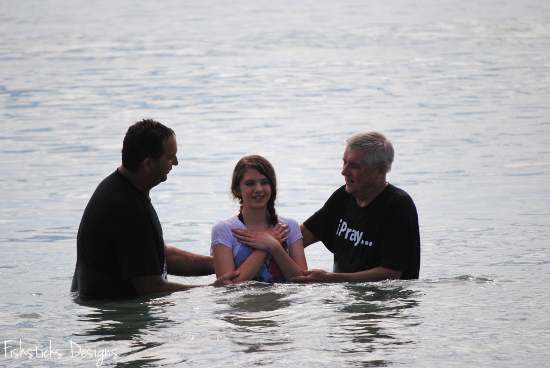
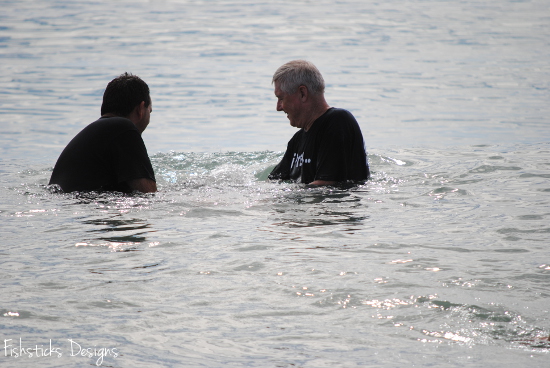
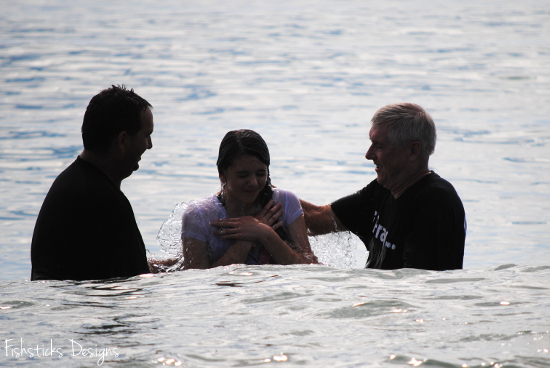
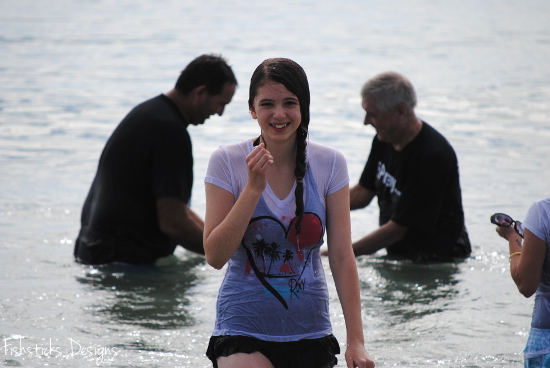
A Beautiful Day for a Beach Baptism
A quick post for my family nestled in here among those about sewing and crafting — Our sweet Samantha was baptized this morning, and our extended family wasn’t able to join us. My prayer is that these pictures will make each of you feel as if you were there with us on this overwhelmingly beautiful day at the beach! Lots of love to each of you! (Of course, my dear blog followers are very welcome to enjoy this celebration with us, too. I feel like many of you are family!)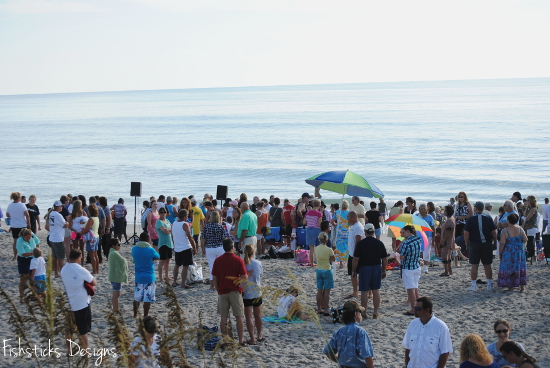


Easter Pictures!
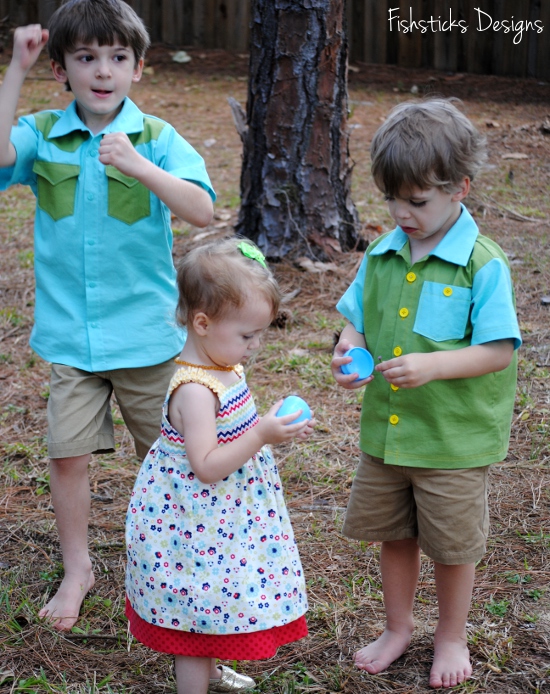
 I hope you were all blessed with a wonderful Easter Sunday! We enjoyed an amazing worship service, yummy food, great company and beautiful weather! I was up late two nights in a row last week sewing for our two little guys and our granddaughter. The boys ended up with khaki shorts that I ran out and grabbed at Target on Saturday night, and I was still sewing buttons on Charlie’s shirt about fifteen minutes before church started on Sunday morning! (We’re used-car shopping right now, and it takes so much time! We were out nearly all day on Saturday after spending hours of time researching for days ahead of time, and we still haven’t purchased anything. I’d really like the perfect van to just appear in our driveway so we can be done.)
We went to the early service on Sunday morning, so we were all a little wrinkled by the time we got out to hunt eggs in the afternoon. You’ll just have to overlook the wrinkles. We also had no baskets, so the kids hunted with my reusable grocery bags! Katie’s dress is the Reversible Double-Layer Katie J. Jumper in Riley Blake Tone-on-Tone Dots and coordinates from Dress-up Days.
 Charlie got an Everyday Camp Shirt made with Timeless Treasures’ Soho Solids and yellow buttons! (Hmmm . . . how did I miss that dirty face? Just pretend that I washed it, and you can’t see that chocolate.)
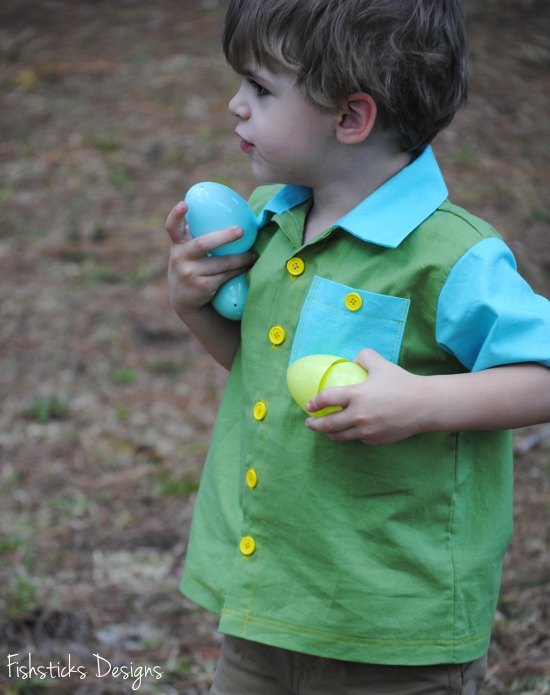 I’ll be back to share a little more about Charlie’s shirt later this week. It’s Button Week at Sew-vivor!
 Jamie’s shirt is a prototype of a new design that I’m working on. It’s a fun retro Western-style shirt.
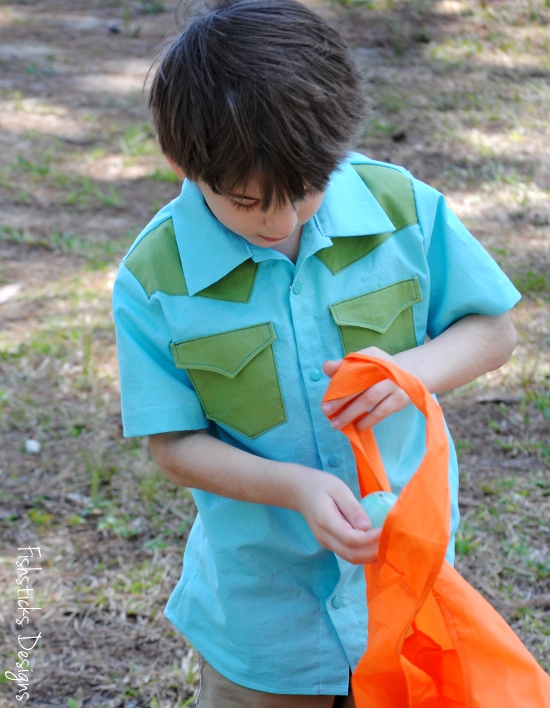 Those pocket flaps were supposed to get snaps, too, but church was starting without us! I love the shirt-tail hem on this one.
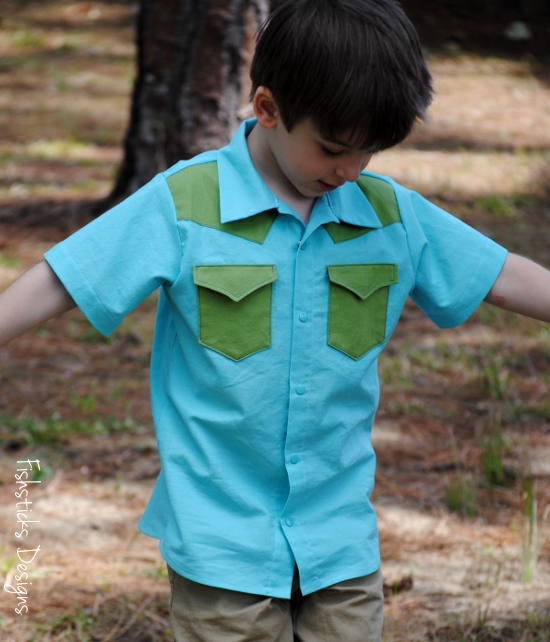 Ray and Samantha hid the eggs for us, including a few that they thought would be too high for the little ones to get to on their own.
 Bet you never knew that palm trees were made for climbing! (I certainly didn’t!)
 I attempted to get some pictures of the three little ones together.
 I also tried to get some pictures of Charlie and Jamie together.
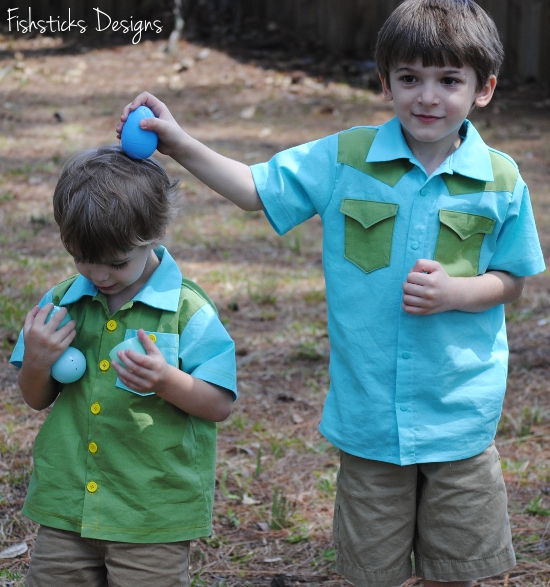 Maybe next year? I did get one really cute one of Jamie and Katie!
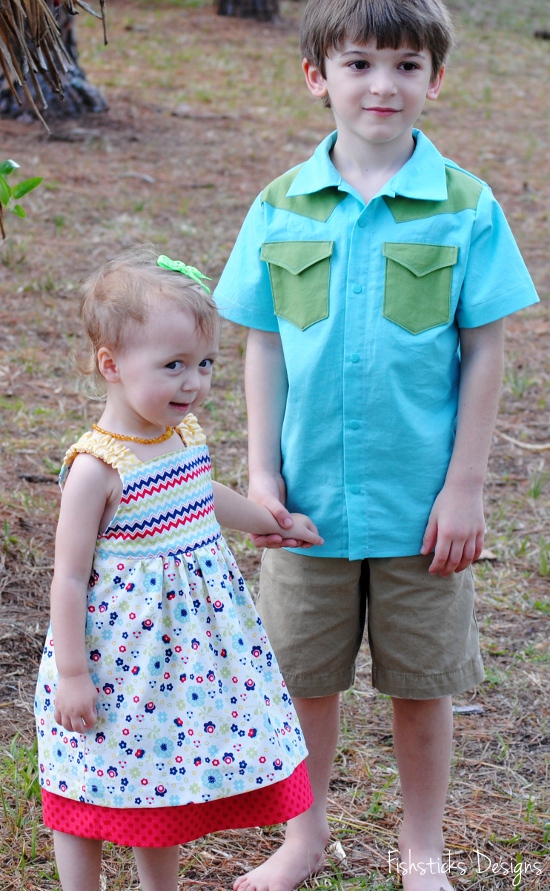 I’ll leave you with that! Happy Easter . . . a couple days late!
Bibs, Bibs, Bibs!
 I cannot possibly thank you enough for sharing your time, your talents and your fabric by sewing so many bibs for last month’s Hopeful Threads Dinner for 2 project!
  Opening your packages has been so much fun! It’s so cool to see the love and care that was put into each bib.
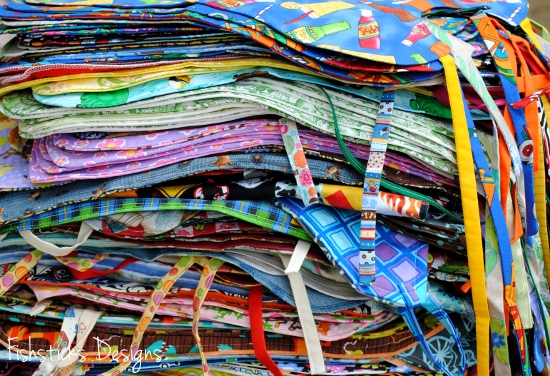 Over 160 bibs are packed in a suitcase, ready to fly off to China where they are going to be a huge blessing to the children at Hidden Treasures Foster Home. (No worries, though, if you haven’t shipped your bibs yet. You can still send them, and we’ll make sure that they make it over on the next trip!)
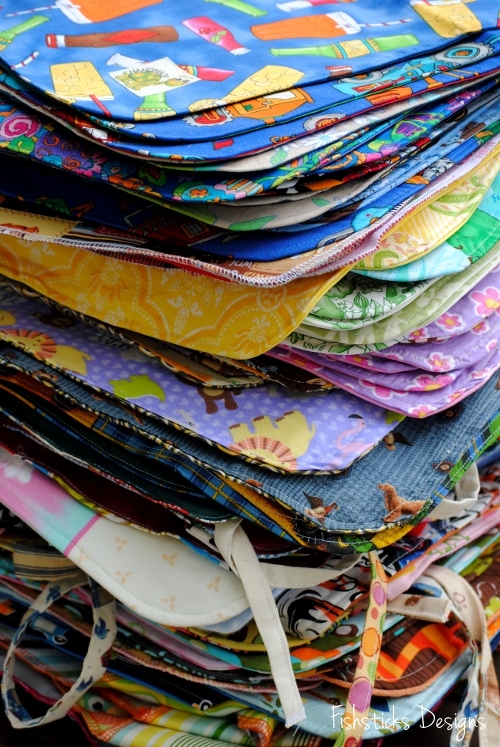 I’m working on a little “Thank-You” gift that I hope to have for you tomorrow!
The Big Kid Bib: Serged & Snapped in Seconds

Have you peeked over at the Dinner for 2 Flickr Group lately? There are some seriously great-looking bibs showing up already, bibs for kids and adults alike. Have you sewn a bib or two yet? What are you waiting for? A quicker method of sewing perhaps? Do you have a serger? Well, then the Serged & Snapped in Seconds Bib tutorial is just for you! (Okay, so it really takes minutes, but seconds make up minutes and without seconds you don’t get the alliteration.)
Let’s get started! First, hop over to this post: Hopeful Threads & Dinner for Two. Read all about why we’re sewing bibs this month, print the Big Kid Snap Bib Pattern and get your three fabric pieces cut out: I have a front piece of cotton quilting fabric, a hidden inner layer of cotton flannel and a backing piece of PUL. (This method works well with PUL because the slippery side is hidden when you serge. Ripstop may be too slippery, but you can certainly try it!)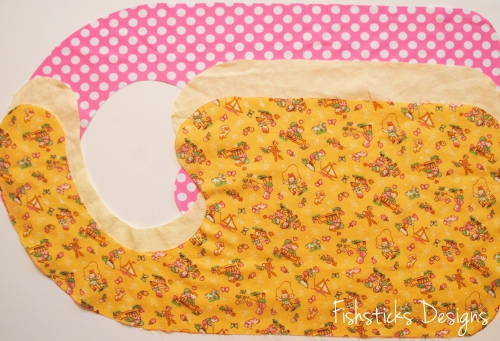
Grab a glue stick from your school supply closet or your junk drawer. A fabric glue stick will certainly work, but regular glue stick is cheaper and easier to find, and as long as it’s washable, it works just as well. You do want a glue stick that is new and not gummy at all. It needs to spread quickly and in a thin layer. Rub that glue stick all over the shiny side of your PUL. You want plenty of glue so there won’t be any slipping and sliding. Carefully place your hidden layer on top, line up all the edges and smooth it out.
 Now glue the wrong side of your front fabric piece to the top of the flannel using the same method. It is much easier to spread the glue stick glue on cotton quilting fabric than on flannel. Flannel leaves icky fuzzy stuff on your glue stick.
 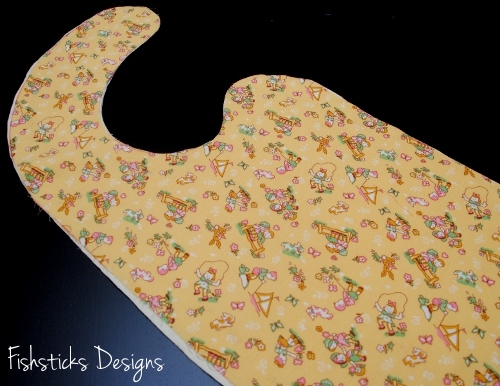 Check to see if you have any areas where the fabrics are overlapping and square them all up.
  Now you’re ready to serge.
  Just one second before you head to the serger, though. Do you have one of these baskets? These beautiful colored spools of Woolly Nylon have been sitting in this basket since Joanns clearanced them quite some time ago. If you have a basket like this, you might consider pulling one of those pretty colors through your upper looper. If you don’t, white will work just as well!
  Now, off to the serger! The seam allowance is 1/2″ so you want to cut off 1/2″ or close to that with your serger blade. It’s hard to keep that exact when you’re going around curves, but get it as close as you can.
  I started and stopped my serging at the back of the neckline since that’s the spot that will be least likely to be seen when the bib is worn.
 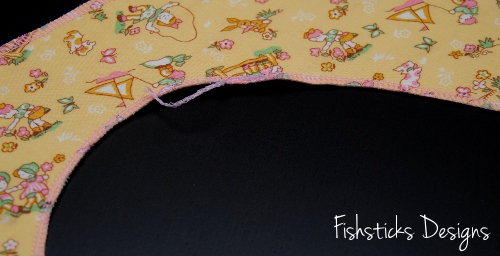 Zip, zip, round the corners, and all you have left to do is add the snaps.
 Refer back to the pattern for snap placement. Press the snaps in place.
 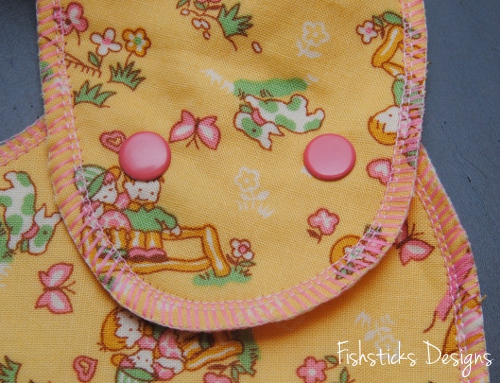 And you have a bib ready to send off with love to a sweet little one who will be so excited to receive it! Now wasn’t that fast?! Fast enough that you have time to make another one? Super! Go serge some more!
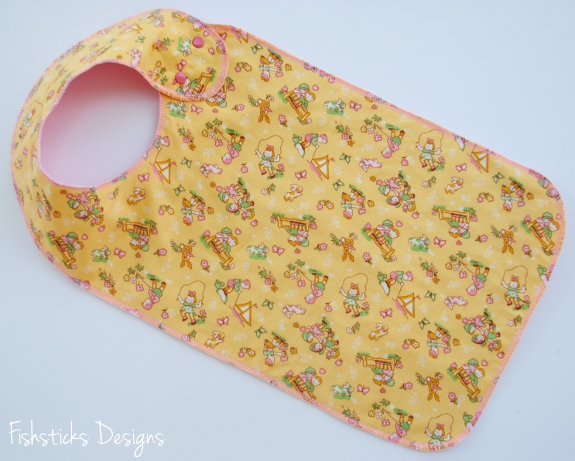
Hopeful Threads, Dinner for Two & Big Kid Bibs for Hidden Treasures
 Woohoo! It’s February! I have been bubbling over with excitement about today for weeks now! Not only do I have the magnificent privilege of getting to work with Kristy and all of the incredibly giving Hopeful Threads followers this month, but I get to be involved in a project that I know is going to be a huge blessing to everyone involved, from those who contribute their sewing talents to the beautiful children and caregivers who receive these handmade gifts.
 I was visiting with my friend, Heather, several weeks ago, and she mentioned that she was getting ready to sew some waterproof bibs to send to China with her daughter, Ransley. Actually, I think she simply asked me if I thought diaper-making PUL would work as a waterproof backing for the bibs that she was making. I thought it would be perfect and offered her some scraps that I had in a box in my garage. A few days later, she texted me about the PUL, and I called her to ask some more questions. The more I heard, the more I was sure that this was a great project for all you sewists who are so kind and generous about offering your time and talents each month to give to those in need! A quick email to Kristy and an even quicker response from her, and I was busy at work putting together everything that you would need to start sewing!
 First, though, a little bit about the children who will be receiving your gifts. This is Ransley, above, on her last visit to the Hidden Treasures Home just outside of Fuzhou, China. Ransley is leaving in the next few months to go serve on staff at Hidden Treasures for the next few years. She shared with me that God showed her such peace, love and joy on her last journey there. The home is filled with children, many of whom have special needs, but it’s also filled with love and fun and hope. You can read many of the children’s stories and browse through photos on the homes’ official website right here: Loaves and Fishes International and the Hidden Treasures Foster Home. I urge you to take a few minutes to read about these sweet little ones.
 When I asked Heather to tell me about the bibs she was sewing, she shared that she’d been asked to sew some when Ransley last journeyed to China. The older special needs children often need bibs to keep their clothing clean and dry, but larger bibs are harder to come by, especially in China. The staff at Hidden Treasures actually sent her a pattern drawn up on a paper bag and suggested that she sew them with cotton fronts and vinyl shower curtain backing.
 Heather sent over about a dozen sewn that way, but she heard they didn’t hold up as well as she’d hoped. I was so excited to jump in and offer suggestions that I hope will produce bibs they will be able to use for years to come! And, after reading this inscription on the original paper bag pattern, I feel so incredibly blessed to have the opportunity to offer my experience!
 Are you ready to get sewing?
 I have two different bib options for you, but let’s start with a little about fabrics and notions. For the waterproof backing, I highly recommend diaper-making polyurethane laminate. You’ll find it labeled PUL in most fabric shops. (Natures Fabrics is offering a 10% discount on PUL for participants. Just type in the code loavesfishes1 when you checkout. You must only have PUL in your cart to check out with the code.) Rip-stop nylon is an alternative waterproof backing.
These bibs will be packed into spare suitcases for the trip to China, so they need to be absorbent, but not too thick. I’m suggesting sewing them with cotton woven quilting fabric or flannel on the front and a hidden flannel layer for a little extra absorbency without too much thickness. Please pre-wash all cotton fabrics.
One last thing, the staff at Hidden Treasures has specifically asked for bibs with no Velcro (or other hook and loop) because the children tend to rub their heads against it, and it can be irritating. The first bib pattern is a traditional tie bib. These work really well for the needs of the children at Hidden Treasures. (Now that this project has ended, this tie bib tutorial is no longer available, but be sure to grab my tutorial for the snap bib in four sizes here: The Bibs in All Sizes Tutorial.)
 The second bib pattern is a snapped bib with a wrap-around back. These are very quick to make and great for both the needs of the children at Hidden Treasures and perfect for your little ones at home, too. (My favorite tool for attaching metal snaps is The Snap Source Snapsetter. It’s what I use for campshirts, pajamas, overalls, anything that needs metal snaps, and at only $9, it’s quite economical, too!) Just click this picture for the Snap Bib PDF pattern download.
 Be sure to add pictures of your bibs to the Flickr album: Dinner for 2 Album. Thank you so much for giving your talents, your time, your stash, yourselves for these little ones!


