Family & Friends
An I-Spy Quilt for a Sweet Little Boy to Cuddle

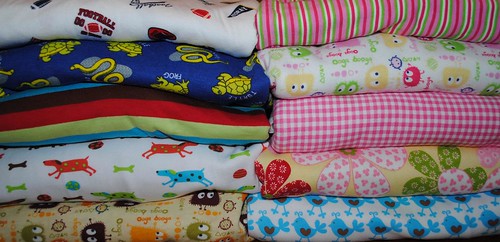
A nine-year-old little boy from the local church where we’ve worshipped for the last several years passed away a little over a week ago. His name was Montana. Although we weren’t close friends with the family, we worshipped with them and our children went to Sunday School together, and my heart breaks for them. I can’t even begin to imagine what a difficult time this is for them. Montana had a four-year-old little brother who’s left to grow up without his big brother now, and I really felt the leading to craft something for him–something that might bring him a little comfort.
I’ve posted before about the I-Spy Quilt that I made for Jamie and how much he loves it. Collecting all those different blocks left me with quite the collection of blocks leftover, and I knew right away that would be the perfect thing.

The finished quilt measures about 40″ X 50″. A good lap-quilt or nap-quilt size for a preschooler. I like that the I-Spy blocks make it fun, too. In fact, Jamie and I played “Can you find the race car, dinosaur, football . . . ” with it before I threw it in the wash when it was all finished.

I left out batting and backed it with minkee. I love the way this makes a nice drag-around-the-house quilt that’s easy and compact to fold, but still feels soft and warm.

I also added a label to the back to remind Dooley of how very much he’s loved by family and friends.

A Valentines Swap for the Kids!
I am so excited that so many of you have so many questions about cloth-diapering! I’m working on an information post for you–hopefully, I’ll have it up in a few days.
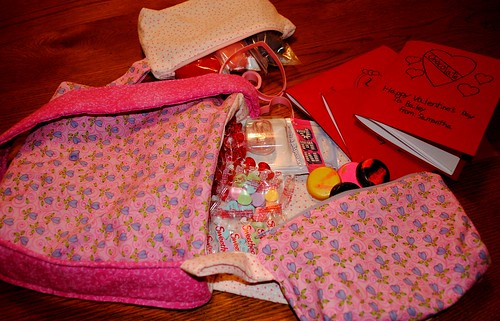
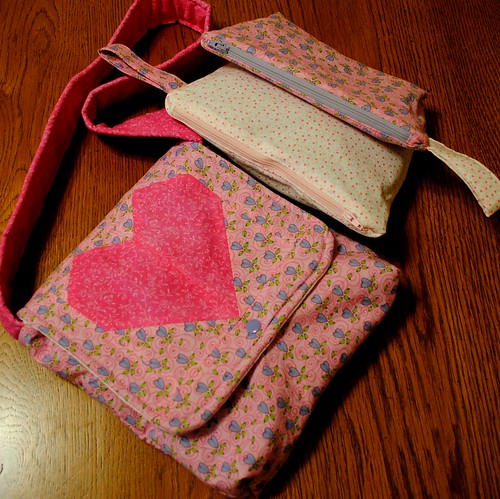
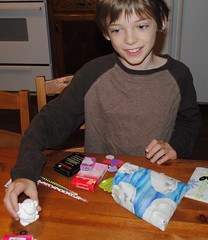
In the meantime, I wanted to share how much fun we had putting together this swap that was hosted on one of my favorite boards: Diaper Sewing Divas. (That’s a great place to go, by the way, to learn all about sewing your own cloth diapers.) In this particular swap, the kids (with moms help) were supposed to put together Valentine’s Day goodies for the children in the family we were partnered with. My three youngest participated by putting together this package for a little girl who is almost two. We started with a little messenger bag and matching zippered bags that I sewed up using tutorials from here on my blog.
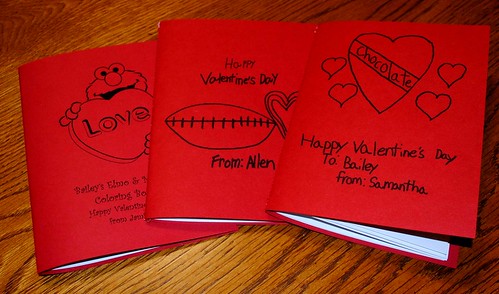
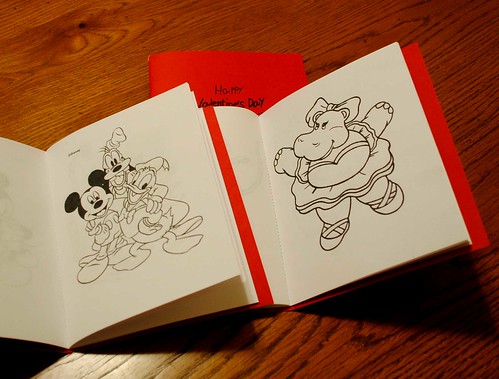
Then we added homemade coloring books. The kids each picked out coloring pages that we found online to make up a coloring book from each one of them. I used Chez Beeper Bebe’s Coloring Book Tutorial to put these together. (I did leave off the book-binding tape, though, because we didn’t have any on hand.)
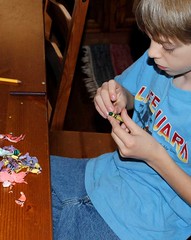
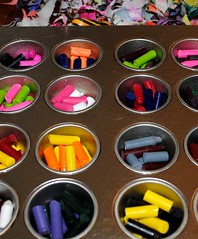
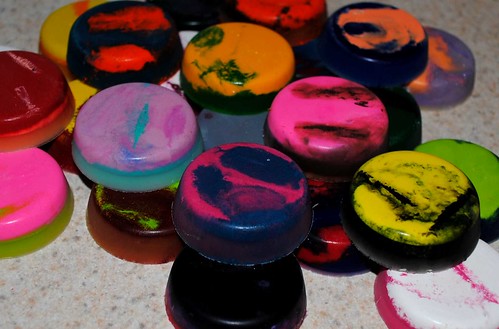
Coloring books need crayons, of course, so we followed the Cool Chunky Crayon Tutorial at Whimsy Love to recycle our old broken crayons into new chunky ones!
Finally, we mixed up some of our favorite Kool-Aid playdough to send along with some multi-sized heart cookie cutters.


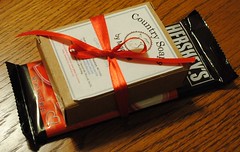
Of course, we couldn’t leave mom out, so we sent along some fun things for her, too!
All packaged up and ready to go!

Only a few days after we sent our package, our swap package arrived!
There was a little arguing over who got to open the package.
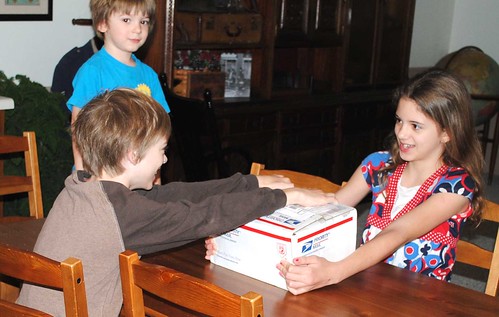
Somehow, Jamie won!

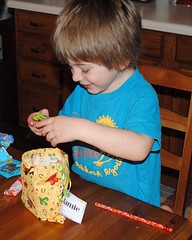
Each one of the kids got an awesome drawstring bag. (Allen’s has already been put to good use holding his Nerf darts!) Each bag was filled with all sorts of goodies–candy, bubbles, socks, pencils, pop-up balloons, ceramics to paint and lots more!

And, there were fuzzy socks for me and a pile of cloth diapers and a blanket for baby! Such a fun swap to give and to receive!
Diapers, Diapers and More Diapers . . . and they’re all cloth!
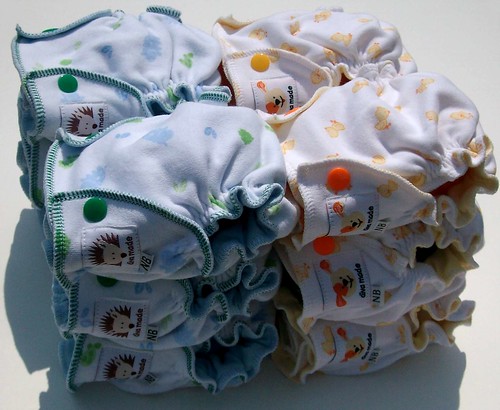
It’s getting close to time to welcome our new little one! We love using cloth diapers, and I especially enjoy sewing them myself. I’ve actually been working on diapers since not long after we found out that we were expecting. There are so many patterns available now, and they all have advantages. I thought I’d show off our newborn stash now, and then, as we try out each pattern on baby, I’ll report back with feedback.

I tried to make our newborn diapers from prints that are gender neutral so that they can be used again for another baby.
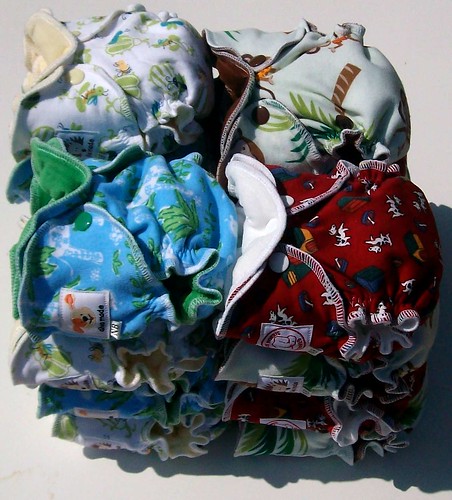
I also used knit fabrics to make all of these. The stretch in the fabric will help them to fit longer than if I used woven fabrics.
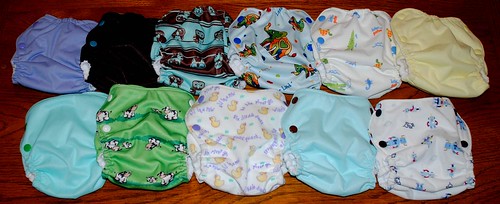
In case you’re counting, that makes a total of 40 newborn fitted diapers and 12 covers. I also have quite a few smalls finished, but I’ll save those for another post. Aren’t these adorable, though? If you’ve never tried cloth, you really should give a go. I promise they’re much easier to use and care for than you think they are!
Pizza-making Fun at CiCi’s Pizza!
Our homeschool group had a field trip to CiCi’s Pizza yesterday, and the kids had a great time. There’s just something about making your own pizza that makes it taste soooo good! I couldn’t resist showing off some pictures of the fun.


Handmade Christmas – The Play Kitchen
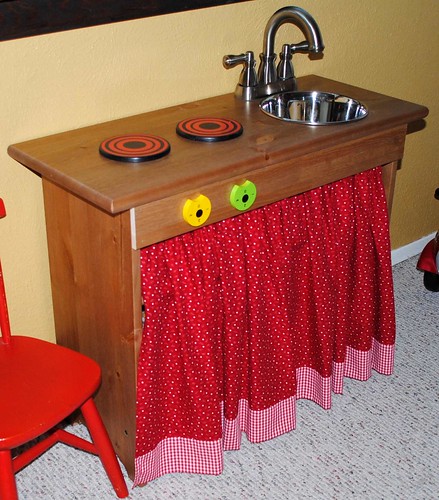
Our almost three-year-old, Jamie, has developed a love of helping in the kitchen lately, so we thought we’d put together a play kitchen for him for Christmas. A quick google search turned up hundreds of handmade kitchens with idea after idea for how to create one. We knew we wanted something simple, gender neutral and not too complicated to put together.
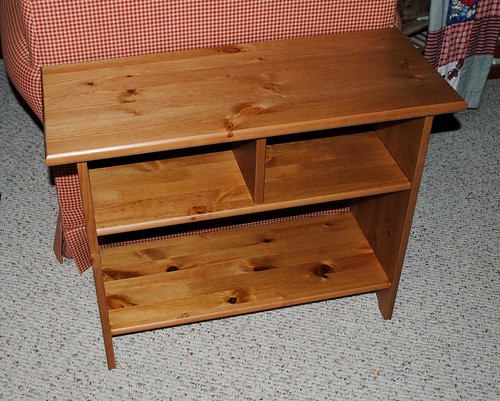
The kitchen’s home would be our family room which is decorated almost entirely in Ikea’s Leksvik line of furniture, so that was an obvious starting point. We picked up this Leksvik side table just before Thanksgiving and started brainstorming ideas for the kitchen “parts”.
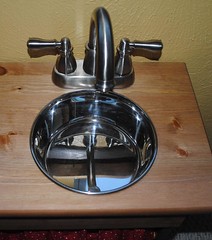
We drove out to our local Habitat for Humanity Restore one Saturday to hunt for a faucet and stove knobs. We were really excited to find this bathroom faucet, brand new in the package, for under $20. We didn’t find any knobs, though, and the ones that we found online cost more than we really wanted to pay. Samantha, our 11-year-old daughter, reminded us that we had an old wood tabletop play kitchen that we had originally purchased at a thrift shop put away in the storage closet because it had lost a knob. We pulled it out and quickly made use of the remaining knobs and the burners.
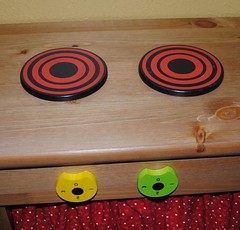
Ray was even able to install the knobs so that they turn. Finding a sink then became a problem because the space on the top of the side table is fairly narrow. All the stainless steel bowls in the kitchen section were either too wide to fit or too small to work properly. Walking around our local thrift store for inspiration, though, Ray ran across a stainless steel dog bowl that proved to be the perfect solution. We did, however, end up purchasing a new dog bowl from Walmart for the sink.
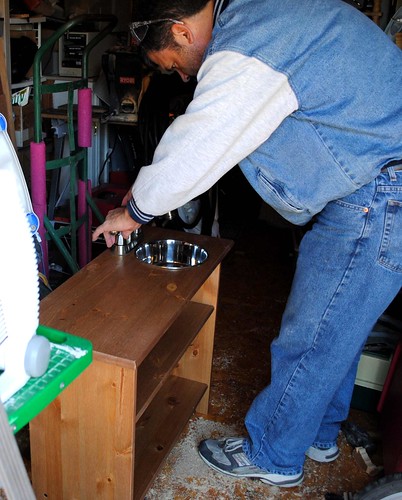
Ray put the kitchen together in the shed so that Jamie would be surprised on Christmas morning. Most of the construction was pretty straight-forward. He did add an additional piece of wood to the front of the kitchen for the knobs. (The wood came from a stack of extra pieces in the “As-Is” section at Ikea.)
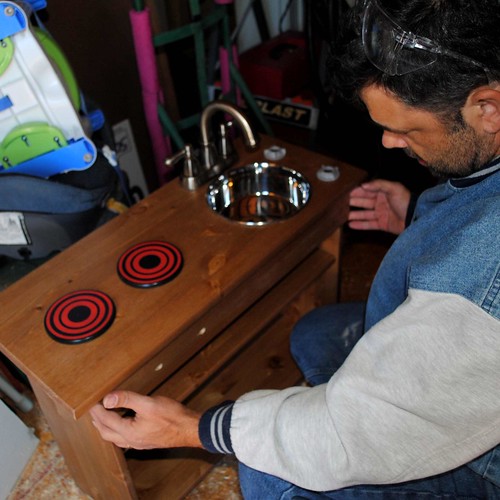
Once Ray’s work putting the kitchen together was complete, I just needed to sew up a curtain for the front to hide the play kitchen accessories, and it was ready for Christmas morning.
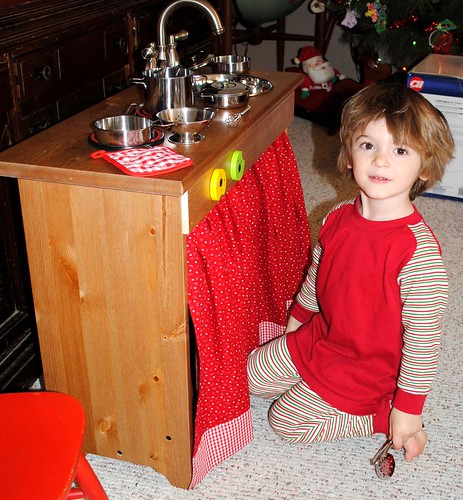
(Don’t you just love the bedhead?)

Cooking pancakes for Daddy.
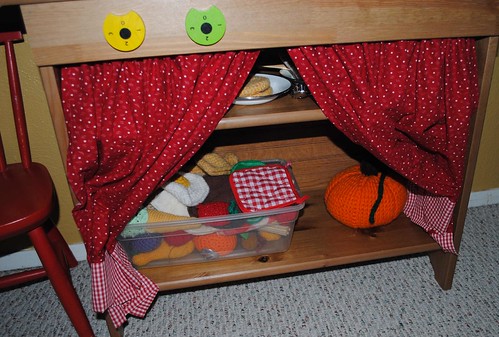
And, last a peek inside to see part our massive collection of felt and crocheted play food!
I’m sure that this kitchen will see a lot of attention in the coming years. I love that it fits in nicely with our decor and that it’s not overwhelming in size. I am so appreciative to all the other moms and dads who shared their play kitchen ideas that inspired this one!
Fabric-Covered Journals, Board Games & Dinner with Young Friends

We had three of Morgan’s friends and one of Sean’s friends over last night. It was such fun! We enjoyed an early dinner, then visited two different living nativities before coming back to our house for a devotional, gifts and homemade doughnuts.
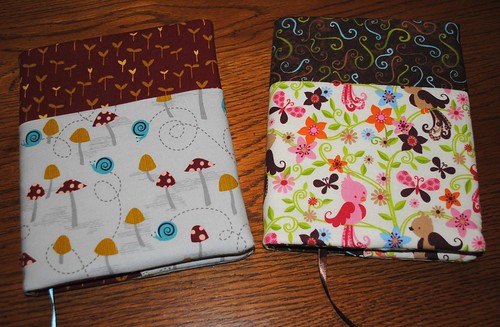
I made fabric-covered journals for the girls using the Journal Cover Tutorial at Moda Bake Shop for the basic construction.

These go together really quickly, and the girls loved them! I also included a nice pen and some hot cocoa, microwave popcorn and chocolate.
I had a much harder time coming up with a gift for the college-age guys. Some brainstorming for ideas and a few minutes spent roaming around the toy department, though, and here’s what I came up with:
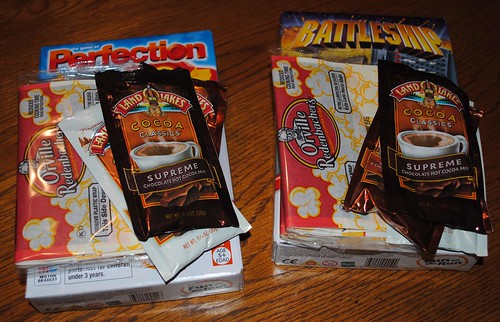
Each one got a travel-size version of a classic board game (perfect for storing in the dorm) along with popcorn, hot cocoa and chocolate.
I’m pretty sure that everyone enjoyed their gifts as much as I enjoyed putting them together for them!
Mmmm . . . Biscotti!
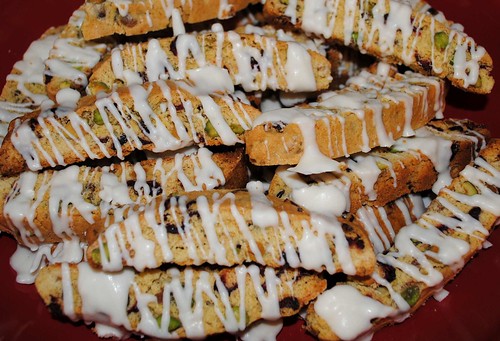
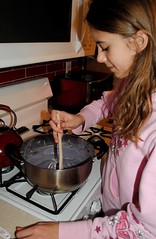
I am a huge lover of coffee and biscotti, especially in the cold winter months. I love to sit down with a cup of coffee and a biscotti in the afternoon during naptime and just enjoy a few quiet minutes to myself. Store-bought biscotti is good, but home-made is so much better.
Our homeschool moms’ group is meeting at my house for a Christmas cookie exchange tonight, and that was just the motivation that I needed to bake up a couple of batches of biscotti. I used my favorite recipe: Cranberry Pistachio Biscotti. I love it just the way it is, but I also like to substitute sliced almonds and mini-chocolate chips for the cranberries and pistachios. (I decrease the vanilla to 1 teaspoon and increase the almond extract to 1 teaspoon for the almond ones.)

When they’re all cool, I drizzle them with chocolate because, really, who doesn’t need a little more chocolate in their diet? And, it makes them so pretty. If you like biscotti and haven’t made it before, give it a try. It’s really easy–I promise!
100th Post Giveaway and a Chance to Give!
 Wow! Just over a year of blogging, and I’ve reached my 100th post! I love sharing my family, my ministry and my sewing with each of you, and I especially enjoy hearing from you and getting to “know” each of you. It’s exciting to watch how my number of blog readers is continuing to increase. (Of course, our family size is increasing a bit, too, as you can tell by the size of my belly in the picture to the right.) Christmas is quickly approaching, so I want to offer a gift to each of you, a chance to win an even bigger gift and the opportunity to know the joy of giving something to a family in need.
First, a way for you to give a gift to a poor family in Asia and maybe even mark off a few names on your Christmas list at the same time: Having trouble coming up with a gift idea for that relative who already has everything? Perhaps a gift in his or her honor for the poor in another country would be the perfect thing!  As Gospel for Asia staff members, my husband and I often get to hear the incredibly heart-warming stories of how blessed people are to receive the gifts given through the GFA Christmas Catalog. Because I love to sew, the ability to give the gift of a sewing machine to a poor family in Asia brings me great joy! You can read for yourself a few stories on the GFA website about how much the gift of a sewing machine can help out a family in need: Christmas Gifts Warm Body and Heart and Stitching Her Garments with a Grateful Heart. If you’d like to check out how you can give a sewing machine, or other gifts like chickens, blankets, even a water buffalo, visit GFA’s Christmas Catalog online.
Second, a gift for all of my readers: This week only, from November 30th through December 6th, you can use the code “BlogPost100” in my store to receive a 15% discount on any pattern order. I’m even adding a preorder option for the new Little One Jammies Pattern which should be ready to ship by Monday, December 7th.
Finally, the big giveaway! In celebration of my 100th post, I am giving away a full set of all eight of my patterns and 5 yards of knit fabric to sew into beautiful clothing for your little one. The winner will get to choose from one of the two sets of fabric shown–either the boys’ set or the girls’ set.
For your first entry into the drawing, just leave a comment on this post with which of my patterns you like the best and why, or leave a comment about which of my patterns you’d most like to try and why. For an additional entry, blog about this post or blog about GFA’s Christmas catalog and email me the link to your post. You can enter anytime between now and noon central time on Friday (December 4, 2009). (Please note that I will cover the postage if the winner is inside the US. If you win and you live outside of the US, you’ll need to cover any postage cost above $10.)
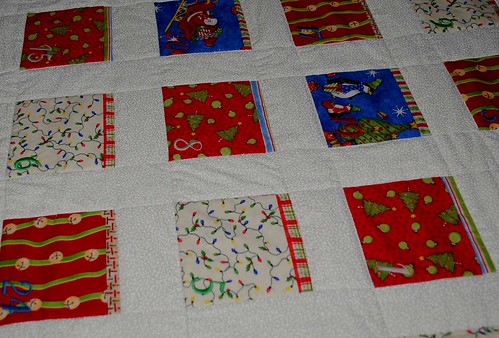
Handmade Christmas: Advent Calendar

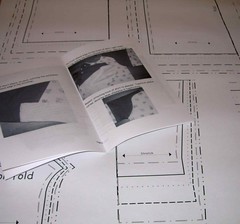
I’ve always loved the idea of having an Advent Calendar with an activity to do each day of December up to Christmas, but I’d never found just the right one. Early in November this year, I saw and fell for this one on the Sew Mama Sew Blog: Advent Calendar. I modified the calendar slightly (I really am planning to practice free-motion machine quilting one of these days). Overall, though, I followed the instructions there, and the result is exactly what I was hoping for.
It actually took me more time to come up with the activities than it did to sew up the calendar. I really wanted activities that were centered around spending time as a family and giving to others.
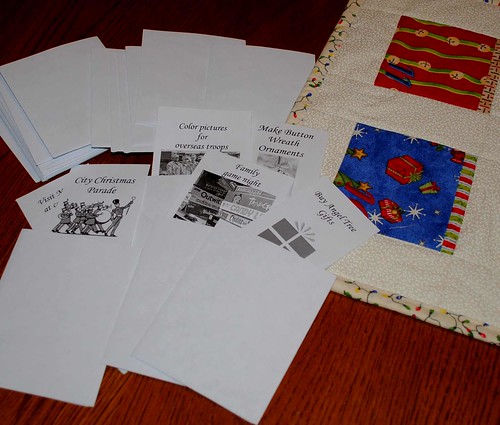
Here’s my list of activities–feel free to use any or all of the ideas! In fact, I’d love to hear what you think!
1. Make button wreath ornaments.
2. Color pictures for troops overseas.
3. Visit a relative (or a friend) for lunch. (We’re driving out to visit our oldest daughter at college.)
4. Go see a family Christmas theatre production. (Our local playhouse is doing A Christmas Wizard of Oz.)
5. Walk in (or you could just watch) the city Christmas parade.
6. Buy gifts for a needy family. (We choose one from the Angel Tree at our church, but there are many organizations that you can give through.)
7. Have a family game night. (Board games and popcorn! Our favorite family games are Mexican Train and Speed Scrabble.)
8. Buy canned goods and deliver to a local food pantry. (You might want to call ahead and ask what they are specifically in need of. Our church’s pantry actually told me that need meat and bread more than canned goods right now.)
9. Watch Frosty the Snowman (or any other classic animated movie).
10. Make jar mixes for our Christmas dinner guests. (Jar mixes are nice gifts to have on hand for expected or unexpected Christmas guests. They’re fun and easy for kids to put together, too.)
11. Attend company (or ministry or other group) Christmas party.
12. Visit a living nativity. (We have a local church that does a beautiful one each year.)
13. Make Christmas card ornaments.
14. Make cards for Nana and Papa.
15. Make cards for MawMaw.
16. Bake cookies.
17. Take cookies to the local firestation. (We’re actually going to invite some other local homeschool families to join us in this one.)
18. Go out for dinner. (Enjoy a special night out at your family’s favorite restaurant. I’m not sure whether it’ll be Italian or Mexican for us.)
19. Go Christmas shopping for siblings. (We give each of our children a budget and let them shop for each other.)
20. Watch A Christmas Story (or another live-action Christmas movie).
21. Drive around to see Christmas lights. (You could drive around your neighborhood or go see a big light presentation somewhere close by.)
22. Make playdough and play with Christmas cookie cutters. (This is one of my kids’ favorite activities, and we don’t do it often enough. We like to make Kool-aid playdough. I thought this one would be a great calming activity for just before Christmas when things can get a little overwhelming.)
23. Visit and take pictures with Santa Claus.
24. Make a birthday cake for Jesus. (This a traditional family activity of ours that helps us to put the focus back on what the Christmas season is really about. We even gather around the table, light candles and sing Happy Birthday to Jesus.)
I have a two back-up ideas on hand in case something doesn’t work out, too: string popcorn to hang outside for the birds and plant an indoor herb garden. My husband also suggested that next year we see if we can ring the bell for the Salvation Army one day.
Here’s our calendar hung on the wall and ready for Tuesday:
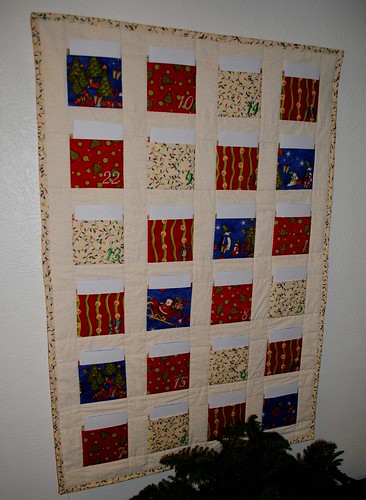
The kids are really excited about finding out what each activity is going to be. (We’re keeping them a secret until they open the envelopes each morning.) I’m really excited about getting started, too!
Finding the Perfect Christmas Tree

Since we don’t currently have any crawling babies or pets, Ray suggested that we skip using our artificial tree this year and buy a real one. I love real trees, so I was easily convinced. We’ve never cut down our own tree before, and I thought it would make a great family memory to do just that. A little bit of hunting turned up a tree farm less than an hour from our house, and the whole family got excited about choosing and cutting our own tree!
The day after Thanksgiving was a beautiful day here in Dallas, even if it was a little un-Christmas-like. The temperature was around 70 degrees when we arrived at the tree farm. . . we just pretended that it was cold and enjoyed some free apple cider anyway. Then we boarded a hayride to travel out to the fields of trees.

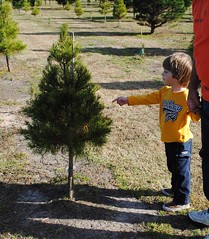
Jamie was worried that the big ones wouldn’t fit in our house. He thought this one was perfect. Thankfully, we managed to convince him that we could fit one a little bit taller in our living room.
A little browsing among the trees brought us to this beauty which the kids decided was absolutely perfect.

Daddy cut it down. (He did let the kids each have a quick turn with the saw, too.)

Then it was back to the gift shop while we waited for our tree to be gathered, wrapped and tied onto the roof of the Suburban for the trip home.

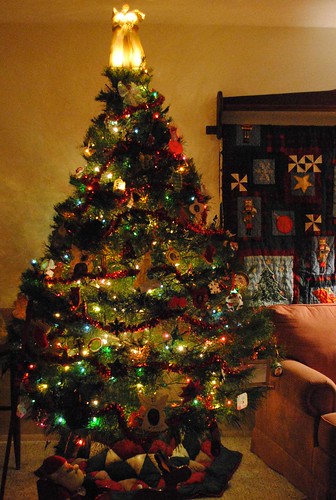
A day later, and it’s beautifully decorated with an array of handmade (mostly kidmade) ornaments and ready to enjoy in our livingroom for the rest of the Christmas season.