Giveaways
The Snapsource SnapSetter Winners are . . .

The winners of last week’s Snapsource SnapSetter Giveaway are Carla, Paula and DM! Congratulations to all three of you! I’ll be in touch with you via email or Facebook later today.
a Rafflecopter giveaway
New patterns are coming late this afternoon!
Indygo Junction’s Fabric Flowers Book Tour (and Giveaway!)
 I can’t tell you how excited I was to be asked to be on the book tour for Amy Barickman’s new book, Indygo Junction’s Fabric Flowers! There are so many fun little embellishments packed in here that use tiny scrap pieces of fabric. I chose to make one that even uses recycled fabric! (I love putting previously-loved clothing to new use.)
  Amy’s instructions made turning these two pairs of my 13-year-old son’s old jeans into a beautiful Ragged Edge Rose so simple! My 15-year-old daughter, Samantha, pinned this rose to her denim library bag, and it went from simple to “That is so cool, Mom!” instantly.
 Since I gave up my first rose, I had to make a second one. I happen to own a denim jacket like the one in the book photo, and it was looking a little boring. It needed a Ragged Edge Rose made with colored denim! A quick run out to a local thrift store turned up the perfect pair of pink jeans. And now, look at my jacket! (I hope we have at least a few more days cool enough here for me to wear it!)
 Want to take a peek at some of the other flowers in the book?
Are you inspired to start ripping up some old jeans and digging through your scrap pile to make some fabric flowers of your own? Great! You have a chance to win your own copy of Indygo Junction’s Fabric Flowers AND some fun tools from Clover: Fuse ‘n Gather & Wrap ‘n Fuse Piping!
 To enter, just leave a comment telling me which flower you’d like to try out first and/or what you would embellish with your own handmade fabric flower! I’ll leave the giveaway open through Wednesday, February 27th at 10 p. m. EST and announce the randomly-chosen winner on Thursday, 2/28.
Wait! That’s not all! You get a prize without even entering! Everyone who reads this can go shopping right now in the Indygo Junction Store and receive 20% off of your whole order! Just use the code: FFBK15. This code is valid through 5/1/2013. 
A flower a day & 25 chances to win! Don’t miss a stop on Indygo Junction’s Fabric Flowers Blog Tour:
2/2/13 – Indygo Junction Kick Off Post
2/4/13 – Kollabora
2/5/13 – CraftFoxes
2/6/13 – Sewing Secrets
2/7/13 – Princess Lasertron
2/8/13 – Dollar Store Crafts
2/11/13 – Tatertots & Jello
2/12/13 – Family Ever After
2/13/13 – This Mama Makes Stuff
2/14/13 – Amy’s Creative Side
2/15/13 – Today’s Creative Blog
2/18/13 – Lazy Girl Designs
2/19/13 – Skip to My Lou
2/20/13 – The Sewing Loft
2/21/13 – The Crafty Cupboard
2/22/13 – Fishsticks Designs <—— Today’s tour stop!
2/25/13 – Taradara
2/26/13 – Diary of a Quilter
2/27/13 – Craft Gossip
2/28/13 – How Joyful
3/1/13 – Lindsay Sews
3/4/13 – Flamingo Toes
3/5/13 – In Color Order
3/6/13 – See Kate Sew
3/7/13 – Handmade Charlotte
3/8/13 – Sew Caroline
3/9/13 – Indygo Junction Wrap Up Post, Bonus Giveaway & Free Flower Project
Comments are now closed, and a winner has been chosen!
It’s a Snap Source Giveaway!
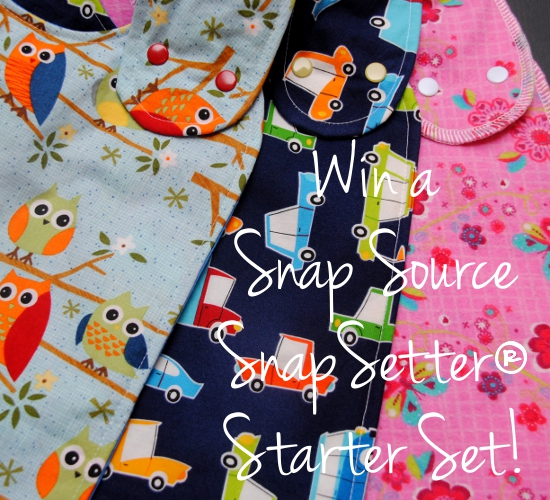 Guess what?! When the folks over at The Snap Source heard that we were joining with Hopeful Threads to sew bibs for two different charities this month, they offered to send me THREE SnapSetter® Starter Sets to give away! How cool is that?
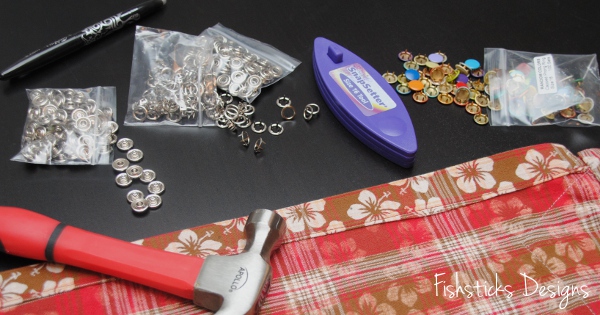 I love using the SnapSetter® for clothing. The snaps are high quality, affordable and long-lasting, and applying them is fast and easy! Simply position the snap components and fabric in between the layers of The SnapSetter® and hammer into place.
 How many things can you think of that could use snaps? (Snaps, by the way, are far easier for little hands to manage when dressing themselves than buttons. My six-year-old, Jamie, requests them on all of his camp shirts!)
 Each starter set comes with the standard size 16 SnapSetter®, six open-ring snap sets and 40 capped snap sets! And, did I mention, that THREE people will win?
 To enter, just follow the instructions on the Rafflecopter below! I’ll announce the winners on Monday, 2/25, and the winners will have 48 hours to respond. Both domestic and international entries are welcome!
a Rafflecopter giveaway
A Christmas Tee in a Twinkling: A Tutorial

Have you been following along with the Holiday Bake & Craft Sew Along over at Skip to my Lou? There are some great sewing tutorials already posted and lots more to come, AND today is my turn to share! Be sure to click over and check out A Christmas Tee in a Twinkling!
")
I also get to treat you to a SEW Amazing giveaway as part of our crafty series.
This is one AMAZING giveaway!
We are giving away a fabulous Prize Package worth more than $700!
 One lucky winner will receive…
- Singer ONE Sewing Machine this is Singer’s easiest sewing machine! True to SINGER, it is easy to learn on, simple and has basic stitches for crafts.
The perfect machine for stitching home made goods or something fun this holiday season! - Simplicity SideWinder Quickly and easily fill bobbins without having to un-thread and re-thread your sewing machine. The SideWinder transfers thread from spool to bobbin effortlessly and quickly; works with most bobbins, metal or plastic. An adjustable tension knob accommodates different thicknesses of thread! So cool!
- Simplicity Bias Tape Maker This Simplicity Bias Tape Maker will Create customized single fold bias tape with the push of a button!
- and so you have something beautiful to sew, $100.00 of fabric from Riley Blake!
Simply wait for RaffleCopter to load and enter there! Be sure to check out all the fabulous sewing projects shared this month for this Holiday Bake Craft Sew series going on all month long!
Drum Roll Please . . .
Oh my goodness! We have giggled all day at your guesses as to what our little project might be! The truth is, no one even came close! So . . . I did a random drawing of the 18 of you who were brave enough to venture a guess, and the winner is #17 DebbieKL! (I’ll be in touch with you for your information as soon as I’m home next week, Debbie.)

Now, I suppose you actually want to see what we did create with all those seemingly random parts. I can’t believe that no one guessed that it’s an old-fashioned potbelly stove!

Isn’t it cute? We had someone stop by as we were finishing up our setup this afternoon and ask if it was real! I think that means it looks pretty authenticate in real life. (More pictures in our finished booth are coming in a day or two! I love how the booth came out!)

Quilt Market Time and a Fun Little Giveaway!
The last few weeks (months, really) at my house have been full of a whole lot of this:

a little of this:

and perhaps a bit too much of this:

All of that was in preparation for Quilt Market this weekend! Ray and I arrived in Kansas City late in the afternoon yesterday. Booth setup has started and will continue (with the help of a few wonderful local friends–more about them later) through today.
We have a fun little theme going on with the booth, and it fits my personality very nicely. The centerpiece of the whole thing started out this way:

Have any idea what we might have turned those random pieces into? Why don’t we have a little contest? I have seven new patterns that I’ve been working furiously to finish for Market. I’ll be revealing them over the next couple of weeks. Would you like to get a set of them for free? Just leave a comment on this post telling me what your guess is to the very cool project we created with this set of pieces. I’ll check back in before bedtime tonight and pick a random winner from those who guess correctly, and I’ll reveal the answer with a picture (as long as things go as planned).
Oh, and for the record, yes, I do eat chocolate chips out of the bag for a chocolate fix whenever necessary.
Hopeful Threads: Giving Back & a Giveaway

Have you heard about the wonderful things happening over at Hopeful Threads? Kristy has such a heart for people in need, especially children, and she is doing a fabulous job of encouraging those of us who love sewing and are blessed with much to take a few minutes each month to give back. On the first of every month, Kristy posts a new charity sewing project on the Hopeful Threads blog. Participants from around the world join together in contributing their time, talents and fabric to help those who need what we can give.

Last month, I set aside a day to sew up a dozen bloomers for the January project. Annabelle’s Wish had a special request for bloomers to go with the many dresses that are donated during the summer months to the little girls in China’s orphanages. One day of sewing time and a few yards of fabric was an easy thing for me to give even on a tight budget. This month, Kristy is encouraging you to find a fundraising project that you can contribute to, whether it’s by creating a handmade project to be auctioned off, bidding on an auction or by skipping that latte and giving the dollars instead. (That last suggestion was not really from Kristy. It was all me, and really for me.)

Also, this month, I’m joining in as a Hopeful Threads supporter! (Kristy and I are working on a really exciting plan for a project that we’re hoping will happen in a few months, too, but it’s a secret for now. Shhhh . . . ) In addition to asking you to skip over to Hopeful Threads and start using your sewing talents to give back, I’m giving something to you: three chances to win two of my patterns! You have to go read Kristy’s post to find out how to enter: FD Giveaway.
Every man shall give as he is able, according to the blessing of the LORD your God that He has given you. Deuteronomy 16:17, ESV
Knit Knowledge–Questions & Answers
Such great questions! I can’t answer all of them today (I do have to sleep a little!), but I have a list printed out, and I’ll do my best to provide more answers in later posts.

There were quite a few questions about the other stitches that are recommended for sewing knits. The three primary ones are in this picture above. The first is the “stretch stitch”. It sort of looks like a lightning bolt. The stretch stitch is designed for use with stretchy fabrics and is a great choice to cut down on broken stitches. I don’t use it, simply because I don’t care for the look of it. The second set of stitches is a regular zig-zag, and the third is the three-step zig zag. Those are also good choices because the zig-zag gives a bit more room for the fabric to stretch.
There is also the option of using a twin needle for hemming your knits. That is another great choice because you get two lines of straight stitching on the front of your fabric and a zig zag on the back. I don’t use it because :bag over head: I’ve never been able to get it to work well on my machine. Mastering the twin needle is on my to-do list!
Valarie, Jill and Michelle S. asked, “Do you use a straight stitch for your topstitching?” Laura B. asked, “Do you find that a straight stitch pops over time?”
I use a regular straight stitch for topstitching with stretchy nylon serger thread in the bobbin. So far, I’ve not had any problem with those stitches popping. When I was just using a straight stitch for my hems, I did notice those stitches popping over time.

Laura B. wrote, “Recently I sewed a maternity top for myself out of a lightweight jersey knit. It came out beautifully, except for the shirt hem and sleeve hems, which always flip up. Is there any way I can remedy this? I just serged the edge, turned it up 1/2″, and topstitched it, as per the pattern.”
There are a couple of things that you can try out, Laura. It sounds to me like the hemming allowance on that particular top isn’t enough for the lightweight jersey that you’re using. I would suggest if using this pattern again with the same type of fabric that you increase the hemming allowance to 1″. I think that will make a big difference. My second suggestion is to not hem it at all and just let the jersey roll up on the hems instead. I actually have a few ready-to-wear tops in my closet that are finished that way!

Barbara asks, “Do you find it neccesary to use your sewing machine to sew over a serged edge to reinforce the threads?”
When I’m sewing knits, no, I don’t go back and sew over the serged edge. When I’m sewing wovens, I do, but with knits, I’ve always found that the serged edge holds up great!
Jill and Kimberly both asked, “How do you go about putting stretchy nylon serger thread in the bobbin for your sewing machine?” and Kimberly also wanted to know, “Does it change your thread tension?”
This really depends on your machine. I use my machine to wind the nylon serger thread onto the bobbin, but I do have to be really careful to make sure that it doesn’t go on too tight. I’ve actually had a few bobbins break when I wasn’t paying close attention. Many sewists wind the wooly thread onto the bobbin by hand. As far as the tension, it does not change on my machine, but that’s, again, something you’ll have to test out on your own machine to be sure.
Valarie wrote, “What seams can/should be sewn with a coverstitch machine, if a person has one?”
For those who don’t know, a coverstitch machine is what hems on most ready-to-wear clothing are finished with. It sews two rows of straight stitches on the right side of the fabric and an overlocking stitch on the wrong side.

I used to dream about owning a coverstitch machine, but recently I’ve decided to forego purchasing one. Most home seamstresses don’t have access to one, and I want to be able to provide instruction and inspiration to as many sewists as possible. All that said, because I’ve never used a coverstitch, I’m actually not sure if you can use it for seams other than the hem.
Ananda asked, “Do you switch the needles on your serger to ball point needles as well?”
Yes. I do use ball point needles in my serger when working with knits, as well.
Erin’s question is, “When buying knits how do you know what is an interlock knit? I noticed you said they have a “v” on the front and back but I don’t really know what that means. Is there a special word when shopping at a store to look for? I don’t think I have ever seen a separate interlock knit section.”
I snapped a few pictures of a pair of longies that I’ve been knitting because I think the pictures will help. Knit fabrics are knitted similarly to the way we knit when we knit by hand. Here’s a picture of the what the front of a traditional stockinette stitch looks like. See how it has a repeating “v” pattern?
Interlocks have this same “v” pattern on both the front and the back of the fabric. Here’s what the “-” purl pattern looks like on the back of my knitting.

On jerseys, you’ll see the “v” pattern above on the front and the “-” pattern on the back. Now let’s look at the waistband of my longies. When knitting, this ribbing is produced by knitting two stitches and purling two stitches.

If you look closely at the top of the picture, you’ll see that the pattern is the same on both the front and the back. Ribbed knits look just like this.
When you go into your local fabric store, you can definitely ask if they have a section of cotton interlocks. Joanns carries solid interlocks in a cotton/polyester blend and children’s print interlocks in 100% cotton. Hancocks carries a selection of solid interlocks in 100% cotton.
Jada wrote, “I have been having trouble with thinner knits (I think jersey, but some are interlock) getting chewed up in my sewing machine. I’m using the correct needle and everything, but the fabric just gets pushed down and chewed up. Do you have any suggestions?”
I hate when that happens! First, try a few maintenance things: Change out your sewing machine needle and brush off the feeddogs to make sure that neither of those is an issue. If that doesn’t help, toss that thin knit in the trashcan, yell a few times, turn off the machine, walk around the house and cool off a little. Whew! Feel better? Okay, now pull the fabric back out of the trashcan, and try these things. When you start a row of stitches, start in about an inch and backstitch first but don’t go quite all the way to the edge, then forward stitch. When you hem, be sure to fold over and fold over again so you have a little more thickness to work with. Hopefully, those things will help.
Bekah asks, “#1- What was the first thing you ever made with knit fabric? (mine was a fitted diaper) #2- What is your current favorite knit (print) on the market?”
I don’t think it was actually the very first thing that I sewed with a knit fabric, but sewing fitted diapers for my now four-year-old is definitely what kick-started my love for sewing knit clothing! These were some of the very first diapers that I sewed about five years ago:

As far as my favorite knit print that’s on the market right now . . . I’m not sure that I have an absolute favorite. I mostly sew for my boys right now, so I love the Dino Dudes by Michael Miller. The puppy print that I used for the applique tutorial yesterday is a definitely a favorite, although I wish it didn’t have a white background. The old Joann’s farm print is one of my all-time favorites. I actually just used the last of what I had of it in a coverall for Charlie. Jeanne at Nature’s Fabrics has some Znok Fabrics that are due in this week, and they make my heart skip a beat. They’re a little expensive, though. I keep putting a few yards in my basket and then closing the window before I check out. This Zoo Animals print and this Train Adventure print from The Fabric Fairy are both so cute in person! Okay, I must stop window shopping, or I’ll never finish this post!
Valarie wants to know, “Is it ok to sew garments with rib knits containing 5% spandex or should it just be used for neck lines and cuffs?”
You can definitely sew with ribbed knits that contain spandex. Ready-to-wear ribbed tanks are often made with a little spandex mixed in the fiber.
Ananda asks, “What do you do with ribbing that comes in a tube? Cut one side so it’s flat?”
That is exactly what I do with it.
Colleen wants to know, “Can you tell us how many layers you use to make your cloth tissues? Thanks!”
Sure! I use two layers of cotton velour in our tissues so they end up double-sided. I cut them about 8 1/2″ X 6 1/2″ then serge.

Alisa writes, “How do you know if the knit you order online (as I am assuming you do) is going to be a good quality fabric? I once ordered some knit fabrics online and I was so dissappointed with the quality. I have also used Michael Miller’s knits which were great to work with. Are there certain names or manufacturers that have a reputation for quality knit fabrics?”
I do order most of my knit fabrics online, and sometimes I just end up with fabrics that aren’t what I’d expected. The Little Miss Sunshine fabric that you see in this post is a case in point. I’m pretty sure that it’s the thinnest rib knit I’ve ever seen. I love shopping at The Fabric Fairy because they list the weight of each fabric which really helps when you can’t actually touch the fabric. My favorite weight knits are between 9.5 and 11 ounces per yard. Most online shops, if you are unsure about a fabric, will let you order a swatch (often for FREE!) to check it out before ordering.
Trisha asks, “My question is how to get the hems lined up nicely when you hem them before you sew the side seams together? No matter how much I measure and try to get my hems the same size, the stitching just does NOT match up at the seams.”
You mean your side seams look like this?

Honestly, my seams never line up exactly, and I’ve never worried much with it. I just make sure that the bottom of the hem, the underarm seams and the bottom of the sleeve hem line up. I don’t think that a little bit of difference in the how the hem seams line up is noticeable when the clothing is worn.
Finally, Yara asks, “What is the best place to buy knits?”
Well, I’ve mentioned the The Fabric Fairy more than a few times, and they are giving away a $20 gift certificate to one of my readers, so you should definitely start there! They are a great store to work with and have amazing customer service.
There are a few other online shops were I enjoy shopping, as well:
Sewzannes Fabrics
A&A’s Fabric Attic
Wise Sewing Supplies
The Fabric Zoo
Nature’s Fabrics
Girl Charlee
Fabric.com
I’m sure I’m missing a few. If you have a favorite that I haven’t listed, please add it to the comments section!
Alright, I think that’s all I can manage for now. I have a list of later blog post topics including rolled and lettuce edging, serging tips, reinforcing seams (I’ve never done this, but I want to research it a bit) and working with swimsuit fabrics.
Finally, there’s a giveaway to do! Thank you all so much for all your questions and comments. I’m hoping that this series will prove valuable for many more sewists in the months and years to come! There were 143 comments and questions between the four posts. I let random.org choose a number:

Then I counted starting from post one, and found the winner in post number two, and that winner is . . . Katie! Congratulations, Katie! I can’t wait to see what fabrics you buy and what you sew with it for your family. You have to be sure to share pictures!
The Winner of Stitch Giveaway #2

All the entries–printed, cut apart and folded–ready to be chosen.

And, the winner is . . .

. . . Laura B of Lil Bean Baby! Congratulations, Laura! Laura is an amazing seamstress and her knitting is just incredible. You have to take a minute to go check out her blog. And, I happen to know that Laura is expecting a new little bean that the Comfy Sleep Set will be perfect for! Hmmm . . . I wonder if she’ll pick the Dino Dudes or the Mod Blooms interlock.
Oh, and you might have noticed that my helper for the drawing is wearing a Comfy Sleep Set in a bigger size. I have had quite a few moms ask if I could draft up sizes 18 months to 4T so that big brothers and sisters can have Comfy Sleep Sets, too. I checked in with Stitch, and they said they’d be happy for me to add the bigger sizes! I’m sure it’ll take me several weeks to get it done, but they’re coming. (This draft actually needs a little work–the neckline is bigger than I’d like it, and there are a few other little adjustments to be made. Jamie’s totally happy with it, though. He loves having Dino Dude pjs to match little brother, Charlie!)

Sleeping Comfy with Dino Dudes – Stitch Giveaway #2

Woo-hoo! The Comfy Sleep Set download is all fixed and back up on the Stitch website! If you downloaded it before, please try this one out instead. I think you’ll really like it. At least, I hope you’ll really like it!
Remember this post: Carnival Bloom Skirt? I was so excited about Michael Miller and Moda and their cotton interlocks. I actually mentioned how much I’d love to see some Michael Miller boy prints on interlock, and MM fulfilled my wish with this amazing Dino Dudes interlock! Do you think the folks at MM read my blog? (I want more! Little boys need a selection of adorable designer cotton knits.)
Moving on . . . there’s a giveaway here, I promise! Here’s the latest Comfy Sleep Set that I sewed up for my little guy:

I used my Serger Detailing tutorial to give some extra color to the neck binding in this one:


This cotton/spandex waistband is really awesome. (As a side note, the waistband is cut quite a bit shorter than the opening in the pants where it attaches. You really have to give it a good stretch while you’re sewing it on. The spandex in it will make it bounce right back.) Here are a few pictures of the fit over a cloth diaper. (This is an AI2 that I wouldn’t call super trim or bulky.)


And, here a few pictures of the fit over a disposable diaper:


Ah, the giveaway–that’s what you came here for, right? This week, I’m giving away everything you need to make your own Dino Dudes Comfy Sleep Set: 3/4 yard of Dino Dudes cotton interlock, 1/4 yard of cotton/spandex ribbing and a copy of the Spring 2011 Stitch magazine.

I didn’t forget you moms of little girls, though. If you win and you’d prefer something more feminine than dinosaurs, I’ll let you choose this Mod Blooms cotton interlock, instead.

How to enter:
Entry option #1: Leave a comment here telling me if you were a fabric designer, what would you put on cotton interlock? What subjects, colors, etc. You can link to a favorite fabric, if you’d like, but it’ll take a bit for your comment to post because I’ll have to approve it.
Entry option #2: Like Fishsticks Designs on Facebook: Fishsticks Designs Facebook Fan Page. Yes, I finally put up a FD Fan page. There’s not much there yet. Well, there’s really nothing there yet, but I’m planning to use it for announcements, contests, special discounts, etc.
Entry Option #3: Post something that you’ve made with a Fishsticks Designs pattern on the FD fan page. I can’t wait to see what you have to share!
Giveaway entries will be closed at 10 p.m. central on Tuesday, February 8, 2011.


