Quilting
Large Scale Crazy Quilting
Anyone who has been around me long enough, has heard me utter these words: “If it doesn’t come with an actual pattern piece, then I won’t sew it.”
Enter the Crazy Quilt Block Sewalong!
And you’re absolutely right, this is exactly the type of sewing I said I would never do!
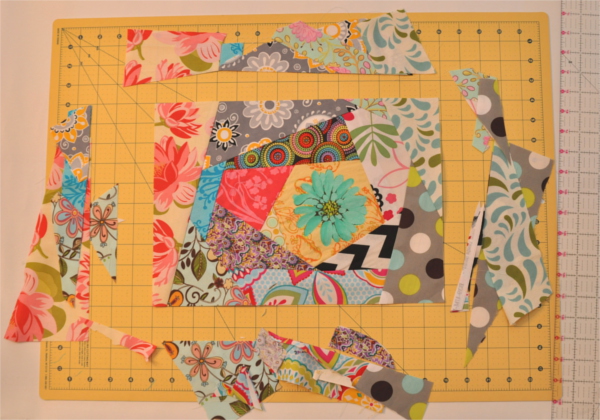
But can I admit something? It’s actually incredibly fun! Even if you make a silly mistake like I did while trimming.
Do you see that nick in the fabric to the left of my oh-so-sharp rotary cutter? Oops. Thankfully with crazy quilting I can easily choose any number of ways to cover it up before my project is finished!

I was crossing my fingers a little by this stage. Just hoping and praying it really would look pretty after it was all trimmed off, and that I wouldn’t lose too much of my favorite fabrics on the edges, in the process.
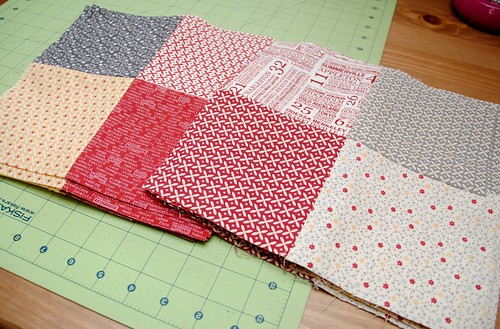
Before trimming:

As you can tell, it was a rather big block that I’d pieced together. And seeing as I am not making a quilt (I already have 2 in the works!), I decided to trim it to the very biggest size I could. As the sides are trimmed and moved out of the way, it’s amazing to see this cute block suddenly emerge from the chaos!
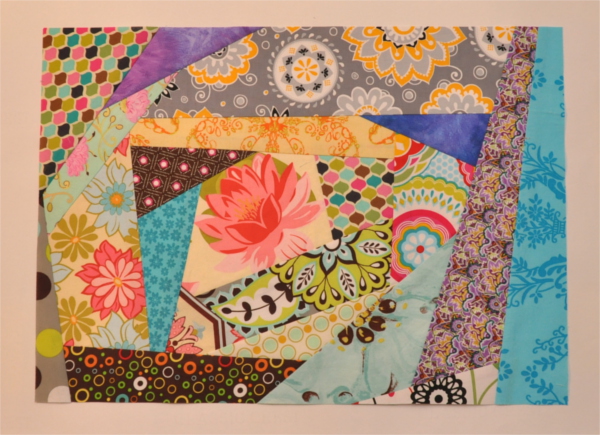
Ta-da! I love it!
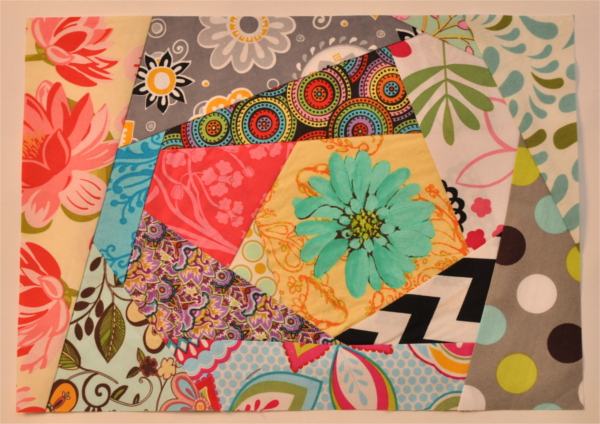
In fact, I loved it so much that I stayed up late making another one! This one is actually much bigger than the first. It’s probably going to be a lovely big placemat. The first is probably going to be turned into a super cute snack mat for our little girl, who makes messes of about the same proportion as a wild animal at the zoo during snack and meal times!
Well, I’m off to put my photos up onto the SewCanShe Crazy Quilt Block Sewalong Facebook. Have you put yours up yet? I can’t wait to see what new ones have been added today!
~Leigh
Crazy Mini-Block Set #1 for Charlie’s Quilt
 Things are moving along quite nicely with the crazy I-spy mini-blocks for Charlie’s quilt. (I love that he gets so excited when he finds me in my studio working on it! I really have to get it finished for him before we leave on our trip!)
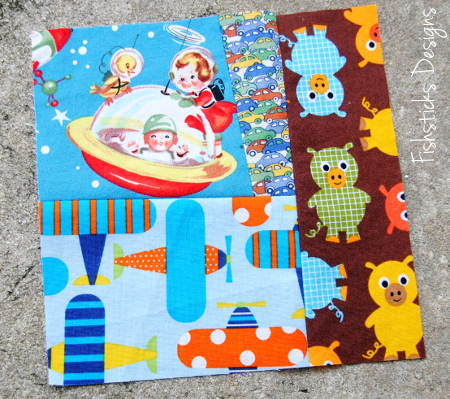 I’m not sure yet whether I’m going to sew 10 or 12 of these mini-blocks. Either way, these are the first five finished blocks. (This week’s Crazy Quilt Sewalong Challenge is to show off at least one finished block.)
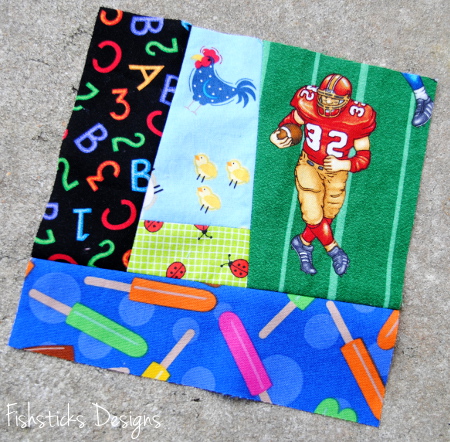 For each block, I started with a fussy-cut focus piece and worked around it with the other scraps that I have on hand.
 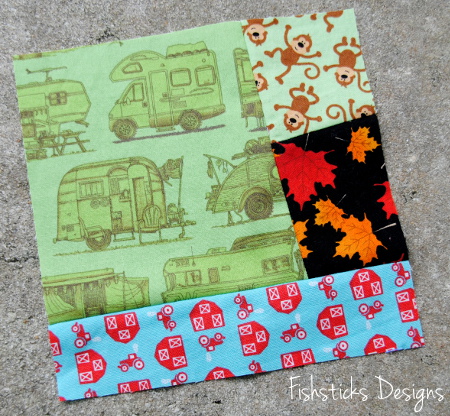 I’m such a planner. These blocks definitely push me out of my comfort zone because they’re such an exercise in going with the flow.
 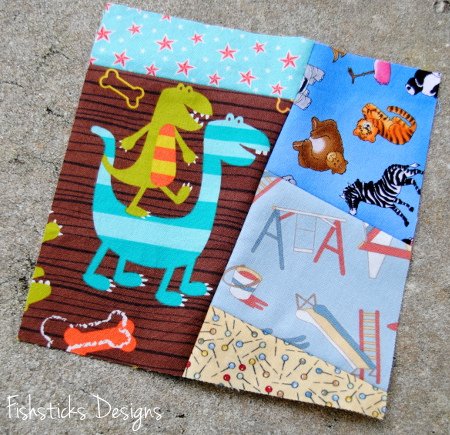 I am having fun choosing fabrics that are very “Charlie”. He was born in Texas thus the block below, and the Michael Miller Dino Dudes above makes me laugh a bit. I worked so much with Dino Dudes between the interlock, the woven and the various colors of jerseys . . . oh, and the PUL! This child wore Dino Dudes at least one day a week for the first couple years of his life!
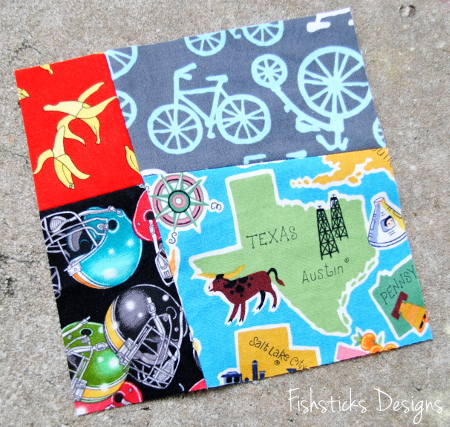 My blocks are incredibly simple compared to some of the amazing blocks showing up on the Crazy Quilt Sewalong Facebook Event Page! If you’re looking for inspiration, you have to go check it out!
~Bonnie
Bonnie’s Crazy Scrap Pile and Plan
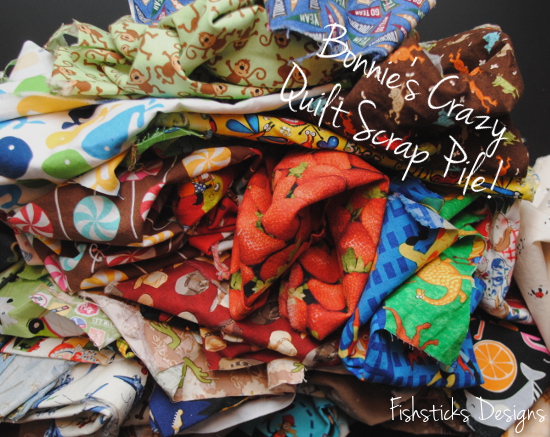 Weeeee! Time to get started on the Sew Can She Crazy Quilt Sewalong! This little mountain shows just a small portion of my I-Spy scraps. We’ve been a little I-Spy Quilt crazy around here in the past, and it’s time to make another one! I have a tendency to grab fat quarters and 1/4 yards that have fun novelty prints on them whenever I run across them, and I hang onto any scraps with cute prints that would work in an I-Spy Quilt, too!
Each of my kids has what we call “couch quilts” that I’ve sewn for them. They are generally about 50″ x 60″ finished with a quilted top and minky on the back. I’ve turned and topstitched some and machine bound others. They are perfect quilts for little ones to sleep with and for big ones to curl up under on the couch. (They’re the only blankets that I allow to be dragged around the house.) They also fold up quite compactly for travel, so they go with us when we’re on the road.
I started planning Charlie’s quilt last year before we left Texas. Actually, I even sewed six blocks for it, but then the house sold and packing started, and I never made it back to it. I was so excited when Caroline told me she was planning a crazy quilt sewalong because it’s perfect motivation to get this quilt done! It just so happens, that my first six blocks are crazy (or wonky) log cabin blocks.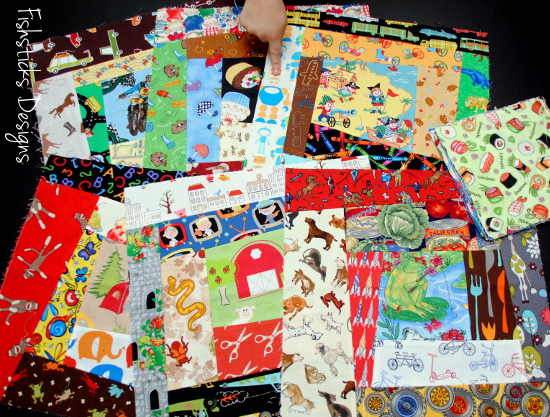
(That’s Charlie’s little finger pointing out the I Heart Robots fabric on top.) The pile of squares to the right are already cut to 6 1/2″ which is 1/4 the size of my finished blocks. My plan is to sew random crazy blocks that are 6 1/2″ to mix in with those squares in 4-patch blocks. To finish the piecing, I’ll stagger the crazy log cabin blocks and the crazy 4-patch blogs. But, we leave on a trip next Friday, so I’ll be sewing fast and sewing ahead of everyone else! I’ll share pieces as we travel, though, so you won’t get to see my finished project until the very end.
~Bonnie
The Sew Can She Crazy Quilt Sewalong!
 Do you have a pile of fabric scraps? Have you ever wondered what to do with them? Would you love to try out crazy quilting? Are you motivated by great sewing prizes? If you answered yes to any (or all!) of those questions, then come join us as we put those scraps to use in crazy new ways in Sew Can She’s Crazy Quilt Sewalong!
 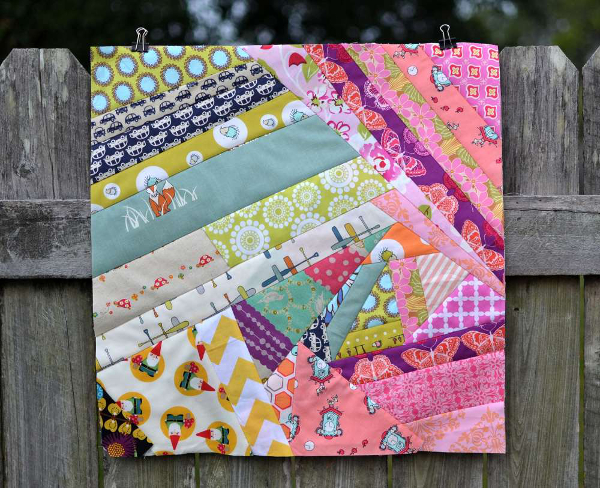 The fun starts this Saturday, April 20th. Your goal is to create something amazing with a crazy quilt block or two or a dozen. The possibilities are only limited by your imagination . . . and your fabric stash! At the end of the sewalong, you’ll have a handmade and crazy project to enjoy, and you could be the proud winner of a prize from one of these generous sponsors:
I’m excited, too, to tell you that my new assistant, Leigh, is going to be joining in the Crazy Quilt Sewalong with me and sharing here on the Fishsticks Designs blog! I’ll be back this afternoon to share her introduction with you. I think you’re going to love her!
To read all the details and join the Facebook event page for the sewalong, click right here: The Crazy Quilt Sewalong Announcement. I can’t wait to see what you sew!
March Riley Blake Mystery Quilt Block – Simplicity
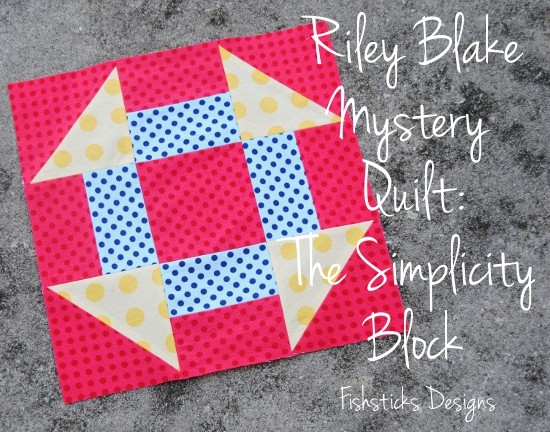 I’m moving right along with the blocks in the Riley Blake Mystery Quilt! I don’t have a whole lot to share about this month’s “Simplicity” block because it really was simple. It looks far more complicated than it is!
You start with four half-square triangles. (If you don’t want to sew these one at a time, take a look around for short-cut tutorials. Here are two from the Sew Mama Sew blog: 8-at-a-Time HSTs and 4-at-a-Time HSTs.) Add four squares made from two equal-sized rectangles. (I sewed these all at once in a strip. Since I wanted 4 – 4 1/2″ squares, I cut a strip from each fabric 2 1/2″ x 18″. I stitched the two strips together, pressed the seam allowances and cut the strip into 4 1/2″ squares. If you use this method, be sure that you’re using a short stitch length so that your seams don’t pull apart when you start piecing the blocks together.)
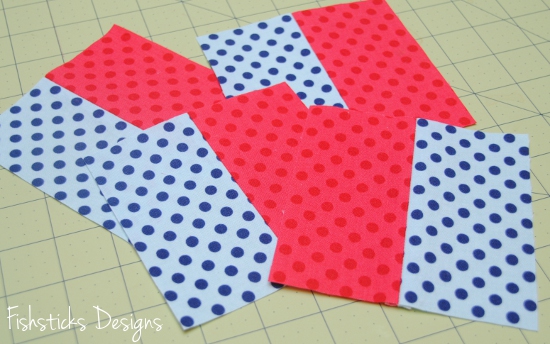 Cut a center block.
 Follow the instructions for piecing your blocks together, and you’re done!
  Here are January, February and March all together! Once I finished the first two blocks, I decided that I needed some more color so I added in some blue, still sticking with the RB Tone-on-Tone dots. I think I like it. What do you think? It seems a little off now, but once I add the other blocks with the blue mixed in, I think it will all balance out.
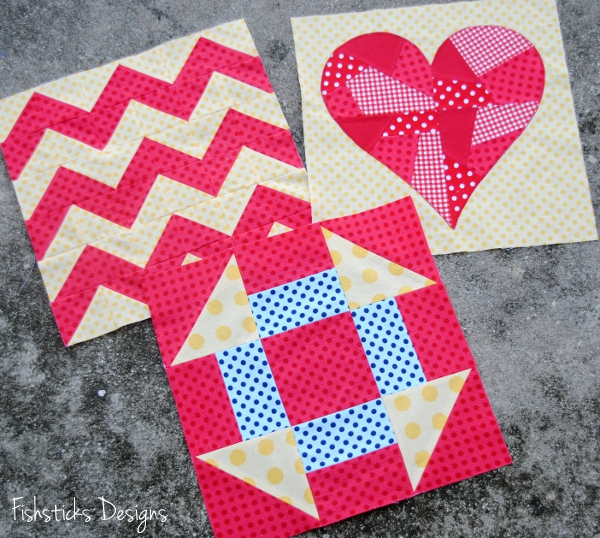
February Riley Blake Mystery Quilt Block – Hearts
 Yes, February is over, but I’m not considering myself behind on this block since the next block doesn’t come out until Monday. (I almost called this Block #2, instead of the February Block, but I already called the first block January, so . . . )
The second Mystery Quilt Block in Riley Blake’s Quilt Block of the Month series is a paper-pieced, appliqued heart. The video was actually down on the weekend that I started my block so I just downloaded the pattern and used the freezer-paper piecing technique that I’m familiar with.  It wasn’t until I watched the video a few days later that I realized my heart is pieced backwards. Who’s going to notice, right? Oh, and I stitched the right and left portions together first instead of the top and bottom portions. Ooops! It worked out, though!
My husband wandered in at about the point below and said, “I thought you were making a heart?” “It’s an abstract quilt, Dear.” 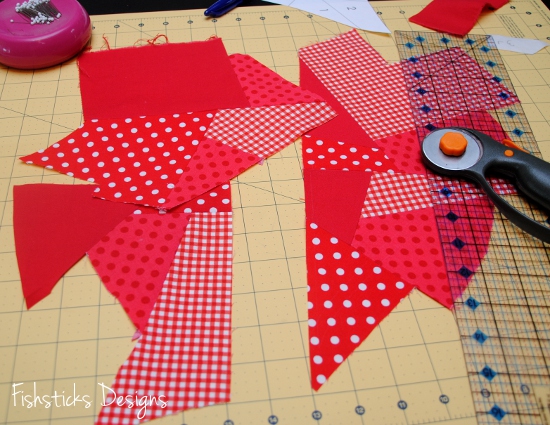 Jina’s and Cindy’s blocks on the Riley Blake blog were finished using reverse applique. My “abstract” heart sat around here for over a week waiting to be trimmed into a non-abstract heart while I waffled back and forth over how I was going to finish it. In the end, though, lack of time thanks to a weekend lost to a nasty little stomach bug that attacked the whole family, led me to go with a quicker method. A little sewable iron-on adhesive coupled with the blanket-stitch on my sewing machine, and the applique was done.
![]() Here’s my Heart Block all finished!
Here’s my Heart Block all finished! And here are the January and February blocks together. I think I’m ready for March!
Handmade Decor: The Hidden Thermostat
 I showed you my TV wall last week along with my solution for making the television disappear: The Great TV Cover-up. Before we even placed the TV on the wall, though, there was another eyesore to deal with.
  Who put that thing there and why? There are so many more appropriate places for the thermostat. How about the stairway wall right across from here or maybe one of the hallways or almost anywhere else? Ray and I did discuss cutting holes in the wall and dragging the thermostat closer to the edge of the wall to make it a little less noticeable, but late one evening, inspiration struck!
We have this little box that is designed to hang on the wall and hold your keys. I didn’t take a picture of the inside, but inside there were little knobs mounted to a solid back. I enlisted Ray’s help to remove the back while I headed down to my sewing studio.
 First, I removed the glass and the print from the box, then I took a few minutes to paint the box red. While the paint was drying, I dug through my stash and pulled out a pile of red and white fabrics. In no time at all, I had pieced together a wonky house block, just the right size for the frame on the front of the box. (How is it that sewing something so small, can result in a mess this big?)
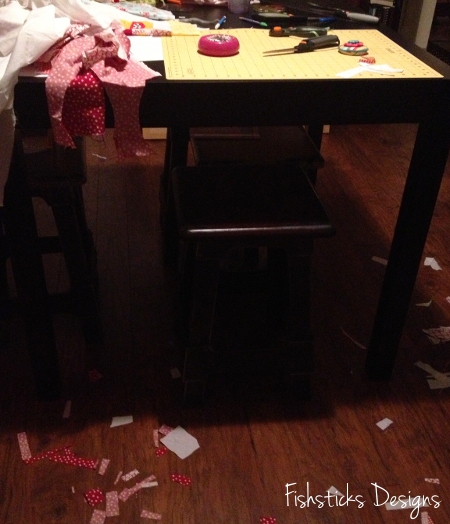 What do you think? Oh, how I love re-purposing something old into something beautiful with purpose!
 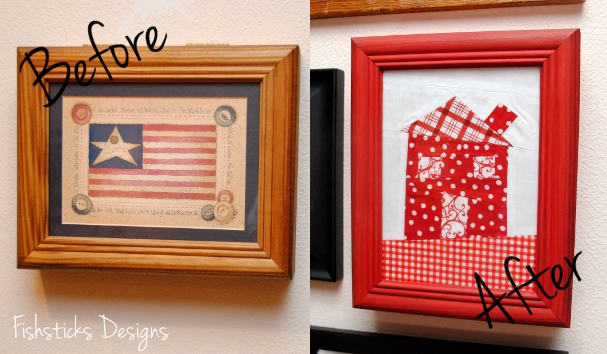 With the back removed, I simply placed a few screws right above the thermostat for the top of the box to sit on, and the door allows us to access the thermostat whenever necessary.
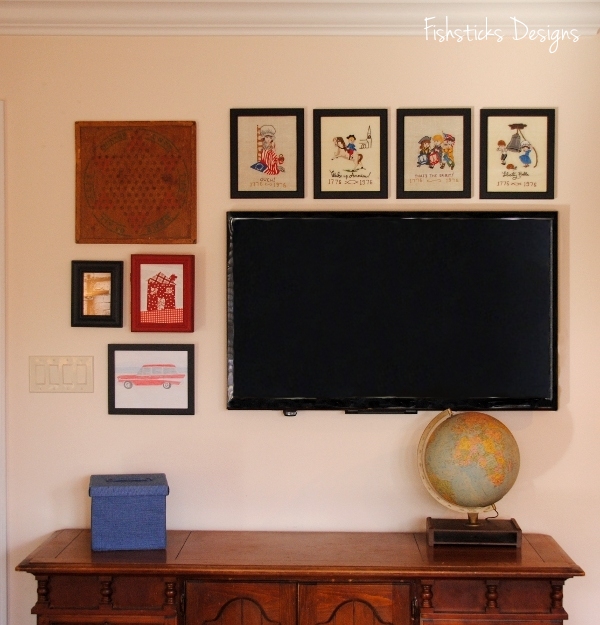
 Here’s one more look at our TV wall with the television and the thermostat hidden away. (Next week, I’ll share a little about the framed embroidery pieces above the television!)
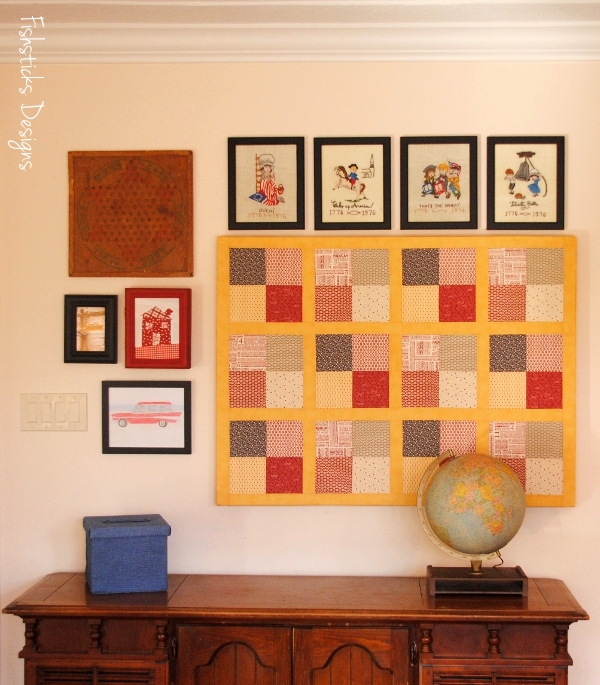
Handmade Decor: The Great TV Coverup!
 This might be my favorite home decor project ever, and I can’t wait to share it with you! As many of you know already, we moved into a new-to-us house this past fall, and we’ve been working since then on decorating it to make it truly ours. We have a very limited decorating budget, so I’m doing my best to create decor as much as possible. I love handmade things, so handmade decor works perfectly for us! I thought I’d try to start sharing a handmade decor idea here on my blog once a week . . . at least until I run out of house to decorate.
That’s our TV wall above. It’s one of the first things you see when you walk in our front door, and while my family enjoys owning and watching television, I don’t like having it on display when we have guests over. I knew that we couldn’t really purchase a piece of furniture to hide the TV, so I went hunting for ideas to cover it up when we wanted to do so. I found some great ideas on Pinterest, including several that balanced a canvas print on the television using brackets attached to the print. I liked that idea because it’s simple and cheap, but I thought maybe I could take it a few steps further.
We started by mounting our television and pulling the cords into the wall so that they’re all hidden. (I say “we”, but really, Ray did all of that work while I stayed out of the way!) Once the TV was mounted, I checked all the measurements: length, width and depth from wall. With measurements in hand, I went hunting for the perfect canvas. I found that when you’re looking for a larger canvas, it’s usually less expensive to purchase one with a print on it rather than a plain white canvas. The canvas that worked for us started out as an alphabet print from Hobby Lobby. (I promise I took a before picture, but I have hunted everywhere and cannot find it.) On clearance, I paid $25 for the canvas.
 I had this stack of quilt blocks that I pieced early last year during a quilt-along, a quilt-along that I failed to completely quilt along with. That’s okay, though, because these blocks were ready and waiting and perfect for this project. I measured everything out to determine the width that I needed for my sashing and a border wide enough to wrap all the way around the back of the canvas. Once the quilt top was pieced together, I was ready to to assemble my “canvas quilt”. Because the canvas print was pretty bright, I covered the canvas with white cotton fabric then stretched my quilt top over it and stapled it in place.
  I wanted the canvas to slide completely over the television, but the back had some braces that needed to come out for that to be possible. I called in Ray’s help again. (I feel like I should add here that he was worried the frame might not hold it’s angles well without the support, but he was willing to saw out the supports as long as I knew that was a possibility. Thankfully, the frame held together beautifully!)
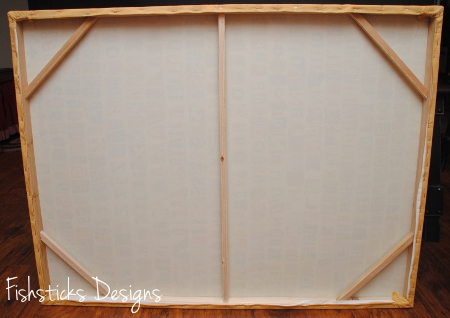
 With that, this project was done! Because you can see the TV from all sides in our home, I love that this cover mounts all the way over the TV. It’s also really lightweight, so I don’t worry that it will cause any harm to the television.
 We had friends over last week, and late in the evening, someone asked me, “Do you own a television?” She happened to be standing right next to it and had no idea! Exactly what I was hoping for!
January Riley Blake Mystery Quilt Block – Chevron
Cindy and Jina from Riley Blake just started a Mystery Block of the Month Quilt, and I thought I’d sew along. The first block in the set of nine is this chevron block. You can find the instructions in both video and pdf form on the Riley Blake blog: Mystery Quilt Block #1
![]()
I considered subtitling this post: “The Quilt Block that Almost Wasn’t,” but I want you to want to sew along, too. Instead, how about the subtitle, “The Quilt Block that Tried to Defeat Me and Lost!”? If you’ve been around me for very long, you might know already that I tend to be the instant-gratification type of sewist. I was really excited about this block, but when I read the pdf instructions and saw that it required piecing together 36 – 2 1/2″ half square triangles, I was a little skeptical about whether or not I’d make it all the way through. That’s a whole lot of tiny triangles!
![]()
I found that the hardest part for me, though, was patiently trimming down and squaring up all 36 of those blocks! About five blocks in, I decided that I needed someone to keep me company, so I called my mom. It’s amazing how much more quickly a job that feels a little tedious goes by when you’re enjoying a great conversation. (Thanks, Mom!)
![]()
By the time I decided that I had to hang up or my neck was going to fall off from balancing the phone while cutting and sewing, I had finished squaring up everything, and I had two rows of the half square triangle blocks sewn together. From there, things moved along quite well until I stopped for a second to see how it was all coming out and something didn’t look quite right.
![]()
Ugh. It’s a good thing that I was far enough in at that point that I was determined to get this thing done! (Somewhere along the way, I started promising myself a cup of chai and some chocolate when I was finished. The promise of chocolate has a way of keeping me incredibly focused.) A few minutes of seam ripping, and I was back on track. And, I think the end result was worth all the work. You probably won’t see me sewing up dozens of these, but I’m quite happy with the way this one came out and very glad that I conquered it, and I can’t wait to see next month’s block!
![]()
Samantha’s Room Re-do 52 (Family) Projects in 2012: #5, 6 & 7

Samantha’s room was badly in need of some updating. The last time we decorated, she was 9, and while this room is cute at 9,

it’s not so hot when you’re 14! A birthday room re-do was definitely in order! The wall mural had to go, but we left the paint color so that the whole room didn’t have to be painted.

Once the walls were done, I planned a new quilt for the bed around Alexander Henry’s “Starling” fabric which Samantha picked out years ago. Samantha is a lot of fun and has a passion for things that are creative and a little out-of-the-ordinary. This wonky log-cabin quilt (Project #5) suits her perfectly!

Next was an update to the valance on the window (Project #6).

We ran across this naked chair in the “As Is” section at IKEA for a measly $29, and since lack of a cover shouldn’t slow down anyone who can use a sewing machine, it came home with us!

I sewed up really simple pillow shams for the cushions on the back and covered the seat cushion with an elasticized fitted “sheet” that I made following a couple of tutorials for crib sheets (Project #7). We threw on a few toss pillows, and Samantha has the perfect place to curl up and read or knit to her heart’s content.

Samantha loves to draw, and since this is her room, we framed a few of her favorite pieces of artwork to display.

A few days before Samantha’s birthday, we loaded in the car and drove around town snapping pictures of the letters in SAMANTHA. (Yes, we did get some odd looks, and I was a little nervous snapping pictures from my car window of the bank around the corner.) We used this really cool Christmas Card holder that we grabbed back in December–another IKEA find–to spell out her name with letters that we photographed.

Samantha’s bulletin board got a quick re-do with some Mod-Podged fabric, trim and new paint. (The perfect spot to display a collection of Texas State Fair ribbons for her knitting work!)

This quote cracks me up!

A few accessories wrapped up the project, and now Samantha has a room that will hopefully last until she’s ready to move on to a college dorm! (Ack! Let’s hope that time doesn’t come too soon!)

One more look at the finished room. (Well, sort of finished–there is a purple desk on the other side of the room that needs replacing, and now that Samantha is big enough not to fall out of bed, a boxspring under that mattress would be nice. For now, though, I’m calling it good!) What do you think? Any rooms in your house in need of updating?


