Reviews
Armstrong the Elephant
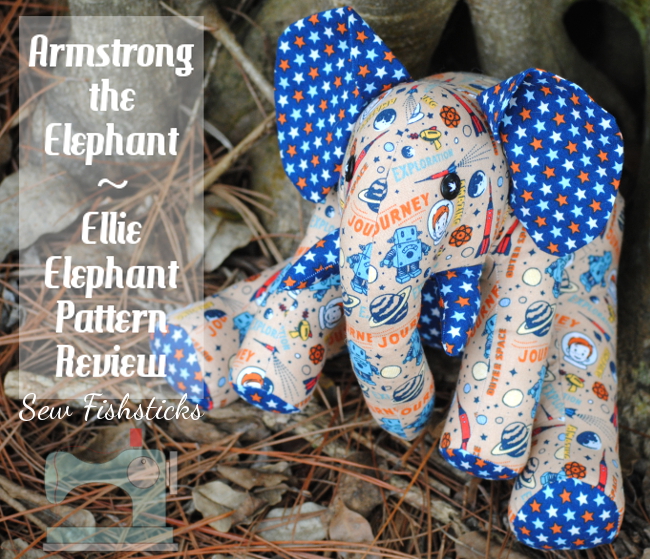 Late on Christmas morning, my almost 8-year-old Jamie, curled up next to me and asked, “You didn’t make us new stuffies for Christmas this year?” He was so sad that I hadn’t followed through with my normal holiday tradition of sewing new stuffed animals for him and his brother! Of course, since he has a birthday just three weeks after Christmas, I promised that I would rectify my lack of cute, cuddly sewing with whatever stuffed friend he wanted!
His specific request? A stuffed elephant WITH tusks! Sounds easy enough, right? But, I was so surprised at how hard it was to find a pattern that didn’t leave off the tusks. A Pinterest search led me to the Funky Friends Factory Ellie Elephant pattern, and I knew it was the perfect choice.
Continue reading
The Daphne Bag from Clover & Violet {Pattern Parcel}
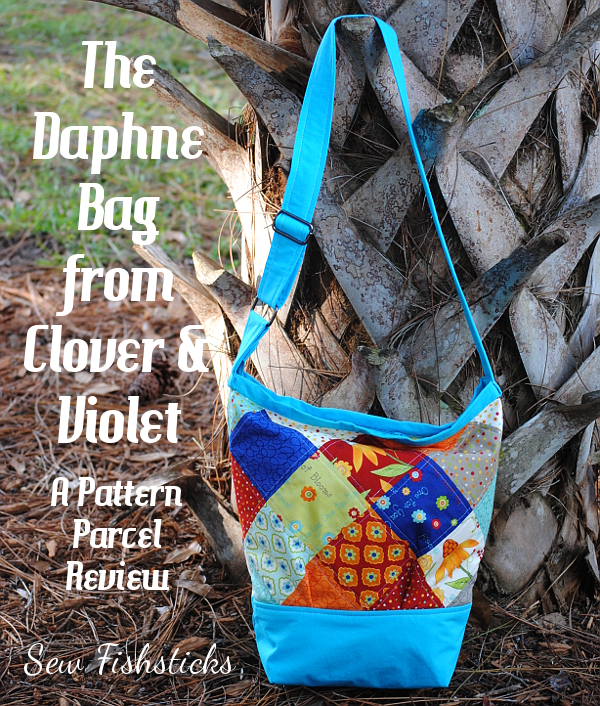 Have you seen the great collection of handbag patterns that are included with Pattern Parcel #7? You can pop over and check them all out by clicking the image below, and read on to see my version of the Daphne Bag from Clover & Violet!

How Pattern Parcel Works:
Here at Perfect Pattern Parcel, we believe in supporting independent pattern designers. It’s our opinion that indie patterns are just, well, better than big box patterns, and we’re pretty sure our customers think so too. So, we allow customers to show their support in naming their own price for each Parcel. We also encourage customers to allocate part of their Parcel price to the charity Donorschoose.org in order to help classrooms in need. Pattern Parcel donates all profits after expenses from Parcel sales to the charity as well. Its our goal to raise over $20,000 for Donors Choose this year.
Here at Perfect Pattern Parcel, we believe in supporting independent pattern designers. It’s our opinion that indie patterns are just, well, better than big box patterns, and we’re pretty sure our customers think so too. So, we allow customers to show their support in naming their own price for each Parcel. We also encourage customers to allocate part of their Parcel price to the charity Donorschoose.org in order to help classrooms in need. Pattern Parcel donates all profits after expenses from Parcel sales to the charity as well. Its our goal to raise over $20,000 for Donors Choose this year.
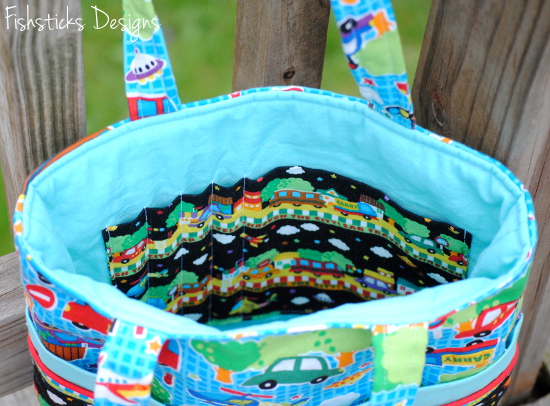
 I mentioned in my post yesterday that I’ve really been enjoying quilting lately, so it’s no surprise that the patchwork design drew me to this bag. I used a charm pack of Pat Sloan’s fabric line, “One for You, One for Me“, in the pieced section and American Made Brand solids for the rest of the bag.
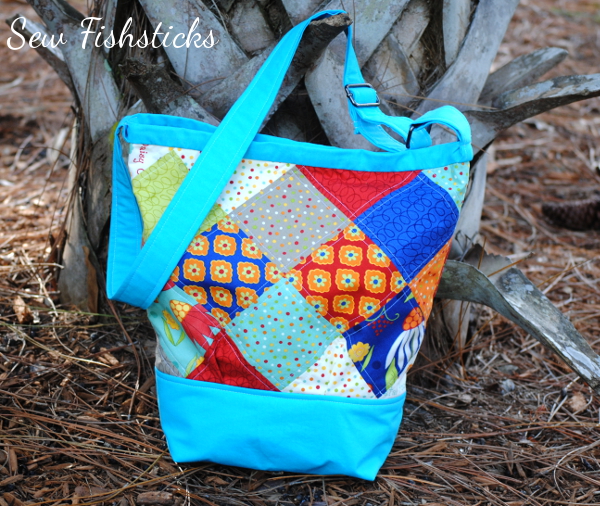
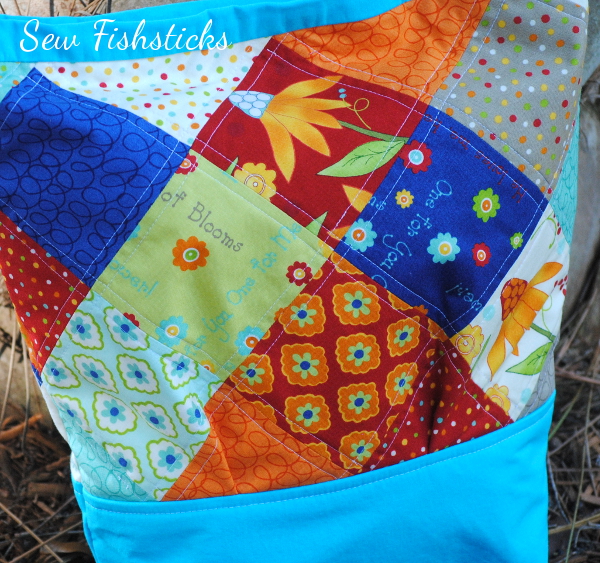 This slouchy satchel features an adjustable strap and a zippered top closure.
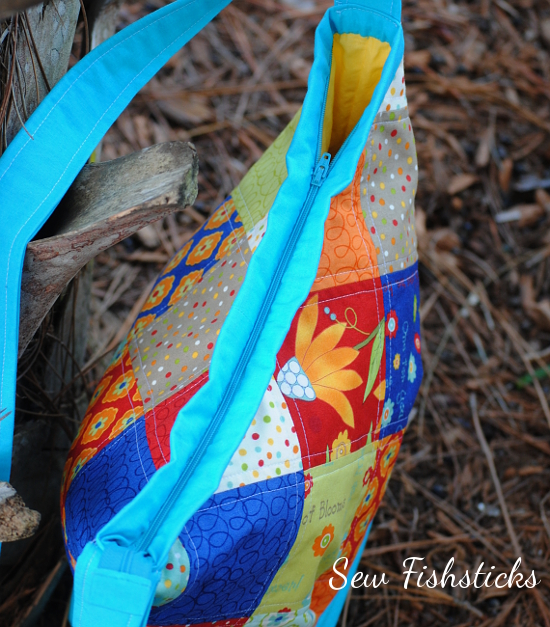 Inside, there’s a zippered pocket …
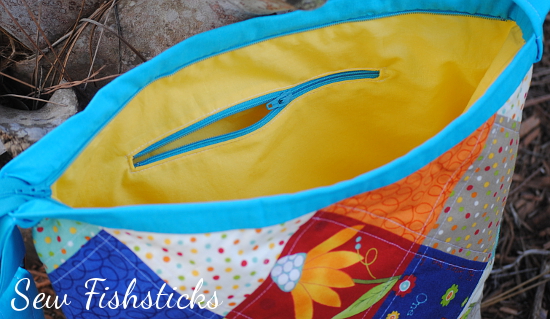 …and a slip pocket. (I divided my slip pocket in half so that I would have a place to keep my cellphone.)
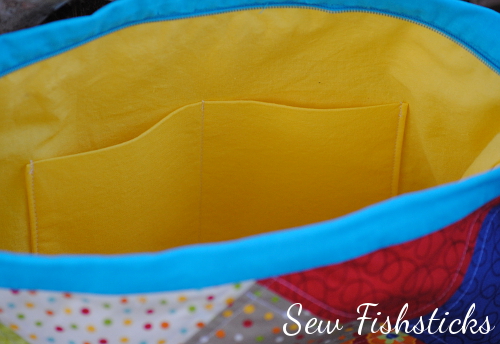 I love how this bag turned out! I originally thought maybe I would give it away as a gift, but now I think I’ll keep it! I even have enough charm squares left to make a little wallet to match.
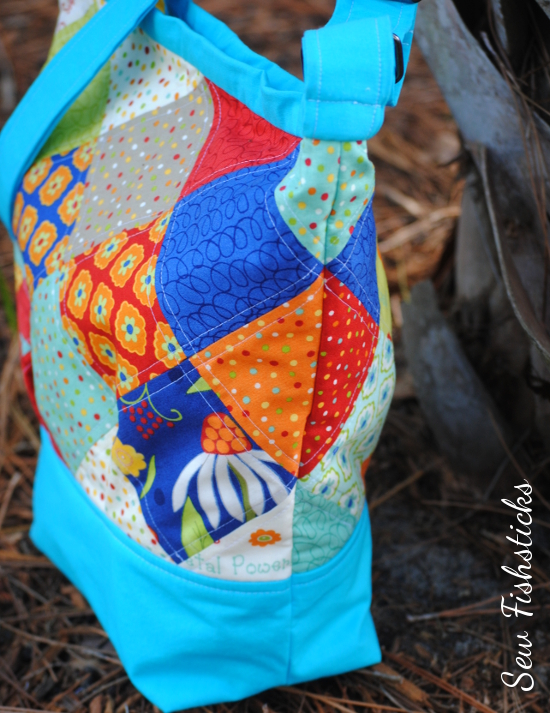
Friday, November 7
Stitched ||
Sew Exhausted
Saturday, November 8
Made by Sara ||Oliver’s Fancy ||
Strawberry Patch Ramblings
Sunday, November 9
from a box ||
Mia’s Creations ||
MOMENTS
Monday, November 10
owen’s olivia ||
While she was sleeping
Tuesday, November 11
Nutta ||
Radiant Home Studio ||
La Pantigana
Wednesday, November 12
Sew Fishsticks ||
Stacy Sews ||
Stitching Insane ||
GnomeAngel
Thursday, November 13
Needle and Ted ||
Patchouli Moon Studio ||
Sprouting JubeJube ||
The Crazy Tailor
Friday, November 14
Casa Crafty ||
A Jennuine Life ||
‘So, Zo… What do you know?’
Saturday, November 15
Stitches by Laura ||
Rebekah Sews ||
Serger Pepper
Sunday, November 16
Blogs Like A Mother ||
Vicky Myers creations ||
Blossom Heart Quilts
Monday, November 17
Shanni Loves ||
So Sew Easy ||
GYCT Designs ||
Tiger In A Tornado
Tuesday, November 18
The Nosy Pepper ||
Keep Calm and Carrion ||
There & Back ||
Sewing Sober
Wednesday, November 19
Sew Like My Mom ||
Knot Sew Normal ||
Stacy Sews ||
sewVery
Thursday, November 20
Mimi’s Mom ||
Our Family Four ||
shades of BOLD ||
Modern Handcraft
Friday, November 21
Shawnta Sews ||
Lulu & Celeste ||
Amanda Rose ||
Robin’s Fabric Nest ||
House of Pinheiro
The Sew in Style Book Tour, Giveaway & a Dolly Tardis Dress!
 My youngest daughter and I get to share a new book with you today, and it’s a great one for those of you who have girls learning to sew! Samantha and I met Erin Hentzel at Spring Quilt Market in Pittsburgh while we were setting up our booth, and we enjoyed chatting with her about sewing and the sewing industry and her newly released book!
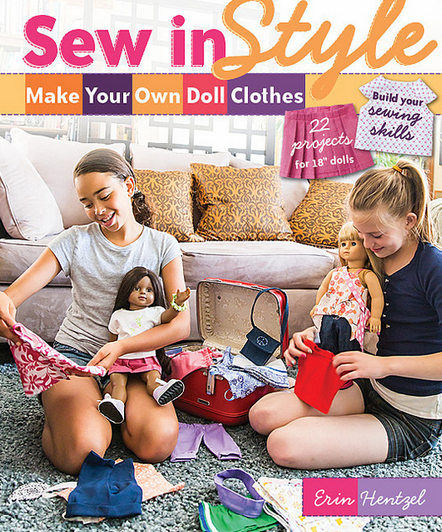 Sew in Style – Make Your Own Doll Clothes was written to teach girls to sew for their own 18″ dolls, and it does a beautiful job of doing just that. At 16, Samantha is probably a little older than the target audience, but she gladly pulled her well-loved American Girl Samantha Doll out of storage and started planning as soon as she saw the book. (Her Samantha Doll is not making an appearance here because when I say “well loved” I mean she looks like she slept with a little girl who loved her very much for many, many years! Instead, we opened up an AG Doll that we picked up on sale a few years ago and kept for some special little girl that we have yet to meet. Is that a little odd? I just know that we’ll meet someone someday who will just be overjoyed with this doll.)
 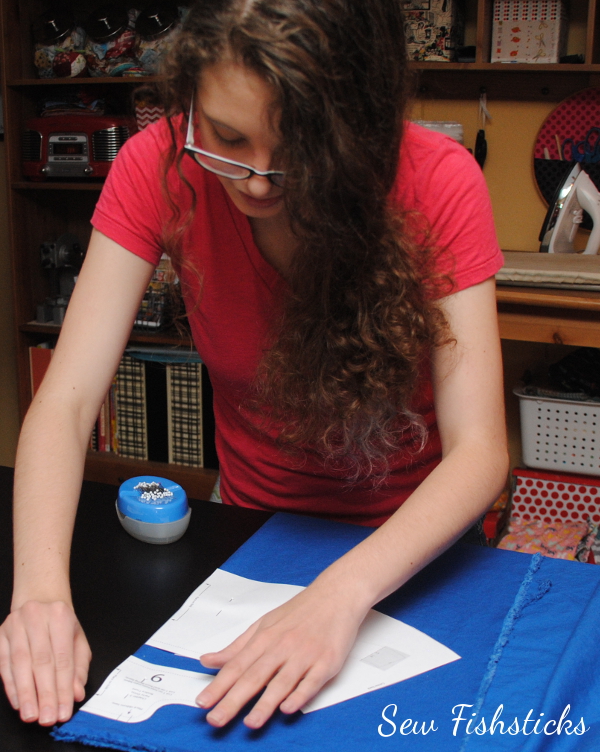 C&T Publishing sent us an eBook copy of the book for this review. This was my first time using one of their eBooks, and I really appreciated the layout. It’s super easy to find what you need, and all of the full-size patterns are included in easy-to-print-and-tape-together format. Samantha scrolled through the book on the computer, and then we printed just the pages she needed.
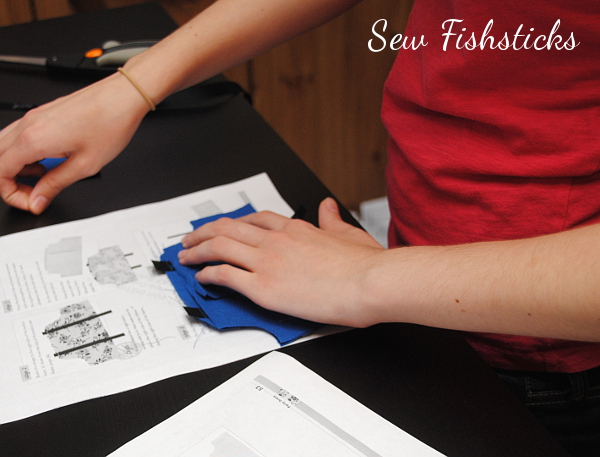 My favorite thing about this book is that I just handed it all over to Samantha and let her go with it. The beginning of the book teaches basic sewing skills with plenty of tips and guidance. Really, the only thing I helped with was brainstorming how to turn the book’s Party Dress into a Tardis Party Dress!
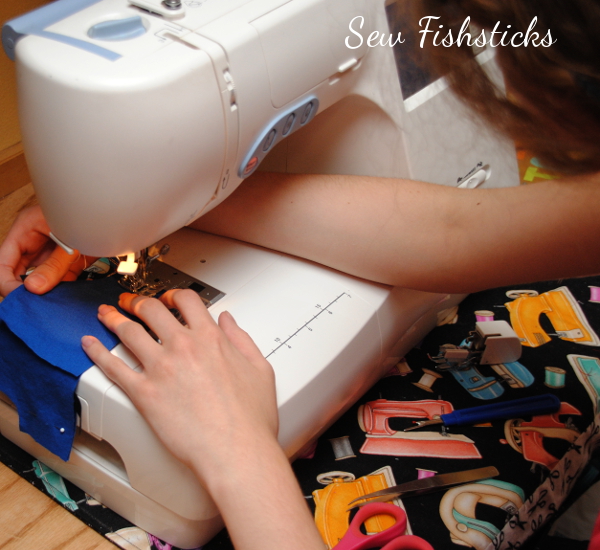 Things have been a little bit Doctor Who crazy around here lately. We started watching the Doctor a few months ago as a family, and I feel like I’m raising a houseful of Whovians at the moment. My two little guys run around the house now battling invisible Daleks and opening things with imaginary sonic screwdrivers, and my teenagers amuse themselves by turning pieces of furniture into police boxes:
Samantha’s idea for designing a dolly Tardis dress did not surprise me at all!
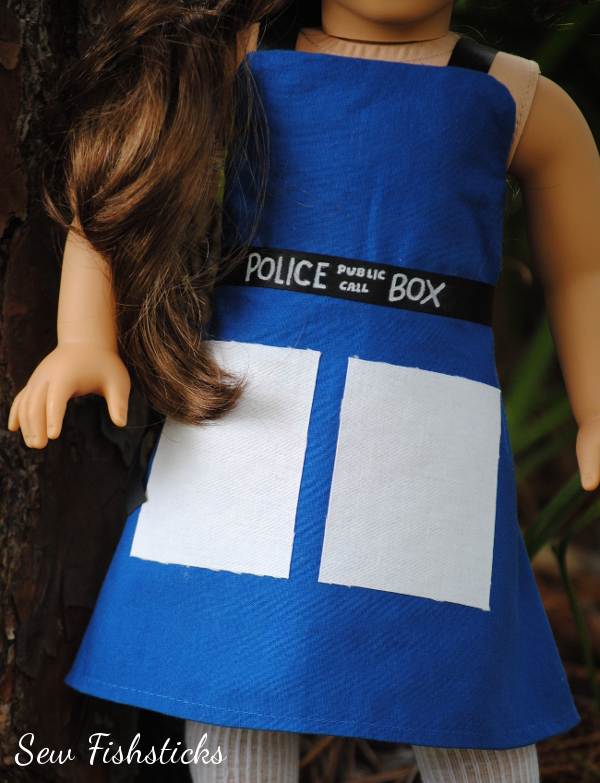 To make this dress, Samantha chose the closest-to-Tardis blue Kona cotton that she could find and black ribbon. She used a white paint pen to inscribe the words “Police Public Call Box” on the ribbon, and she used Wonder Under to iron on the white window patches. I think it turned out really well! What do you think? (We even think that if this particular doll had red hair, she could pass as Amy Pond, and the irony of this whole thing is amusing since Doctor Who is a British series and this is an American Girl Doll.)
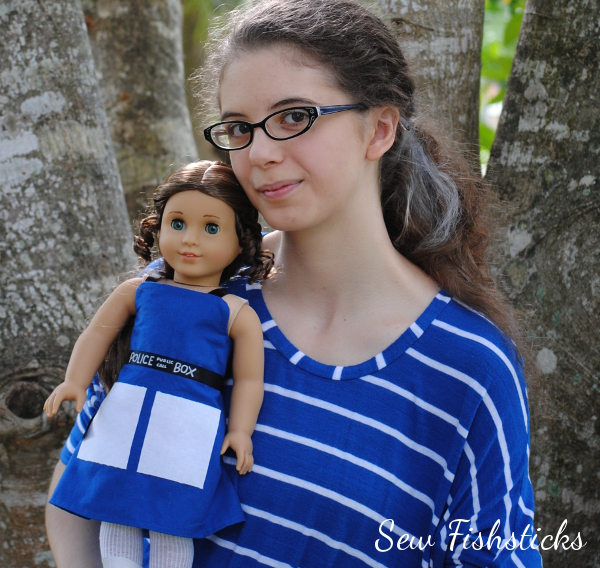 Giveaway is closed! And the winner is lucky #13! Comment #13 was from Heidi K! Congratulations!
Giveaway ends July 27th, 2014 at 8:00 PM EST. Giveaway is open to U.S and international residents who are 18 years of age or older. One entry per person. Winner will be selected by Random.org. Winner will be announced using the winner’s public username on or before 12:00 PM EST on August 1st, 2014. Prize will be emailed to the winner who must be contactable via email. Email addresses will never be shared.
Quilts & Lace on Visit Your Local Quilt Shop Day
 This past Saturday was Visit Your Local Quilt Shop Day, so Samantha and I headed out to visit a local quilt shop that I’d found online, but hadn’t yet had a chance to see. Quilts and Lace is just a few minutes up the road from us, and I’m so excited to have found it.
  In my opinion, one of the best things about local quilt shops is walking into a shop and being welcomed in. Aira and Allan, the owners of Quilts and Lace, are just lovely! I loved getting to know them a bit, and I enjoyed watching and listening as they chatted with their other customers, answering questions and giving advice on sewing and sewing machines and just visiting. Allan even brewed up quick pot of coffee for a waiting husband while Aira helped the wife with a machine that she was purchasing!
 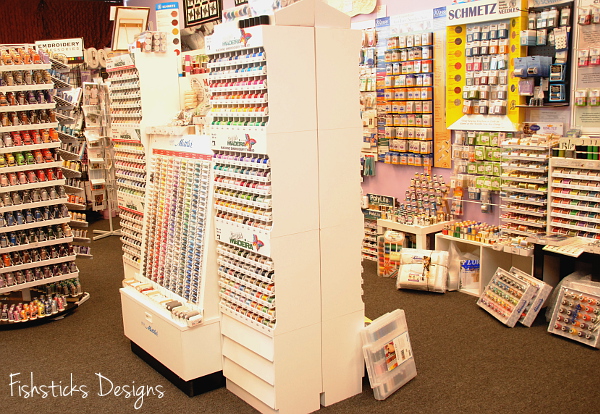 The shop carries both Brother and Babylock sewing machines, and their selection runs all the way from just-starting-out machines to sewing-is-my-life machines. They also have an incredible stock of threads, needles, patterns, notions and every sewing supply you could possibly need.
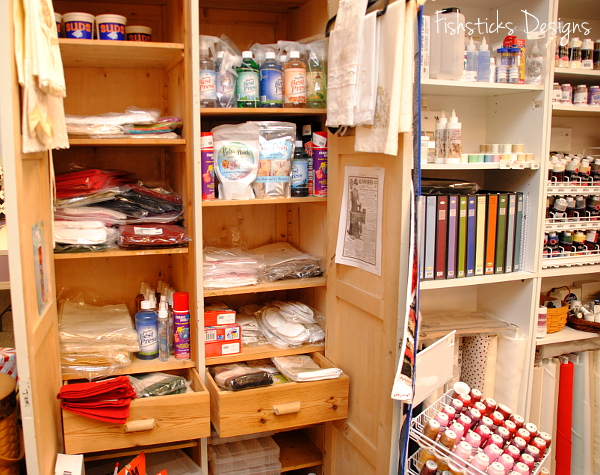 There’s a nice fabric selection with great variety and some beautiful choices.
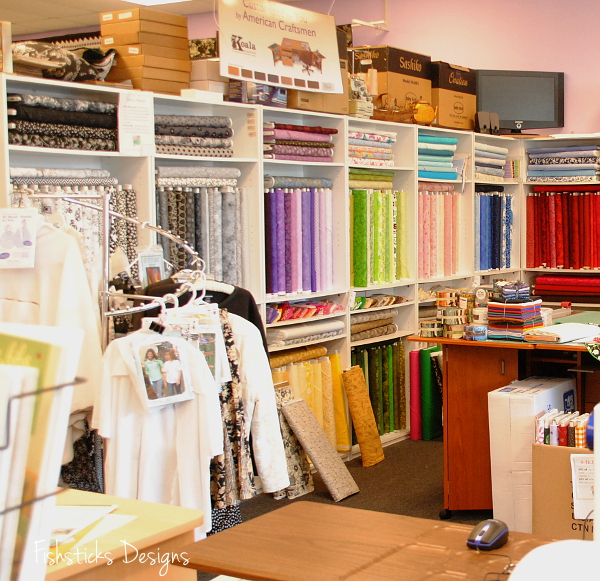
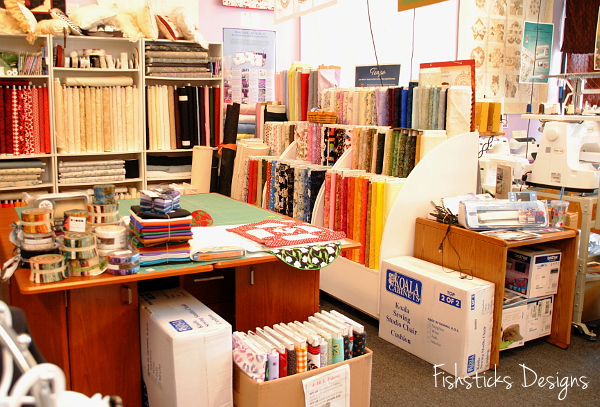 They even carry designer knit fabrics!
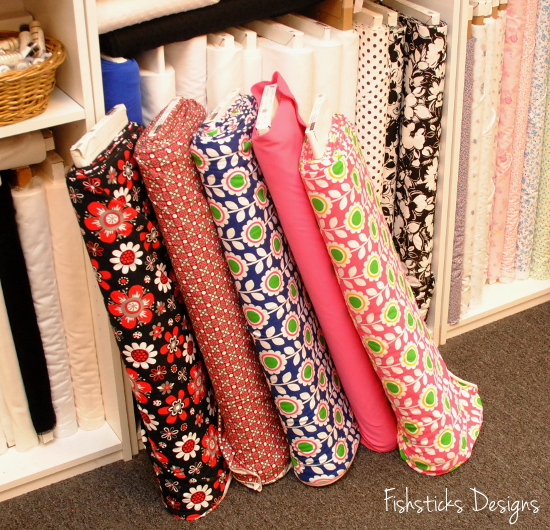 And, over on one of the pattern racks at Quilts and Lace, I found the Fishsticks Designs Charlie Tee & Hoodie pattern!
  In addition to machines, fabric and notions, Quilts and Lace offers an array of sewing classes and special events. Their classes teach everything from sewing machine basics to serging techniques, along with quilting, embroidery and more.
Have you visited your local quilt shop lately? You should really drop in and see what they have to offer. You might learn a new skill, find a new favorite fabric and maybe even make some new friends!
A Three-Piece Theo Trio
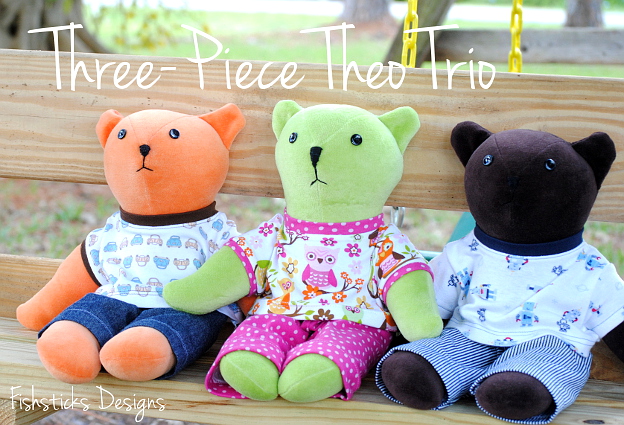 I’m still loving sewing new stuffies for my two little guys and our granddaughter for every holiday. (Eventually, they’re going to run out of room for new ones, aren’t they? But, maybe not before they outgrow them.) A few weeks before Christmas, I asked for pattern suggestions in an online PDF pattern group. Since I don’t generally design stuffie patterns, this is an area where I enjoy trying out patterns from other designers. Time was short so I needed something quick, but I wanted something really cute, too. Enter Three-Piece Theo from Tie Die Diva Sewing Patterns!
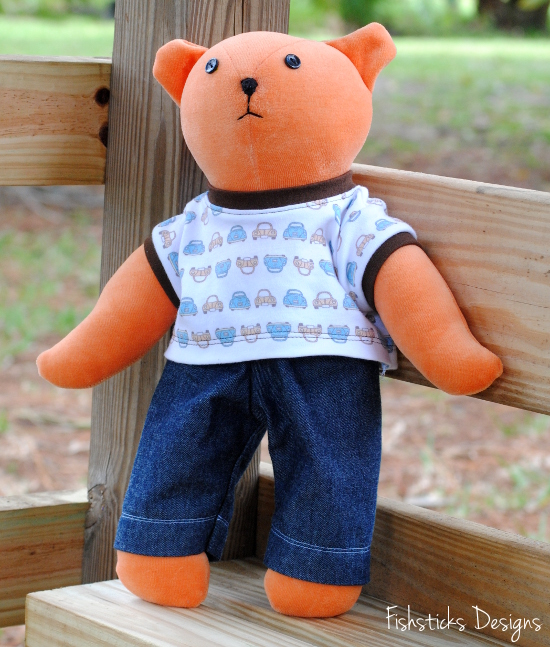 This pattern goes together so fast, and this bear is the cutest thing ever! I’m a bit of a naturalist when it comes to fabrics, so I used cotton velour rather than the suggested polyester fleece for the three bears that I made. I love how soft and squooshy they are, and the cotton velour makes them easy to wash, too.
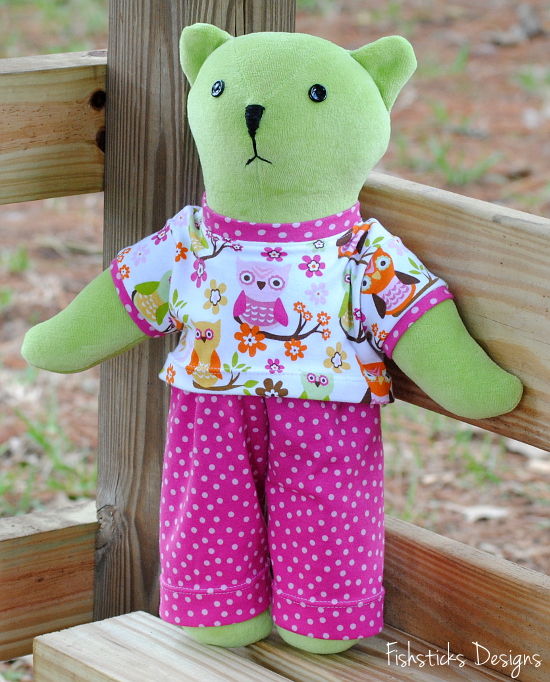 I chose to use buttons for the eyes and to embroider the faces for a more vintage-y look. The hand embroidery was definitely the hardest part for me. If you follow me on Instagram, you already know that I stitched the noses on the boys’ bears on Christmas Eve after everyone was asleep and the presents were under the tree. Then, I decided on Christmas afternoon that I really didn’t like the rectangular shape I originally used, so while the kids all played with their new toys, I ripped the bears back apart and gave them much nicer triangular noses!
 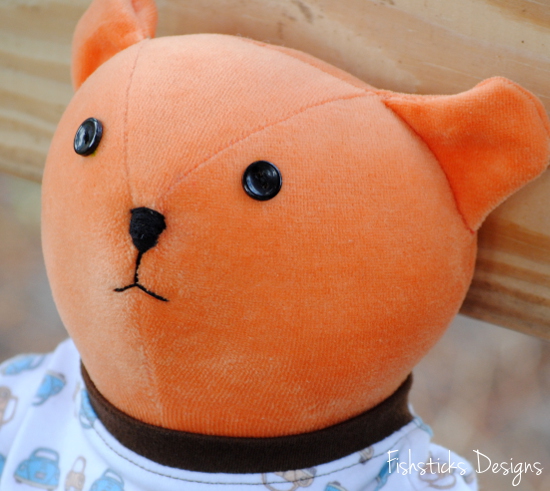 It’s pretty cool to see how much you can change the personality of the bear with a slightly different face. My kids think that Katie’s green bear looks like a koala because of its long nose.
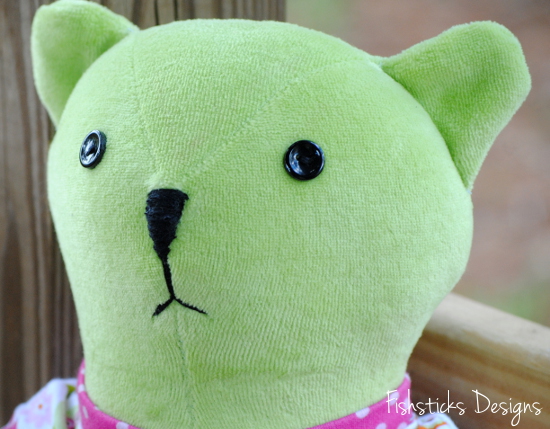 I used the pants pattern that comes with the bear for the pants, but I couldn’t resist downsizing my Charlie Tee pattern for the top! Wouldn’t it be fun to make matching bear/child clothes? My boys would probably roll their eyes, but I think Katie would love that!
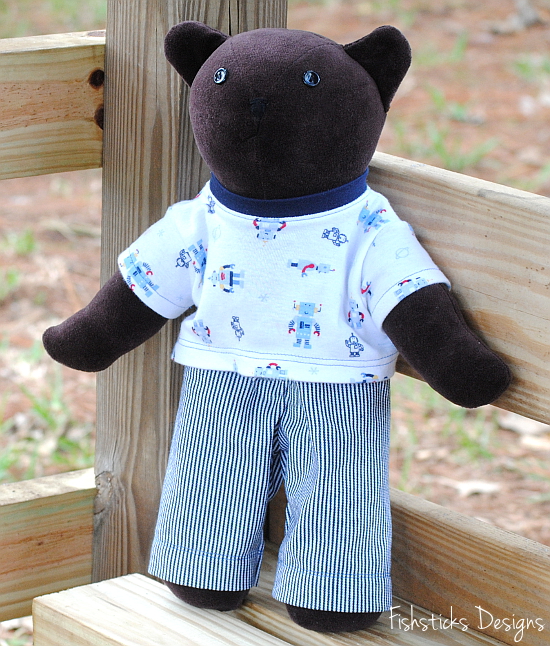 These were a hit with my littles. They even traveled with us on our mini Orlando vacation this past weekend. I think I’ll be turning to this pattern again in the future for more quick handmade and personalized gifts, too!
The Indygo Junction Casserole Carry-All Review & Giveaway!
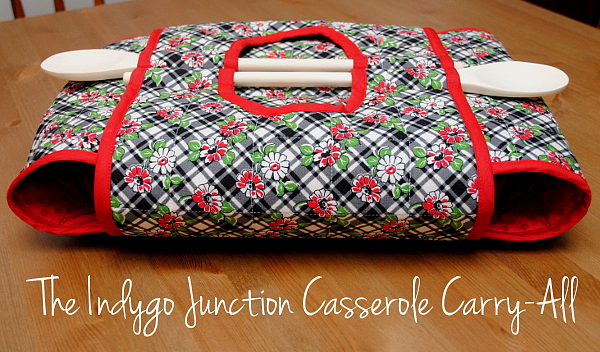 I am so excited to share this cute casserole carrier with you guys! As fall approaches and the kids start back to school (or homeschool, in our case), opportunities to enjoy potluck-style gatherings start popping up all over. We always seem to be grabbing our dish from the oven and wrapping it up with all the dish towels we can gather to transport it to our dinner. You’d think that I would have made one of these long ago, wouldn’t you?
When I got an email from Indygo Junction asking if I’d like to try out one of Amy Barickman’s new patterns, I was so excited to see the Casserole Carry-All! Actually, I was really excited until I realized that it’s sewn with bias tape. If you’ve been around me much, you know that I sort of view bias tape as my sewing arch-nemesis. I loved the design of this pattern so much, though, I decided to give it a try. The way I figured it, if I could make it through sewing this casserole carrier without losing my patience, I could tell you in all honesty that this is a great pattern! I’m happy to report that not only did I make it through with my patience in tact, I enjoyed sewing it, AND I’m planning to make at least one more!
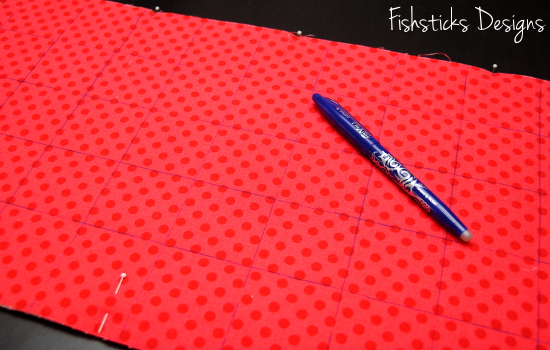
The pattern and instructions are really straight-forward and easy to follow. I used one of my handy-dandy Frixion pens to draw the quilting grid on the inside layer.
 And, with a swipe of my hot steam iron after quilting, the marks were gone! (Do be careful with using Frixion pens on things that won’t be washed and might be subjected to cold temperatures. That ink that disappeared can sometimes reappear if it’s not washed away before being exposed to really cold temperatures. No worries about that at all with this project!)
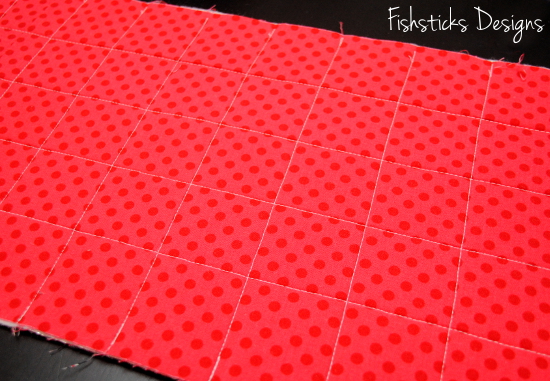 The only place that I had a problem wasn’t even related to sewing, it was with finding spoons the right length! I assumed that the long-handled wooden spoons in my kitchen would work, but the handle wasn’t quite long enough. You can see in these pictures that the loops the spoons pass through are sort of squished together and the handle only comes out a tiny bit. My spoons are 14″ long total, and I really needed 16″ long ones. I searched all over town and didn’t turn up a single one long enough. Amazon is coming to my rescue, though, with a set of 16″ long wooden spoons that are on their way to me right now!
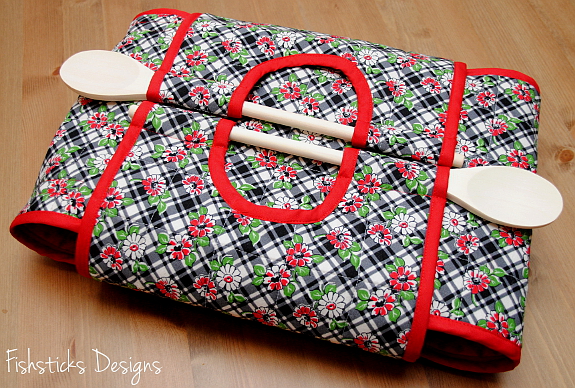 I love that this casserole carrier has multiple layers of hook & loop tape so it works for a 9×13 rectangle dish or an 8×8 square dish. You just open it up, center your dish on it, fold over the long ends and fasten the hook & loop, then fold the spoon-handles up and you’re ready to go!
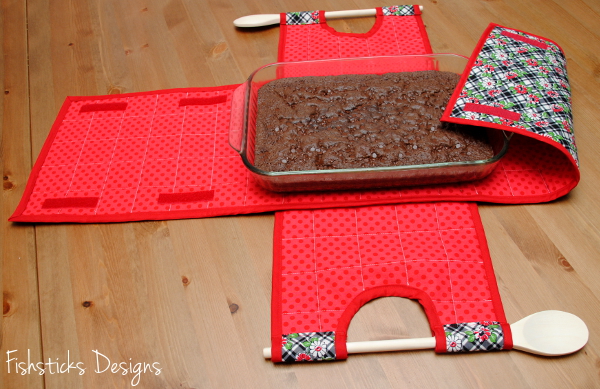 The casserole carrier is also lined with insulated fleece, so when you need to hold it in your lap on the ride to the potluck, you don’t have to worry about burning yourself! Nice, huh? (Oh, the dish above? That’s the gluten-free, real-food brownie recipe that I’ve been experimenting with! I think it’s finally ready to share with you. You’ll have to check back next Saturday to find it!)
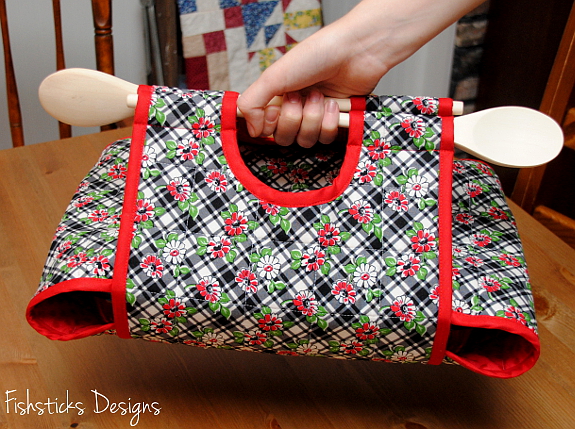 Indygo Junction didn’t just send me one pattern, by the way. They sent me two! I get to give away the second one to one of you! But that’s not all! Since I was already ordering 16″ long spoons for my Casserole Carry-All, I ordered a second set to go along with the pattern to the winner!
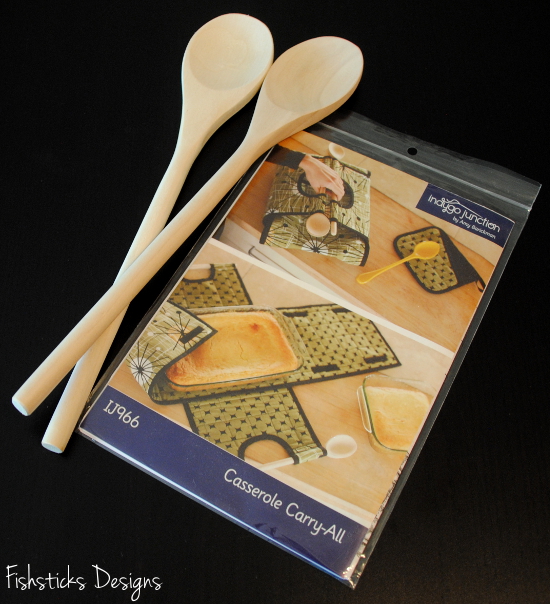
GIVEAWAY IS NOW CLOSED!
The Roly-Poly-Along Giveaway Winner!
 And the winner of the free Roly Poly Pattern from Imagine Gnats is . . . Susan! Susan wrote, “My two daughters and many nieces would love a roly-poly. Plus, we have several stuffed animals that would demand one of their own!” (How cute would a stuffed animal Roly-Poly be?!) Congratulations!
a Rafflecopter giveaway
Those of you who didn’t win, can hop right over to Rachael’s store and buy the pattern by clicking on the picture below:
Bento Boxes for Real Food on the Road
 I have plans for a series on family travel to start soon, but I promised that I’d share this sweet little bento box this week! Isn’t it perfect for a family full of Lego-loving little boys?! I found it at Modes4U! It came in the same package as the fabric that I used for my little guys’ travel bags.

When you’re on the road or even just spending the day out at the park, it’s hard to take real foods with you. I had considered bento boxes before, but I hadn’t actually tried one until this trip, and now I think I need one for each member of the family. In case you’ve never heard of bento before, Lunch in a Box defines “bento” as a compact, balanced, visually appealing meal packed in a box. Historically, it’s a Japanese box lunch. And, a quick Pinterest search for “bento lunch” will make you gasp at the artistic talent that many people put into bento lunches! My bento lunch is very simple in comparison! The very top layer of this box has a freezer pack to keep the food in the top storage compartment cold. On this particular day, I packed a boiled egg, cucumber slices, grape tomatoes and cheese — a great real food lunch, and it’s gluten-free to boot!
 The divider between the top and bottom storage compartments holds a little set of chopsticks, in case you need utensils.
 The bottom storage compartment is just as roomy as the first. I really like that this bento box is BPA free and painted with food-safe lacquer. It’s really easy to keep clean and ready to go, and I trust that it’s safe storage for our foods. Because it was warm out the day I took these pictures, I didn’t have food packed in the bottom. Instead, I threw in a ziploc bag of ice and left out the middle divider to be sure that the eggs stayed cold! That was a great bonus to using a double-layer bento box!
 On other days, we packed the bottom layer with pretzels and crackers.
 We packed a lot of picnic lunches while we were traveling this time, and having this handy little box made at least one of our lunches a lot of fun. We’ll have to make sure that we have bento boxes for everyone next time! I love anything that keeps our kids excited about eating real food, especially when the vendors surrounding us are selling stuff that looks and smells good, but isn’t really at all what we want to put in our bodies!

Modes4U Fabric & Travel Bags for My Boys
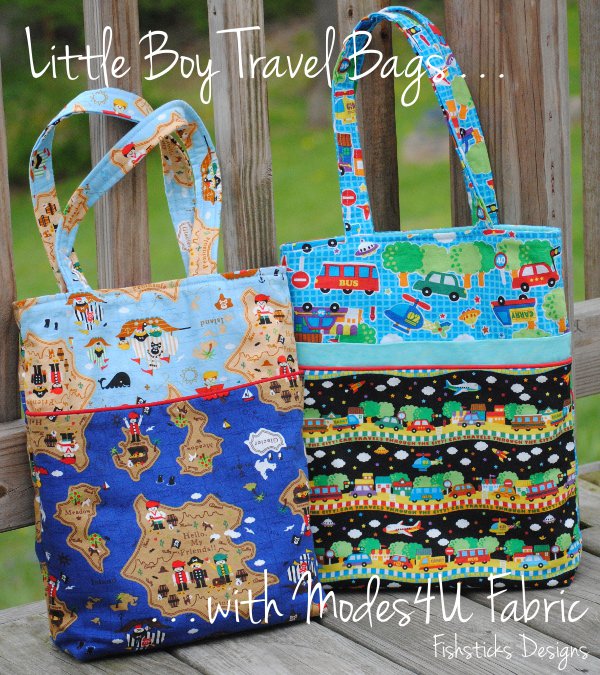 Traveling with little ones is so much easier when everyone has their own place to keep and carry their things. We’re away from home right now on a trip that includes several different destinations and quite a bit of time in the car. Just before we left, I stocked up on activity books for three-year-old Charlie and six-year-old Jamie and whipped up these quick totebags for each of them to keep everything organized!
I’d been eyeing some of the adorable oxford Kokka boys’ fabrics at Modes4U. I knew that Jamie would love the pirate fabric, and Charlie is all about anything that drives or flies, so the vehicle fabric was perfect for him! My only worry was whether the fabric would get here in time since it ships from Hong Kong. Thankfully, it arrived in plenty of time — about 7 business days! (Their website does say that it can take up to 15 business days, though, so be sure you have a backup plan if, like me, you have to have the fabric really quickly.)
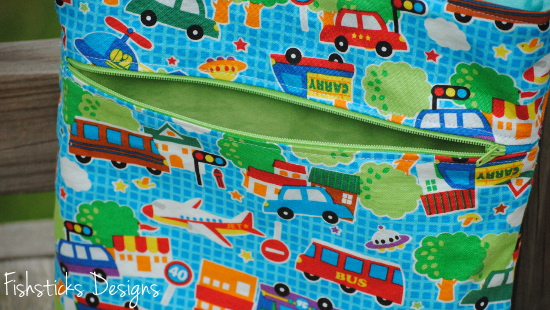
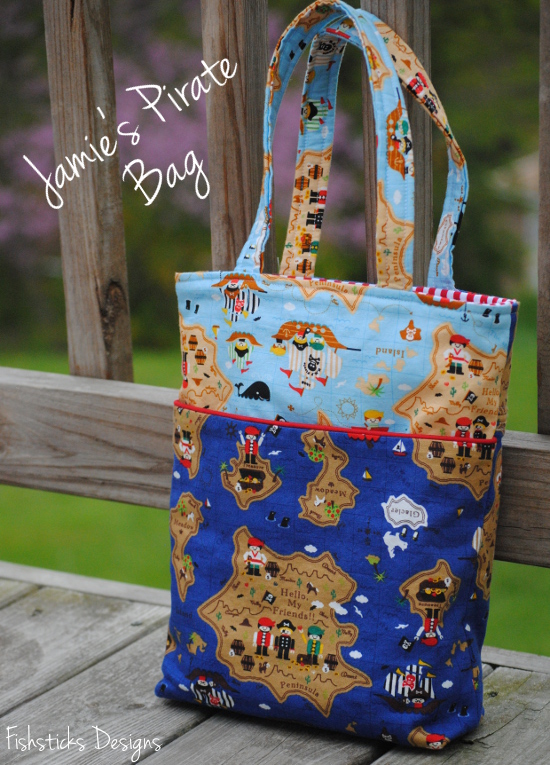 The oxford fabric is sort of a lightweight canvas, so it’s perfect for a simple totebag. For Jamie’s bag, I used two different colors of the same fabric and added piping along the front pocket. Charlie’s bag used two fabrics from the same line that were pretty busy-looking when I put them together. I eased that problem by breaking them up a bit with piping and a strip of solid fabric at the top of the pocket.
 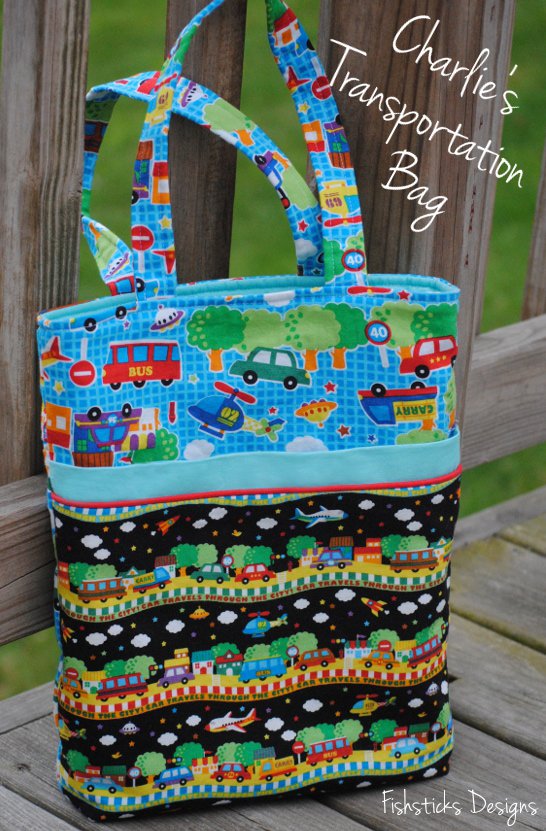 Both bags got zippered back pockets for those little things that tend to need better containment.
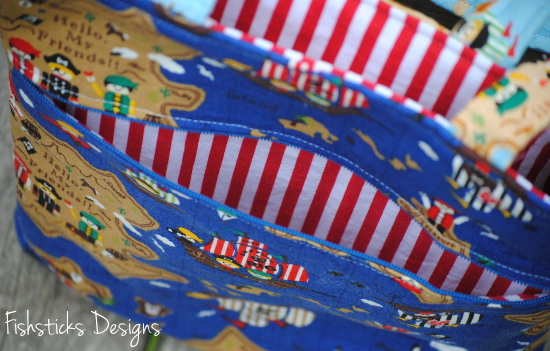
 Inside, I added a couple of colored pencil pockets along with a pocket that is just the right size for the mini-coloring and sticker books that I slipped into their bags. (I love being able to completely customize what I’m sewing for our needs!)
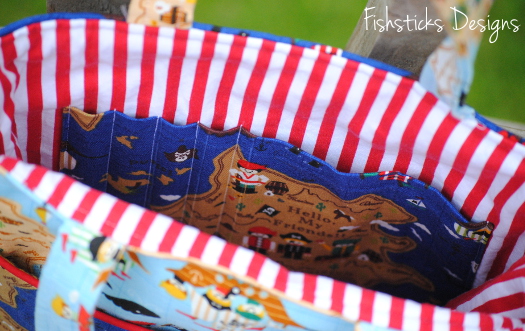
 The boys are really enjoying their new bags, and so far, they’ve done a really good job of putting their things away when they’re done so we don’t lose track of or leave anything behind on any of our stops.
For those of you who are moms to boys, Modes4U has an enormous selection of boys’ fabrics! I don’t think there’s a single one that I don’t like! I’ll definitely be back for more. This oxford fabric would be great for summer shorts! They also carry a whole list of other things, including bento boxes. I grabbed one of those, too, that you’ll see later. (I think it’s going to be perfect for next week’s sightseeing.)
Indygo Junction’s Fabric Flowers Book Tour (and Giveaway!)
 I can’t tell you how excited I was to be asked to be on the book tour for Amy Barickman’s new book, Indygo Junction’s Fabric Flowers! There are so many fun little embellishments packed in here that use tiny scrap pieces of fabric. I chose to make one that even uses recycled fabric! (I love putting previously-loved clothing to new use.)
  Amy’s instructions made turning these two pairs of my 13-year-old son’s old jeans into a beautiful Ragged Edge Rose so simple! My 15-year-old daughter, Samantha, pinned this rose to her denim library bag, and it went from simple to “That is so cool, Mom!” instantly.
 Since I gave up my first rose, I had to make a second one. I happen to own a denim jacket like the one in the book photo, and it was looking a little boring. It needed a Ragged Edge Rose made with colored denim! A quick run out to a local thrift store turned up the perfect pair of pink jeans. And now, look at my jacket! (I hope we have at least a few more days cool enough here for me to wear it!)
 Want to take a peek at some of the other flowers in the book?
Are you inspired to start ripping up some old jeans and digging through your scrap pile to make some fabric flowers of your own? Great! You have a chance to win your own copy of Indygo Junction’s Fabric Flowers AND some fun tools from Clover: Fuse ‘n Gather & Wrap ‘n Fuse Piping!
 To enter, just leave a comment telling me which flower you’d like to try out first and/or what you would embellish with your own handmade fabric flower! I’ll leave the giveaway open through Wednesday, February 27th at 10 p. m. EST and announce the randomly-chosen winner on Thursday, 2/28.
Wait! That’s not all! You get a prize without even entering! Everyone who reads this can go shopping right now in the Indygo Junction Store and receive 20% off of your whole order! Just use the code: FFBK15. This code is valid through 5/1/2013. 
A flower a day & 25 chances to win! Don’t miss a stop on Indygo Junction’s Fabric Flowers Blog Tour:
2/2/13 – Indygo Junction Kick Off Post
2/4/13 – Kollabora
2/5/13 – CraftFoxes
2/6/13 – Sewing Secrets
2/7/13 – Princess Lasertron
2/8/13 – Dollar Store Crafts
2/11/13 – Tatertots & Jello
2/12/13 – Family Ever After
2/13/13 – This Mama Makes Stuff
2/14/13 – Amy’s Creative Side
2/15/13 – Today’s Creative Blog
2/18/13 – Lazy Girl Designs
2/19/13 – Skip to My Lou
2/20/13 – The Sewing Loft
2/21/13 – The Crafty Cupboard
2/22/13 – Fishsticks Designs <—— Today’s tour stop!
2/25/13 – Taradara
2/26/13 – Diary of a Quilter
2/27/13 – Craft Gossip
2/28/13 – How Joyful
3/1/13 – Lindsay Sews
3/4/13 – Flamingo Toes
3/5/13 – In Color Order
3/6/13 – See Kate Sew
3/7/13 – Handmade Charlotte
3/8/13 – Sew Caroline
3/9/13 – Indygo Junction Wrap Up Post, Bonus Giveaway & Free Flower Project
Comments are now closed, and a winner has been chosen!


