Riley Blake Mystery Quilt
May Riley Blake Mystery Quilt Block – Selvage Spools
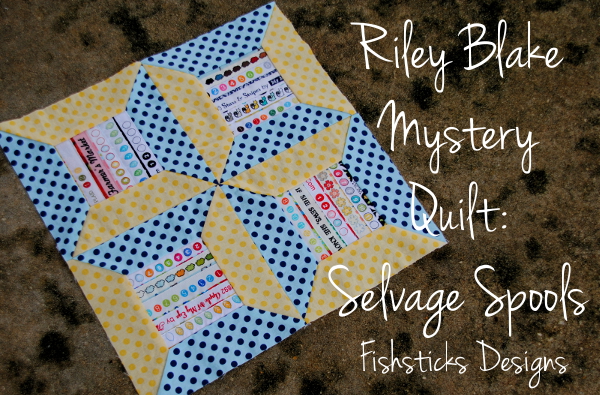 I’m almost caught up now! Woo-hoo! May’s Selvage Spool block is so cool, and the construction process was really fun!
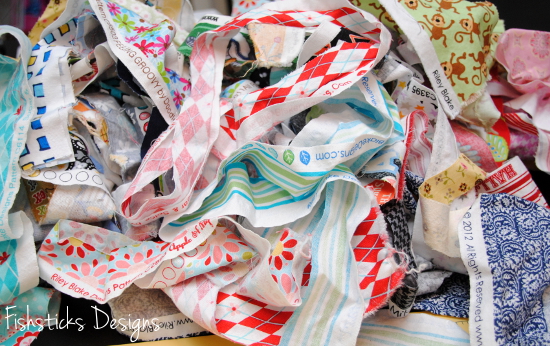 All those selvages and the blank solid squares waiting to be filled up were a little overwhelming, so I started by pulling out the selvage pieces that I knew wanted to use and cutting them down to a manageable size (4″). Before putting away the rest of the huge pile, I made a separate small pile of “maybes”. Once that was done, I was able to concentrate on arranging my selvages.
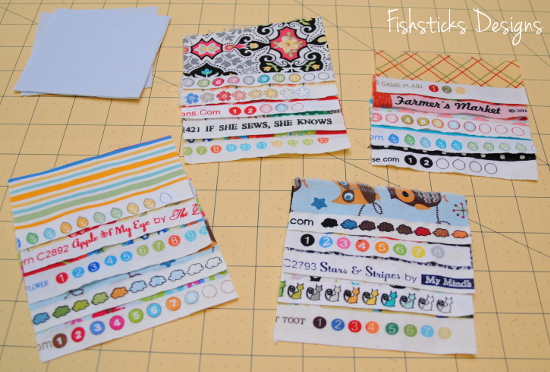 A little note here: the video for this block says to use a 3 1/2″ square, but the pdf says 3 1/4″. Your selvage square does need to be 3 1/2″ in order to get the correct finished size. Riley Blake is working on correcting the pdf. In the meantime, if you’re behind like me and still working on this block, be sure not to cut that square too small! You’ll also need to enlarge the spool end template. I did this by printing at 106%. My completed selvage spools came out with about 1/8″ to trim off and square up on each side.
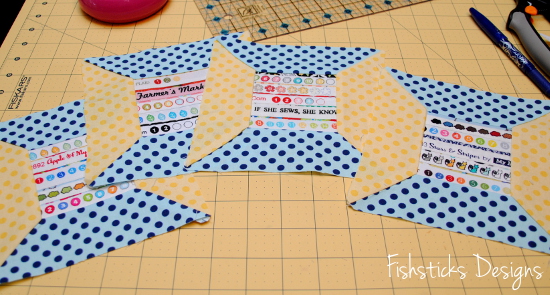 I think this block is my favorite so far! A whole quilt made up of these would be perfect for display in a sewing studio or as a gift for someone who loves sewing.
 Here’s my whole set so far. June’s block is another needle-turned applique. Should I just take a deep breath and actually try it this time? I suppose the worst that could happen is that I don’t like it, and then I at least tried it, right?
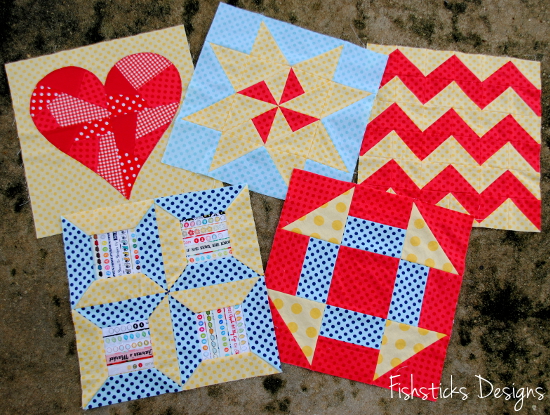
April Riley Blake Mystery Quilt Block – Sunshine
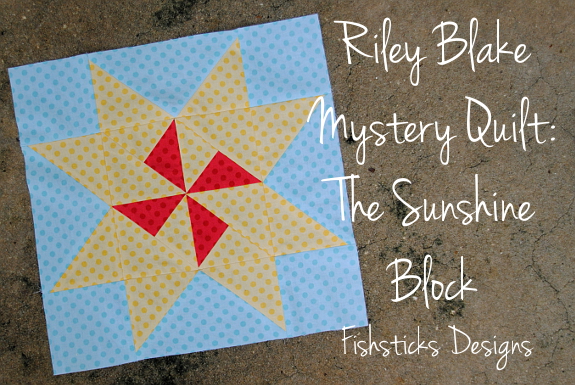 It’s catch-up time! I’ve fallen behind on my Mystery Quilt Blocks because I’ve been busy behind the scenes working on new patterns which should be ready very soon! I managed to get April’s Sunshine Block done over the weekend, though.
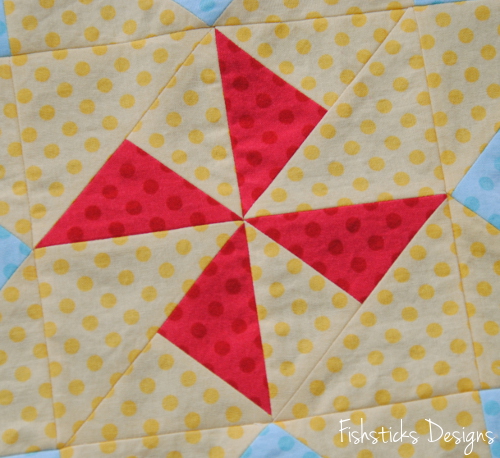 There are more half-square triangles in this one. Half-square triangles with smaller triangles mixed in to make up the center section. The four outside sections of the block are made up of flying geese. I used the same method that Bee in My Bonnet shares in her Easy Flying Geese Tutorial to sew those. I just increased the rectangle size to 3 1/2″ x 6 1/2″ and the squares to 3 1/2″ x 3 1/2″.
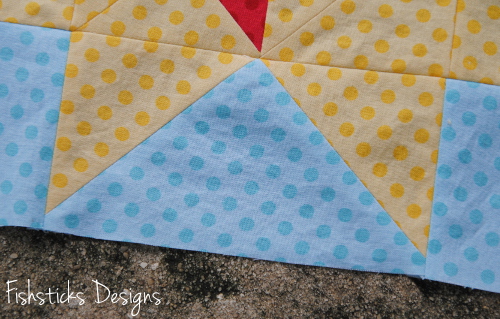 Here are all four blocks together:
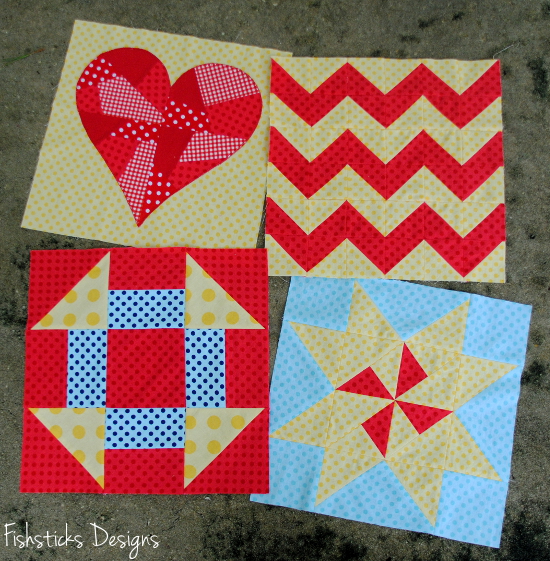 I’ll have to make time this week to dig through my selvage pile for May’s block which I’m hoping to get done next weekend. Once that’s done, I’ll be all caught up . . . as long as I can get June’s block done this month, too!
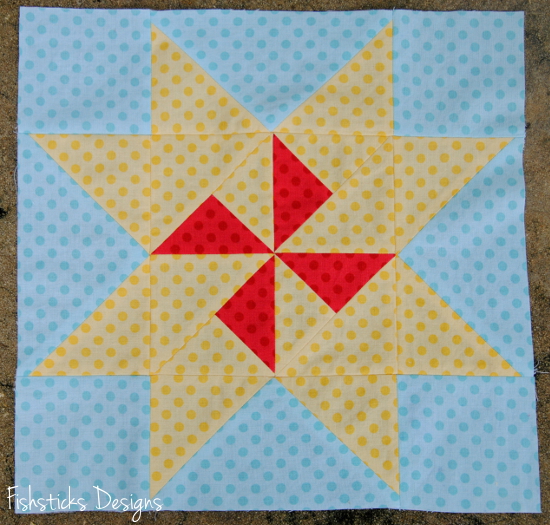
March Riley Blake Mystery Quilt Block – Simplicity
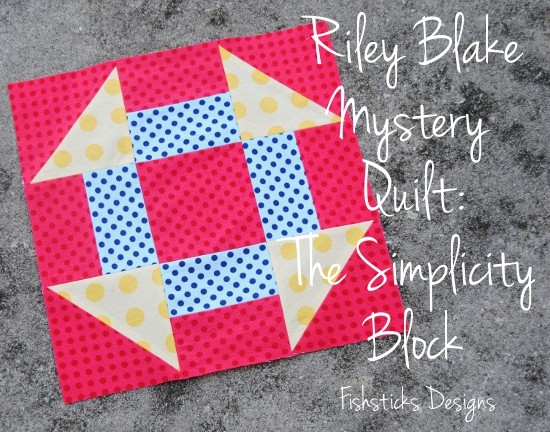 I’m moving right along with the blocks in the Riley Blake Mystery Quilt! I don’t have a whole lot to share about this month’s “Simplicity” block because it really was simple. It looks far more complicated than it is!
You start with four half-square triangles. (If you don’t want to sew these one at a time, take a look around for short-cut tutorials. Here are two from the Sew Mama Sew blog: 8-at-a-Time HSTs and 4-at-a-Time HSTs.) Add four squares made from two equal-sized rectangles. (I sewed these all at once in a strip. Since I wanted 4 – 4 1/2″ squares, I cut a strip from each fabric 2 1/2″ x 18″. I stitched the two strips together, pressed the seam allowances and cut the strip into 4 1/2″ squares. If you use this method, be sure that you’re using a short stitch length so that your seams don’t pull apart when you start piecing the blocks together.)
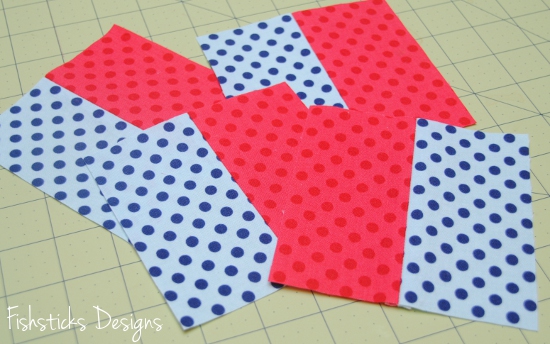 Cut a center block.
 Follow the instructions for piecing your blocks together, and you’re done!
  Here are January, February and March all together! Once I finished the first two blocks, I decided that I needed some more color so I added in some blue, still sticking with the RB Tone-on-Tone dots. I think I like it. What do you think? It seems a little off now, but once I add the other blocks with the blue mixed in, I think it will all balance out.
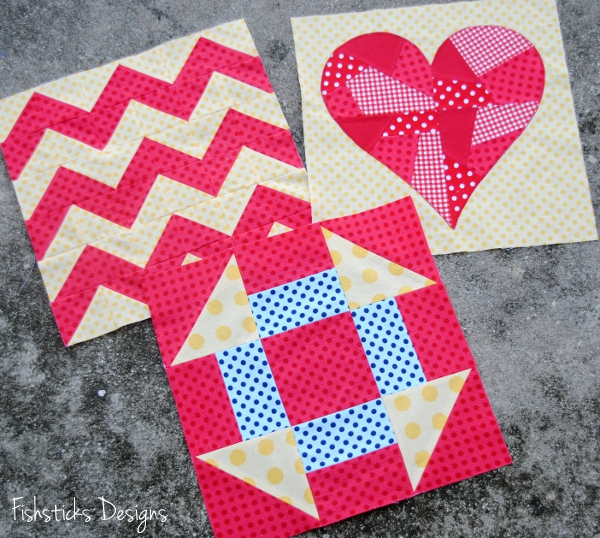
February Riley Blake Mystery Quilt Block – Hearts
 Yes, February is over, but I’m not considering myself behind on this block since the next block doesn’t come out until Monday. (I almost called this Block #2, instead of the February Block, but I already called the first block January, so . . . )
The second Mystery Quilt Block in Riley Blake’s Quilt Block of the Month series is a paper-pieced, appliqued heart. The video was actually down on the weekend that I started my block so I just downloaded the pattern and used the freezer-paper piecing technique that I’m familiar with.  It wasn’t until I watched the video a few days later that I realized my heart is pieced backwards. Who’s going to notice, right? Oh, and I stitched the right and left portions together first instead of the top and bottom portions. Ooops! It worked out, though!
My husband wandered in at about the point below and said, “I thought you were making a heart?” “It’s an abstract quilt, Dear.” 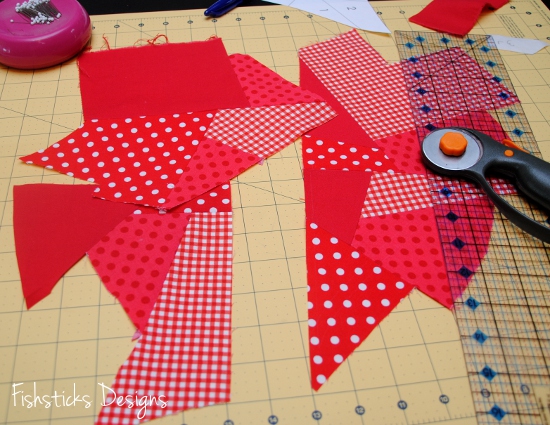 Jina’s and Cindy’s blocks on the Riley Blake blog were finished using reverse applique. My “abstract” heart sat around here for over a week waiting to be trimmed into a non-abstract heart while I waffled back and forth over how I was going to finish it. In the end, though, lack of time thanks to a weekend lost to a nasty little stomach bug that attacked the whole family, led me to go with a quicker method. A little sewable iron-on adhesive coupled with the blanket-stitch on my sewing machine, and the applique was done.
![]() Here’s my Heart Block all finished!
Here’s my Heart Block all finished! And here are the January and February blocks together. I think I’m ready for March!
January Riley Blake Mystery Quilt Block – Chevron
Cindy and Jina from Riley Blake just started a Mystery Block of the Month Quilt, and I thought I’d sew along. The first block in the set of nine is this chevron block. You can find the instructions in both video and pdf form on the Riley Blake blog: Mystery Quilt Block #1
![]()
I considered subtitling this post: “The Quilt Block that Almost Wasn’t,” but I want you to want to sew along, too. Instead, how about the subtitle, “The Quilt Block that Tried to Defeat Me and Lost!”? If you’ve been around me for very long, you might know already that I tend to be the instant-gratification type of sewist. I was really excited about this block, but when I read the pdf instructions and saw that it required piecing together 36 – 2 1/2″ half square triangles, I was a little skeptical about whether or not I’d make it all the way through. That’s a whole lot of tiny triangles!
![]()
I found that the hardest part for me, though, was patiently trimming down and squaring up all 36 of those blocks! About five blocks in, I decided that I needed someone to keep me company, so I called my mom. It’s amazing how much more quickly a job that feels a little tedious goes by when you’re enjoying a great conversation. (Thanks, Mom!)
![]()
By the time I decided that I had to hang up or my neck was going to fall off from balancing the phone while cutting and sewing, I had finished squaring up everything, and I had two rows of the half square triangle blocks sewn together. From there, things moved along quite well until I stopped for a second to see how it was all coming out and something didn’t look quite right.
![]()
Ugh. It’s a good thing that I was far enough in at that point that I was determined to get this thing done! (Somewhere along the way, I started promising myself a cup of chai and some chocolate when I was finished. The promise of chocolate has a way of keeping me incredibly focused.) A few minutes of seam ripping, and I was back on track. And, I think the end result was worth all the work. You probably won’t see me sewing up dozens of these, but I’m quite happy with the way this one came out and very glad that I conquered it, and I can’t wait to see next month’s block!
![]()


