Tutorials
The Jungle Jalopy Zippered Pouch Tutorial & a Huge Giveaway!
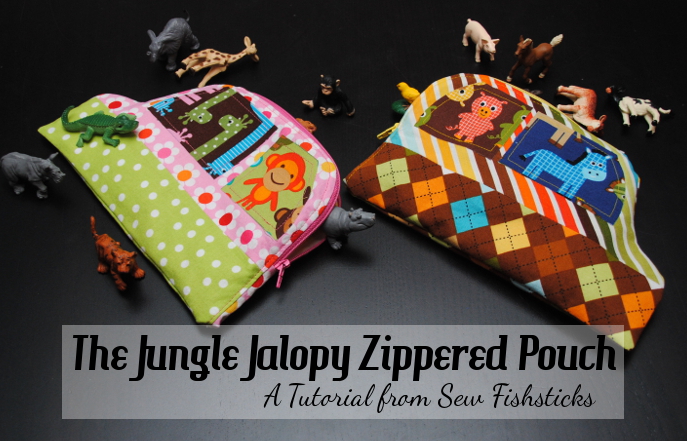 I’m over at Skip My Lou today with a brand new gift tutorial as a part of this year’s edition of the Bake, Craft, Sew & Crochet Along! Just click right here to find the Jungle Jalopy Zippered Pouch Tutorial. Read on for your chance to win a beautiful new Babylock Sewing Machine!

This is one AMAZING giveaway! She is a beauty and her name is Rachel.
Pattern Extra: Add a Zippered Pocket to the Sand & Sidewalk Boardshorts
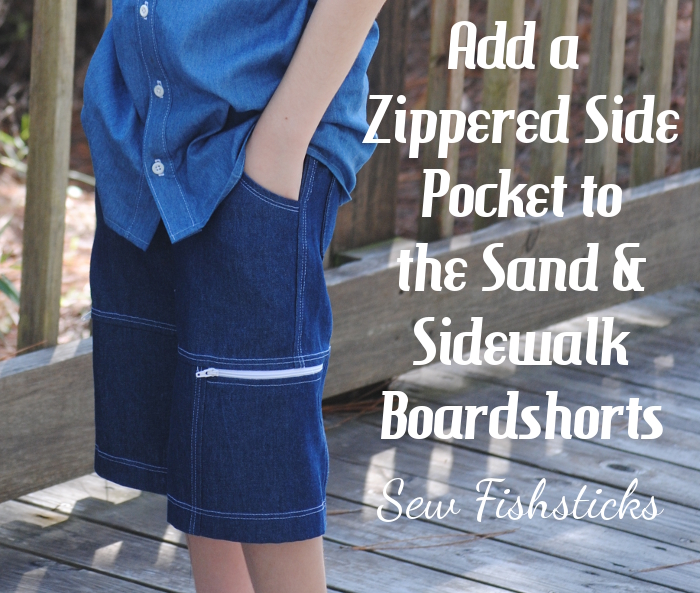 Because you asked, and it makes me happy to make you happy … here are the instructions for incorporating a zippered pocket into the side of the Sand & Sidewalk Boardshorts. Those of us who live in the deep south or in the southern hemisphere will be using this tutorial right away — I promise that I’ll remind those of you up north about it in the spring! In case you’re not familiar with the Sand & Sidewalk Boardshorts and Skate Pants pattern, a front knee panel is incorporated into both the shorts and the pants. This tutorial is only for the shorts. (The curve at the bottom of the knee panel on the pants would make this more difficult.) This tutorial is a little long but the most complicated step is drawing in the back portion of the wrap-around knee panel, and that’s not really hard at all! I’ll walk you through each step, and if you have a question, just ask!
Start by printing and assembling your pattern.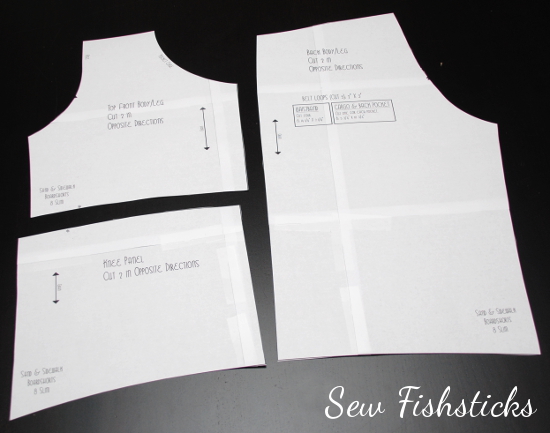 Flip the knee panel pattern piece over onto the bottom edge of the back pattern piece so that their right sides are facing. Line the bottom edges up on the right hand side as you’re facing the pattern pieces. Mark where the top edge of the knee panel hits on the right hand side. (Doing this will assure that the sides of your knee panel will line up properly.)
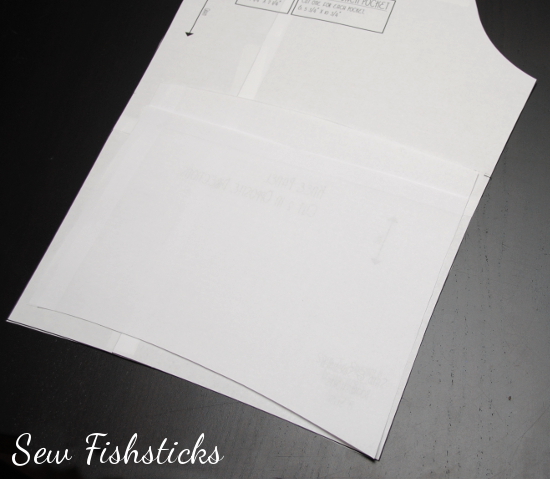 Flip the knee panel back over and place the right hand edge of it so that it’s overlapping the left side of the back pattern piece by 1″ with the bottom edges aligned, as shown. Tape this in place.
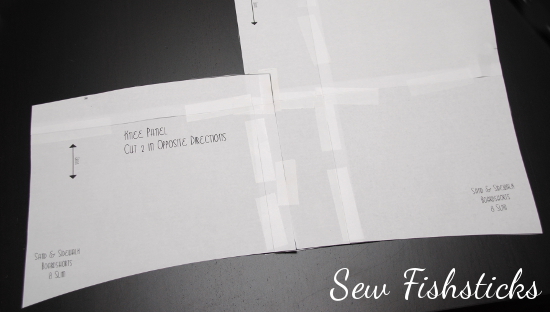 Now comes the slightly tricky part. You’re going to have to draw in a slight, gentle curve from the overlapped edge to the far side of your back pattern piece where you made that mark before. (I’ve found that it’s easier to get a nice curve when I cut than when I’m drawing, so if your curve isn’t perfect now, you may be able to “fix it” when you cut in a minute.) You can see here that I drew the curve starting at the very edge of the back piece, rather than starting at the edge of the overlapped knee panel. This will give you a smooth finish on the top of your pocket.
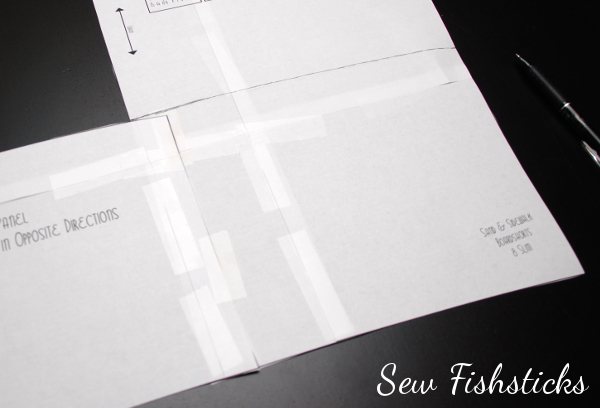 Still with me? Now cut along that curve that you just drew.
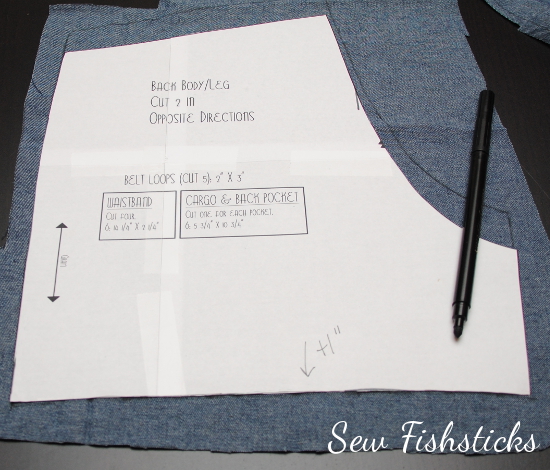
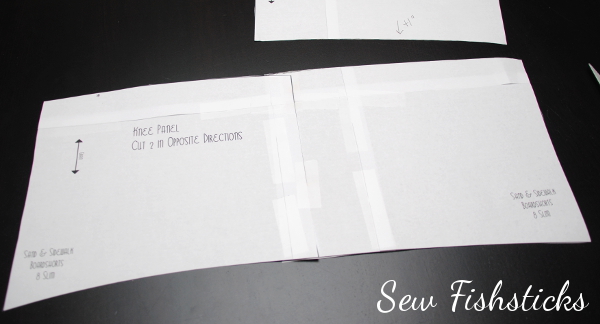 Before you move on, make a notation on the top back pattern piece that you just cut away that says, “Add 1 inch,” with an arrow pointing to the bottom edge. (You’ll need to add an inch when you trace this later to accommodate the seam allowance.)
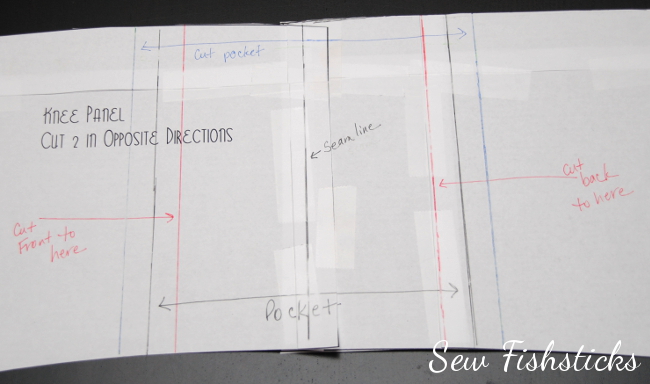
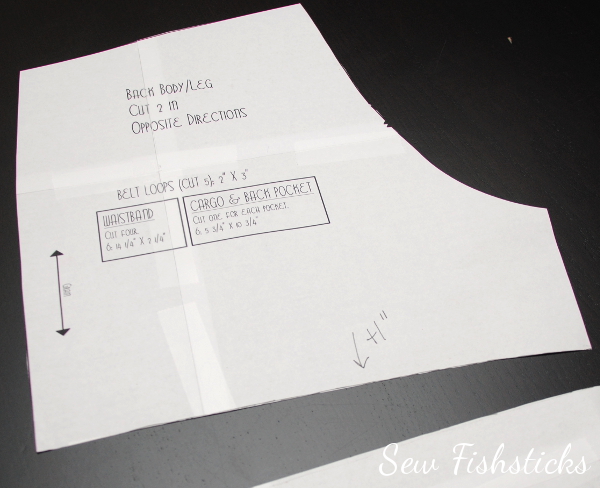 Deep breath. When you finish this, you’ll be ready to modify all sorts of patterns to do fun things like this! Okay, now we need to draw in the pocket. On the size 5 that I did for Charlie, I made the pocket 5″ wide. On the size 7/8 that I sewed for Jamie, I made the pocket 6″ wide. You sort of have to decide what size works best for the size shorts that you’re sewing. (And, you’ll need a zipper slightly longer than the length you decide. Any length will work, as long as it’s at least a bit longer than the width of the pocket.) The center of your wrap-around panel is going to be at the center of that overlap. Draw a line there, then draw straight lines 1/2 the distance of the width of your pocket on each side. In this case, since my pocket is going to be 6″ wide, my lines are both 3″ out from the center. (The center line says, “Seam line”, on my copy because that is where the seam on the upper part of the shorts will line up.)
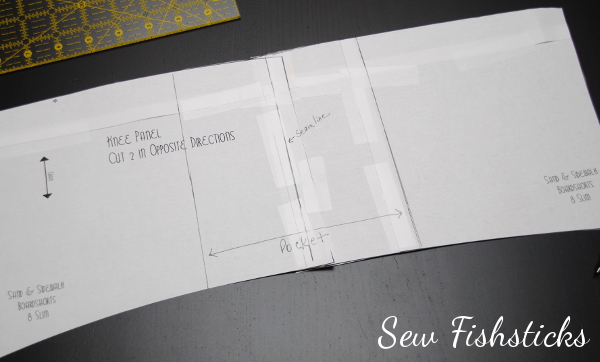 The lines that you just drew in will end up being the finished seam lines, but you need seam allowances drawn in before you can cut out your fabric. If you have different color pens on hand, some color-coding may help keep things clear in this step. I generally use a 1/2″ seam allowance on all of my patterns, so that’s what I’m going with here. To get the width that I’ll cut the pocket, I drew new lines 1/2″ on the outside of the original lines. Those are the blue lines in the following two pictures. For the front and back pieces of my wrap-around panel, I added lines 1/2″ to the inside of the pocket seam lines. Those are the red lines that you see here. I like to draw in arrows and note which part is cut to which line when I draw in these seam allowances. Otherwise, it’s really easy to get mixed up!
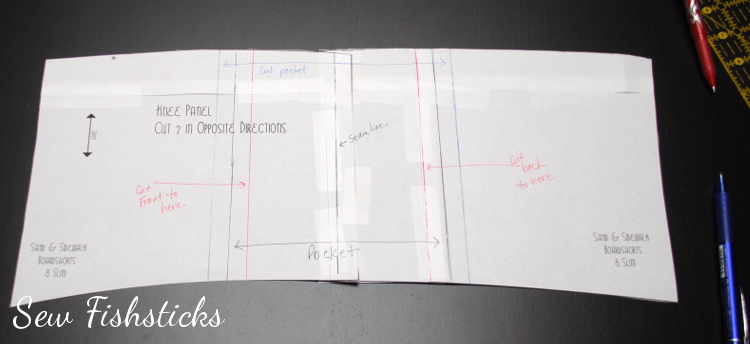
 You’re ready to cut out your fabric pieces! What I usually do is place the pattern on the fabric, trace the outside of the pattern up to the lines that I’ve drawn in …
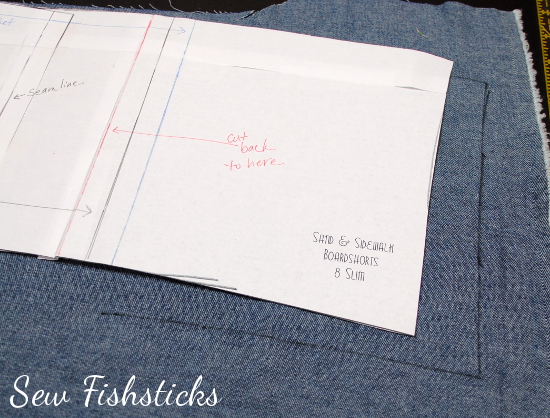 Then, I either fold the pattern back on the line, or I use a straight-edge to draw in the straight line.
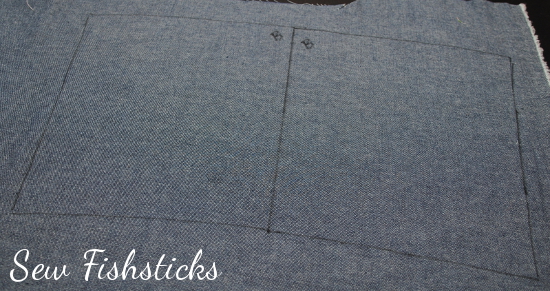
 Be sure that you’re tracing your pattern pieces to the correct seam allowance line. You’ll need four pocket pieces (two, then two reversed), and you’ll need two each of the front and back pieces (one, then one reversed). Label your pieces when you trace them!!! I put a letter “B” for the back, a letter “F” for the front and a letter “P” for the pocket using a washable marker at the inside edge. (If you don’t label these, you may end up with a mess.)
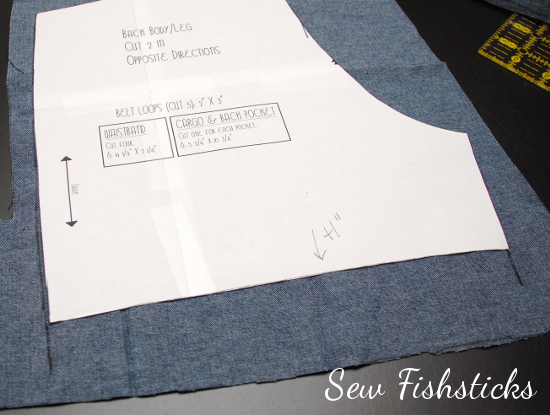
 Now that your wrap-around/pocket pieces are all cut out, you’ll need to cut out the rest of your pieces. When you cut out the upper back, you’ll need to add 1″ for the seam allowance. (Since you didn’t add 1/2″ to the back knee panel that you created, you’re adding the seam allowance for it and the seam allowance for the back at the same time. Just trust me, that you need an inch. You do not need to add seam allowance to the front piece, since it has the seam allowance already added in.)
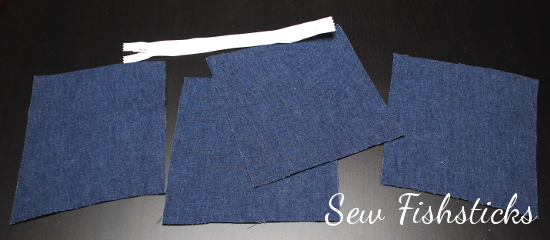
 Time to sew in the zipper! Are you ready? Lay out the pattern pieces for the wrap-around on one leg, and arrange them in order. This photo shows the pieces for the left leg. The front piece is all the way to your left, the two pocket pieces are in the middle (both with right sides facing up) and the back piece all the way to your right. You want your zipper to close with the pull towards the front of the pants.
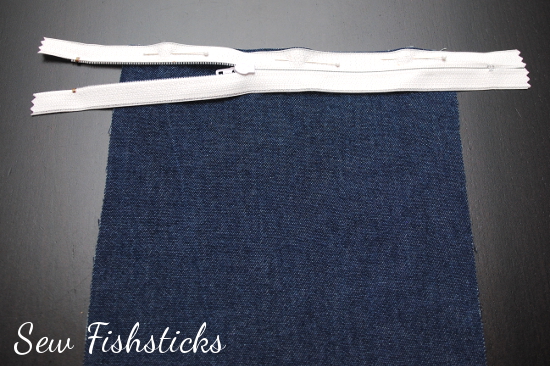
 Set everything to the side except for the front pocket piece. Turn your zipper face down, as shown, on the top edge of this piece and line up the edges. Pin the zipper so that the pin heads will be facing you as you guide the zipper through your machine. That will allow you to remove them as you get to them.
 Put the zipper foot on your machine and adjust the needle so that it falls 1/4″ from the zipper’s outside edge. (Remember this setting because when you sew the other side of the zipper, it will be hidden between two layers of fabric, and you want both sides to be even.) Stitch the zipper in. When you get to zipper pull, backstitch, remove the fabric from the machine, pull the zipper pull past and start stitching again where you left off.
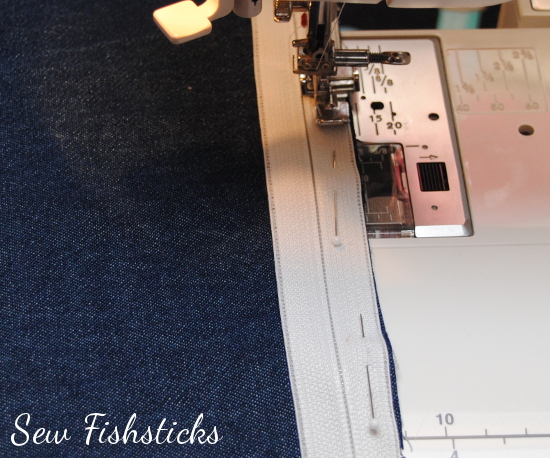 Once you have this side of the zipper stitched in, I like to flip over to the back and trim away some of the fabric so that those raw edges will end up sewn neatly under the zipper when it’s topstitched. (If you don’t do this, those edges may fray with washing and end up getting caught in the zipper teeth. You won’t have to do this on the other side of the zipper since it will be sewn between two layers of fabric.)
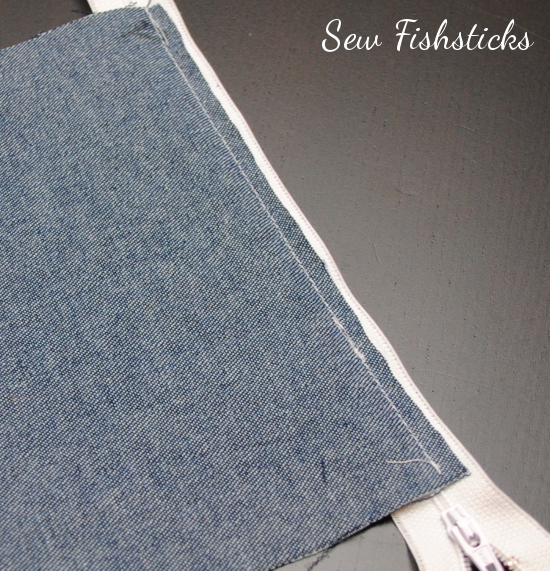
Flip the pocket down away from the zipper and press it lightly. (Be careful because plastic zippers can melt!) Topstitch 1/4″ from the seam.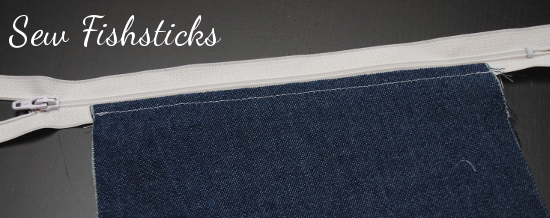 Pull the zipper pull over so that it’s above the pocket and cut away the extra zipper.
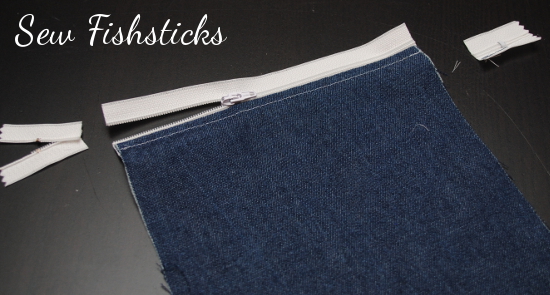 Place the second pocket piece behind the front. Line up the top edge of this piece with the top edge of the zipper and pin. Flip the front piece up at the bottom edge and trim away enough of the bottom pocket piece so that it falls 1/2″ shorter than the front piece. (This will reduce the bulk when you hem the shorts.)
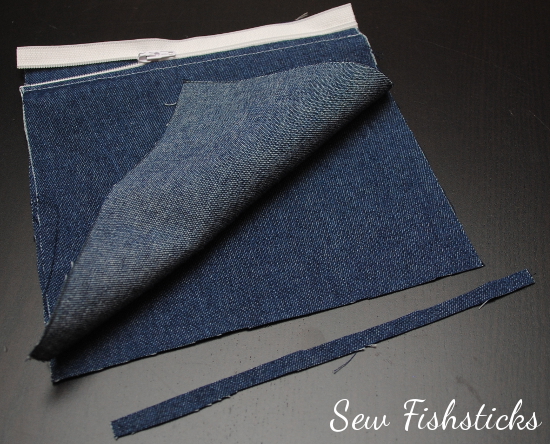 Sew the back wrap-around panel piece to the back side of the pocket. Serge or overcast your seam allowance to prevent fraying. Before sewing the front of the wrap-around to the pocket, pull the zipper pull back and pin the zipper teeth close together.
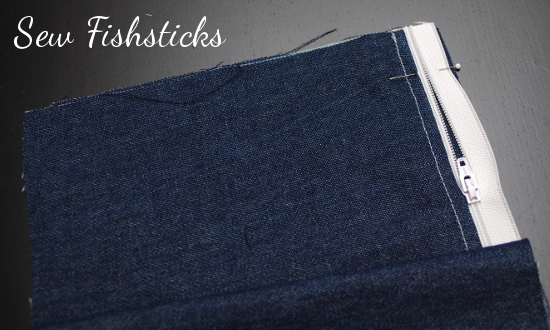 Sew the front of the wrap-around piece to the pocket. Serge or overcast the seam allowances.
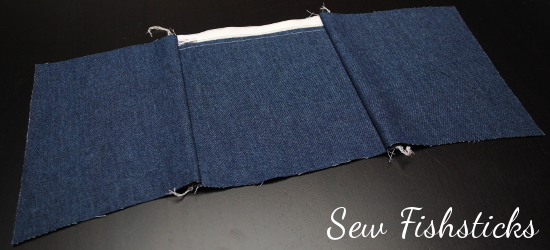 Pull out that twin needle and topstitch down both sides of the zipper. (Or just sew two rows of side-by-side topstitching.)
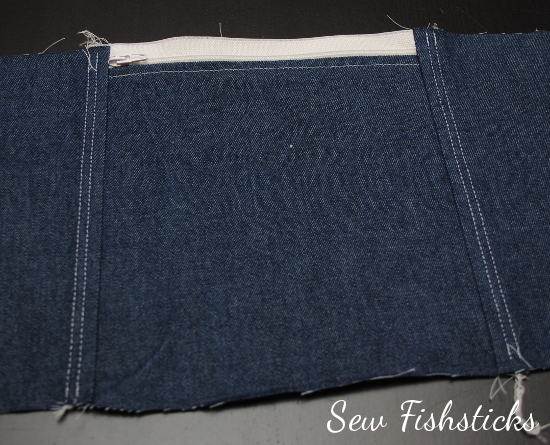 If you haven’t already assembling the top portion of this leg, do so now. (This top portion looks slightly different than the pattern because it’s the modified version that I did for Project Run & Play.)
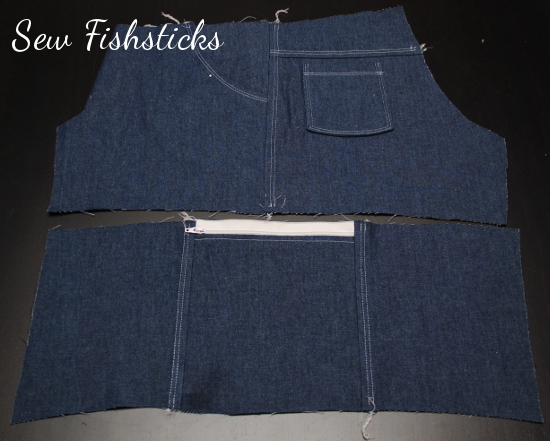 When you pin the wrap-around panel to the bottom edge of the top portion of the leg, pin the top edge of the zipper in the same way that you pinned the bottom edge of the zipper earlier. This time the zipper will be sandwiched between two layers of fabric, so be careful to line up the three edges evenly. Sew the pieces together using your zipper foot with the same settings you used for the bottom of the zipper.
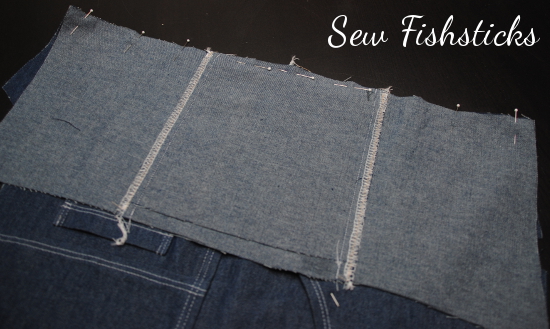 When you overcast or serge this seam allowance, you’ll need to open the zipper, go part-way, stop, pull the zipper past and start again where you left off.
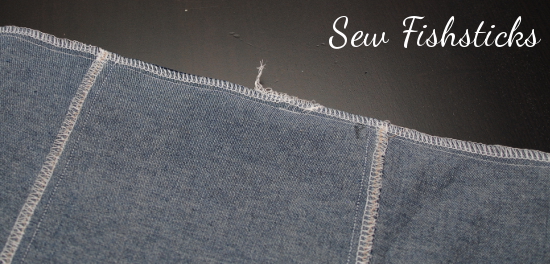 Topstitch above the seam using a twin needle or stitching two rows of side-by-side stitching.
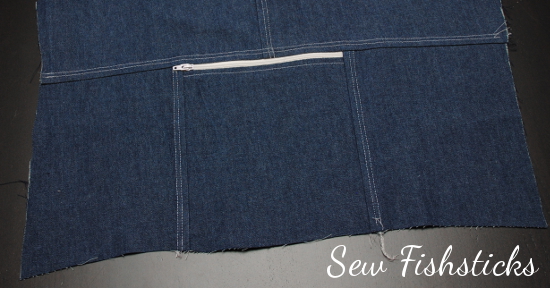 From here, you’ll do the other leg, then follow the instructions in the pattern to complete the shorts. Be careful, though, when you line up the inseams the make sure that the wrap-around seams are lined up as closely as possible.
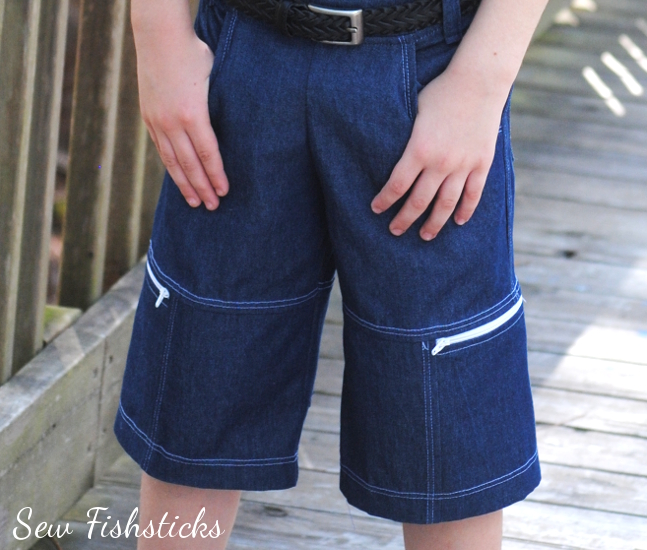 That wasn’t too hard, was it? A few little tips/notes: first, I didn’t put this together in a PDF, but my blog has Print-friendly button at the bottom of each post, that will make it easier for you to print if you prefer. Second, because you’re basically drawing in your pattern and you’re not a computer, you may get edges that don’t quite line up. As long as they’re small pieces, just trim them so that they do line up and move on. Those little tiny misalignments aren’t going to affect the fit of the final piece.
Go sew some cool shorts! And, then share them with us! We would love to see them in the Fishsticks Sewing Group or on the Fishsticks Fan Page or tag me on Instagram!
Go Fish Extra:
Make the OTG Travel Pillow with a Wonky House Pocket
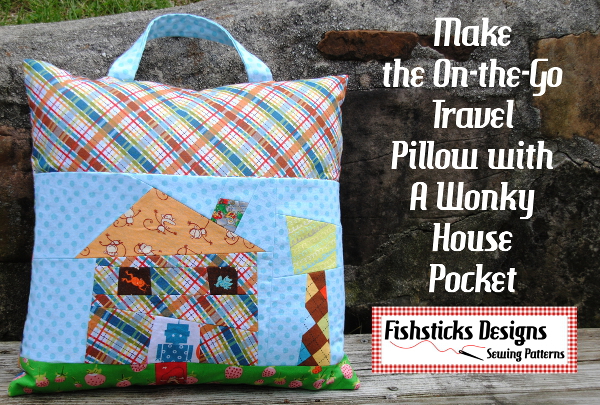 Ready for the next in my Go Fish Pattern “Extras”? This one pairs my Wonky House Quilt block with the On-the-Go Travel Pillow for some extra detail and fun! Find the pattern template and instructions right here: Wonky House Travel Pillow.
Dress Up Your Playhouse Dress!
{Perfect Pattern Parcel/Pattern Extra}
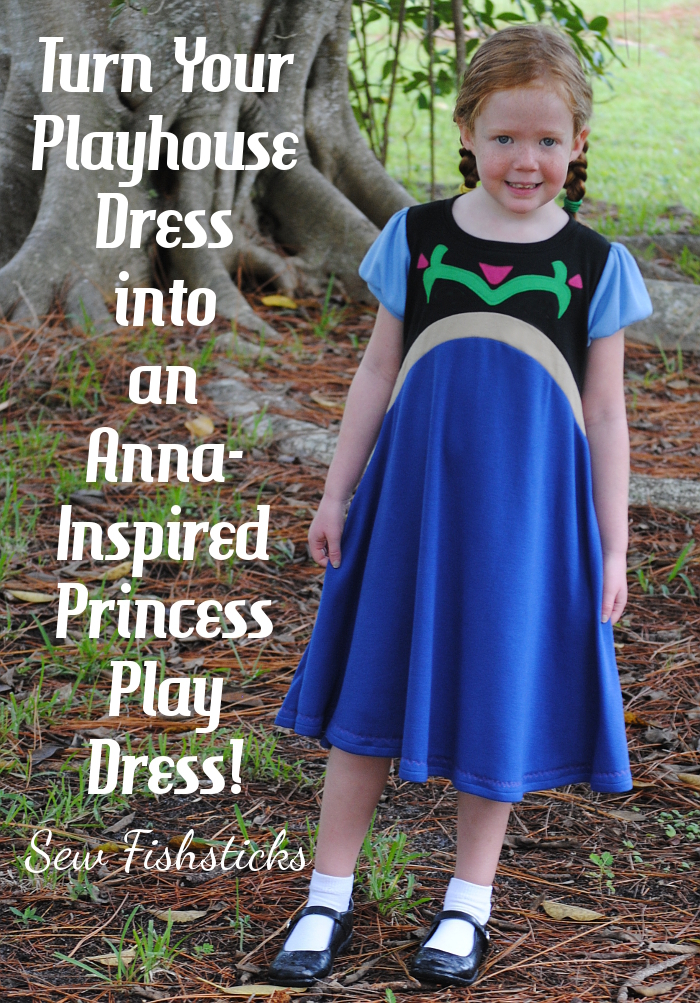 I am so excited that my Playhouse Dress is part of Perfect Pattern Parcel #5!! This collection includes six beautiful and versatile sewing patterns for girls from preschool to preteen.

Here at Perfect Pattern Parcel, we believe in supporting independent pattern designers. It’s our opinion that indie patterns are just, well, better than big box patterns, and we’re pretty sure our customers think so too. So, we allow customers to show their support in naming their own price for each Parcel. We also encourage customers to allocate part of their Parcel price to the charity Donorschoose.org in order to help classrooms in need. Pattern Parcel donates all profits after expenses from Parcel sales to the charity as well. Together we’ve raised over $11,000 for classrooms in need!
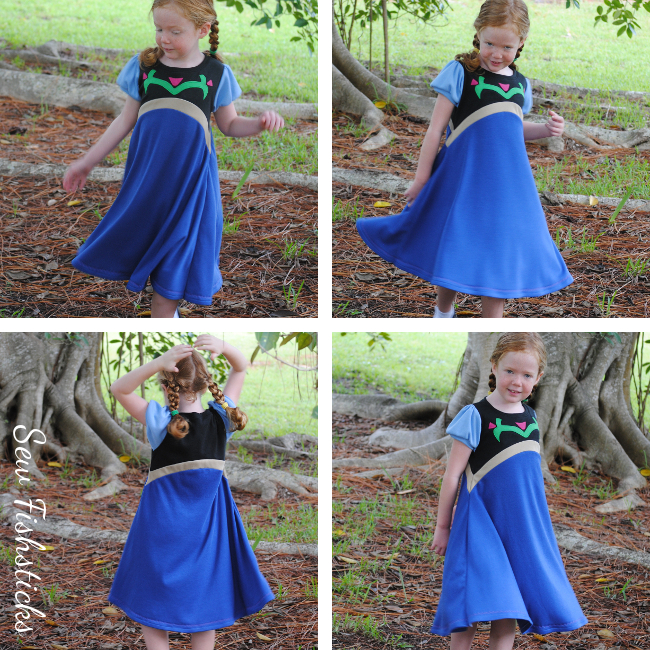
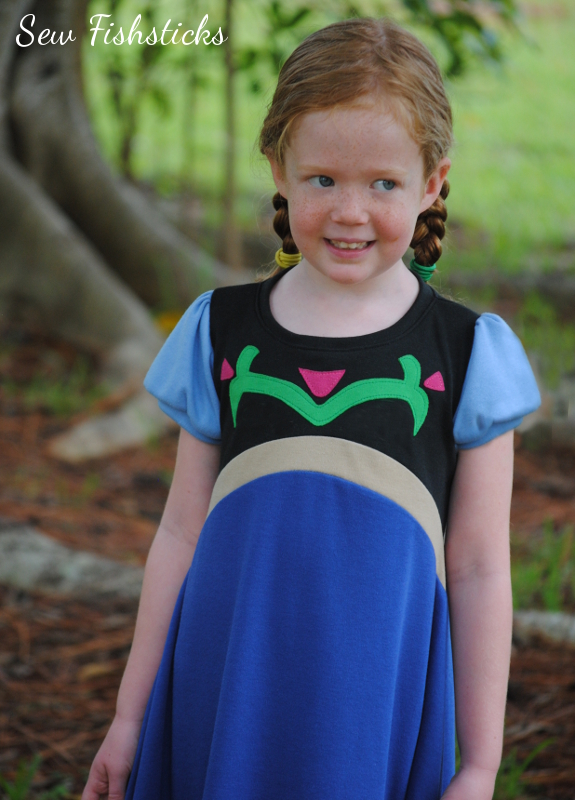 My house is full of little boys, but I’ve heard that there’s this recent movie that little girls have gone a little bit crazy over – a movie about a certain ice princess and her little sister. Because I’m a practical sewist, I don’t generally do costumes, but for our recent trip to the Magic Kingdom, I made a princess-inspired Playhouse Dress for our granddaughter. You can see that dress right here. I love that it’s a play dress that she can wear everyday, but it still makes her feel like she’s dressed up! (If you’ve ever gone to the grocery store with a child in dress-up clothes, I think you’ll totally understand!)
 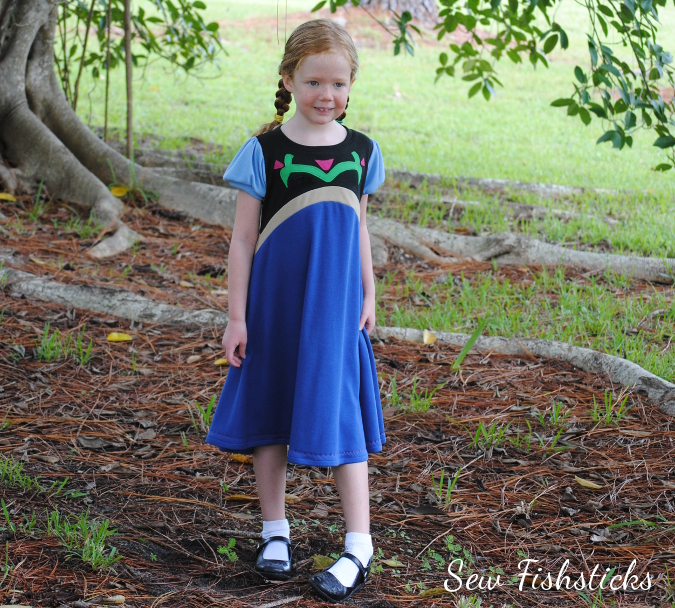 For the Pattern Parcel Blog Tour, I thought I’d show you how you can do the same thing by creating an Anna-inspired Playhouse Dress. I’ve got all of the instructions for you, plus a downloadable PDF for the simple applique.
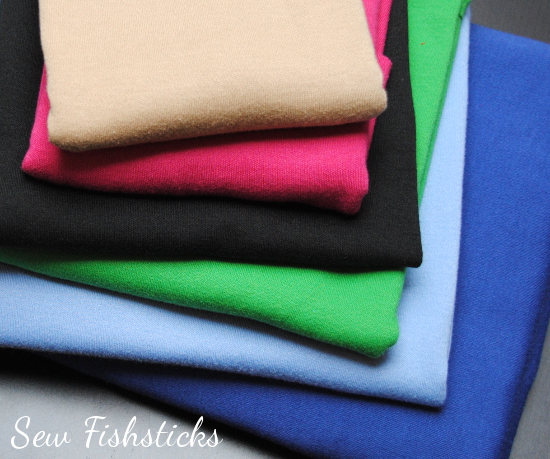
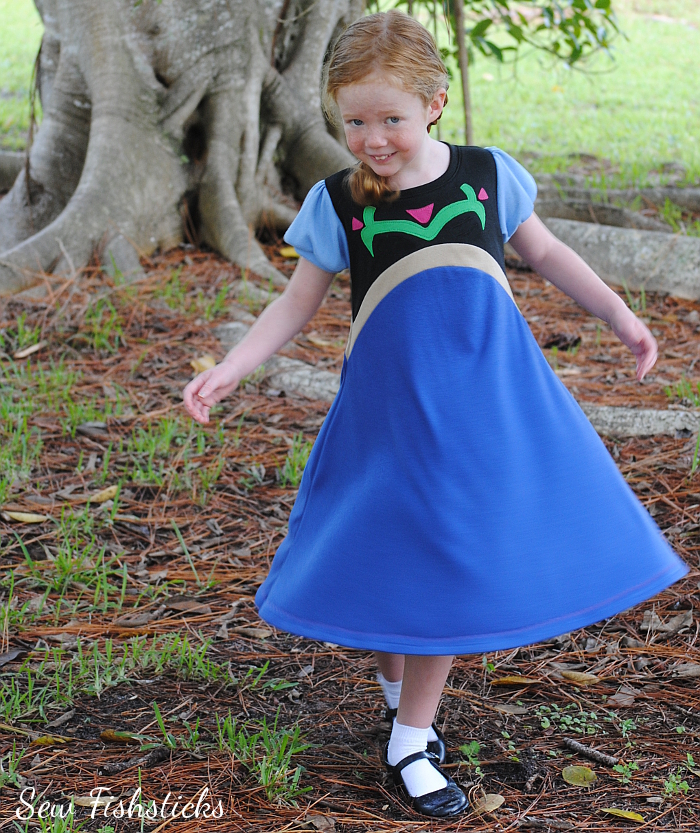 You can sew the Playhouse Dress in a combination of knits and wovens or in all knits. Because I wanted this one to be a casual princess-y dress, I sewed it in cotton/polyester interlocks, and I bought them all at Joann Fabrics. I used Black, Fern Green, Sangria, Cornstalk, Royal and Cornflower Blue.
 Start by printing and assembling your pattern. The Playhouse Dress is one of my updated patterns, so you can choose to print either all sizes of the pattern nested, or just the individual size that you’re sewing. In addition to printing the the entire pattern, you’ll need a second printing of just the top section of the skirt. I’ll explain that a few steps down, though.
You’ll also need to print the applique design. Click here for sizes 12 months to 4 (on sizes 12 months and 18 months, the center flower is left off) and here for sizes 5 to 12.
Finally, you’ll need a sewable, paper-backed, iron-on adhesive for the applique. I used Heat ‘n Bond Lite.
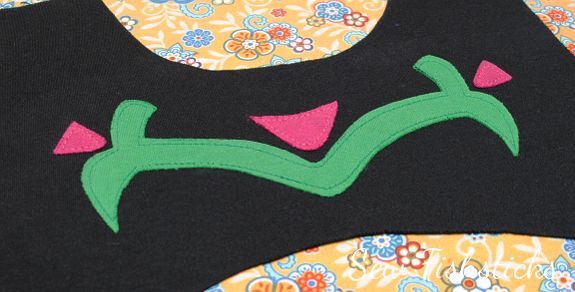
Cut out the front bodice and back bodice of the Playhouse Dress using black interlock. Prepare your applique pieces following the instructions for the iron-on adhesive that you’ve chosen. Use pink fabric for the flowers and green for the vine. I traced my pieces onto the paper backing of the Heat ‘n Bond, then ironed the adhesive to the fabric and cut out the pieces. Once you have all of your pieces ready to be ironed on, place them on the front bodice piece, checking to make sure that everything fits well within the 1/2″ seam allowance and all the pieces are centered properly.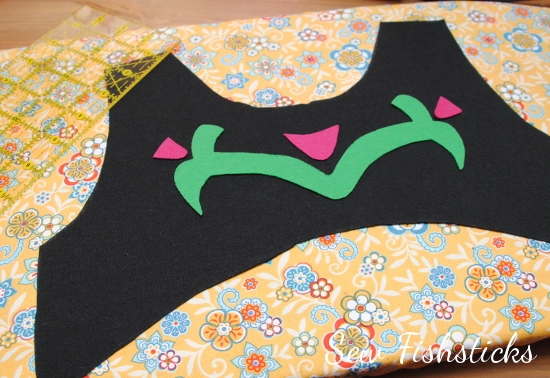 Remove the flowers, and iron on the vine. Depending on the adhesive that you’ve chosen, you may be able to move on to the flowers from here, but the adhesive that I’m using requires that the edges be stitched down. We’re working with knit fabrics that don’t fray, so I’m just going to stitch all the way around 1/8″ from the edge. Those small curves can be tough to go around. Set your stitch length fairly short, sew slowly, and try not to make sharp turns on the curves. Turning the fabric a little bit with each stitch will give you a nicer curve. If you use a matching thread, this doesn’t have to be absolutely perfect stitching.
 Once your vine is done, add your flowers, one at a time.
 Set the bodice pieces aside so that we can work on the skirt. To create the faux sash, you’ll basically be adding a strip of fabric to the top of your front and back skirt pieces. I made my sash 1″ wide finished. The easiest way to do this is to go back once you’ve printed the whole pattern, find which pattern pages to print for just the top portion of the skirt, and print a second set of just those few pages. (You’ll need at least 2″ of the top of the skirt.)
 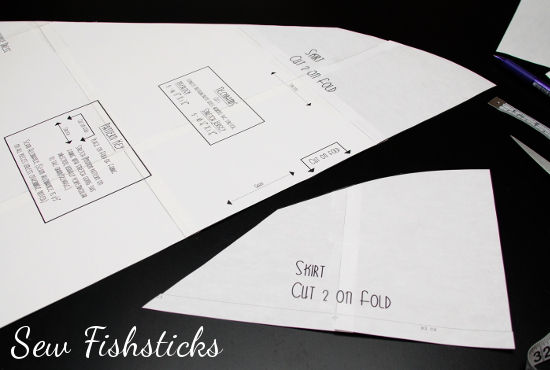 Measure down 1″ from the top of the full skirt pattern and draw a second curve. Use the partial skirt pattern to help draw the curve.
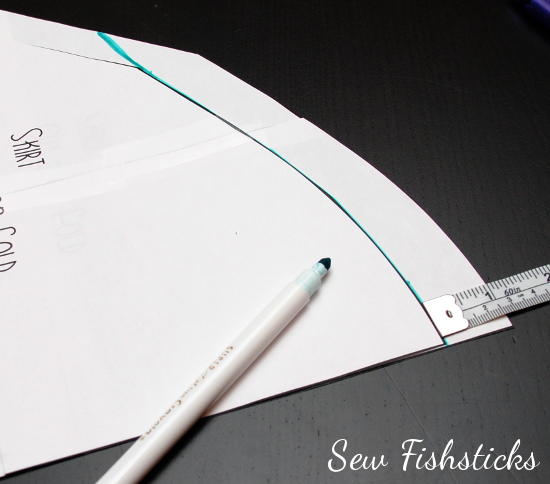 Measure down 2″ from the top of the partial skirt pattern and draw a second curve. Use the full skirt pattern to help draw the curve.
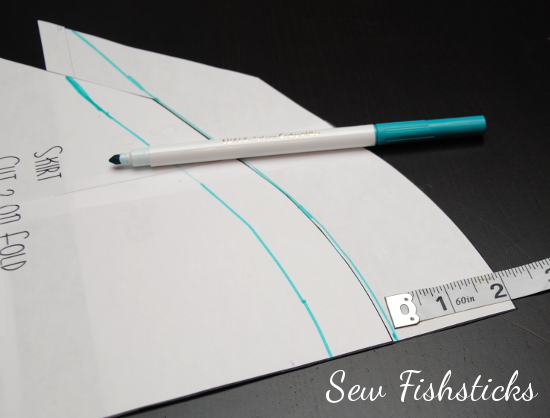 Cut the top 1″ away from the full skirt pattern and discard it. Cut the top 2″ from the partial skirt pattern and keep it. You’ll end up with a full skirt pattern that is 1″ shorter than it originally was and a 2″ “sash” pattern.
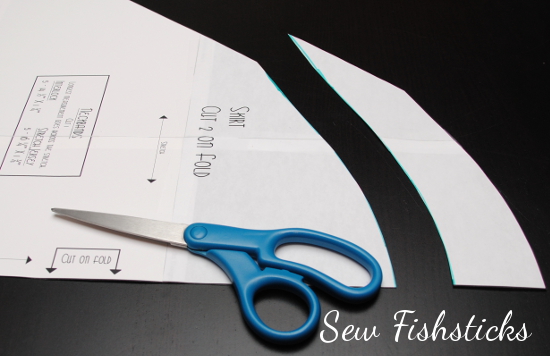 Cut the full skirt pattern from royal blue interlock and the sash pattern from tan or gold interlock – two of each, one for the front and one for the back of the skirt. Pin the bottom edge of each sash piece to the top edge of a skirt piece with right sides together. Start pinning at the center, and gently ease the two curves together as you go.
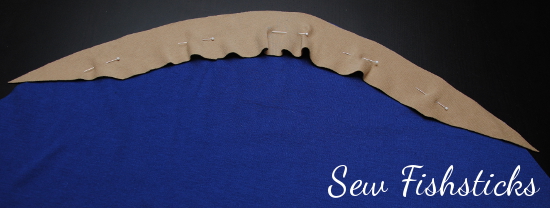 The edges of the sash will overhang a little. When you stitch the two pieces together, your stitching should go right down the center of the points on each side.
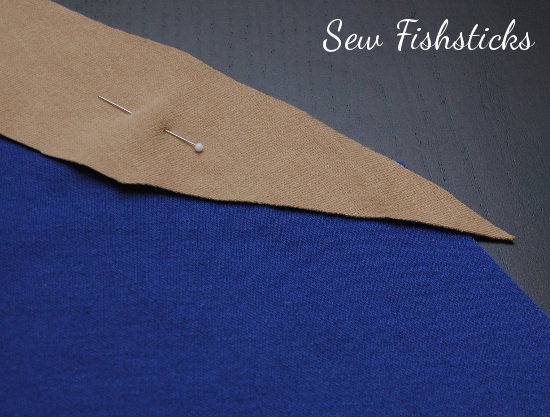 Once these pieces are sewn together, press the seam allowances toward the bottom of the skirt. If you end up with any overhanging fabric on the sides, just trim it away so that the sides are straight again.
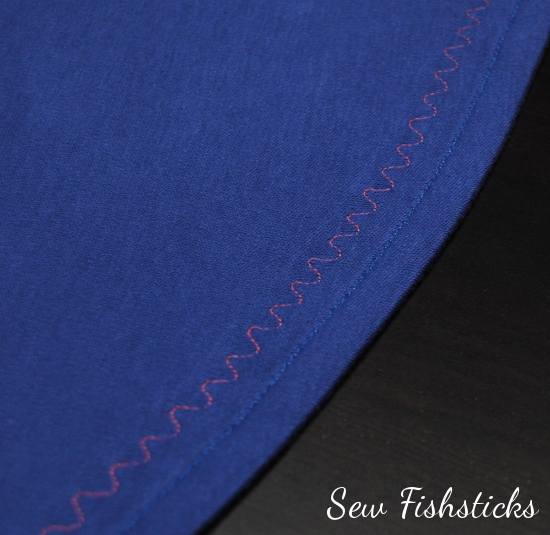
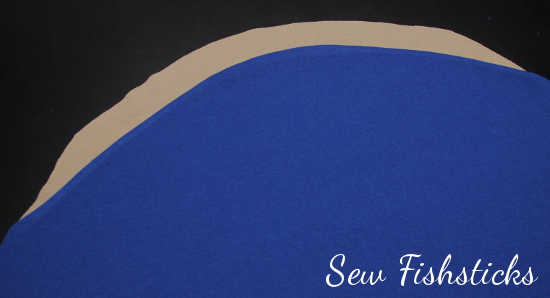 From here, you’ll cut your remaining pieces and follow the instructions for assembling the dress. I added a decorative stitch just above the hem on my skirt pieces.
 When you sew the sides, be careful to line up the points so that you get two nice “V”s on both sides. I found that it was easiest to pin and sew those areas with a long stitch, check the alignment, then serge or sew with a tight finishing stitch once I was happy with how the sides looked.
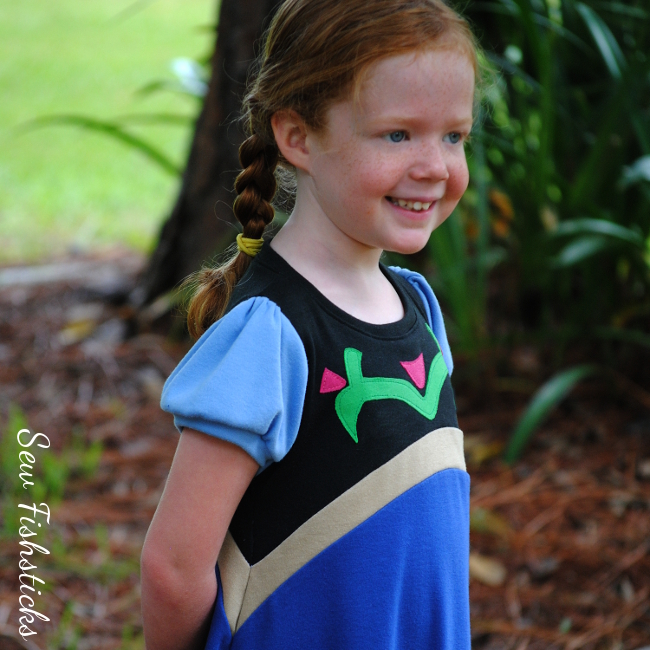 And, that’s it! Your sewing is done, and your little fan of all things Frozen is happy enough to twirl all day!! (Huge thanks to our friends’ daughter, E, for being such a beautiful model for me. I hope you enjoy your Anna Dress!)
 THE PATTERN PARCEL…
Parcel #5: Girls and Tweens includes:
Lily Knit Blazer by Peek-a-Boo Patterns
Everyday Yoga Pant for Girls by Greenstyle
Asymmetrical Drape Top by EYMM
Playhouse Dress by Fishsticks Designs
Mimi Dress and Shirt by Filles a Maman
BONUS PATTERN: Sunki Dress by Figgy’s
Bonus Pattern:
Choose a price of $28 or greater for Parcel #5 and you will automatically also be sent the Bonus Pattern. The Bonus Pattern for this Parcel is the Sunki Dress by Figgy’s. The pattern includes both size runs, so you get 18 months through a 16 tween sizing.
Follow the rest of the tour for more inspiration:
Friday, September 19: Pienkel || Cookin’ and Craftin’
Saturday, September 20: The Life Of A Compulsive Crafter
Sunday, September 21: Keep Calm and Carrion || Felt With Love Designs
Monday, September 22: Radiant Home Studio || Sewing Sober
Tuesday, September 23: Sew Fishsticks || La Pantigana || Amanda Rose
Wednesday,September 24: Shawnta Sews || Sprouting JubeJube || Knot Sew Normal
Thursday, September 25: Make It Perfect || Mimi’s Mom || Climbing the Willow
Friday, September 26: Needle and Ted || Our Family Four
Saturday, September 27: Froo & Boo
Sunday, September 28: Stitches by Laura || Vicky Myers creations
Monday, September 29: Cookin’ and Craftin’ || The Crazy Tailor
Tuesday, September 30: mama says sew || FABulous Home Sewn || The Inspired Wren
Wednesday, October 1: lady and the gents || That’s-Sew-Kari || Sewing Sober
Thursday,October 2: Gracious Threads || Blogs Like A Mother || SewsNBows
Friday, October 3: sew chibi || Lulu & Celeste || Made by Sara
The Holiday Kitchen Gift Set Tutorial
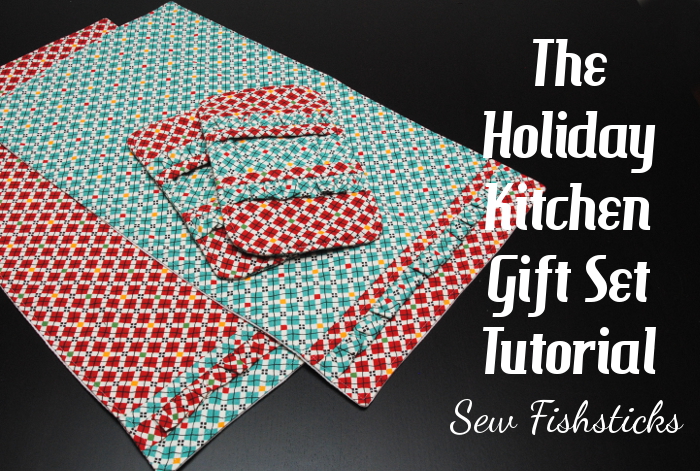 Thanksgiving and Christmas are right around the corner! I know, I know, I’m not sure that I’m ready to hear that either, but I love making handmade gifts, and every year I think if I just get started sooner, I won’t be sewing until 1 a.m. on December 25th! Maybe I’ll actually start early this year? At least I can help you start early! This tutorial is one that I shared at Skip to My Lou last year for the Holiday Bake, Craft and Sew-along, but I just finished putting the whole thing together for you in PDF form to make it easy to download, print and sew!
To download the tutorial, just click here: Holiday Kitchen Gift Set. Be sure to save the file to your computer before you print the pattern.
In case you prefer to read the tutorial here on my blog, here it is for you:
Are you looking for the perfect thank-you gift for all of those holiday party hostesses? The Kitchen Gift Set might be just what you need! The set includes fold-over, oven-mitt potholders (my favorite kind) and matching dishtowels.
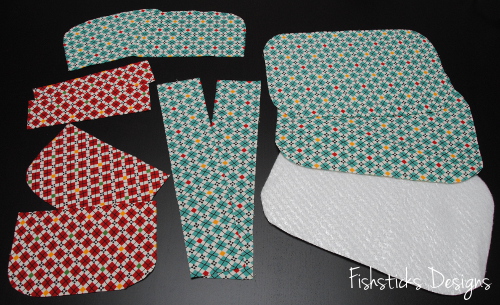
You’ll be able to get two matching potholders and two coordinating dish towels from one yard each of two coordinating cotton prints. You’ll also need 1/4 yard of Insul-Bright or another insulating fleece for the potholders and 1 yard of absorbent cotton fabric for the backing of the dishtowels (diaper fabric, waffle weave, pique, huck toweling, etc.)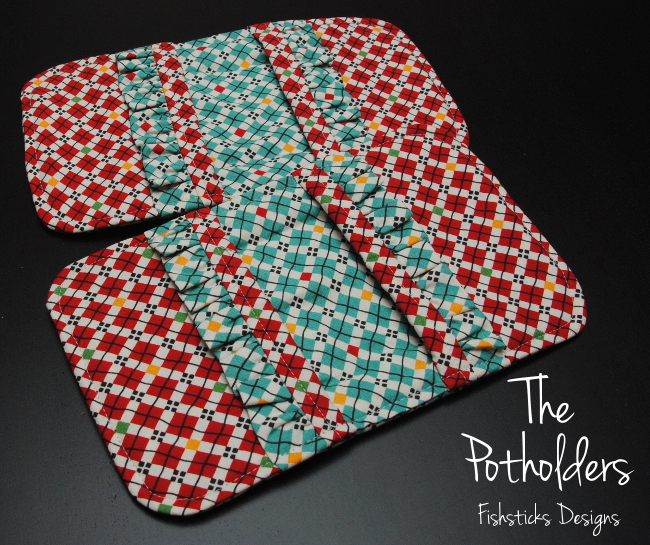 Let’s start with the potholders! You’ll need the pattern pieces found here: Potholder Pattern Pieces. (Be sure to print that “actual size” and check the measurement of the 2 1/2″ square.) Cut out all of your pieces. For each potholder, you’ll cut 2 pocket pieces of Fabric A, 2 pocket pieces of Fabric B, 2 base pieces of Fabric B, 2 base pieces of Insul-Bright, 2 trim pieces – 7″ x 2″, and 2 ruffle pieces – 12″ x 2 1/2″.
 Fold each of your ruffle pieces over with the wrong sides together and match up the long edges. Press well.
 Sew two rows of basting stitches (the longest stitching your machine allows) along the long raw edges — one at 1/8” and one at 1/4”—leaving the threads on each end 2 to 3 inches long.
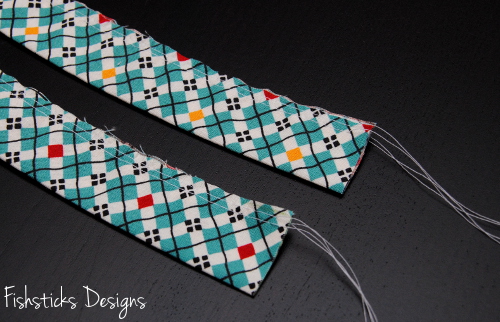 Pull the bobbin threads from each end to gather each ruffle until it is the same length as the trim piece.
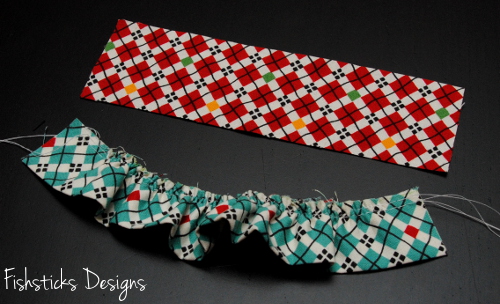 Set one ruffle aside. Pin the gathered edge of the remaining ruffle to the right side of one trim piece along one of the long edges. Check to make sure that your gathers are evenly divided. (You can baste here if you’d like.)
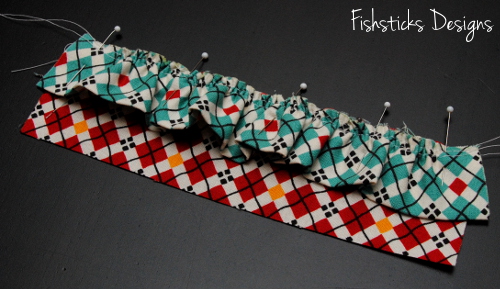 Place one of the Fabric A pocket pieces on top so that the right sides of the trim piece and the pocket piece are together and the ruffle is sandwiched between. Line up the edges as shown and pin in place.
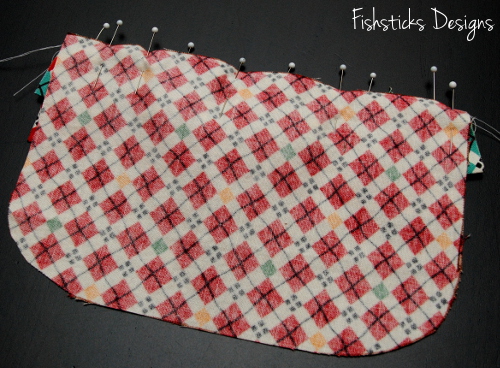 Sew the pinned edge.
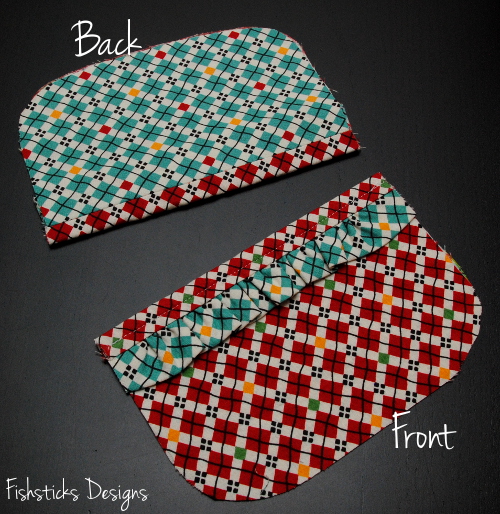
 Flip the pieces to the right side and press the ruffle towards the curved edge of the pocket piece while pressing the seam allowance in the opposite direction. Topstitch 1/4″ from the top edge of the ruffle.
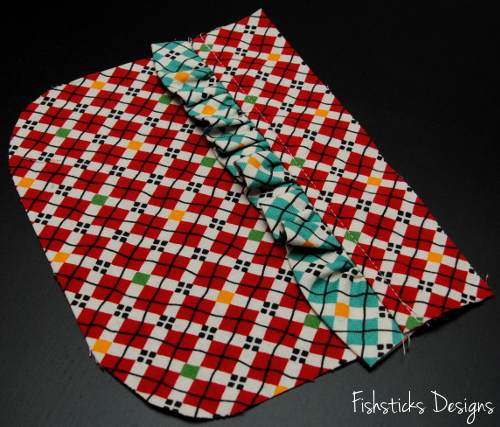 If you find that you have small spots on each side where the ruffle sticks out. Just flip the pocket piece over and trim those off.
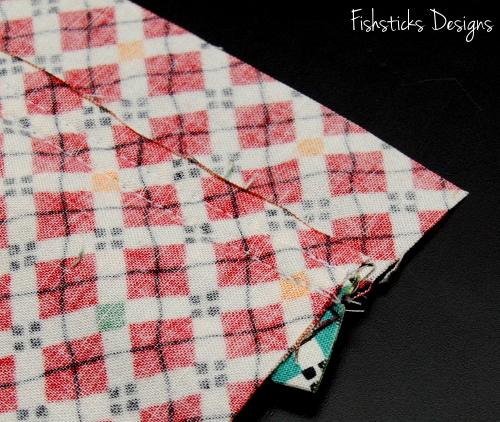 Pin the long edge of one Fabric B pocket piece to the remaining raw edge of the trim piece with the right sides together. Sew the pinned edge.
 Flip the pieces apart and press the seam allowance toward the ruffle.
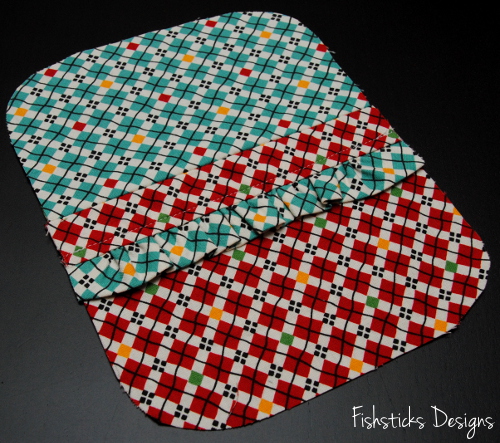 Fold the pocket over so that the wrong sides are together and the curved edges are all lined up. Press well. Follow the same steps to assemble the remaining pocket.
 Set your pocket pieces aside for now. Take one of your base pieces and draw a quilting grid on the right side of it. I used one of my Frixion pens to do this, but you can use a washable or disappearing marker, as well. I placed my lines 1 3/4″ apart, starting from the center in each direction.
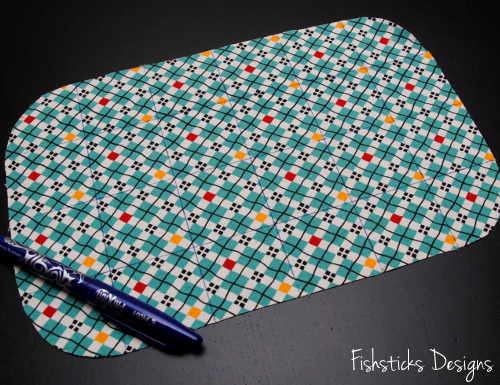 Pin this piece on top of the two layers of Insul-Bright.
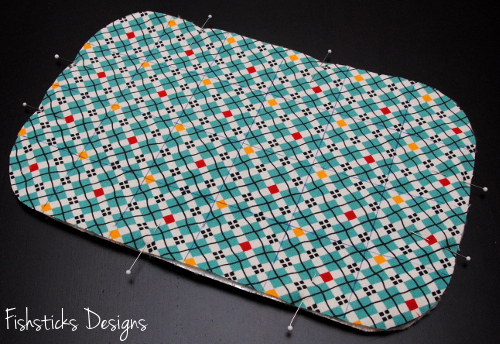 Stitch down each line, starting with the center line and working out. (If your machine has a walking foot, use it for this step and the remaining steps to help keep your fabrics from slipping while you’re sewing.)
 Place your finished pocket pieces on top of the remaining base piece, lining up the curved edges as shown.
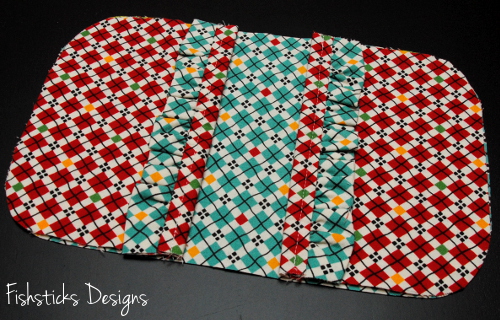 Flip the quilted base piece/Insul-bright over on top of these so that the right sides are together and the pocket pieces are sandwiched between. Pin in place.
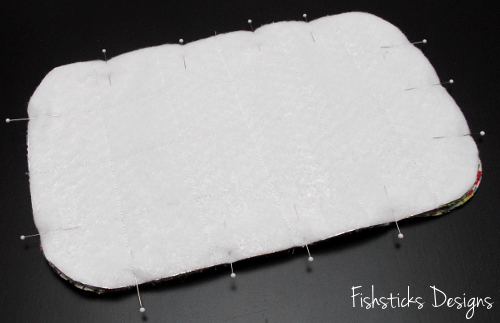 Stitch all the way around, leaving an opening for turning in one short end. Clip or trim the curves before turning right side out.
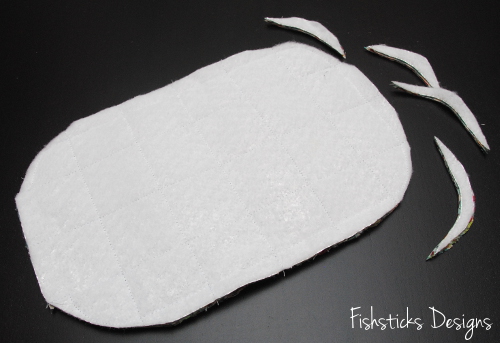 Turn through the opening and push the corners out neatly. Tuck the raw edges of the opening in and press well. Pin the opening closed.
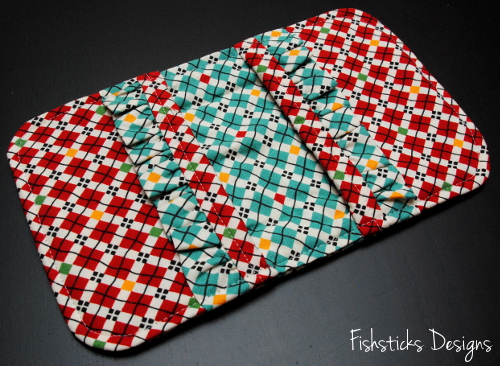
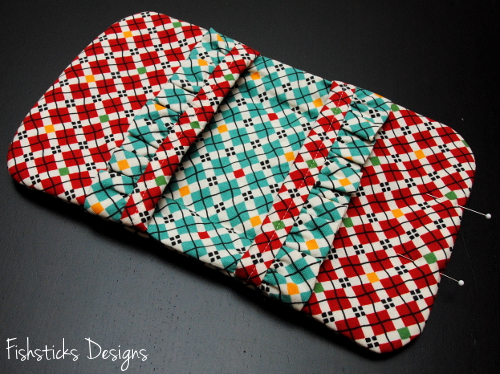 Topstitch all the way around at 1/4″. (In addition to using your walking foot for this step, a denim needle will help to prevent skipped stitches when going over the thick areas.) Your first potholder is done! Now you just need to make it a mate.
 Let’s move on to the dish towels!
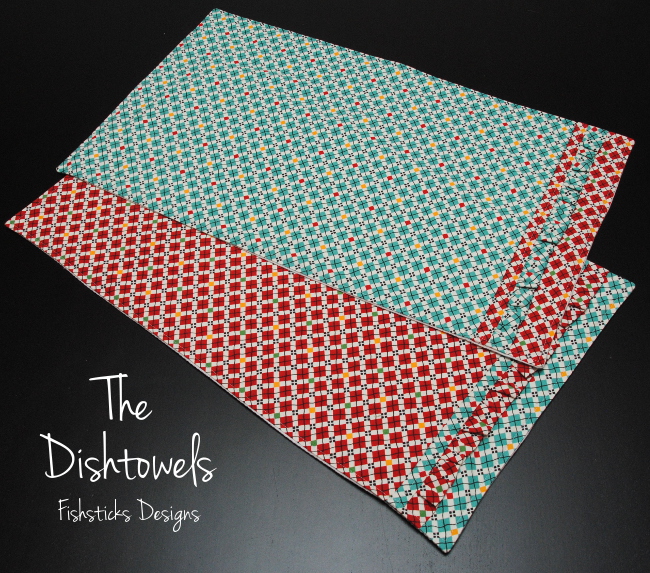 Start by cutting out your pieces. You’ll need a layer or two of absorbent fabric. (I’m using two layers of diaper cloth from Joanns. Be sure to wash and dry all of your fabrics before getting started!) For each dishtowel, you’ll cut these pieces: 1 or 2 layers of absorbent fabric – 23 1/4″ x 14″ (if you cut two layers, you’ll treat them as one from here on), 1 Fabric A main piece – 21″ x 14″, 1 Fabric A ruffle piece – 22″ x 2 1/2″, 1 Fabric B large trim piece – 3″ x 14″ and 1 Fabric B small trim piece – 1 1/2″ X 14″.
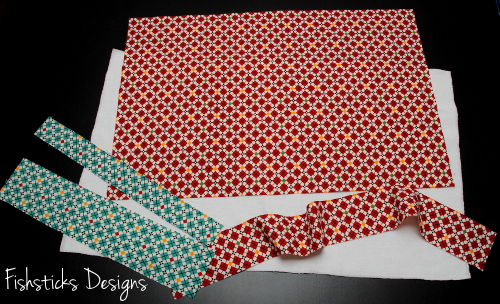 Follow the same steps that you used for the potholders above to create your ruffle.
 Pin the gathered edge along one long edge of the smaller trim piece on the right side.
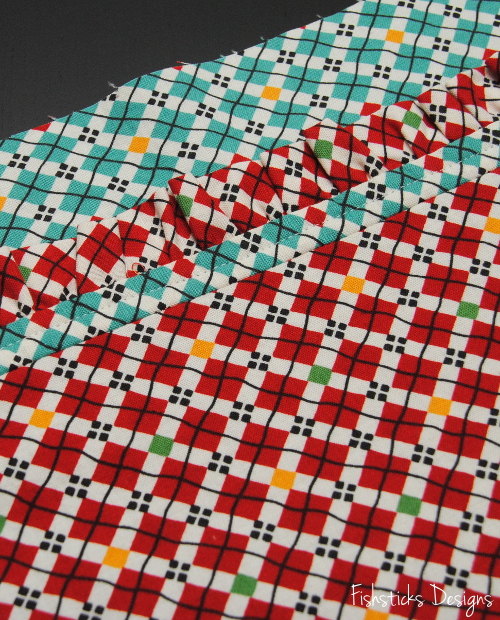
 Place the larger trim piece on top so that the right sides are together and the ruffle is sandwiched between. Line up one of the long raw edges of the larger trim piece with the pinned edges of the ruffle and smaller trim piece and pin in place. Sew along the pinned edge.
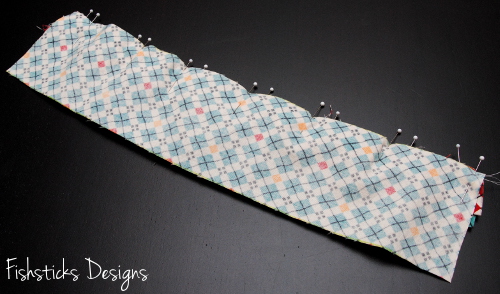 Flip the pieces over to the right sides. Press the ruffle towards the larger trim piece with the seam allowance in the opposite direction, but do not topstitch yet.
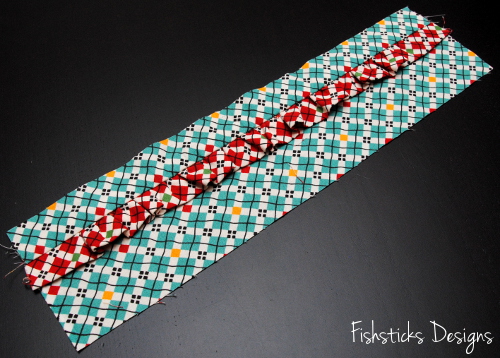 Line up the remaining long raw edge of the smaller trim piece along one short edge of the main towel piece with the right sides together. Pin and sew.
 Flip the pieces apart and turn to the wrong side. Press this seam allowance over the seam allowance from the ruffle.
 Flip back over to the right side and topstitch 1/4″ from top of the ruffle.
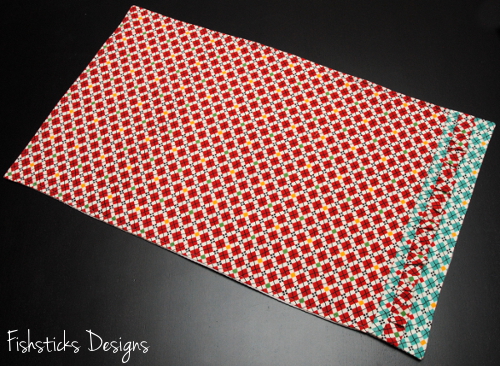
 Place the finished top face down on your absorbent layers so that the right sides are facing. Pin.
 Stitch all the way around, leaving a 4″ opening in one side for turning. Clip the corners.
 Turn the towel through the opening. Push the corners out neatly and tuck the raw edges of the opening inside. Press well and topstitch all the way around at 1/4″. Your dish towel is done! Make a second one if you’d like, and your Kitchen Gift Set will be ready to gift to your favorite hostess!
RBD Flannel Showcase Blog Tour: Reversible Button Bibs
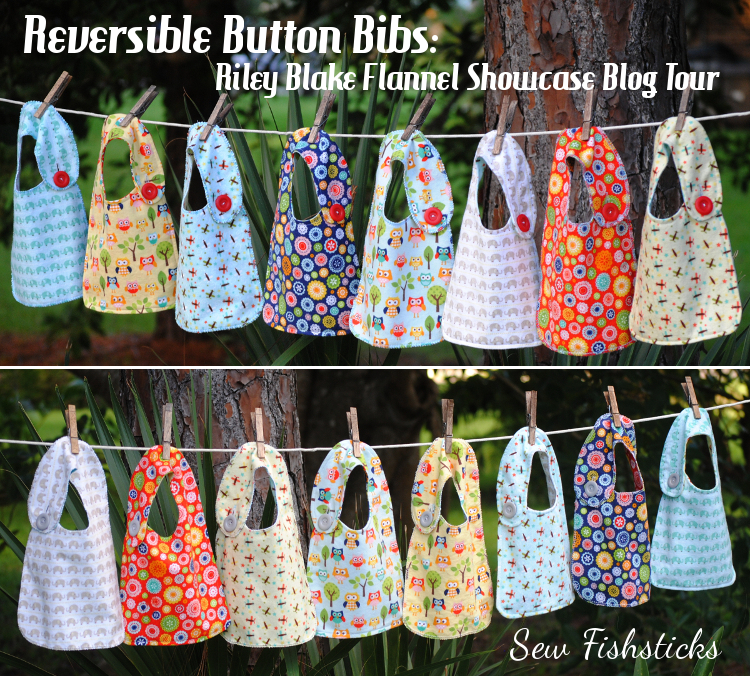 I’m up on the Riley Blake Designs Flannel Showcase Blog Tour! Over the next few months, sewing bloggers will be featuring some of their favorite ways to use flannel fabric in handmades, all using Riley Blake’s great selection of cotton flannel fabrics. RB’s flannel fabric is a favorite here in our house because it has that wonderful soft brushed feel, and it stays that way wash after wash.
 Because it’s 100% cotton and thicker than quilting cotton fabrics, flannel is not only soft, but it’s absorbent, too. That makes it a great choice for those sweet and darling but very drool-ly and spit-uppy babies! Anyone who has spent time with a newborn knows that a collection of absorbent drool bibs makes life much cleaner and drier. Thankfully, bibs are quick and simple to sew, so you can have a stack done in no time, and making them reversible for two looks in one is just as easy. I thought I’d take advantage of the blog tour and show you how!
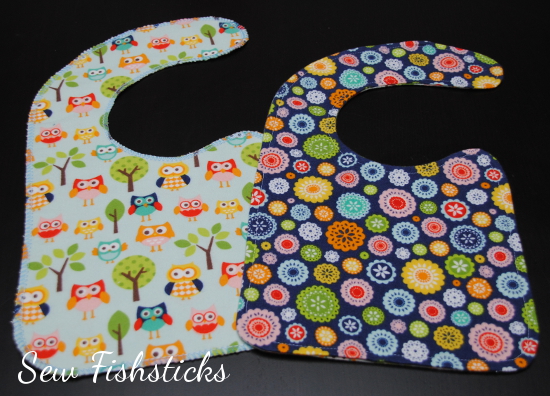
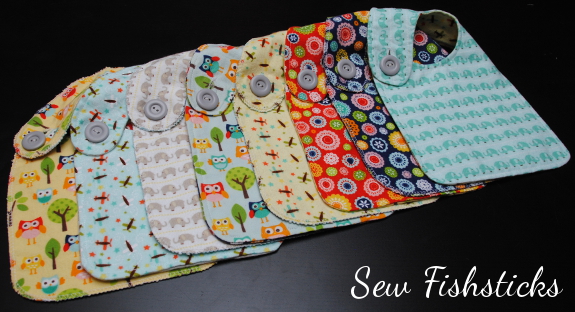 We’re going to start with my free Bibs in All Sizes pattern. To download the pattern, just click here, scroll down to the red link at the bottom of the post and click again. Be sure to save the file to your computer before printing the pattern. In order to make these reversible, I replaced the waterproof backing with another layer of flannel. If you wanted to make these waterproof, though, you could hide a waterproof fabric inside. Follow the instructions for cutting out and assembling your bib, either sewing it with your machine or serging it. (I’m using the infant size here, but toddler, big kid and adult sizes are all included in the free pattern.)
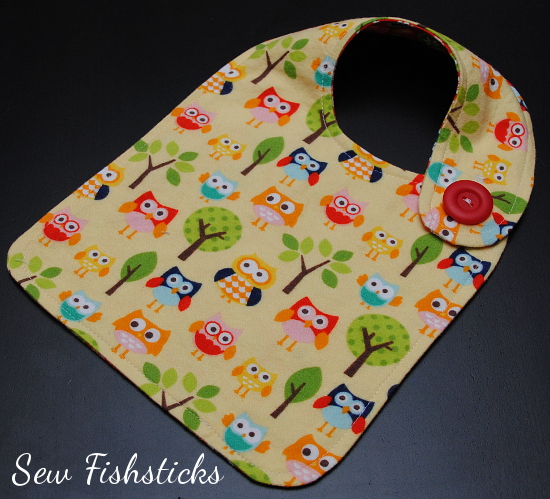
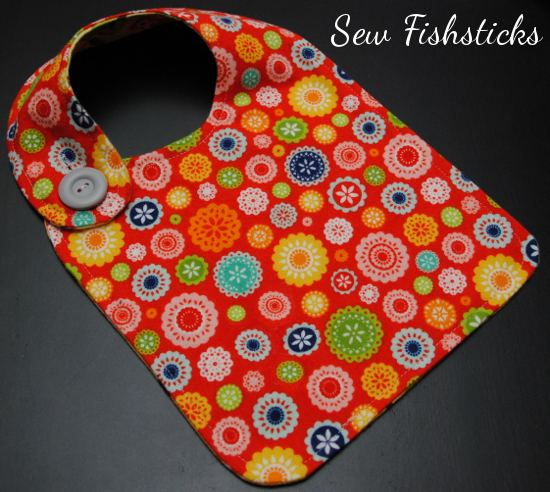
 From here, we’ll be adding buttons for fastening rather than the snaps called for in the pattern. For these bibs, I used Riley Blake’s Matte Finish Buttons in Gray and Red.
Measure in from the end of the snap strap ½” on the Infant Size (1″- Toddler, 1 ½”- Big Kid Bib) and mark the center point. This will be the beginning of your button hole. Draw a vertical straight line 1/4″ longer than the width of your button to mark your button hole. Stitch your button hole. (Refer to your machine’s manual for using your automatic button hole attachment.)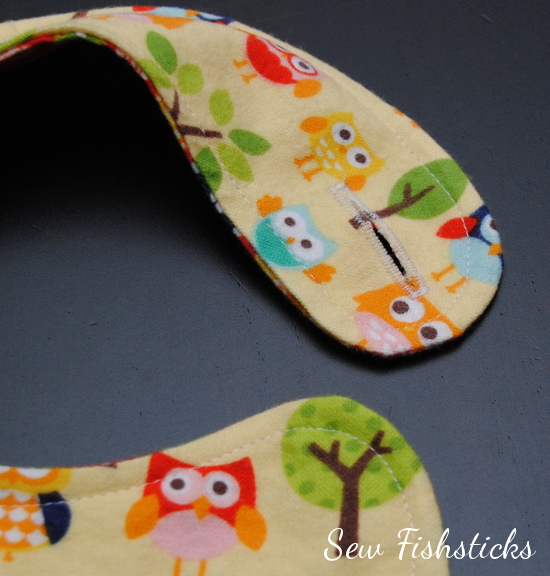 We’re going to sew two buttons back to back so that each side has it’s own button. When you do this, you have to add some space between the buttons to keep them from being too tight. (If you just sewed them back to back without some wiggle room, you wouldn’t be able to pull the buttons through the button hole.) If you have a chopstick (or what I often refer to as a corner-poker-outer) handy, that will work beautifully! Place the chopstick on the front side of the bib, centered on the little hump where you’ll be sewing your buttons.
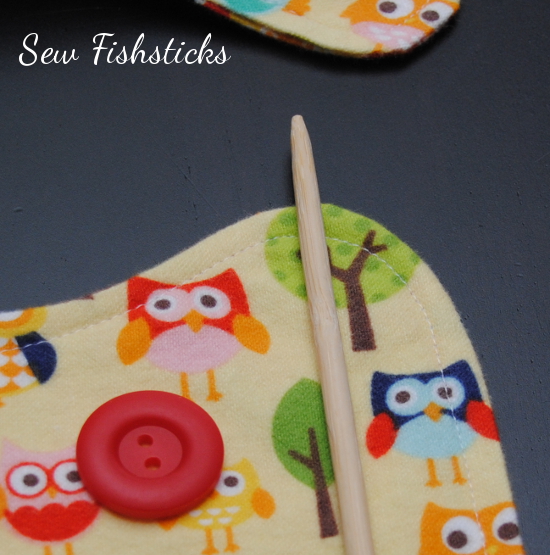 Place the first button on top of the chopstick, just below your topstitching or serger threads. Grab your hand needle and thread, and thread the needle, pulling the thread ends through so that you’ll be stitching with two thread lengths at once. Tie a generously-sized knot in the end of your thread. Pull the thread through from the back into one hole in the button, out the opposite hole and back through to the back of the bib. Be sure that your knot is snug against the back of the bib.
 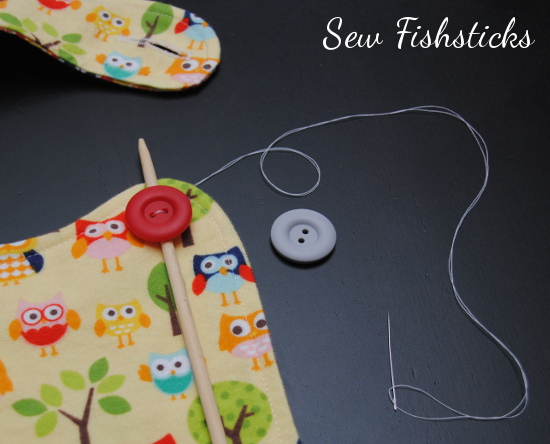 Slide your second button onto the needle and pull it all the way down against the back of the bib, lining it up behind your first button. Poke the needle through the opposite hole in the back button and through the matching hole on the front button.
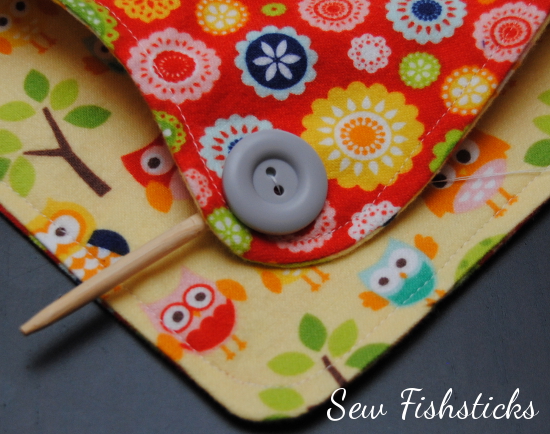 Continue stitching through the two buttons with the chopstick between until your button is well secured. (An important safety note: These buttons must be attached securely and firmly. Be sure to check them regularly. Never ever leave a baby or child alone or sleeping while wearing a bib.)
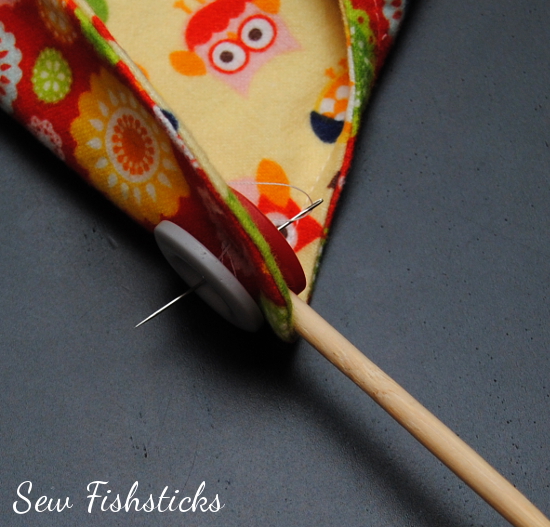 Pull out the chopstick and slide the needle under the threads in the back. Tie a knot around these threads and knot again several times. Trim away the extra thread.
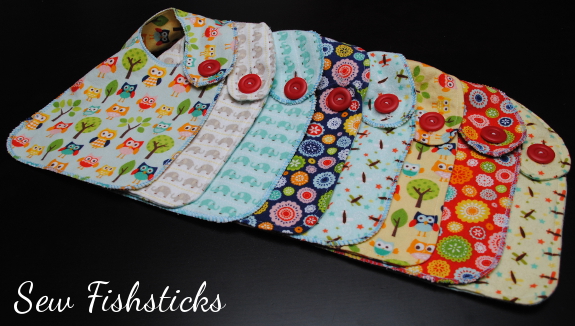
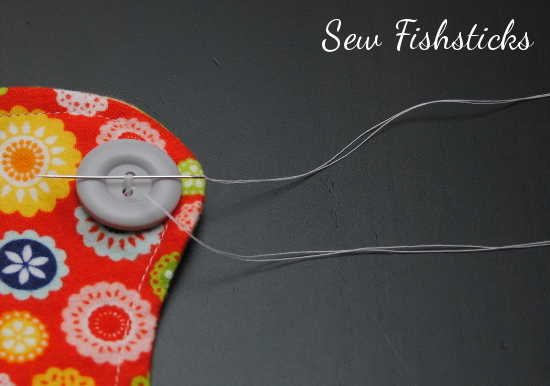 Button your bib on the front side ….
 …or flip it over and button it on the other side!
9/9 Quiltscapes
9/12 Fishsticks Designs
9/23 Sassy Quilter
9/26 Simple Simon & Co.
9/30 Fabric Mutt
10/3 Just Let Me Quilt
10/7 Jedi Craft Girl
10/10 Rose and Odin
10/14 Sew We Quilt
10/17 Haberdashery Fun
10/21 Leigh Laurel Studios
10/24 The Cottage Mama
10/28 Flannel Queen
10/31 Lucy Blaire
The Casual Straight Skirt Tutorial @ Cutting Corners College
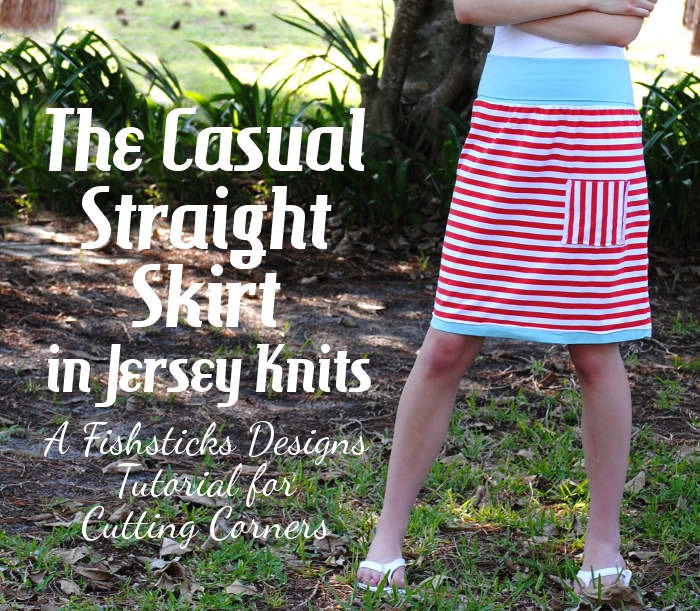 I’ve got a brand new tutorial up at Riley Blake’s Cutting Corners College! The Casual Straight Skirt is a stylish and comfortable skirt that sews up in no time at all.
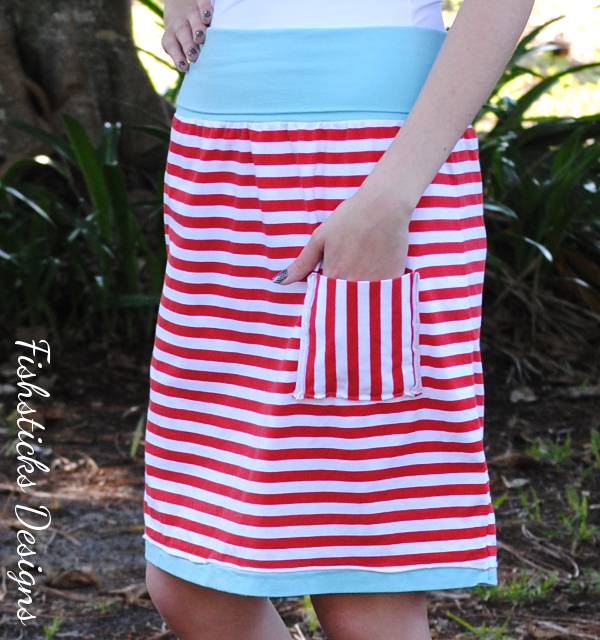 The skirt is made with stretch jersey and takes advantage of those great curling edges in some fun details, and you can make it to fit from toddler to misses with just a few measurements!
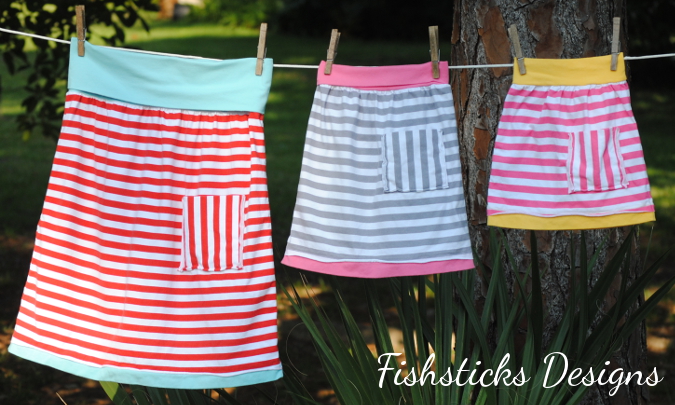 Find the tutorial right here: The Casual Straight Skirt in Jersey Knits.
DIY Framed Fabric Bulletin Board
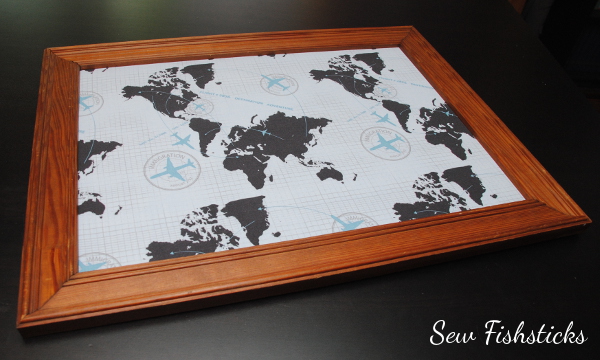
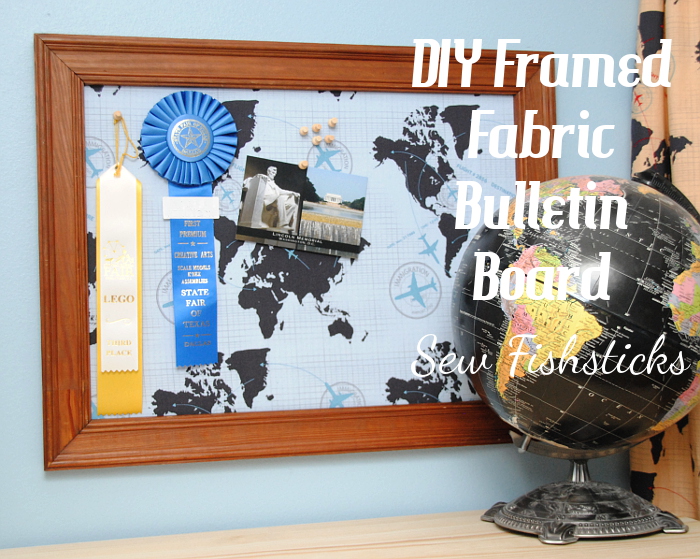 This is a simple and quick project that is as pretty as it is practical! It’s a great way to showcase a favorite piece of fabric, and you can make it any size you like. To see the one above in our newly re-decorated boys’ room, just click right here: All Around the World Boys’ Room.
The supply list:
a frame (We found ours at a thrift store.)
a piece of foam board slightly larger than the frame
a piece of fabric large enough to cover the the foam board and wrap around to the back
duct tape
picture hangers (I used D-ring hangers on ours.)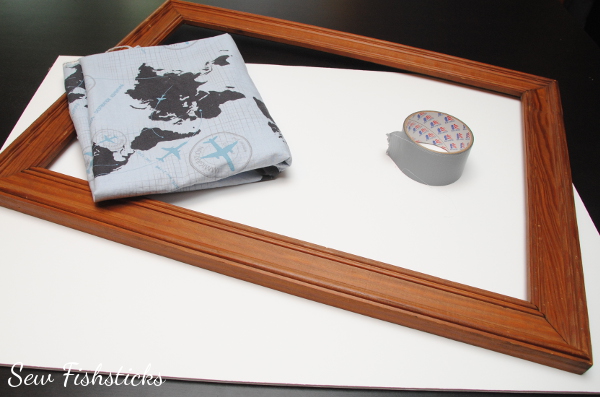 Slide your empty frame over the piece of foam board and shove the foam board tightly into one corner. One top and one side should be firmly up against the frame opening. Use a pencil to trace the other side and the bottom onto the the foam board. You’ll have to slide the pencil tip up under the edge of the frame opening and angle it slightly. You want the foam board to fit tightly into the frame so be sure to trace right up against the opening.
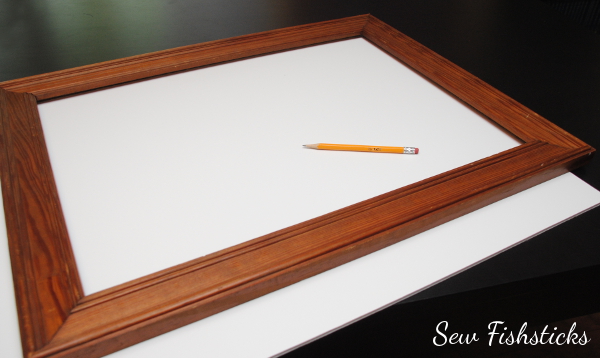 Remove the frame and use a craft knife and straight edge to cut the foam board along the lines you traced.
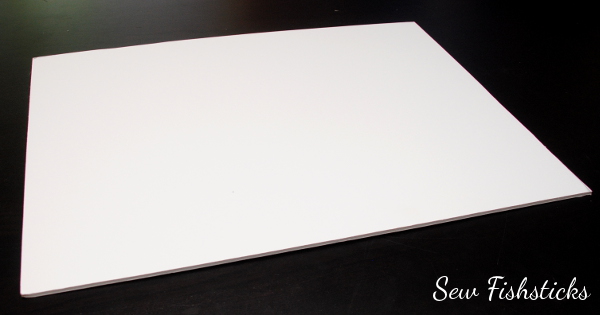
 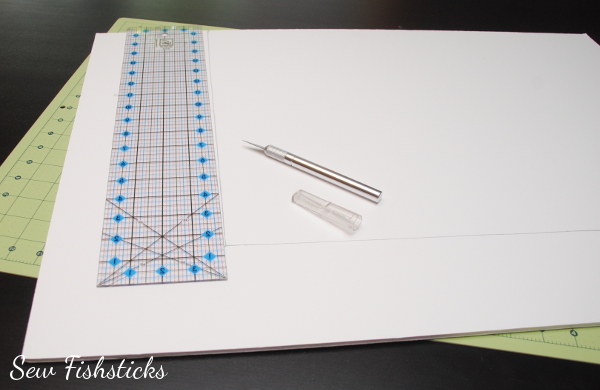 Once your foam board is cut, check the fit inside the back of the frame before moving on. The foam board should fit snugly inside the frame.
 Trim your fabric so that you have at least a few inches to fold up and over on each side of your foam board piece.
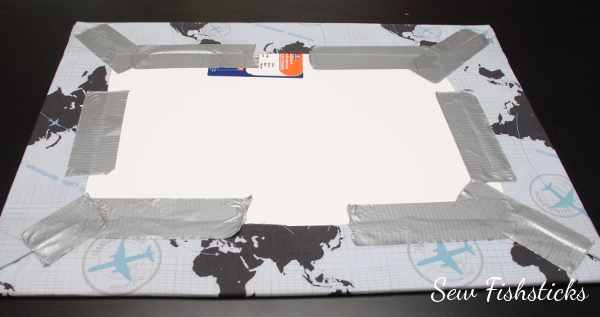
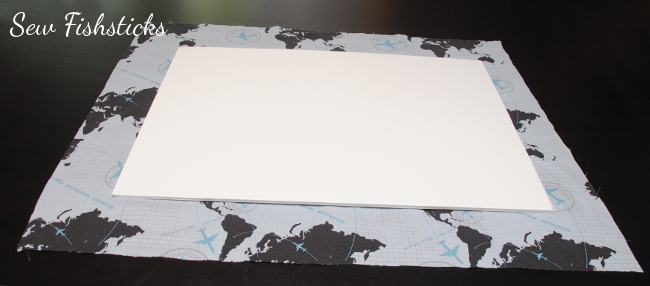 Spread your fabric out in front of you with the wrong side up. Center the cut piece of foam board on top of the fabric. Wrap one long edge up over the foam board and duct tape it in place. (I know it seems silly to use duct tape, but it works! And, it allows you to easily switch out the fabric whenever you’d like.) Wrap the other long edge up and tape it, too.
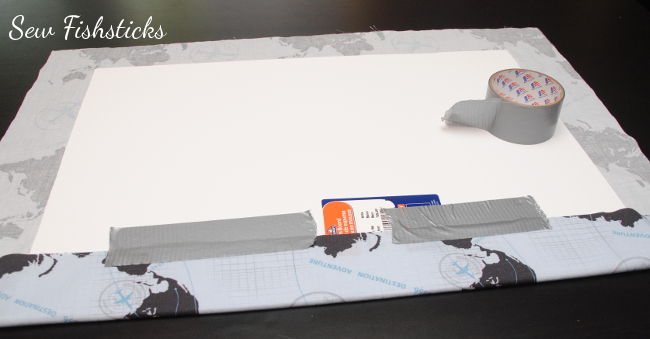 Wrap the short ends up just like you would wrap a gift and tape them in place, as well.
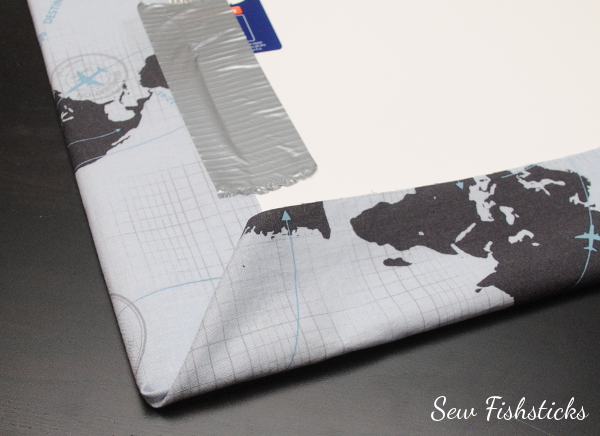 Make sure that your fabric is taped securely.
 Press the fabric-wrapped foam board into the back of the frame. Attach hangers. Hang it up on the wall and display your treasures!
  Do note that if you pin and unpin things on this board often, you may have to replace the foam board since the holes don’t self-heal. These bulletin boards have worked really well in our home, though, and I love how easy they are to switch out whenever the urge strikes!
The Wonky House Quilt Block Tutorial
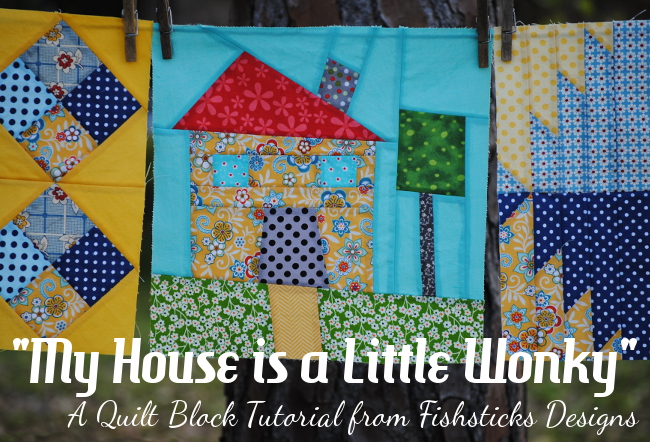 Welcome to the Fishsticks Designs Blog’s first quilt block tutorial! I am so excited about getting to be a part of the Around the Block Round Robin at Patchwork Posse! When Becky asked me if I’d like to join in by sharing my favorite quilt block, I knew right away what block that would be. I’m calling it the “My House is a Little Wonky” Block.
I love the whimsical nature of wonky house blocks, and the fact that they’re perfect in their imperfection. This block has no picky corners to be aligned perfectly, and it lets you use your imagination a bit. My husband retired from the Air Force about eight years ago after 20 (“and a half!” he would add) years, and we’ve lived in a lot of houses. With each move, I immediately started decorating to turn our house into our home. One of the things all of that decorating taught me, is that no house is ever perfectly straight . . . ever. It’s not really visible from the outside or with a casual glance, sometimes you even have to climb up into those dark corners to find out that the walls are slightly crooked, but they always are. I think there’s a little life lesson in that. In spite of how we might look from the outside or at a casual glance, we’re all a little wonky, just like our houses. It’s a good thing, too. If we weren’t, life would be far too boring!
Ready to get started? The tutorial for this freezer-paper-pieced block looks really long, but I promise this block is not hard to assemble at all. I’ll walk you through every step!
You’ll need a few things before you get started. First, you’ll want to print this color template for your house block: Color Template. Be sure when you print that you’ve chosen to print at full-size or 100%. You may have to save the file to your computer to print it. (There’s a black and white template shown below, too. Don’t worry about printing it right now, but you may need it later: Black & White Template.) In addition to your regular quilting supplies, since this is a freezer-paper-pieced block, you’ll need some freezer paper. (Iron Man is totally optional, however. When you live in a house with little boys, and you walk away from your supplies, you often come back to find tiny visitors.) To assemble your color template, just trim the 1/2″ margin off of the left hand side of the bottom right corner page.
 Overlap the bottom right corner page with the bottom left corner page. Line everything up and tape it in place.
 Piece the top two pages together in the same manner, and then tape all four pieces together.
 Check to make sure that your template measures 12 1/2″ square before moving on.
 Cut a piece of freezer paper slightly bigger than your template and place it shiny side down/matte side up on top of your template. (If you find that it’s too difficult to see through the freezer paper, you can print the black and white template for tracing instead.)
 Using a pencil and straight edge, trace the template onto the matte side of the freezer paper.
 Use the color template to label all of the pieces. You’ll see that the block is divided into four sections, and the colors are labeled from left to right and from the bottom up. Using abbreviations will help this part to go faster.
 Choose your fabrics! This is a great time to use up tiny scraps. They are perfect for windows, doors, chimney, etc.
 Cut your freezer paper template into pieces.
 Separate the template pieces into colors/fabrics.
 Now the fun part starts! Position one of your template pieces on the fabric you’ve chosen for it with at least 1/4″ margin all the way around. Be sure that you’ve placed the template on the right side of the fabric with the shiny side of the freezer paper down. With your iron set to cotton/no steam, press the template onto the fabric. The coating on the shiny of the freezer paper will melt and the template will temporarily stick to the fabric.
 To add your 1/4″ seam allowance, place your clear quilting ruler on top of your template/fabric piece. Line the 1/4″ marking up with the edge of the template so that the ruler overlaps the template, as shown.
 Run your rotary cutter down the edge of the ruler to trim away the excess fabric, leaving the 1/4″ seam allowance outside the template.
 Cut each side of your fabric in the same manner so that you have a finished fabric piece with the template still attached and a 1/4″ seam allowance all the way around it. (Don’t take your templates off yet!)
 Where you have multiple templates for one piece of fabric, you can iron them all on at once, but be very careful to make sure you have 1/2″ (1/4″ times two) between all of the pieces. It’s best to put more than that, just in case.
 Continue ironing your templates onto your fabric and using your ruler and rotary cutter to trim away the excess fabric leaving 1/4″ seam allowance all the way around each template. Once you’re finished, separate them all into their individual sections.
 The remaining pictures will walk you through the order in which to assemble your pieces. Remove the templates as you get to each piece. Stitch the pieces together using 1/4″ seam allowance and press your seams (open or to one side, whichever you prefer) before moving on to the next fabric piece.
 Start by sewing the Section 1 grass pieces to either side of the path.
 Assemble Section 2 next — the house, including doors and windows.


 Move onto Section 3 which includes the roof, chimney and sky pieces.


 Finally, sew the Section 4 tree pieces together.


 Now you’re ready to sew your sections together!


 Almost done! Just square your block up to 12 1/2″ and admire your work. That wasn’t hard at all, right?
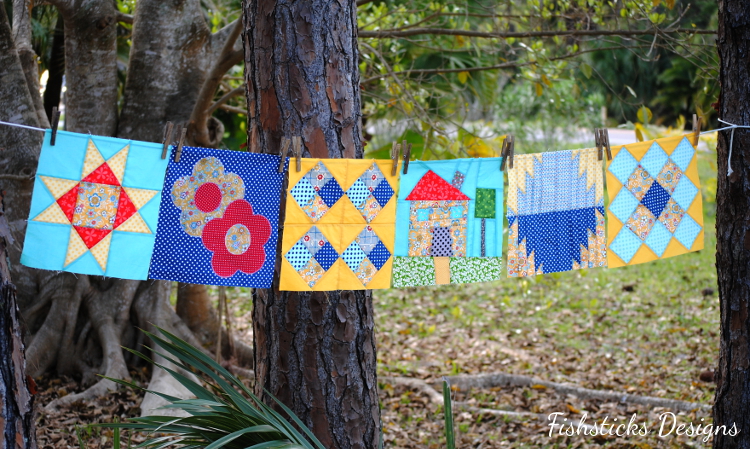
 I can’t wait to see your finished blocks! I’ve been having such a great time sewing along myself. Want to see my blocks so far? I love how they’re coming together!
The Updated FREE Tank & The Red Carpet Awards!
 I’m nearly bubbling over with excitement here! I have several new things to share with you over the next week or so, and I can’t wait to hear what you think about each of them! Today brings the first two announcements on the list: the re-release of the FREE Fishsticks Designs The Tank pattern (now in sizes 12 months to 14) and two nominations for Fishsticks patterns in the PDF Pattern Designers Red Carpet Awards!
If you’ve never joined the PDF Pattern Promotion and Sales Group on Facebook, I encourage you to take a few minutes to head over right now and check it out. You’ll find over 10,000 sewists who are devoted to supporting independent pattern designers and encouraging each other in their sewing endeavors. Many of your favorite designers are there, too, joining in the discussion, sharing their latest patterns, promoting their sales, helping out with questions and more! This week, the group moderators have announced nominees for the first ever PDF Pattern Designers Red Carpet Awards in conjunction with a HUGE giveaway, and all you have to do to have a chance of winning is go vote!
Two of my patterns were nominated: the Charlie Tee & Hoodie and the Runaround Pants, and I’d love if you’d vote for them! To read more about the giveaway and to vote, just click the banner below:
 As my little way of joining in the celebration, I’ve revised my free The Tank pattern, adding big kid sizes and incorporating a big change that is coming soon to all of my PDF patterns.
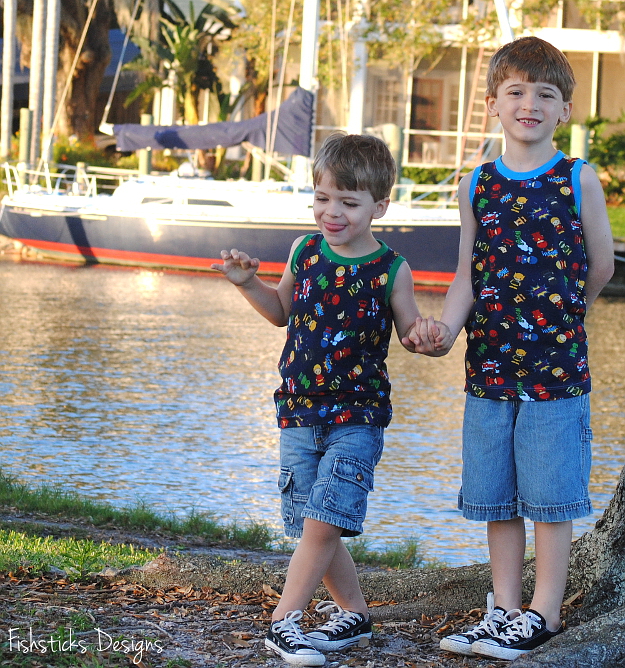 The Tank pattern is designed to be sewn with cotton and cotton blend knits — jersey, interlock or ribbed knits in the body and interlock or ribbing for the neckband and armholes.
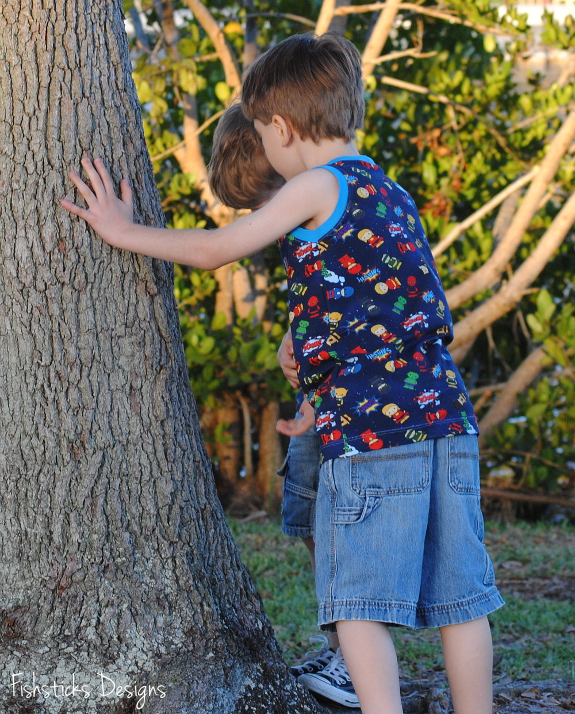 The fit is narrower and longer than a standard tee, making it great for layering, but still perfect for wearing on its own. It also makes a great PJ top when paired with woven or knit lounge pants. (If you haven’t already, be sure to check out the appliqued tanks that I made for my seven-year-old last month!) Or, you can match it up with Undercover Bottoms Boxer Briefs for the perfect little boys’ undies set.
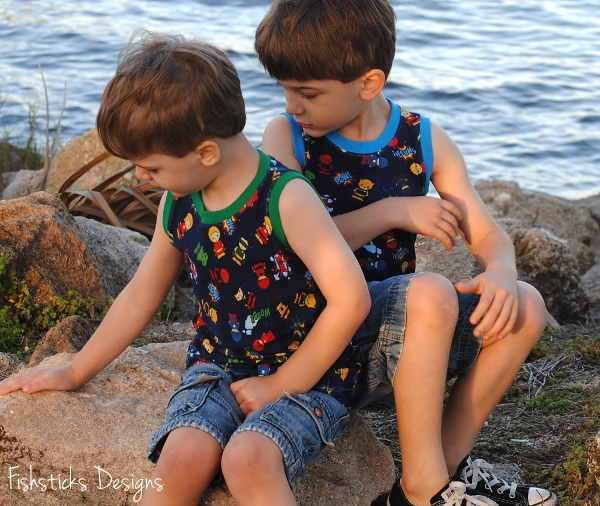 A little aside from the pattern itself, isn’t that the cutest fabric? My boys LOVE it! It came from a custom fabric group that you can find right here: Fabric Stache. If you’re looking for great knits with prints that you can’t find just anywhere, go visit! (They’re doing sew-alongs every other week right now with my knit patterns, too.)
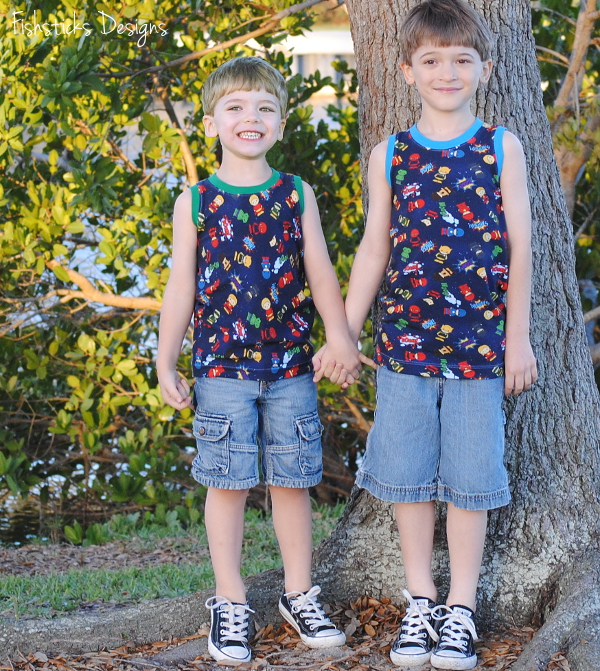 Back to the subject at hand, to download the pattern, just click right here: The Tank Pattern. I’ll be back tomorrow with my next announcement, but if you’re already familiar with my PDF patterns, you’ll figure it out really quickly by scrolling through The Tank pattern!
I just have one, no, two last pictures to share before I wrap up this post. Because we live in Florida, tanks work well for us almost year-round. My little Florida babies, though, thought that they were going to freeze to death when I dragged them out to take pictures last week . . . in 65 degree weather!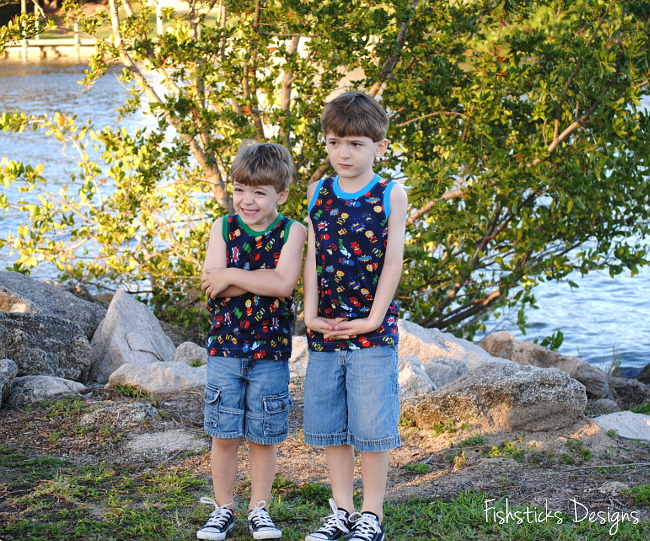 The “freezing cold” weather, however, did not stop them from insisting that I follow through with the promise of frozen yogurt after our photo session!