Tutorials
Messenger Bag Tutorial
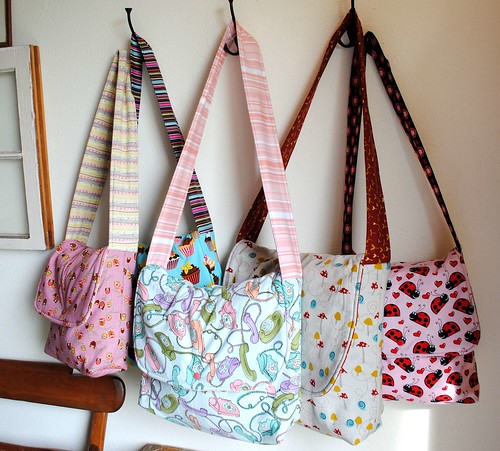
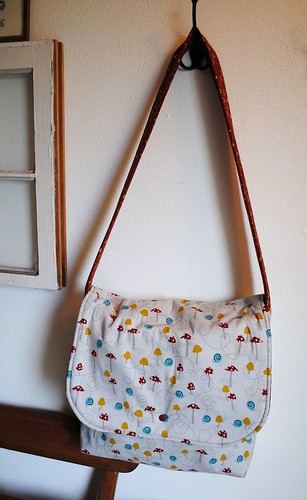 I really like sewing new bags for my sister, nieces and daughters every Christmas, and I think they really like receiving them. (I heard that my oldest niece loves to tell her friends when they ask about her bags that they’re one of a kind!) Handmade bags for the girls have sort of become my annual tradition. This year, I’ve been sewing messenger bags for everyone and thought I’d share my pattern with you. I hope that you’ll enjoy creating with it for yourself and your loved ones.
The tutorial is for the laptop-size messenger bag, but there are suggestions at the end for how to alter the size to your own specifications.
You can find the pattern and instructions here: Messenger Bag.
I’d love to hear from you and see pictures if you make one, and I’m always happy to answer questions. Just leave me a comment, and I’ll do my best to get back with you as soon as I can!
Don’t miss my Art-On-The-Go Kit Tutorial which makes a great stocking stuffer and, of course, my Christmas Stocking Tutorial, too! I hope they help to get you on your way to your own Handmade Holiday traditions!
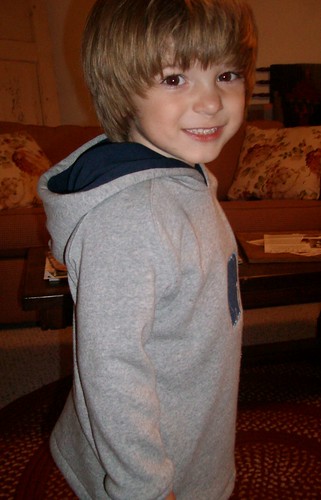
Big Kids Need Hoodies, Too!
The hoodie tutorial for the Big Kid sizes of my Patrick Curved Raglan pattern is all finished now, too. I can’t wait to see all that you create with it!
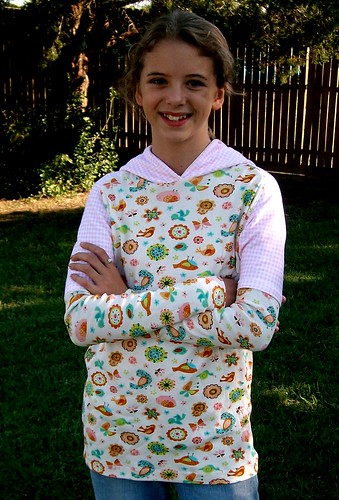
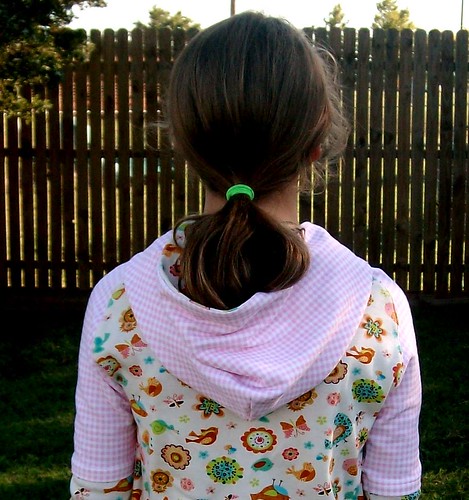
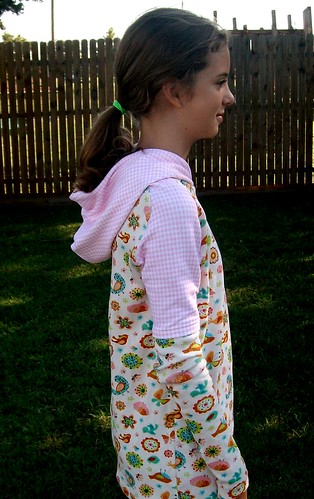
Here’s the link to the pdf tutorial: Hoodie Tutorial. Enjoy!
Tutorial for Converting the Patrick Curved Raglan to a Hoodie
Just in time for cooler weather! I’ve written a tutorial for converting your Patrick Curved Raglan to a hoodie. The hood pattern is currently just for the Infant/Toddler sizes, but the Big Kid sizes are coming next week!
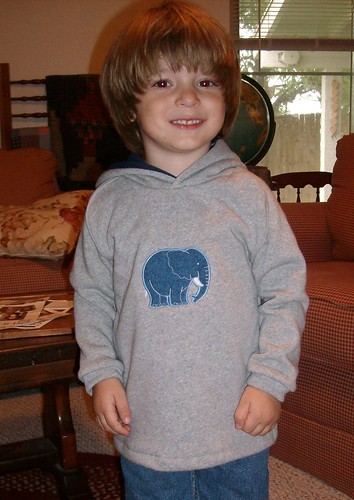
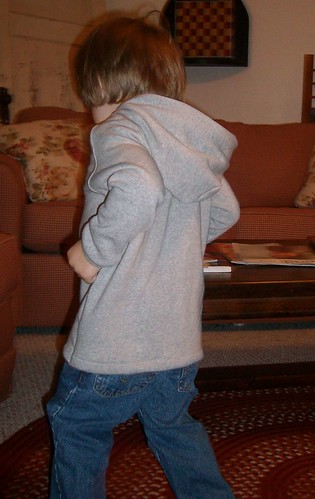
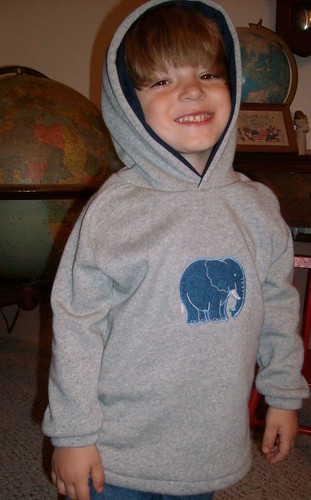
You can find the printable tutorial here: Hoodie Tutorial. Please let me know if you have any questions!
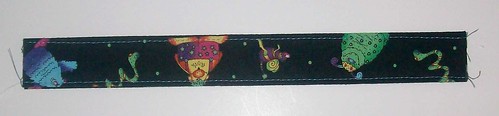
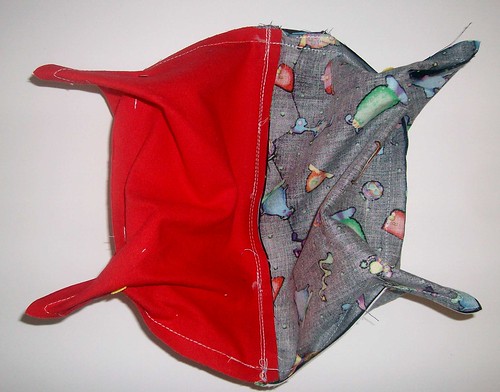
Mini Zippered Bag Tutorial
I started working on this little bag because we have quite a bit of travel planned for this summer, and I’ve found that when we travel I use way too many disposable zipper bags for miscellaneous things, like markers, toys, legos, snacks, etc. This little reusable bag will be perfect to fill with those little things and throw in the kids’ backpacks that I made a few weeks ago. (It would also be a great little cosmetic bag.)
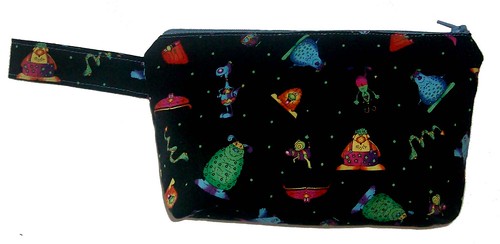
The finished size of this bag is approximately 9″ X 5 1/2″, not including the handle. You could easily increase the size, though, and turn it into a larger bag. If you increase the size, you could also line it with diaper-makers PUL and use it as a wet bag for soiled cloth diapers or damp swimsuits.
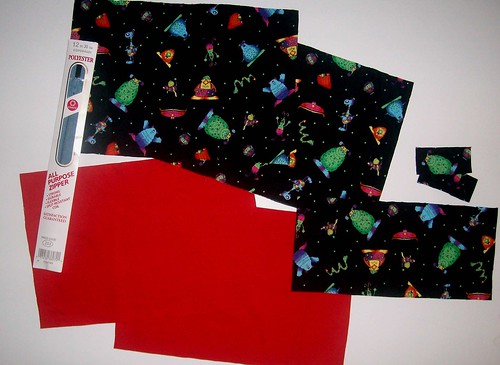
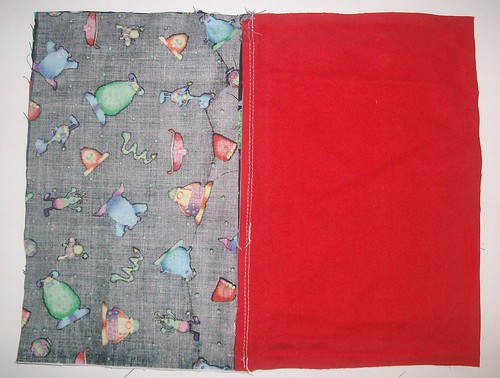
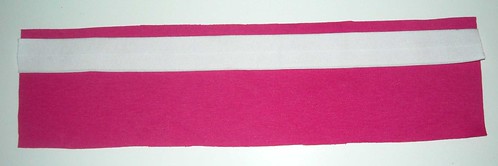
For this project you’ll need two pieces of cotton woven fabric cut to 10″ X 6 1/2″ for the outside of the bag and two pieces of a medium weight fabric like cotton twill cut to 10″ X 6 1/2″ for the inside of the bag. You’ll also need to cut two pieces of your outer fabric 1″ X 2 1/2″, and one piece of outer fabric 9″ X 4″. And, of course, you’ll need a zipper with a length of at least 9″. (I used a 12″ zipper because it’s what I had on hand.) Seam allowances are 1/2″.
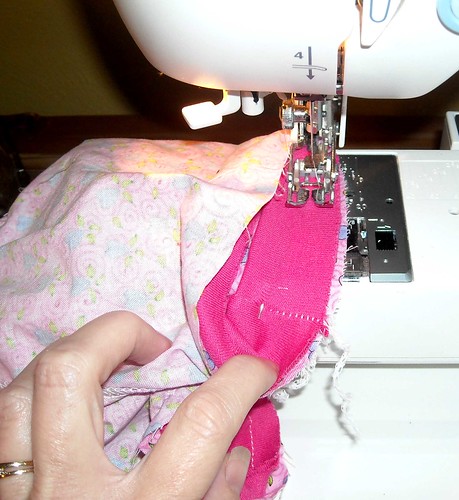
Start with preparing your zipper. Pin your zipper to one of the 1″ X 2 1/2″ pieces of fabric with right sides facing at the top end of the zipper, as shown, and stitch across.

Fold the fabric out at that end of the zipper and lay it out flat with the top facing you. Now, measure 8″ from that seam and mark your zipper at that point.
Line your second 1″ X 2 1/2″ piece of fabric up at that line and pin with right sides facing. Sew across, backstitching and forward stitching a few times to secure the end of the zipper. Fold the fabric out and trim off excess zipper.
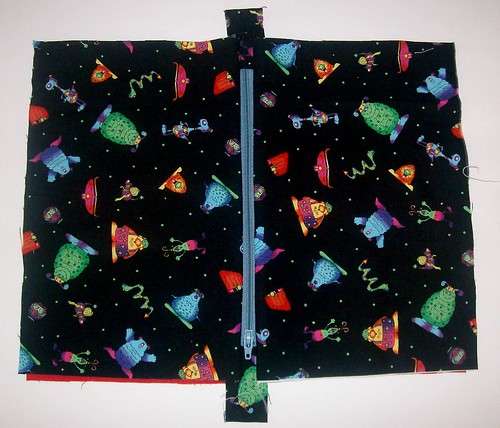
Now lay one of your outer pieces of fabric out with the right side facing you. Center your zipper on top with the right side down and raw edges lined up.
Lay one of your inner pieces on top of the zipper with the right side facing down. Line up the raw edges, and line up the inner piece with the outer piece under it. Pin in place. You should now have a “sandwich” with your outer fabric on bottom, zipper in the middle and inner fabric on top.
Sew in your zipper now using a zipper foot. I put my zipper pull about halfway down, sew to just before the foot, backstitch, remove the fabric from the machine, pull the zipper pull pass where I’ve already sewn, then backstitch across where I just stopped my stitching and stitch all the way to the end.
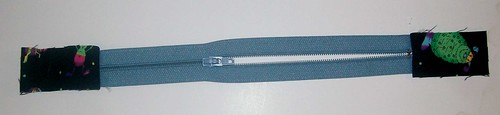
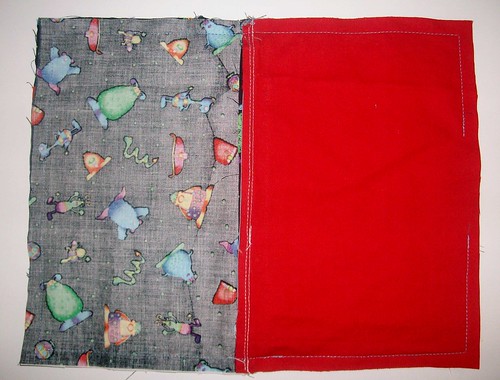
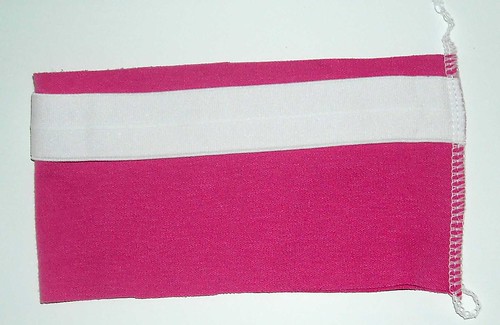
Repeat this process to attach the other outer and inner layers of fabric to the opposite side of your zipper. Now your bag should look like this when it’s layed out flat:
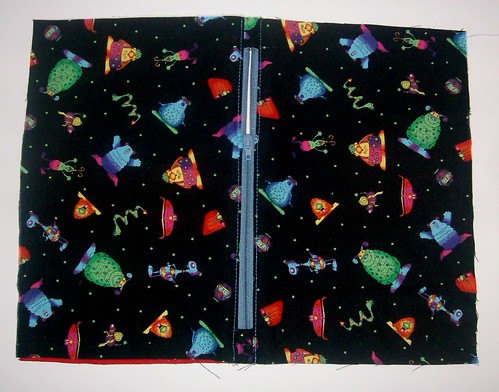
Now you’ll topstitch your zipper, but before you do each side, flip the inner layer to the other side, so you’re just topstitching through the outer layer and the seam allowance. Sew to the zipper pull, put your needle down, lift your sewing machine foot, pull the zipper pull past the foot, put the foot back down and continue sewing. Repeat on the other side. Trim excess fabric from ends of zipper.
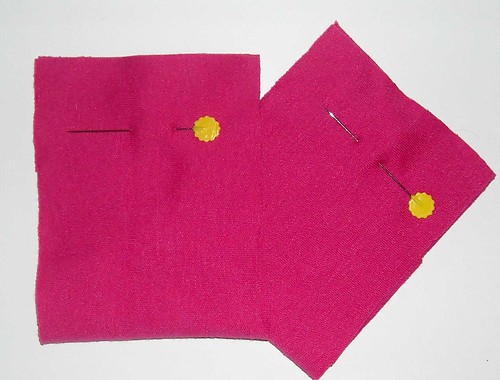
To prepare the strap for your bag, take your 9″ X 4″ piece and press it in half the long way with wrong sides facing. Unfold, then fold each long edge into the middle and press again.
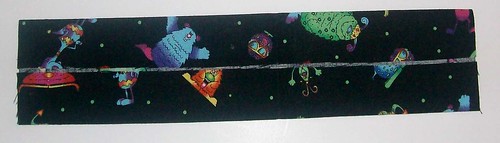
Fold in the center again and press.
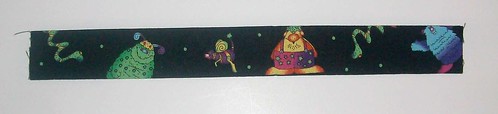
Topstitch each long edge at approximately 1/8″.
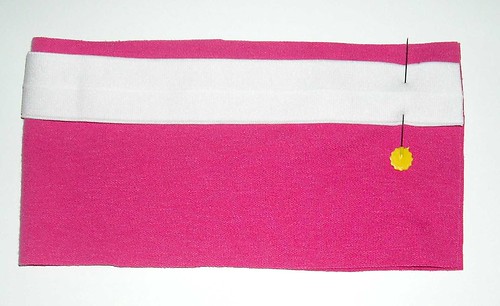
Fold handle in half and line up raw edges about 1/2″ below the zipper and pin to outer layer of fabric only. I angled my handle up slightly. Stitch at about 1/4″, backstitching and foward stitching to reinforce.

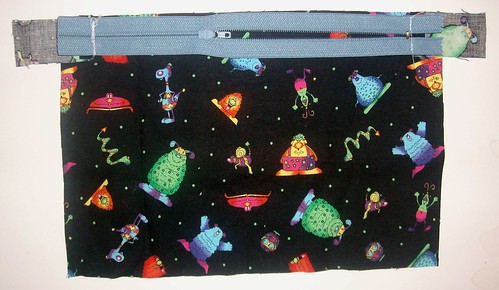
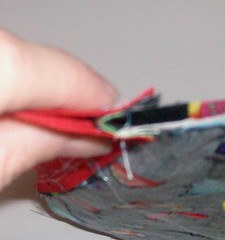
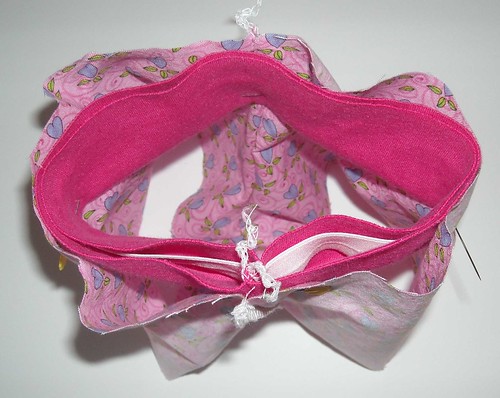
Now, open your zipper up to halfway — don’t forget this step or you won’t be able to turn your bag all the way. Next, flip your inner and outer pieces towards each other, lining them up with right sides facing, like this:
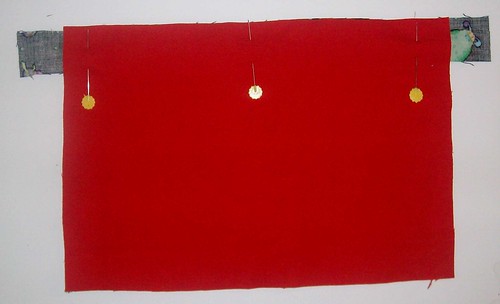
Pin fabrics in place like this. At the zipper, you’ll have a bit of extra fabric. That fabric should be folded towards the inner side of the bag. Here’s a picture to show you what I mean. (I apologize that the picture is blurry. I’ll try to get a better one with the next bag I sew.)
Now begin sewing your pieces together about 2/3 of the way across the bottom of the inner pieces. Sew all the way around the big rectangle, forward and backstitching a few times across the handle to secure it well. Leave about a 3″ opening in the bottom of the inner pieces.
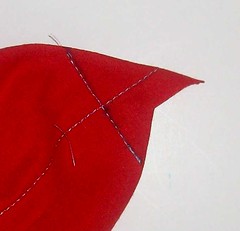
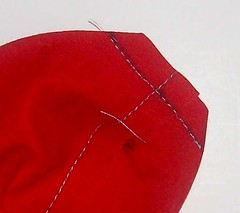
This next step is a little hard to understand until you do it once, then you’ll see that it’s really easy. Grab each corner, individually, and pinch it so that the side seam meets the bottom seam and pin it across. Your bag will now look like it has four little cat ears.
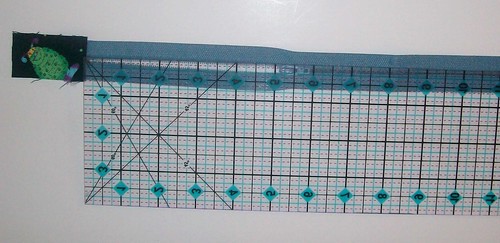
Next, at each corner, use your ruler to determine where the width across the little triangle measures 2″ and draw a line.

Stitch on that line, then trim off the excess fabric.
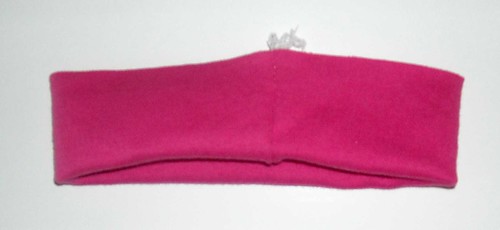
Now, you’re ready to turn your bag right side out. Turn it through the opening, then push the inner layer inside the outer layer, pushing out all your corners. If everything looks nice, pull the inner back out and pin and sew your opening closed.
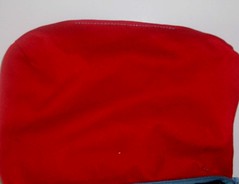
Push the inner back inside and fill it with fun stuff!

Newborn Bloomers Tutorial
I recently fell in love with the Itty Bitty Baby Dress Tutorial by Rae of madebyrae.blogspot.com. It makes such a sweet little newborn dress! I’ve made a few over the last month. This first one was a gift for a friend who’s a huge Florida Gators fan.
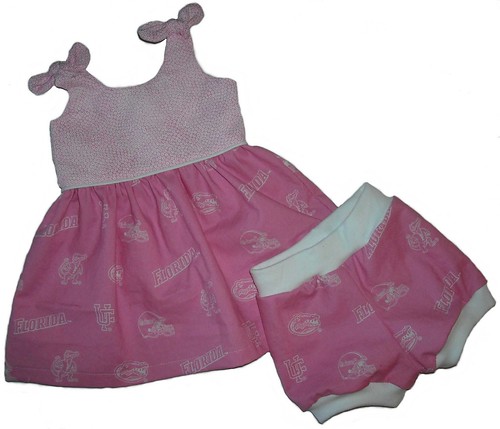
I really like having bloomers to cover baby’s diaper when wearing dresses, though, so I pulled out my AJ Bottoms pattern and got to work on shrinking the smallest size bloomers down to newborn size. I thought I’d share the pattern here with you so you can sew up some sweet baby dress and bloomer sets, too!
I made this set just last week for my friend, Lisa, who is expecting a baby girl very soon:
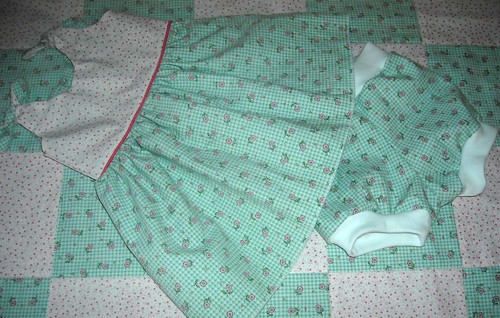
These bloomers should fit from newborn to around 12 pounds, and they’re roomy enough to fit over cloth diapers, too!
Before you get started, you’ll need 1/3 yard of woven fabric to match your dress for the body of the bloomers and 1/4 yard of coordinating cotton or cotton/lycra blend interlock for the waist and legbands. I like to use cotton interlock with enclosed elastic for the waistband. My favorite elastic for this use is 1″ plush diapering fold-over-elastic unfolded. It makes a really nice soft stretchy waistband. You could also use a cotton/lycra blend with no elastic or cotton interlock with 1″ pajama elastic. Really, because these bloomers are for a newborn, you might be able to use the cotton interlock without the elastic, but cotton has a tendency to stretch out and lose it’s shape while being worn, so keep that in mind.
Seam allowance is 1/2″ for sewing. Cutting allowance is 1/4″ for serging.
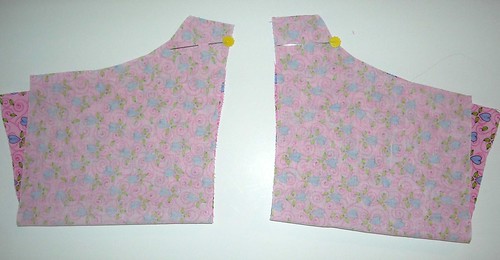
Okay, let’s get started! First, you’ll find the bloomers pattern here: Newborn Bloomer Pattern. Start by cutting out your pieces. Be sure to cut your body pieces in opposite directions. The easiest way to do this is to fold your fabric and cut both pieces at the same time.

Fold each body section over matching up inseam edges and pin.
Sew or serge the inseam. Turn one body section right side out and insert it inside the other section so that the right sides are facing. Match up the inseam and the front and back as shown and pin.
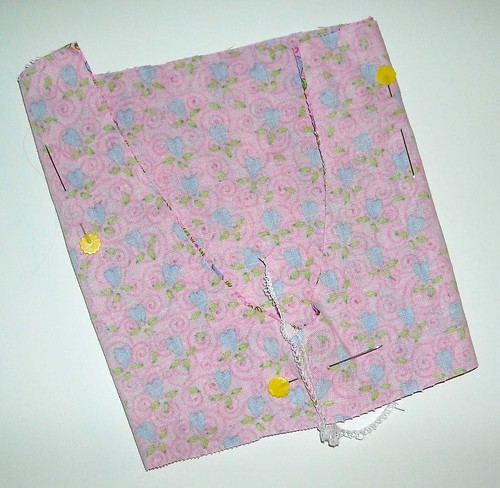
Sew or serge around this “U” shape and open up the body being sure that it’s turned inside out.

To make your waistband with hidden elastic, begin by laying out your waistband and cutting the elastic to the same length. (Remember if you’re using diapering FOE, it’ll stay unfolded.) Position the elastic about 1/4″ from one long edge of your waistband.
Fold the waistband over with the elastic on the outside, match up the short ends and pin.
Sew or serge across the pinned edge.
Now fold the waistband over the elastic, as shown, so that the waistband is right side out and your elastic is hidden inside.
Next, pin your folded over waistband inside the body of your bloomers. Begin by matching up the seam on the waistband with the back seam of the bloomers. (The back of the bloomers is slightly higher than the front.) Then divide the waistband into quarters and pin evenly at the sides and front.
Sew or serge in the waistband. You’ll need to stretch the waistband to fit the body as you go.
Fold your legbands in half, matching up the short edges.
Sew or serge across the pinned edges, then fold over as you did the waistband. With the bloomers still inside out, pin the legbands inside the leg holes, lining up the seams. Divide the legbands into quarters and pin, then sew while stretching to fit, using the same method you used to attach the waistband.
Turn right side out:

Now go sew an Itty Bitty Baby Dress to match!
I love to get your feedback and see pictures of the things you make with my tutorials and patterns. I hope you enjoy this one!
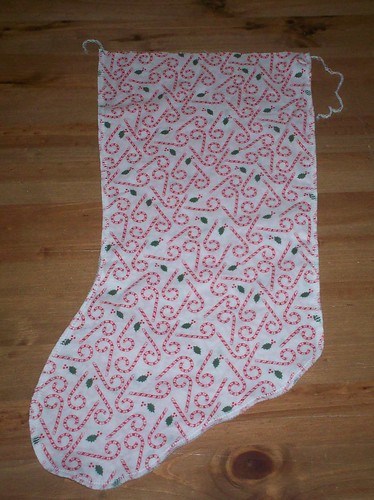
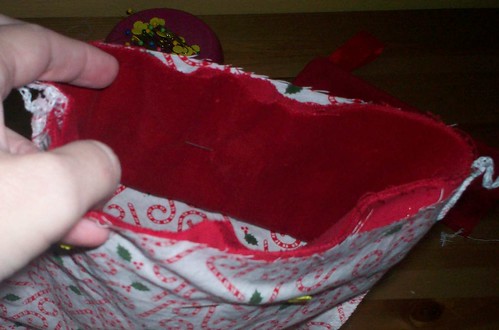
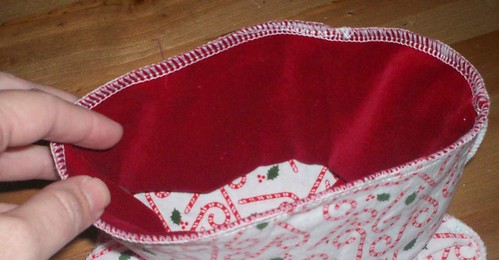
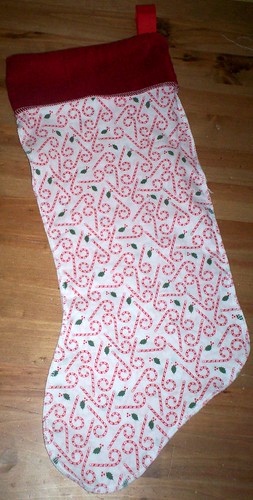
Christmas Stocking Tutorial
The stockings are hung by the . . . well, we don’t actually have a chimney, so they’re hung in the dining room from the quilt rack.

I sewed these stockings up last year so that we’d all have nice coordinating ones, and I thought I’d share my pattern and instructions with you. I love the simple design, and the size, in my opinion, is perfect. They’re big enough to hold a DVD or video game but not so huge that you have to spend your whole Christmas budget on stocking stuffers.
For each stocking, you’ll need 1/2 yard of print woven fabric for the body, 1/4 yard of fabric for the top (velvet works beautifully) and ribbon for hanging. The body pattern can be found here. When you print, be sure that the “Fit to page” option is not selected. The pattern will print in two pages which you should butt up against each other to make a complete pattern. 1/2″ seam allowance is included.
STEP 1
Cut out your pieces. You’ll need to cut two body pieces from the pattern linked above in opposite directions. For the top of the stocking, you’ll need to cut two 17″ X 3 3/4″ strips.

STEP 2
Line body pieces up with right sides facing and sew or serge using 1/2″ seam allowance around all sides except the top.
STEP 3
Cut a piece of ribbon to 5 1/2 inches. I used 1″ grossgrain ribbon for ours. Pin the ribbon on the right side 1″ from the end of one of your top strips as shown.
STEP 4
Line your second strip up on top of the first strip with right sides facing and sew or serge along the edge where the ribbon is pinned, securing the ribbon inside.
STEP 5
Flip your two strips apart exposing the ribbon inside.

Fold over, matching up the short ends and sew or serge across the short edge.

STEP 6
Fold the finished top piece right-side out as shown, being sure that the ribbon is now at the back and on your left hand side.

STEP 7
Now pin the top of your stocking upside down inside the two body pieces which are still right-sides facing, as shown. Match up the seam on your top piece with the seam on the heal side of your stocking.
STEP 8
Sew or serge around the raw edges, attaching the top to the body of the stocking.
STEP 9
Flip the top out of the stocking . . .
. . . and turn right-side out.
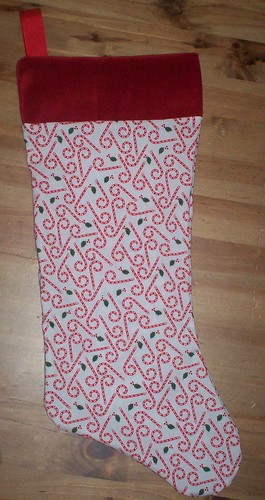
READY FOR SANTA!
Please let me know if you have any questions, and I’d love to hear if you use this tutorial to make your own stockings!
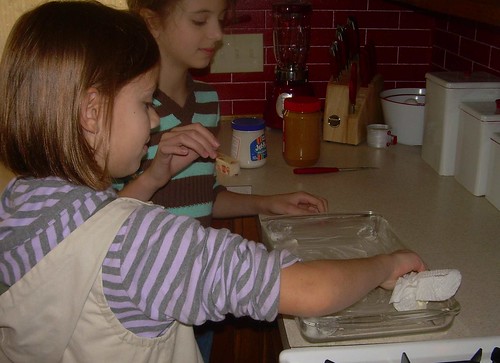
Christmas Traditions – Peanut Butter Fudge
Ray’s mom gave me this recipe the first Christmas that Ray and I spent together. It’s one of their family’s Christmas favorites. They love to offer an unsuspecting guest a drink of soda to go with the fudge and watch the reaction to the “explosion” that results from the combination.
The Recipe

Ingredients
1 stick of butter
1 small can of evaporated milk
2 1/2 cups of sugar
1 cup of creamy peanut butter
1/2 tsp of vanilla
1 7-ounce jar of marshmallow cream
A few willing assistants

Grease a 9X12 dish
Put butter and evaporated milk in pan. Do a little math while measuring the sugar into the pan: how many 1/2 cups make 2 1/2 cups total?

Heat and stir to boiling. Allow to boil for five minutes stirring often.
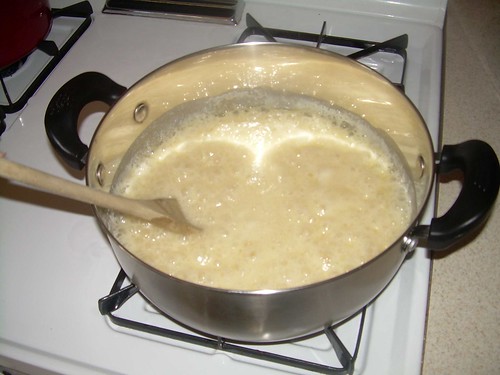
Remove from heat. Stir in peanut butter until smooth.

Add vanilla and marshmallow cream. Stir until smooth.


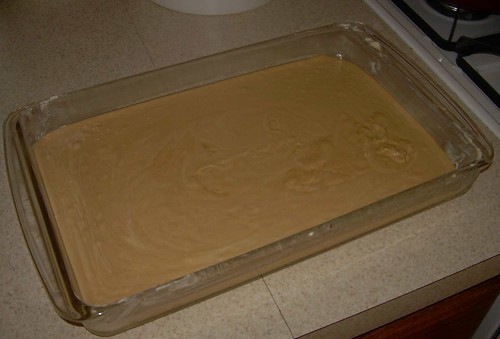
Pour into 9X12 pan.

Let cool.
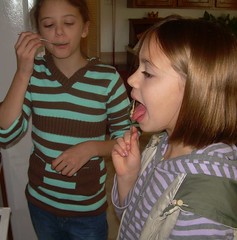
Lick the spoons.

Cut into squares and store in a covered container, dividing the layers with waxed paper.

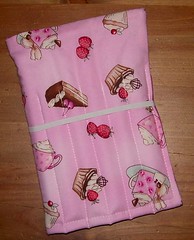
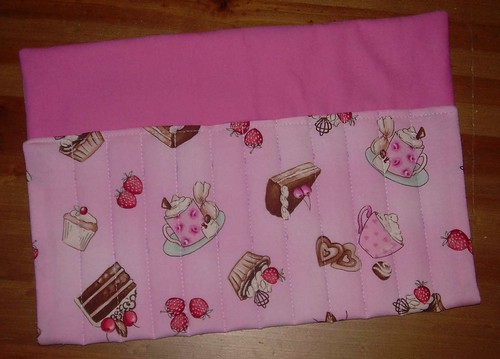
Art-on-the-Go Kit Tutorial
 I sold these from my Hyena Cart last year and thought mamas might enjoy making them for their own children this year. It’s a just a slightly different take on the colored pencil roll-up. This one fastens with elastic which is much easier for little hands than a ribbon that needs to be tied. It also hold a 3″ X 5″ doodle pad which I buy in packs of 12 at Staples for $4.99: Doodle Pads. These art kits are great for carrying in the diaper bag to keep little hands busy while you’re waiting at the doctor’s office or your favorite restaurant. They’re also great for coloring in the car since colored pencils are less messy than markers and won’t melt like crayons.
Start with the cotton woven fabrics of your choice. You can do the front and back in the same fabric, in a print and a solid, or two coordinating prints. For the hidden inner fabric I like to use a layer of fleece, but you can use quilt batting or, for a thinner version, a piece of cotton flannel. Be sure to prewash your fabrics so that your art kit will be washable when you’re all finished.

Cut your fabrics into three rectangles, measuring 15 1/2″ X 13 1/2″. If you’re using a directional print, you’ll want the design to go across the shorter measurement.
STEP 2
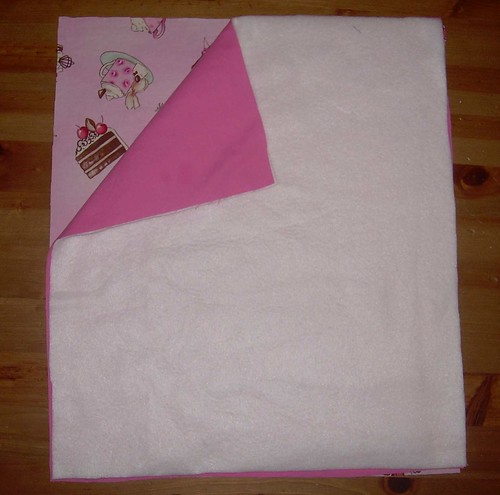
Ready your fabrics for sewing by placing your cotton wovens with the right sides facing and the hidden inner fabric on top.
STEP 3
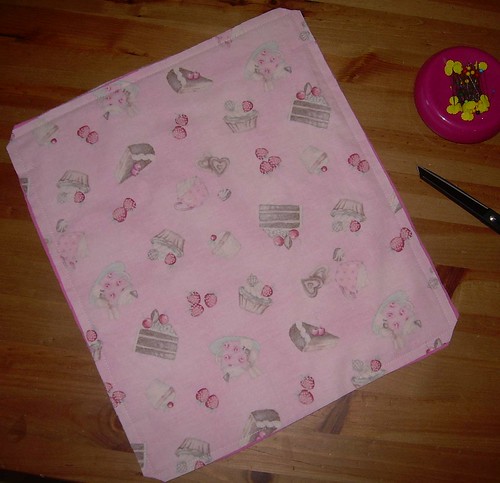
Stitch around the edges using a 3/8″ seam allowance and leaving a 3″ opening in one of the short edges for turning. Clip your corners, then turn right side out, pushing your corners out until they’re as square as possible. (A clean chopstick works great for this. In my house, we call them “corner-poker-outers”.)
STEP 3

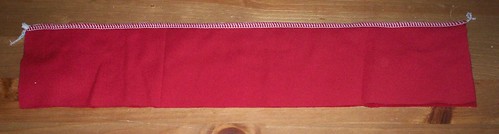
Topstitch at about 1/8″ across the short edge that you left open for turning, closing the hole.
STEP 4
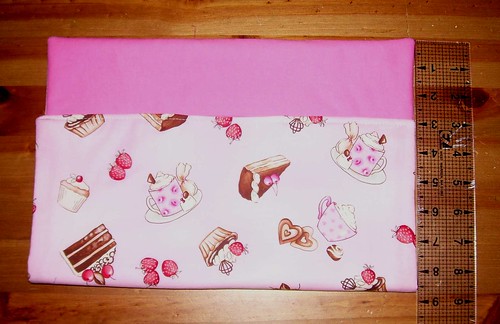
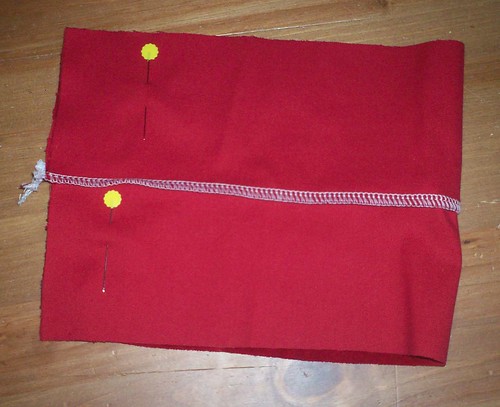
Fold the topstitched edge up as shown to 3″ below the opposite edge and pin.
STEP 5
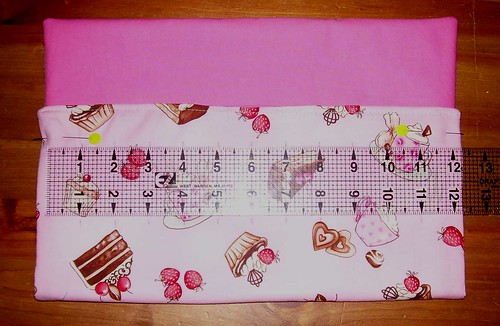
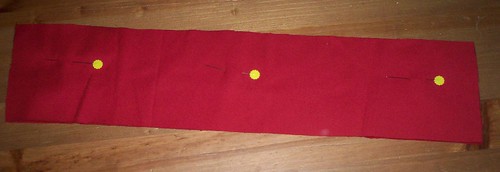
Mark the middle of your art kit, then mark at 1″ intervals across. You should have a total of 11 markings. I use disappearing ink so that I don’t have to worry about cleaning it off later, but you do have to work quickly so that it doesn’t disappear before the next two steps are completed.
STEP 6

Draw in the lines for your pencil pockets at the 11-1″ intervals you just marked.
STEP 7
Stitch down each line, backstitching at the top and bottom to lock in your stitches.
STEP 8

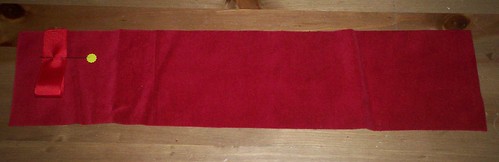
Cut two pieces of 1/4″ elastic, one 5 1/4″, one 11 1/2″. Pin the shorter piece across the pencil pockets beginning at the first stitching line on the right and ending at the fifth line from the right as shown. Fold the longer piece to form a loop and pin between the two layers of fabric on the left-hand side of the art kit leaving about 1/2″ inside the the two layers.
STEP 9
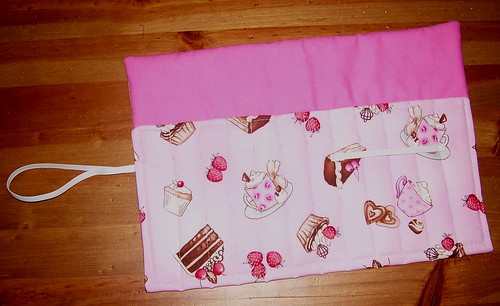
Stitch across the ends of the shorter piece of elastic following your previous stitching lines, backstitching and forward-stitching several times to keep it secure. Then topstitch at 1/4″ beginning on the right at the top of the pocket section, continuing around the bottom and up to the top of the pocket section on the left, securing the elastic loop inside, being sure to backstitch at the beginning and end and over the elastic loop to keep it secure with heavy use.
STEP 10
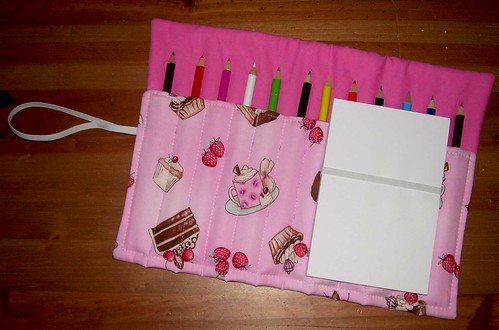
Add your pencils and doodle pad and ENJOY!