Around the Block with Patchwork Posse: Block #1
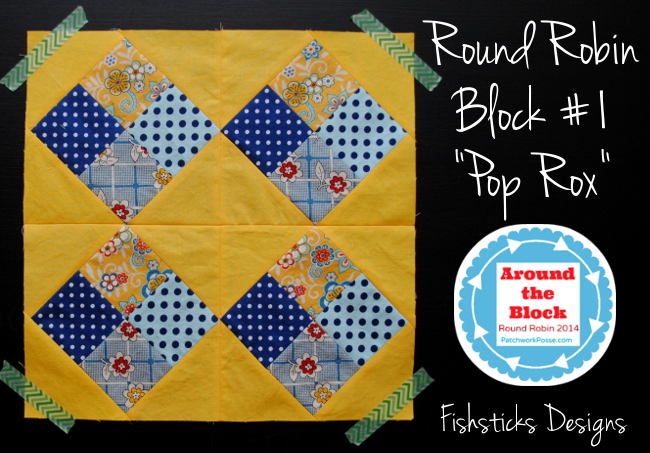 One of my goals this year is to improve my quilting skills … and to actually finish a quilt-along! I’m excited about the new round robin quilt-along that started yesterday at Patchwork Posse, not only because some amazing quilter/bloggers are offering tutorials of their favorite blocks, but also because I get to do my first quilt block tutorial as part of it! (My block is scheduled for next month.) “Pop Rox”, the first block in the Around the Block Round Robin, was designed by my friend, Caroline, from Sew Can She. It’s a fun one that has just enough complexity that there’s a little bit of a challenge in it, but I was able to finish it easily after dinner last night. I struggled a little with getting my points to line up, but I found that increasing my seam allowance to right at 1/4″, rather than the suggested scant 1/4″, when attaching the triangles solved that problem for me. I think that may have been a cutting issue, rather than a problem with the pattern, though. Quilting requires much more exact cutting than sewing clothing!
A new block tutorial will be posted at Patchwork Posse every Wednesday through April. Once all 12 blocks are finished, Becky will walk everyone through adding borders, machine quilting and binding. Oh, and there are prizes! Every week, a great new prize will be given away to one of the participants who posts their quilt block pictures to Becky’s Flickr group. If you’re ready to give quilting a try or looking to build your quilting skills, come join in the fun!
Adding Footies to the Jamie Jumper – Guest Tutorial
My friend, Allison, from Alternate Endings put together this simple tutorial for adding feet to the Jamie Jumper, and I asked her if she’d mind letting me share it on my blog. If you’re looking to make footie PJs for your little ones this winter, just grab your Little One Layette or Wee Tot Collection pattern, and check this out!
Turn your Jamie Jumper into Jamie Jumper Footie PJs
Begin by laying out your pattern pieces (except for leg cuffs – you won’t need them) as directed in the instructions, adding 2″ to the bottom of each leg section. Also add at least 2-3 inches to each piece of binding. If it’s too long you can cut off the excess. You will also need to cut out pieces for the feet. I used pattern pieces from a different pattern, but you can also use the bottom and top pieces for a soft-sole shoe pattern, or just trace around your child’s foot with these approximate shapes, being sure to give some wiggle room and adding a 1/2″ seam allowance. (The half piece is for the top of the foot, and the whole piece is the sole.) If it fits your baby, it should work just fine.
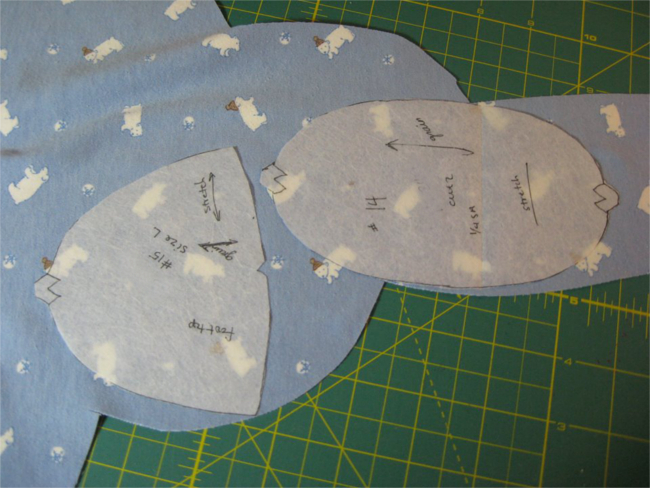 Assemble your Jamie Jumper as usual, leaving off the leg cuffs. And don’t forget to make a few mistakes like I did. You know, things like forgetting to cut the binding an extra two inches longer and having to move the serger next to the sewing machine so you can sew an extra strip of binding on without having to remove the garment from the serger. Please make that mistake. It will make me feel so much better.
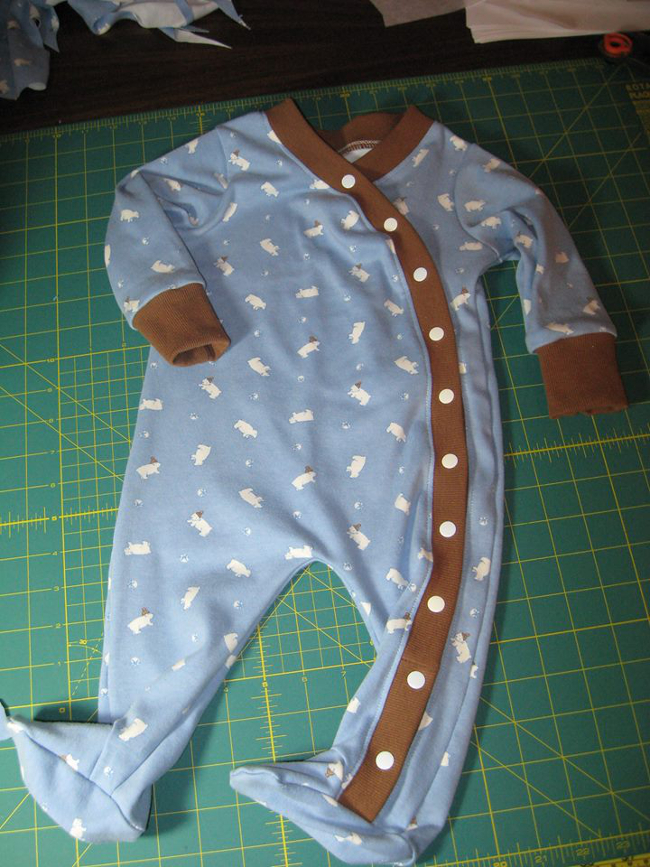
After the JJ is assembled, you need to cut a rounded “V” shape onto the bottom front of each leg – approximately 1″ wide and 1-1/4″ high. Round the pointed part a bit. When you make the V for the side with the ribbing/binding, be careful not to cut it too close to the ribbing. Leave about 1/4″ between the ribbing and the V so you have room to attach the foot pieces.
 Attach the top part of the footie to each “V”, right sides together. Match the middles and sides. You will probably have to stretch the V a little to make it fit.

 After you have attached the top portion of the footie, turn your JJ inside out and attach the bottom part of the footie to the bottom of the Jumper, right sides together. Match ends and sides. You will probably not need to stretch anything for this to fit – unless you have a very large-footed kid.
 Turn garment right side out, admire your handiwork, and finish jumper as directed.
Tutorial by Allison Sanders Morton.
Shared with permission.

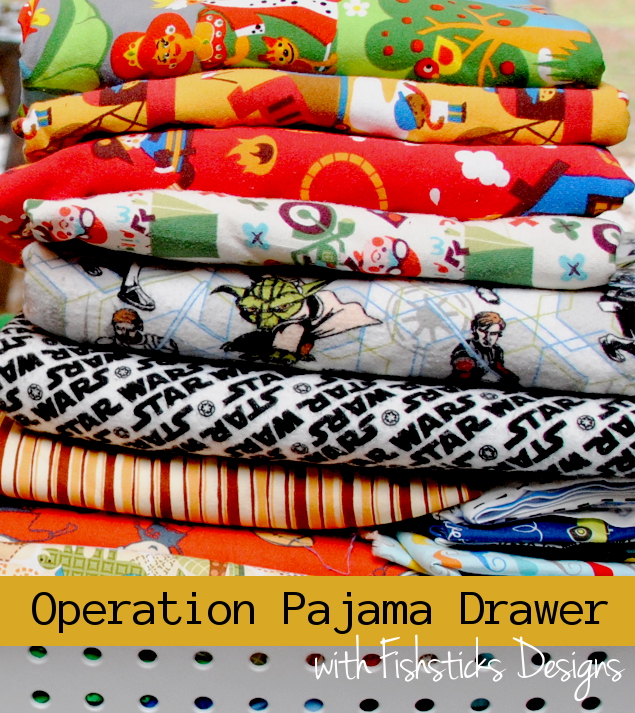
Operation Pajama Drawer
 I have a little confession to make. Do you remember when I sewed Charlie’s and Jamie’s whole summer wardrobes almost three years ago? Summer Wardrobe Wrap-Up 2011 Jamie is still squeezing himself into those size 5T PJs . . . and he’s seven! I have made him a few new pairs of pajamas since then, but if I don’t keep up with the laundry, he’s right back to looking like the Incredible Hulk, bursting out of his clothes. At least people don’t generally see him in his jammies, right? And, Charlie? Well, Charlie was really blessed that I ran across some store-bought PJs on sale recently, or he’d be sleeping in nothing but a diaper. It’s a good thing we live in Florida, huh?
Enter Operation Pajama Drawer! It is time for me to fill up those drawers so my little guys can sleep in mama-made comfort and style again. Who’s up for sewing along with me? How about if I offer a prize? Start thinking about which of your little ones needs new PJs, and I’ll be back later this week with some details about joining in.
I’ll be sharing some pattern-addition tutorials along the way, too. I’ve got an amazing guest tutorial coming tomorrow! If you live somewhere other than Florida, and your kiddos’ toes get cold at night, this one is just for you.
In the meantime, here’s my Operation Pajama Drawer plan: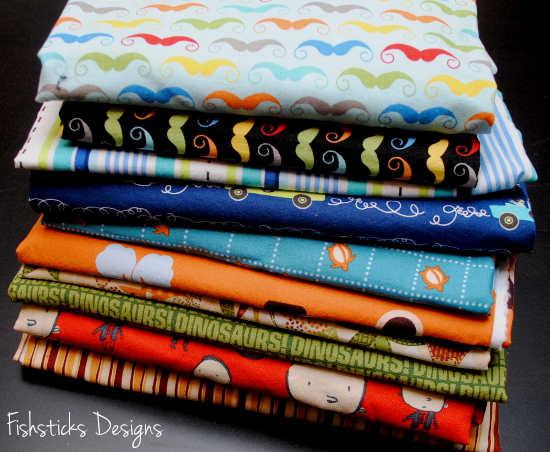 Jamie mostly sleeps in pajama pants without a shirt, so he’s getting five pairs of woven pajama pants made from fabrics he chose from my stash. I’m thinking that I’ll make them long pants for now, then shorten them for the summer. (And, by “shorten them for summer” what I probably really mean is “shorten them in a year or so, when I suddenly notice that the long-pant length has become capri-length”.)
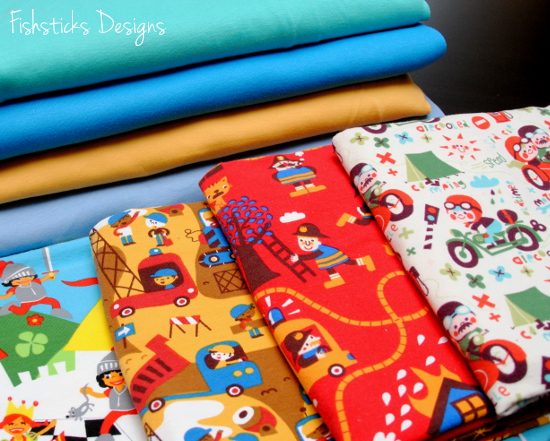 Charlie is getting four pairs of knit PJs, sewn with these adorable organic-cotton Lillestoff prints from Simplifi Fabric combined with some solid organic cotton interlock from Organic Cotton Plus. I haven’t decided yet which of my patterns I’ll use for which prints.
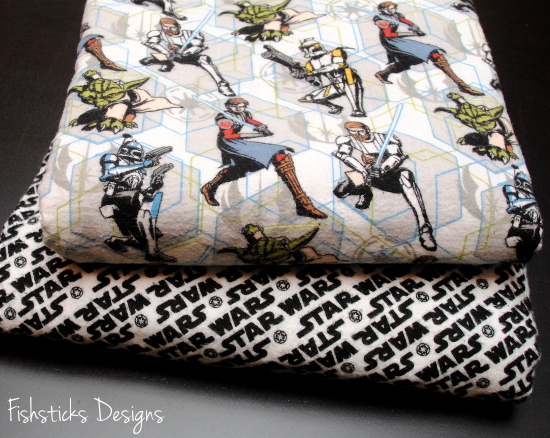 Finally, both boys have demanded that I sew them Pajama Party PJs from this Star Wars: The Clone Wars flannel that I picked up at Joann’s . . . um . . . a long time ago.
Okay, that’s enough procrastination confession for today. Time to get sewing!
Last-Minute Game Day Hot Dip {Gluten Free & Low Carb}
 So, there’s a big game this weekend in the U. S., and whether or not you’re a big football fan, there’s a good chance you’ll be gathering together with friends to watch it . . . or perhaps to just watch the commercials. Either way, there will be food involved. I have a tendency to fail to plan ahead when it comes to bringing along snacks to share, so I love having a few simple, but really good recipes in my stash. This one is incredibly yummy, super easy, and gluten-free/low carb to boot!
Here’s what you need to get started: 1-8 ounce package of cream cheese, softened
1 cup of salsa
1 cup of shredded cheddar cheese
Preheat your oven to 350 degrees. Toss the cream cheese and the salsa into a mixing bowl. Mix until they’re well combined
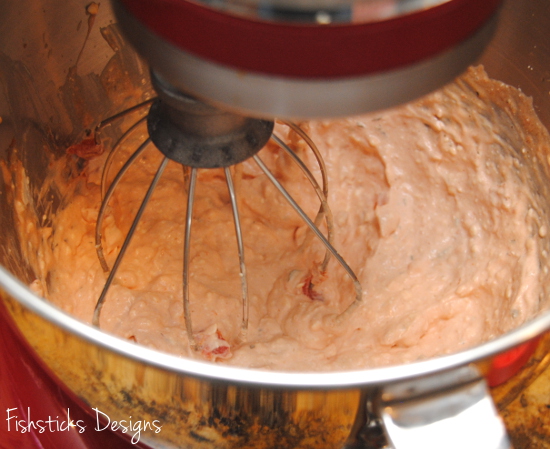 Dump in 1/2 cup of cheese and fold it in.
 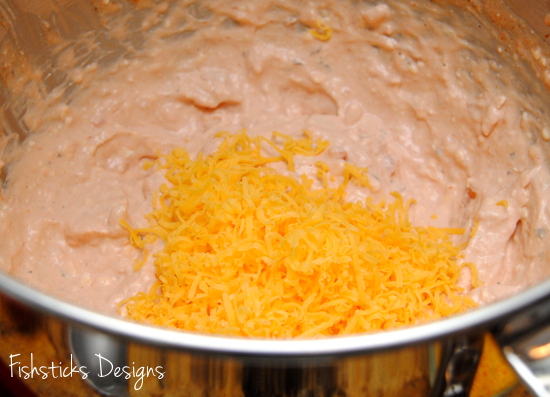 Pour the mixture into a 9″ pie plate or an 8″ square baking dish.
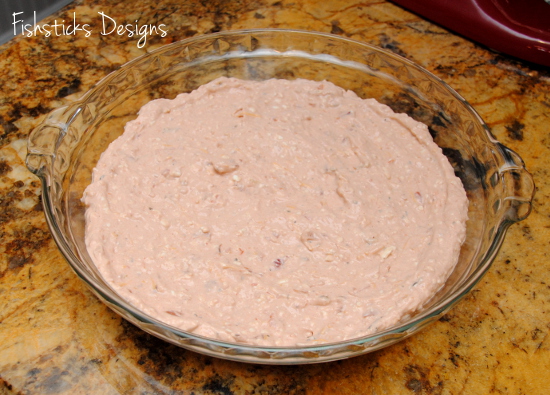 Spread the remaining 1/2 cup of cheese over the top.
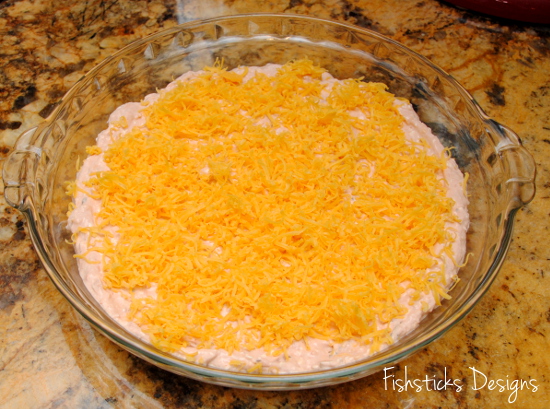 Bake for 18 to 20 minutes or until the cheese is melted and the dip heated through. Garnish it with some chopped scallions, if desired.
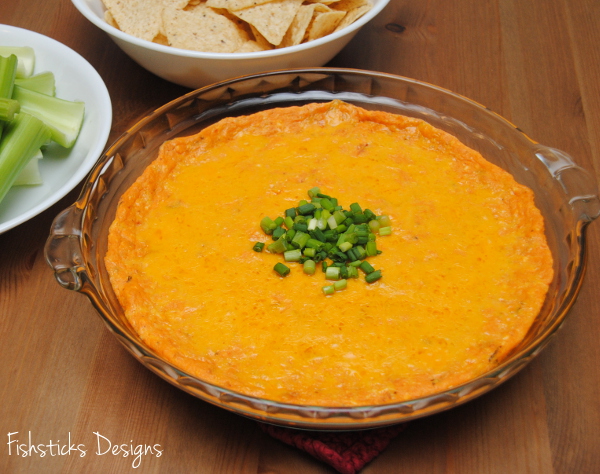 Serve it with tortilla chips or with celery sticks for your low carb friends.
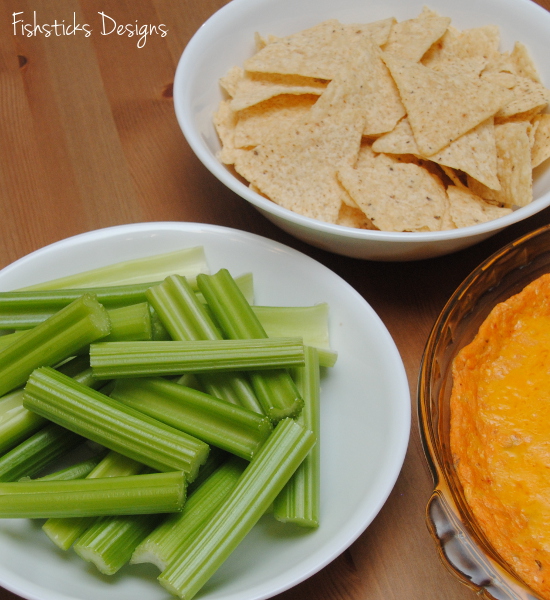 Quick and easy, but a little more impressive than stopping at the grocery store on the way, right?
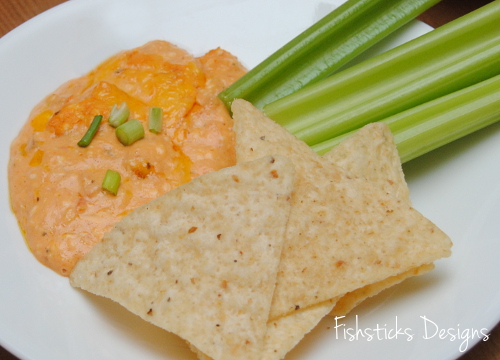
Twin Needle Hemming – A Tutorial
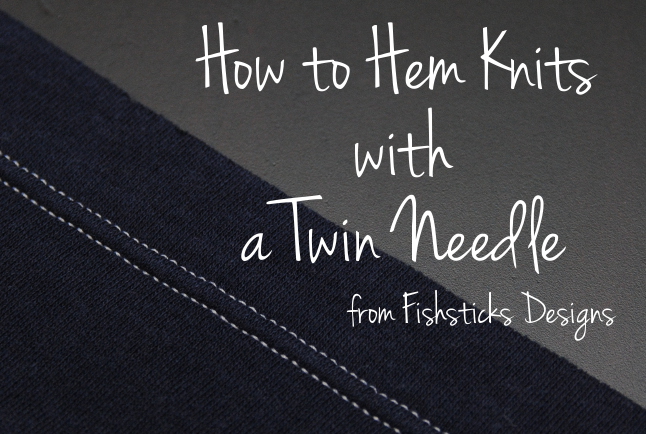 I originally shared this information as part of the Charlie Tee Sew-along in July of 2013, but I thought it deserved to be turned into a stand-alone tutorial so that it’s easy for you to refer to when necessary. The twin needle is a perfect choice for hemming knits, not only because it gives your sewing a beautiful finished look, but also because it gives you two rows of stitches on the front (see above), and a nice stretchy zig-zag on the back (see below). That stretch in the twin needle hem goes a long way in helping to prevent popped stitches.
 Let’s get started! First you need a few tools: a twin needle (also referred to as a double needle), your regular spool of thread and a second source of thread (I use a bobbin). Since you’re working with knits, it’s best to use a ballpoint or stretch twin needle. Those are hard to find locally, but they are pretty easy to find online: stretch twin needle, ballpoint twin needle. I prefer the 4.0 mm twin needle — that number refers to the measurement between the left and right needles. You can use a 2.5 mm if you’d like your stitches closer together.
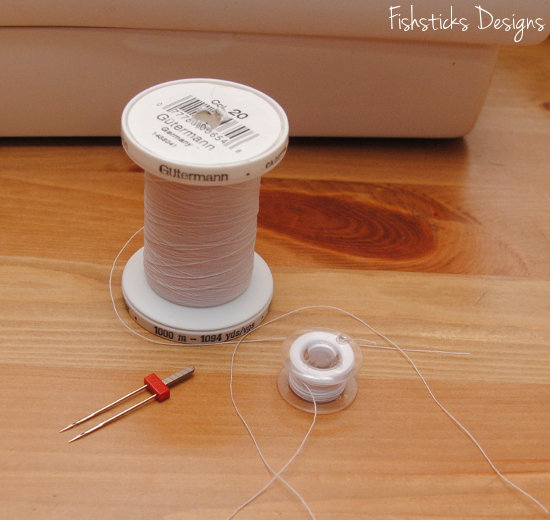 Some sewing machines, like mine, have a button or switch that needs to be pushed to change from single to double-needle sewing. Here’s what that button looks like on my machine. Go ahead and press that button. Remove your single needle and replace it with the twin needle.
 Many sewists put both thread sources on the pin that holds your regular spool. On my machine the threads tend to tangle when I do it this way.
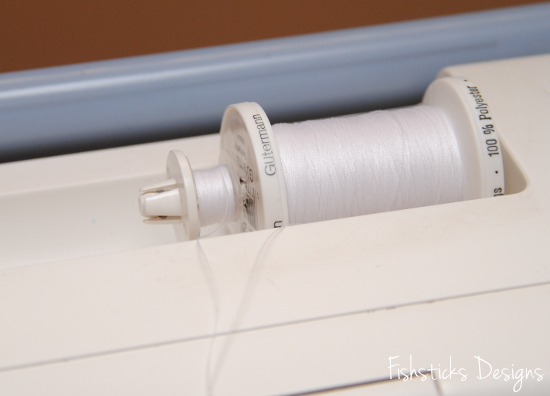 Some machines have a extra removeable pin just for a second spool of thread. I think mine did at one time, but I’m not sure where it’s disappeared to. It’s not a problem, though, since I’m using a bobbin for my second thread. I just pop that bobbin onto the bobbin-winding pin with the thread feeding towards the front of the machine.
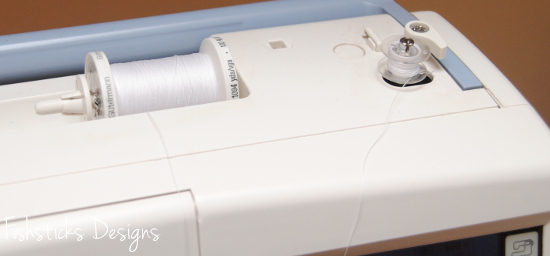 You can thread the twin needle by pulling both threads through as one. My machine is a little bit picky, though, and I’ve had to work with it until I found the best way to thread the twin needle. What I do is thread the left needle first from the spool of thread, then I press and hold that thread in place on top of the machine just before it enters the guides while I thread the right needle from the bobbin.
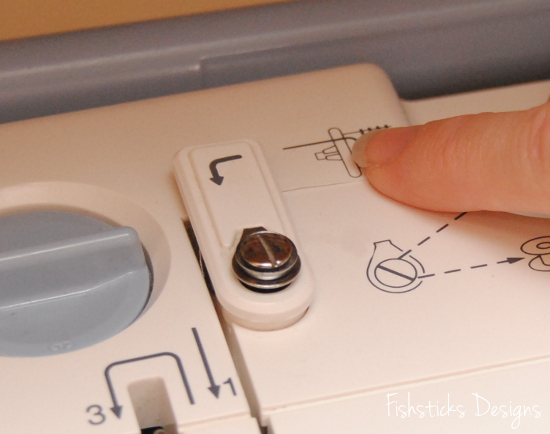 Once I have both needles threaded, I pull the threads back away from the machine as one.
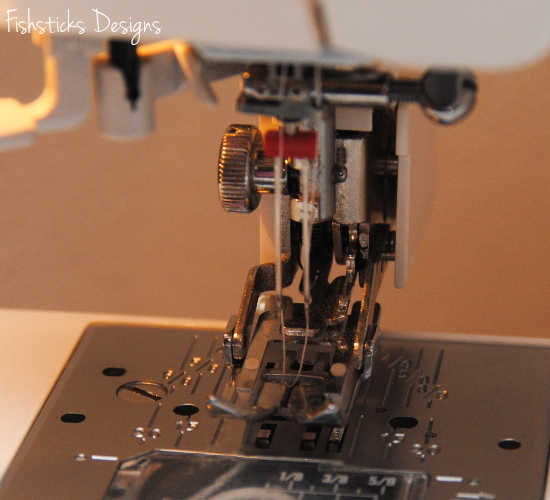 Now that your twin needle is threaded, we’re ready to get hemming! I serge the raw edges of my hems, but that is purely for aesthetic reasons. (I like for the inside of my garments to look as nice as the outside.) Because knits don’t fray, you can totally skip this step if you want to.
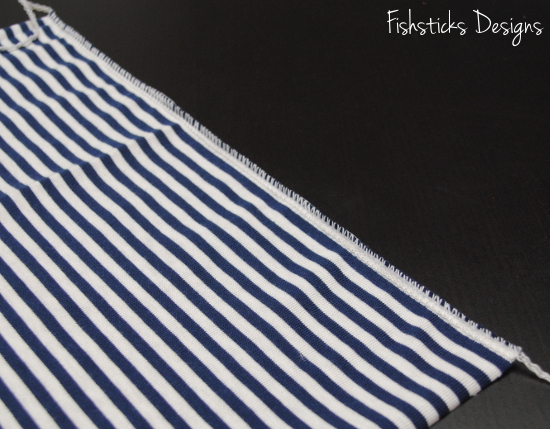 With a hot steam iron, press your hem allowance to the inside. If your knit is particularly stretchy or uncooperative, use a little spray starch when you iron.
 Because we’re going to be stitching on the right side of the fabric, and I don’t want to sew over my pins, I use long pins and position them so that the heads hang off of the folded edge. This way, I can make sure that the hem is pinned properly, and I can remove them as I get to them while I’m sewing.
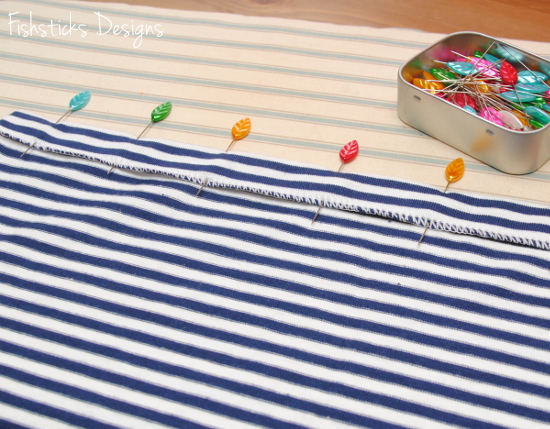 I like to start my hems about 1/2″ in from the edge of the fabric. Set your stitch length to 3.0 or 3.5. (Shorter stitch lengths stretch fabrics.) I backstitch about 1/4″, then stitch all the way across feeling through the fabrics to make sure that my stitching is falling just inside the raw edge on the underside of the fabric. I stop stitching about 1/4″ from the opposite side, backstitch to 1/2″ then sew forward again to the end. (Starting your stitching a bit in from the edge will help to keep your machine from “eating” the end of your knit fabrics. Backstitching to 1/2″ will help make sure that you don’t chop off your fastening stitches when you serge later.)
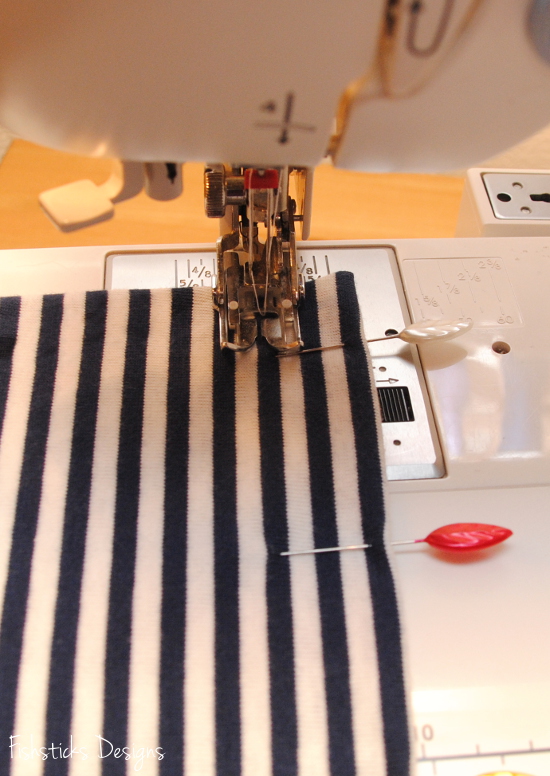 Be careful not to stretch or pull your fabrics as you’re sewing. Just guide and let the feed-dogs pull them through. (This is much easier with a walking foot!) Pulling on your fabrics while you’re sewing can lead to hems that look like this:
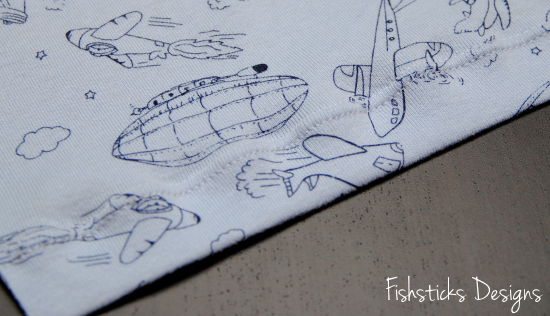 What you really want, though, is hems that look like this:
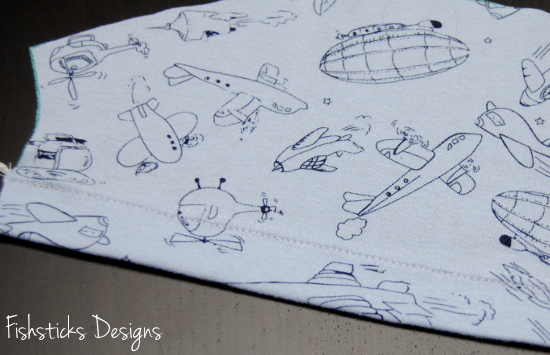 That wasn’t too hard was it?
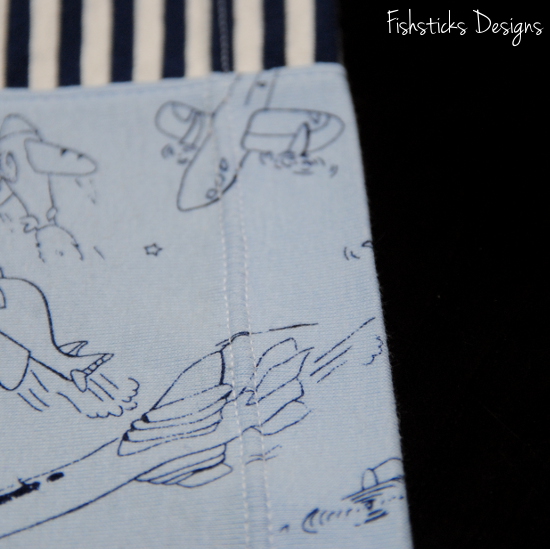
It’s a New Year Sew-along at Sew Can She: My Finished Pillow
 I am so excited to share my finished It’s a New Year Sew-along pillow. I adore it! This is definitely one of those projects that I needed the motivation of a sew-along to finish, though. I am so not one to tackle sewing anything that requires lots of tiny pieces. There was a bit of grumbling in my sewing studio over how teeny these finished blocks were, but I am so glad to have done it. I’m in awe of the ladies in this sew-along who made whole quilts!
Once I had all of my blocks finished, I started playing around with the layout, and I was amazed at how much the whole look changed when the blocks were arranged differently.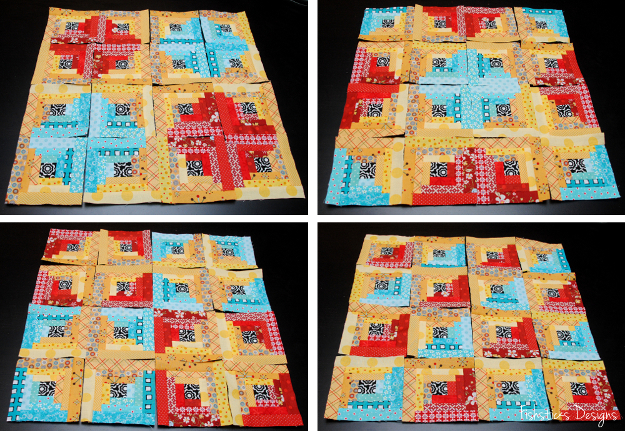 Isn’t that cool? In the end, I went with the top right layout.
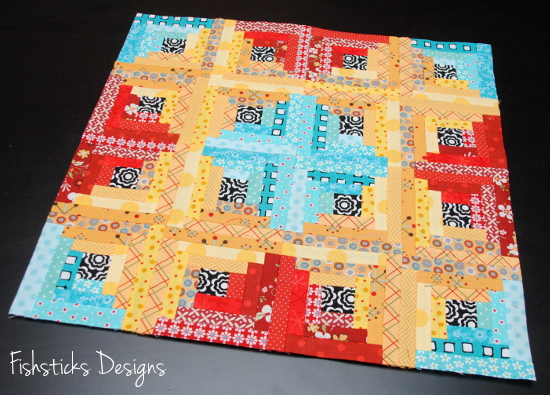 Once my blocks were all pieced together, I added a piece of cotton batting and quilted down the middles of the outside strip in each block.
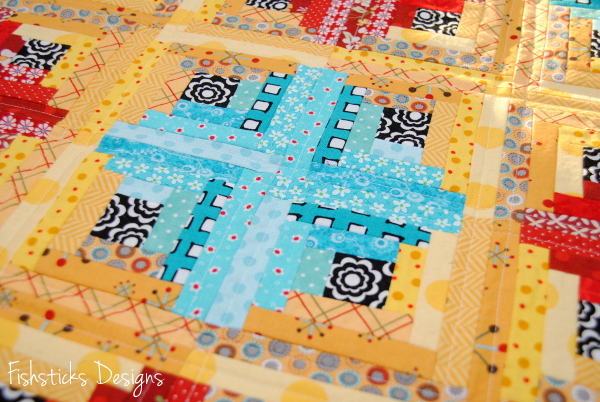 After spending so much time on the front of the pillow, I felt like I had to do something exciting with the back, so I went hunting on Pinterest where I found this tutorial from Pile o’ Fabric: Adding a Zipper to a Quilted Pillow Sham. I generally just do cross-over sham-style closings, but this seemed easy enough to try out, and I loved the finished look that it gave the pillow.
 Seriously? This was so simple, I feel a little foolish that I haven’t been making pillow shams this way all along! (Feel free to ignore the fact that my top row does not line up with the rows under the zipper.)
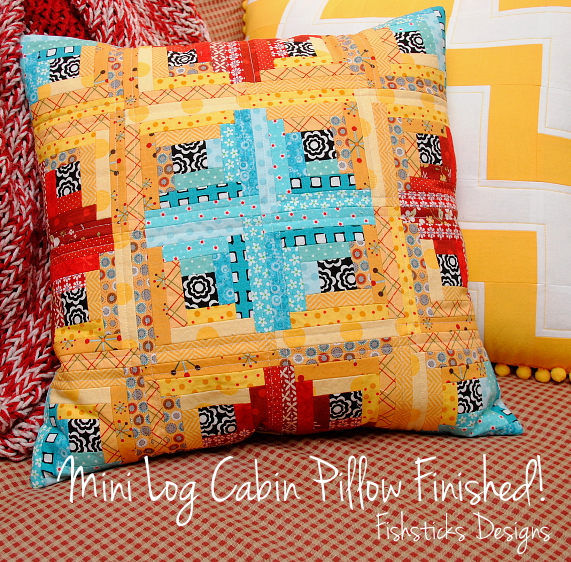
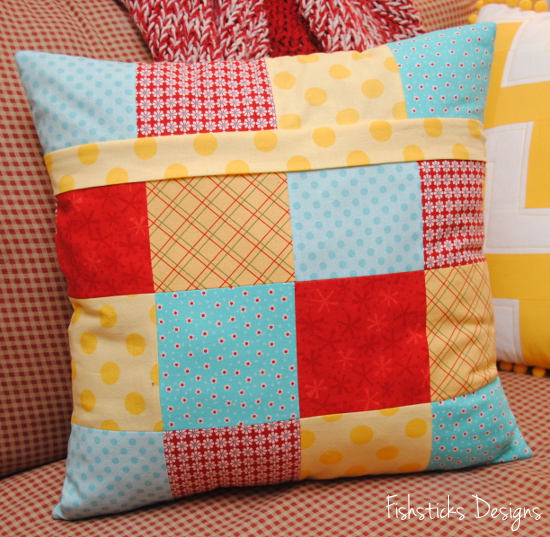 Here’s my finished mini-log cabin pillow doing a beautiful job of decorating the loveseat in my sewing studio.
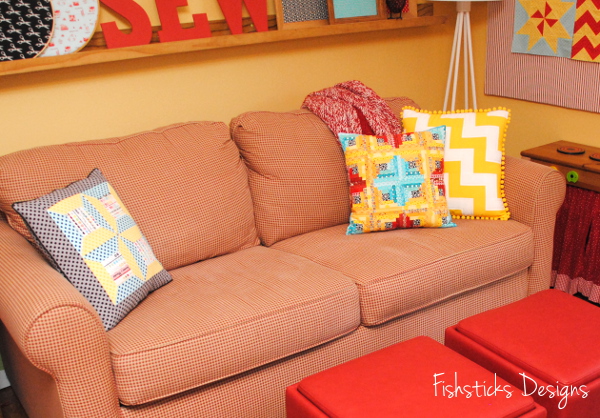 She has a few friends that I was inspired to stitch up, too! I’ll be sharing more about them next week.
Quilts & Lace on Visit Your Local Quilt Shop Day
 This past Saturday was Visit Your Local Quilt Shop Day, so Samantha and I headed out to visit a local quilt shop that I’d found online, but hadn’t yet had a chance to see. Quilts and Lace is just a few minutes up the road from us, and I’m so excited to have found it.
  In my opinion, one of the best things about local quilt shops is walking into a shop and being welcomed in. Aira and Allan, the owners of Quilts and Lace, are just lovely! I loved getting to know them a bit, and I enjoyed watching and listening as they chatted with their other customers, answering questions and giving advice on sewing and sewing machines and just visiting. Allan even brewed up quick pot of coffee for a waiting husband while Aira helped the wife with a machine that she was purchasing!
 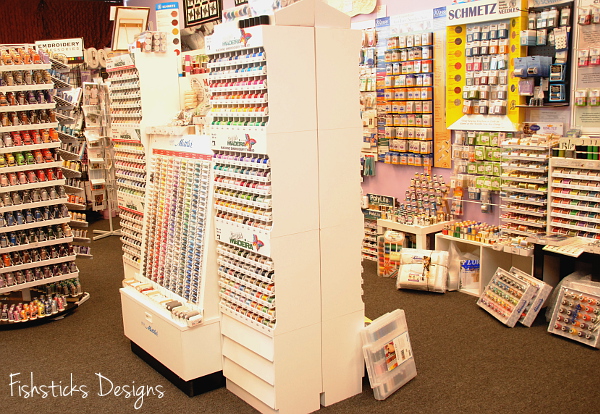 The shop carries both Brother and Babylock sewing machines, and their selection runs all the way from just-starting-out machines to sewing-is-my-life machines. They also have an incredible stock of threads, needles, patterns, notions and every sewing supply you could possibly need.
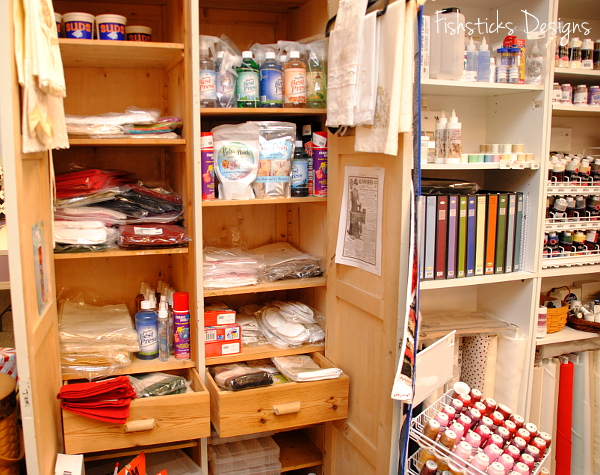 There’s a nice fabric selection with great variety and some beautiful choices.
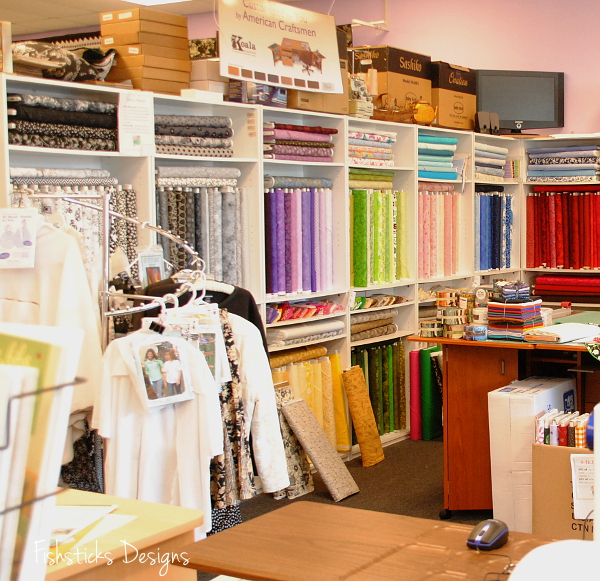
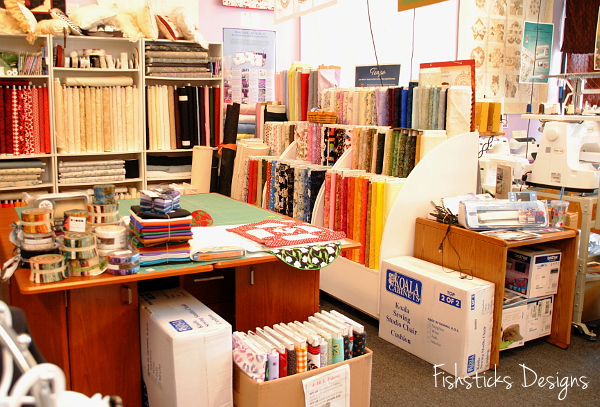 They even carry designer knit fabrics!
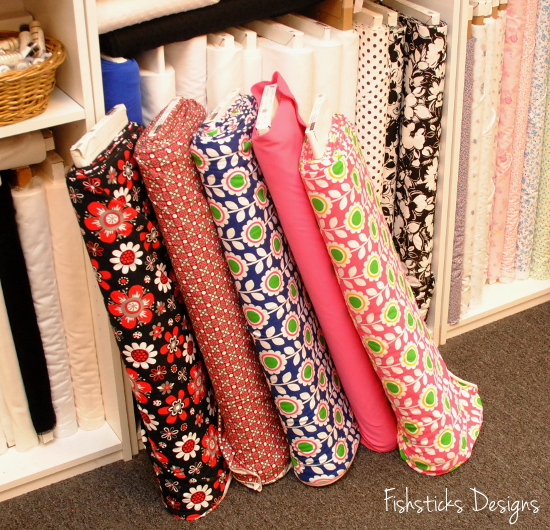 And, over on one of the pattern racks at Quilts and Lace, I found the Fishsticks Designs Charlie Tee & Hoodie pattern!
  In addition to machines, fabric and notions, Quilts and Lace offers an array of sewing classes and special events. Their classes teach everything from sewing machine basics to serging techniques, along with quilting, embroidery and more.
Have you visited your local quilt shop lately? You should really drop in and see what they have to offer. You might learn a new skill, find a new favorite fabric and maybe even make some new friends!
Book Bags for My Nieces
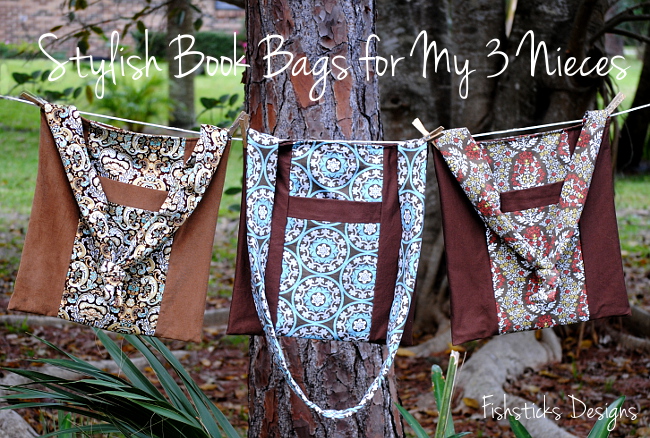 Finally, the last of my Christmas sewing! I have such fun designing new bags for my three nieces every Christmas. They’re building up quite the collection of bags, and I love that they use all of them. This year I went with a simple, but stylish book bag that I’ve wanted to design for ages.
The inside of the bag is generously sized for library books or school books, and the front of the bag has a nice big pocket. I made the strap super long so that the girls can wear them cross-body, or they can tie a quick knot in the center of the strap to wear them as shoulder bags.
 The sides wrap around to a wide strip centered on both the front and the back. I love how the sides frame the main fabric print.
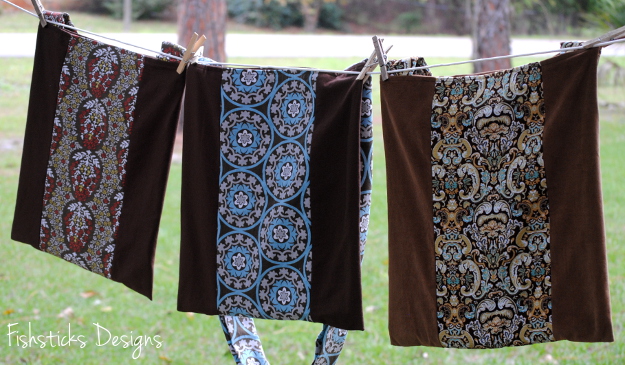 The bag is fairly unstructured or “slouchy”, so it’s easy to fold up and store away, but I used heavier weight fabrics so they have a good amount of substance to them. The two bags above are sewn with twill and home decor fabrics, and the bag below is sewn with fine wale corduroy. (All of the fabrics are from Joann Fabrics.)
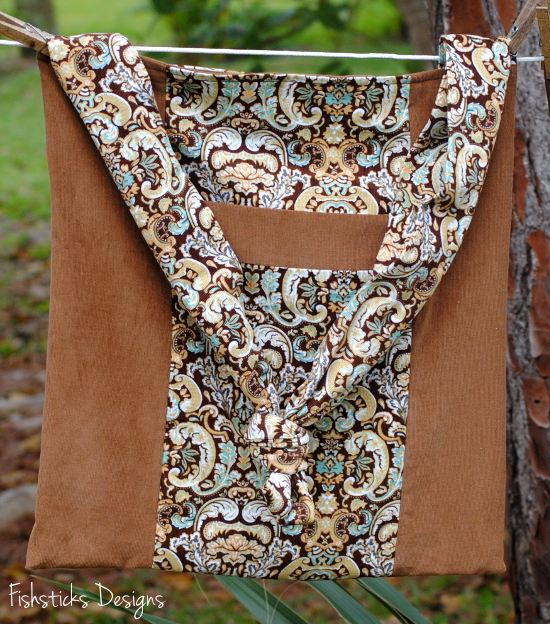 I think these practical, modern bags wrap up last year’s sewing list quite nicely, even if the finish is a bit late. Oh, and you might see this bag again as a pattern in this year’s line-up very soon!
A Three-Piece Theo Trio
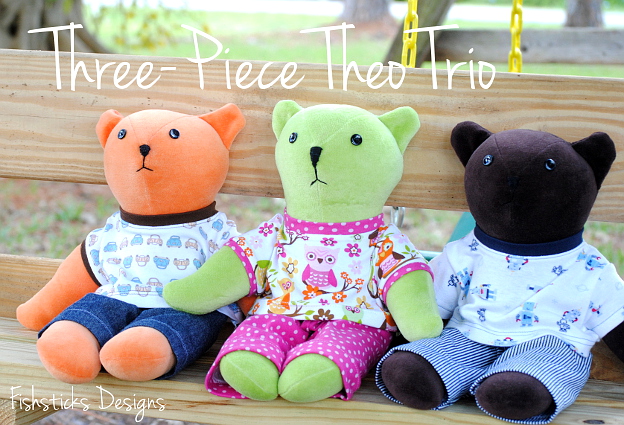 I’m still loving sewing new stuffies for my two little guys and our granddaughter for every holiday. (Eventually, they’re going to run out of room for new ones, aren’t they? But, maybe not before they outgrow them.) A few weeks before Christmas, I asked for pattern suggestions in an online PDF pattern group. Since I don’t generally design stuffie patterns, this is an area where I enjoy trying out patterns from other designers. Time was short so I needed something quick, but I wanted something really cute, too. Enter Three-Piece Theo from Tie Die Diva Sewing Patterns!
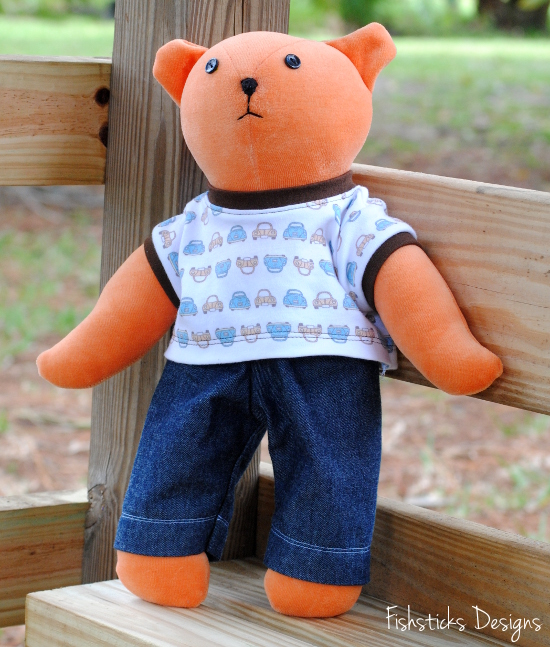 This pattern goes together so fast, and this bear is the cutest thing ever! I’m a bit of a naturalist when it comes to fabrics, so I used cotton velour rather than the suggested polyester fleece for the three bears that I made. I love how soft and squooshy they are, and the cotton velour makes them easy to wash, too.
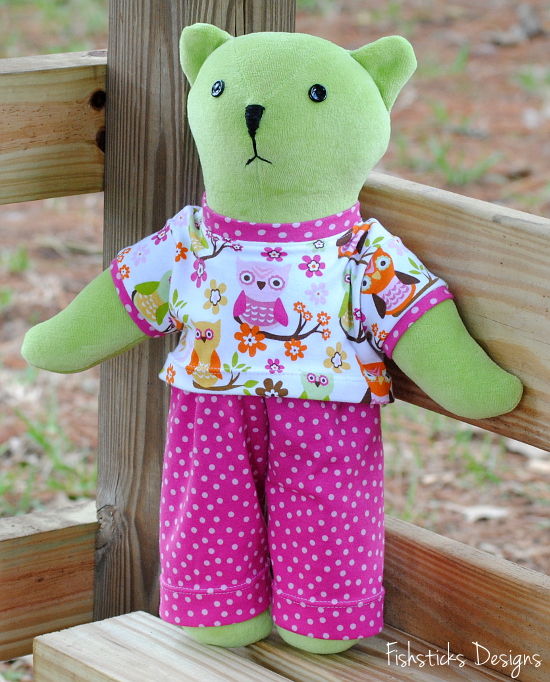 I chose to use buttons for the eyes and to embroider the faces for a more vintage-y look. The hand embroidery was definitely the hardest part for me. If you follow me on Instagram, you already know that I stitched the noses on the boys’ bears on Christmas Eve after everyone was asleep and the presents were under the tree. Then, I decided on Christmas afternoon that I really didn’t like the rectangular shape I originally used, so while the kids all played with their new toys, I ripped the bears back apart and gave them much nicer triangular noses!
 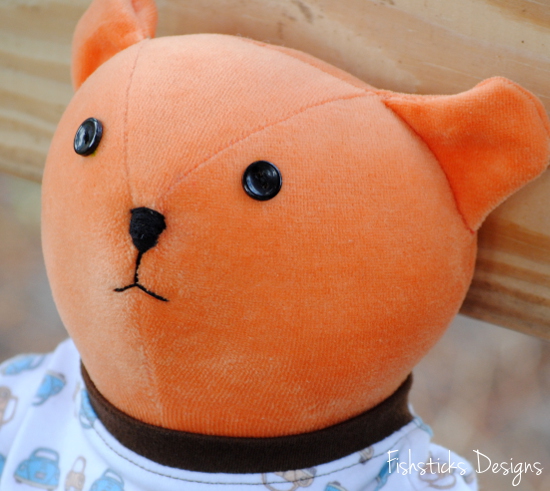 It’s pretty cool to see how much you can change the personality of the bear with a slightly different face. My kids think that Katie’s green bear looks like a koala because of its long nose.
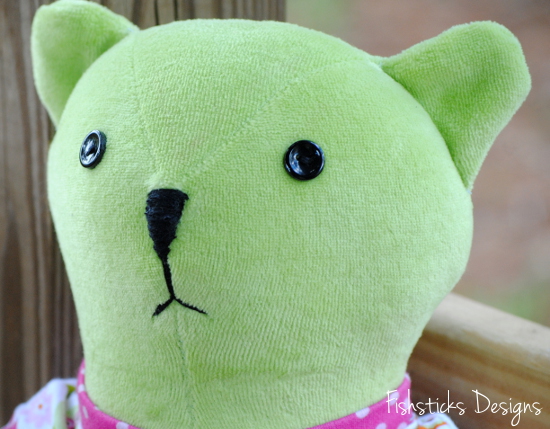 I used the pants pattern that comes with the bear for the pants, but I couldn’t resist downsizing my Charlie Tee pattern for the top! Wouldn’t it be fun to make matching bear/child clothes? My boys would probably roll their eyes, but I think Katie would love that!
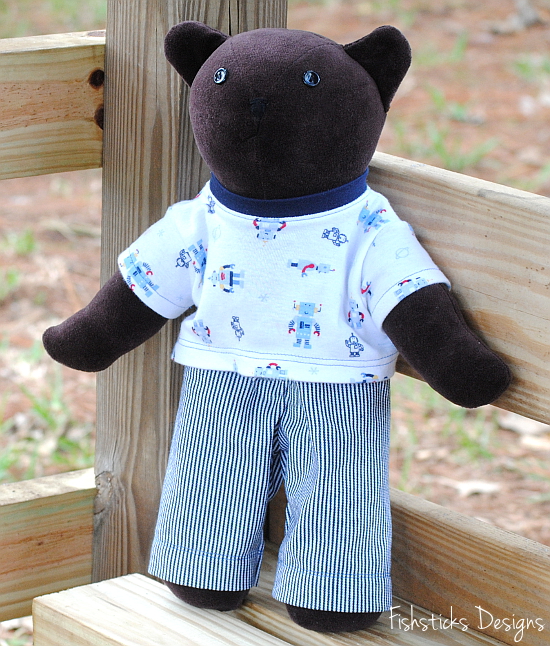 These were a hit with my littles. They even traveled with us on our mini Orlando vacation this past weekend. I think I’ll be turning to this pattern again in the future for more quick handmade and personalized gifts, too!
It’s a New Year Sew-along at Sew Can She: Blocks in Progress
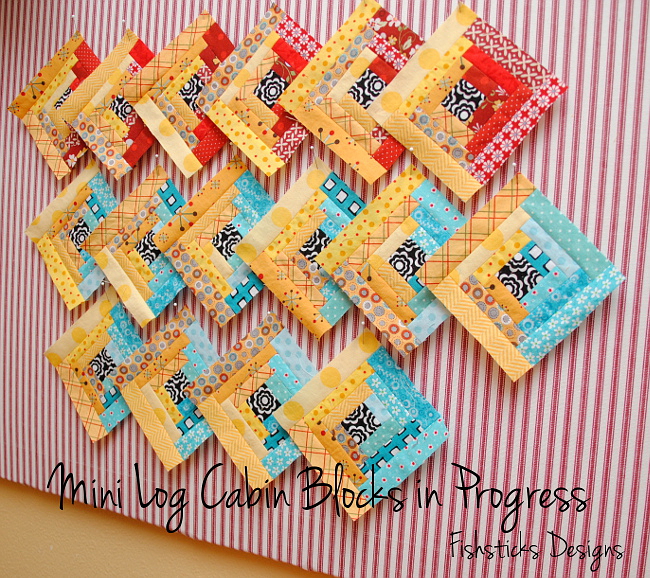 Sorry it’s been so quiet here this week! My oldest two children and our granddaughter are here from California and Georgia to celebrate a late Christmas with us. I managed to sneak away for a few minutes to make sure that I met this week’s goal in the It’s a New Year Sew-along, though!
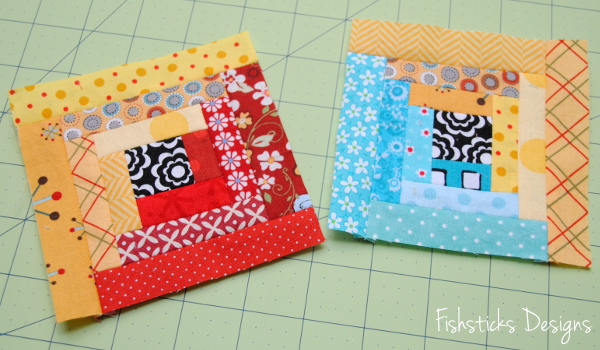
Here’s a quick preview of my mini log cabin blocks. I’m making 20 blocks total — 16 for a toss pillow and four for a mug rug — I think. As you can see above, I have four more to go, but those last ones are going to have to wait until our family visitors have gone home on Monday.  In spite of their tiny size and the fact that I’m not generally one to sew projects that involve itty-bitty pieces, I’m really enjoying sewing these! (I’m not sure I could muster the patience for a whole quilt made from blocks this small, but these small projects are just fine.) You do really have to be super careful to square up each side as you’re piecing these, though. Because they’re so small, every little wiggle shows up! Caroline has some great tips for beautiful finished blocks over on the Sew Can She Blog: Week 3 – Sewing.