Dark Chocolate Peanut Butter Shell with Chocolate Banana Ice Cream
 I have fond childhood memories of “Magic Shell” ice cream topping. I loved pouring it on thick and crunching down into it with a spoon . . . mmmmm. As sweet as those memories are, though, I prefer to feed my family healthier options now. I’ve been making the Healthy Chocolate Peanut Butter Fudge from Creating Naturally for quite some time. We love it! I skip the cupcake liners and just spread the liquid onto a parchment-paper-lined cookie sheet, freeze it and break it into pieces. It’s amazing straight from the freezer on a hot summer day . . . or really even on a cold winter night . . . it’s chocolate and peanut butter, and it’s good for you! Could you possibly ask for more?
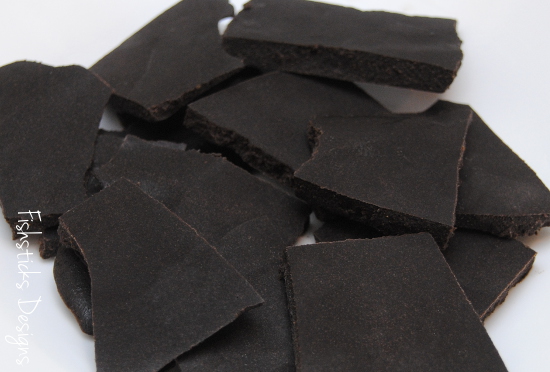 As I was sliding the cookie sheet into the freezer one day, I thought, “You know, this stuff is a whole lot like Magic Shell. I wonder if it would work the same way?” With a few little adjustments to make it a pourable sauce, it worked absolutely perfectly! And, with chocolate “ice cream” made from nothing but frozen bananas and a little leftover chocolate sauce, this is a treat that you’ll feel great about serving to your little ones again and again. I promise they won’t complain!
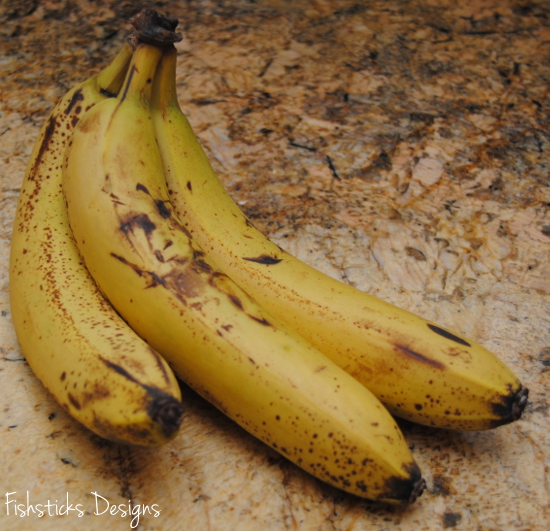 Start a few hours early by peeling and slicing ripe bananas and freezing them. I’ve found they process easily if they’re sliced about 1/2″ thick. One to 1 1/2 bananas makes a good serving size.
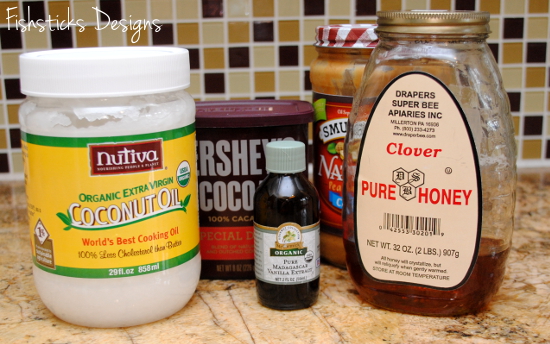
The “Shell” Ingredients
1/3 cup coconut oil, warm enough to be liquid (It only needs to be about 76 degrees to melt, so don’t heat it too much.)
1/3 cup dark cocoa or cacao powder
1/3 cup natural smooth peanut butter
4 tablespoons raw honey or real maple syrup
1/2 teaspoon vanilla
plus frozen sliced bananas for the “ice cream”
(If your maple syrup is stored in the refrigerator, warm it slightly to room temperature in a saucepan with the coconut oil. Otherwise, it will solidify your coconut oil too soon. I have used peanut butter straight from the refrigerator without a problem, however.)
The instructions for this are really, really simple. Just grab your food processor, dump in all of the ingredients (except for the frozen bananas, of course), and process it until it’s smooth.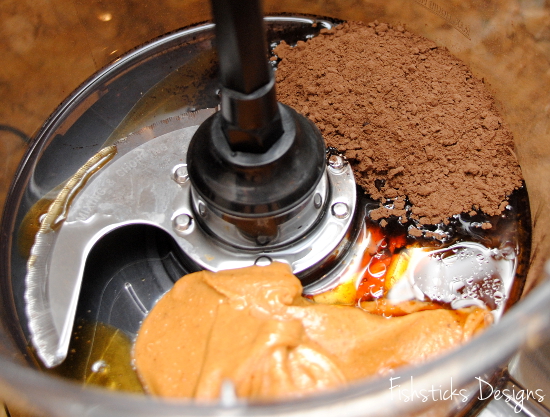 Pour the sauce into a container, but don’t wash the food processor bowl.
 Grab your frozen bananas from the freezer and dump them into the food processor.
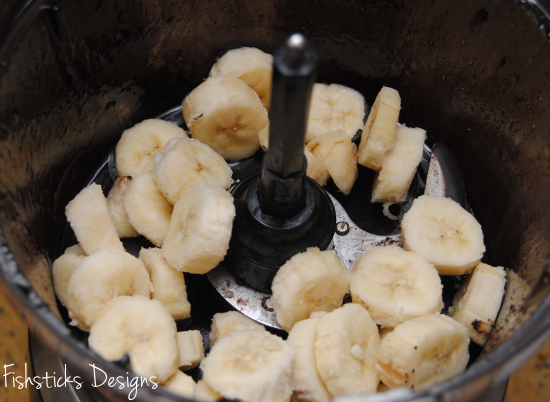 Process until you’ve reached the consistency of soft serve ice cream and dish it out. (It will turn to pea size crumbles first. Just keep processing!)
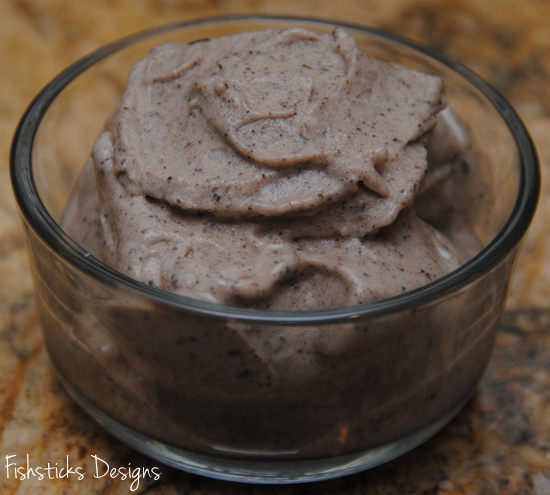 Pour on the sauce.
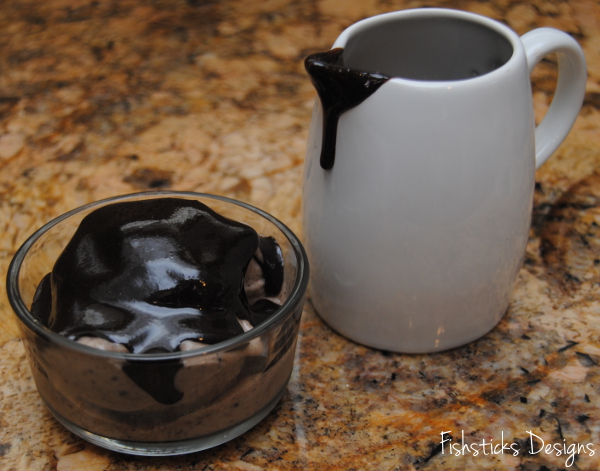 Let it harden.
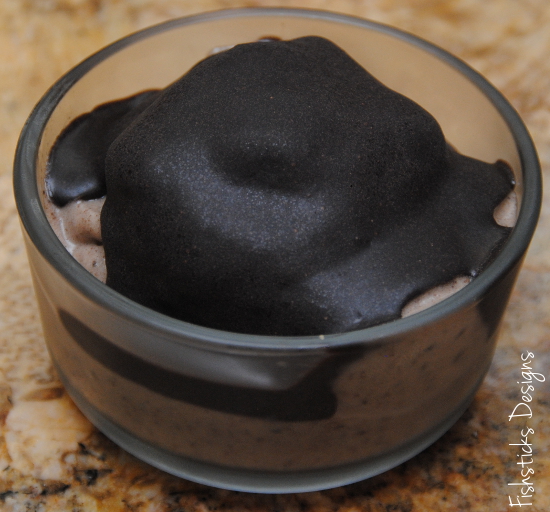 And enjoy that delicious and healthy snack!
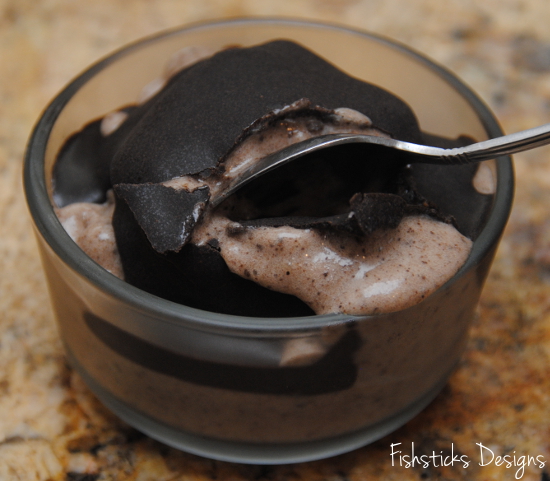 Crack!
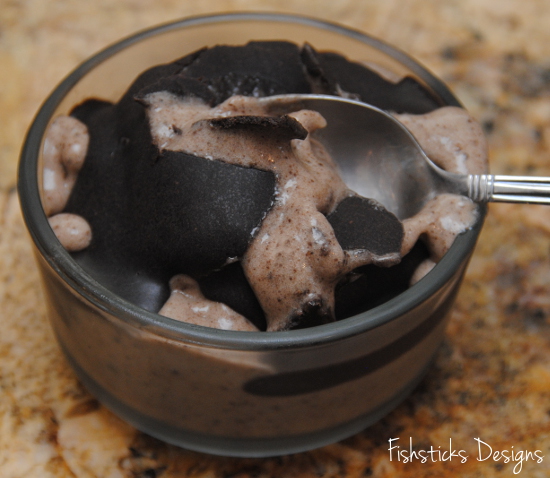 Yum!
Yum!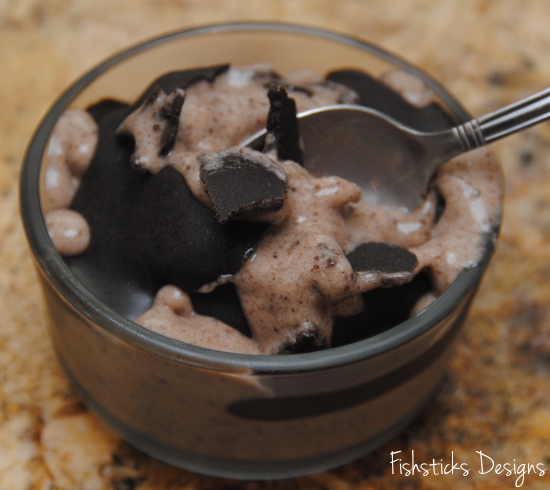
The Roly-Poly-Along Giveaway Winner!
 And the winner of the free Roly Poly Pattern from Imagine Gnats is . . . Susan! Susan wrote, “My two daughters and many nieces would love a roly-poly. Plus, we have several stuffed animals that would demand one of their own!” (How cute would a stuffed animal Roly-Poly be?!) Congratulations!
a Rafflecopter giveaway
Those of you who didn’t win, can hop right over to Rachael’s store and buy the pattern by clicking on the picture below:
It is such a blessing to give!
Remember this huge stack of bibs from the February “Dinner for Two” Hopeful Threads project? Many of the bibs that you sewed and gave are already being put to use at The Hidden Treasures Foster Home, and the others are making their way over in suitcases a little at time as volunteers travel from the states to serve. I’m so excited to get to share with you some beautiful pictures that were emailed to Kristy and me . . . pictures of the children who received your handiwork! These pictures should warm your heart and encourage your spirit.
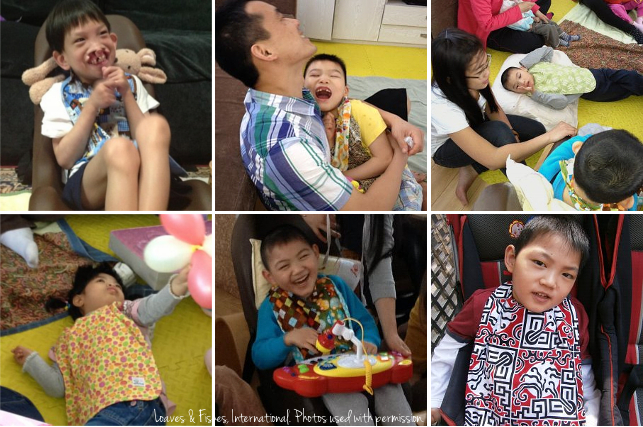 A portion of the thank-you letter that was included with the photos said, “We are so touched because we can feel the outpouring of tender love, quality of workmanship and genuine giving that went into the making of each bib. These bibs brighten the daily life of not only the children but everyone who cares for them and visits the home. The variety of patterns and colors makes a person smile, and I believe makes the child feel very special.”
Thank you so much for giving of your time and your talents!
The above photos are property of Hidden Treasures Foster Home/Loaves and Fishes International, and are used here with permission. Please do not copy or reuse without permission.

The Roly-Poly-Along Blog Tour & Giveaway!
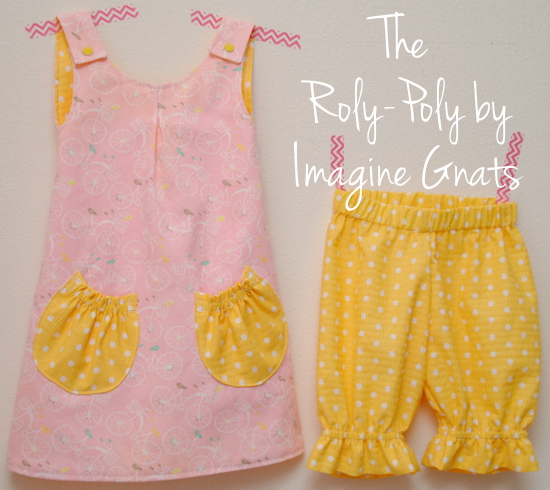 It’s my turn on the Roly-Poly-Along! My friend, Rachael, from Imagine Gnats recently released her first sewing pattern, and it’s such a fun wardrobe basic for little girls! Not only do I get to share my first Roly-Poly with you today, but you also have a chance to win a Roly-Poly pattern of your own!
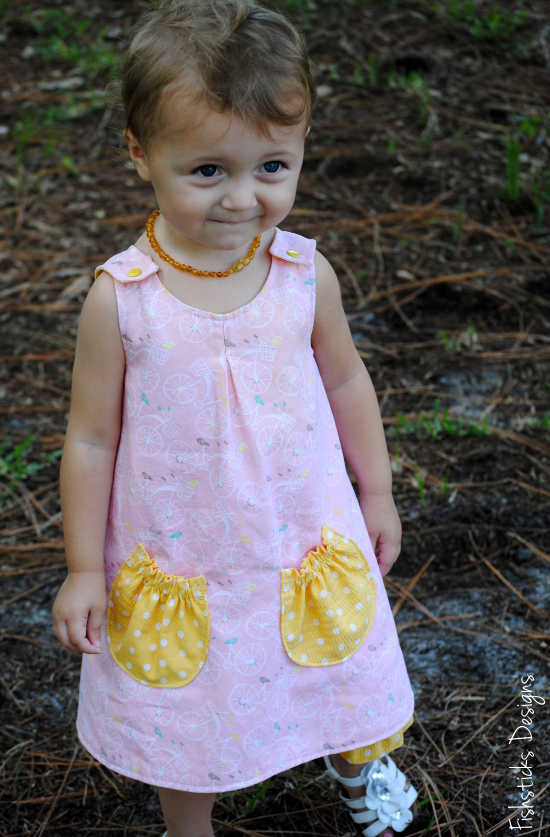 There have been some absolutely amazing Roly-Polies sewn during the blog tour. You have to check out this one and this one and this one and, of course, the knit roly poly here! The creativity left me sitting with my mouth open wondering what I was going to do. I really love the simplicity of the pattern, though! And, if you know me, you know that I’m all about practicality and quick gratification. So, I just went with what I love, and I’m so happy that I did.
 Based on measurements, I cut out the size 1 for Katie. She’s tall and thin and normally wears a size 2T, and the size 1 fits beautifully!
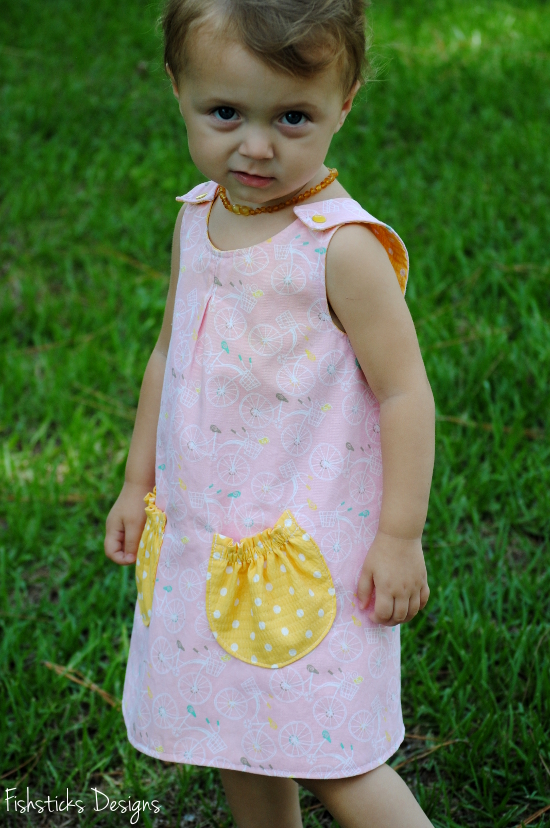 I decided to skip the side seam pockets but extend the tunic to dress length. To do that, I taped the pattern pieces together like Rachael recommends, then I drew a straight line across the center of the pattern, cut the pattern in half, added about 4″ and taped it all back together.
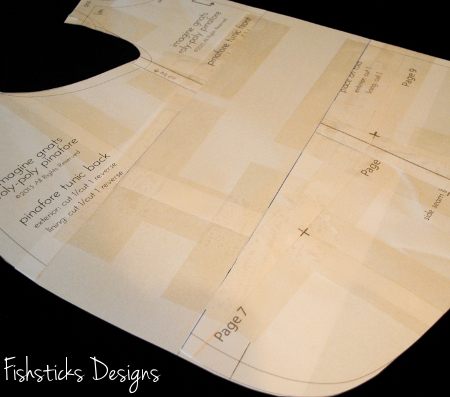 I adore the bicycle twill that I found at Joann Fabrics for the main side, but I thought it needed a little something fun, so I drafted some elastic-top round pockets and sewed them up with fabric from the reverse side.
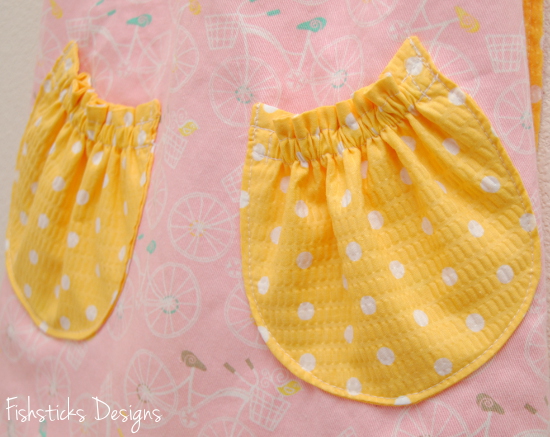 I used metal snaps instead of buttons for the straps (mostly because they were fast and easy!)
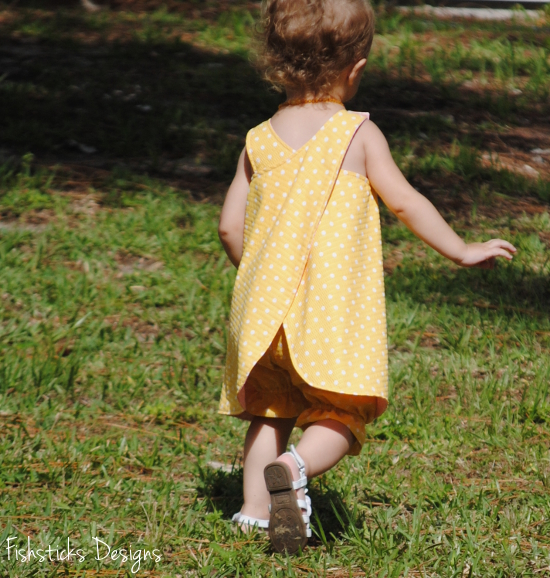
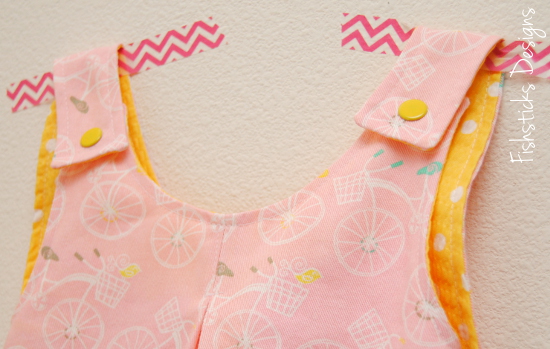 On the reverse side, I used yellow seersucker with white dots, also from Joanns.
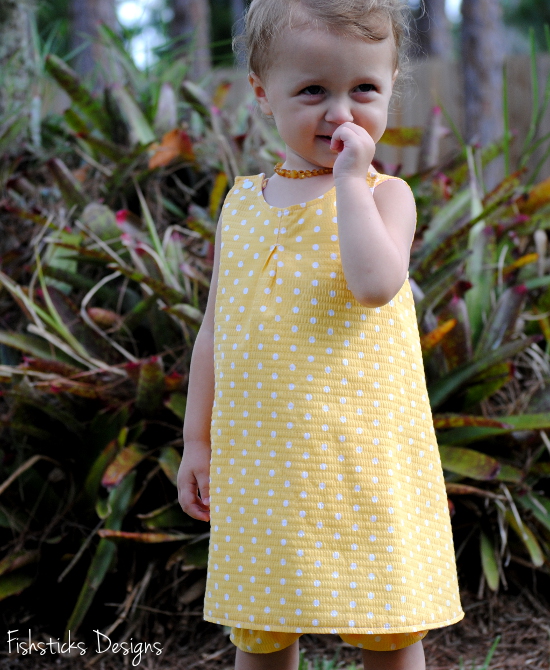 To complete the outfit, I added a pair of retro ruffled-leg bloomers. Aren’t they cute peeking out?
 Wait, though! That’s not all the Roly-Poly goodness you get from Fishsticks today! My amazing assistant, Leigh, is tagging along! You can check out the Roly-Poly she sewed for Missy over on her blog, Rooibos Mom.
 Now for the giveaway! Just leave a comment telling me who you know that would love a handmade Roly-Poly, and register your entry in the Rafflecopter below. The giveaway will run through Saturday, June 1st, and the winner will be announced on Monday, June 3rd.a Rafflecopter giveaway
Be sure to check out the rest of the Roly-Poly-Along:
5.13 Jill Made with Moxie / Stephanie The Crafty Kitty
5.14 Stephanie NeurosesGalore / Cherie you & mie
5.15 Ari Max California / Caila Caila Made
5.16 Veronica SewVery / Tara Girl like the sea
5.17 Nancy owen’s olivia / Adrianna Crafterhours
5.20 Ajaire Call ajaire / Sarah EmmylouBeeDoo
5.21 Laura Craftstorming / Jessica a little gray
5.22 Frances Miss Matatabi / Nicke kiss kiss quilt
5.23 Amy formwork design / Kat Sew Chibi
5.24 Joanne Rose & Dahlia / Amanda Kitschy Coo
5.27 Celina Petit a Petit and family / Delia Delia Creates
5.28 Christy a.Amelia handmade / Carolyn Fake It While You Make It
5.29 Bonnie Fishsticks Designs / Maria La Inglesita
5.30 Jane Buzzmills / Kate Things for Charlie
5.31 Polly Jack & GeeGee / Molly Rose & Odin
Remembering
 Remembering today those who made the ultimate sacrifice to protect the freedoms that I hold dear. Words cannot begin to express my gratitude.
Sewing to Rebuild
 Do you happen to have some sewing time to spare this weekend? Pattern Revolution and Green Style Creations have teamed up with a group of independent PDF pattern designers to collect handmade clothing, as well as stuffed toys and bags, for families affected by the tornadoes that struck Oklahoma this week. As of yesterday morning’s update, they had nearly hit the original collection goal of 100 items in only TWO days! With all the incredibly giving sewists in this online community, I think we could easily hit 10 times that number. Want to know how to use your sewing skills to help, too? Just click on the logo above to find all the details, including free patterns and downloadable tags!
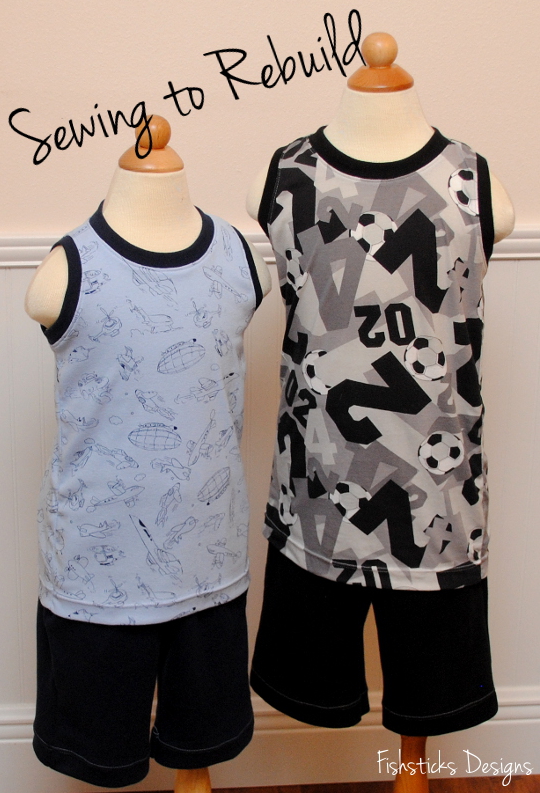 We’re at Florida’s state homeschool (FPEA) convention this weekend, but I was able to squeeze in a couple of hours of sewing before packing our bags on Thursday night. I used my free The Tank pattern and my Mud Puddle Splashers pattern to make these two little boy outfits to add to the collection of items heading to Oklahoma. First up is this navy blue airplane set in size 4T . . .
 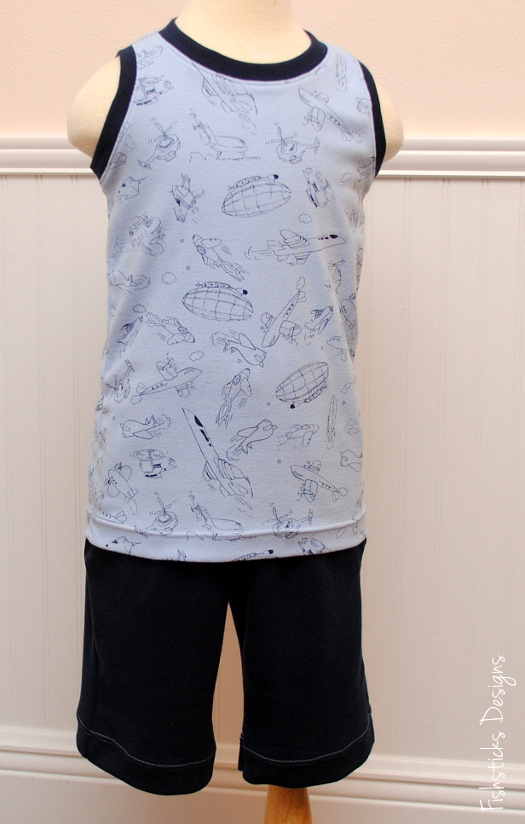 . . . and then this black and gray soccer ball outfit in size 6.
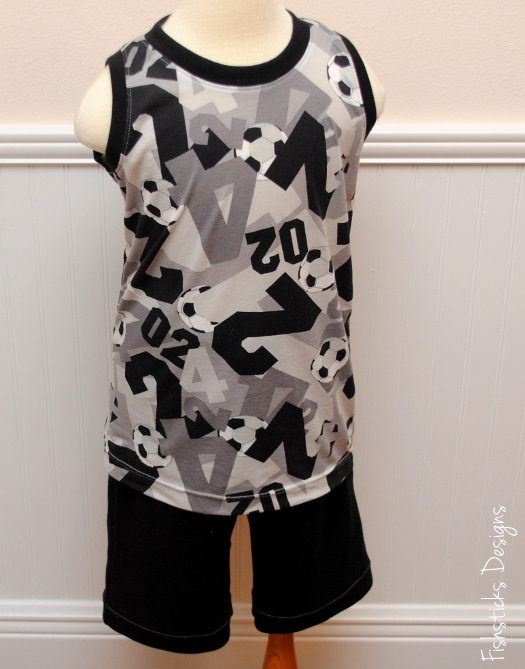 When disaster strikes, we all want to be able to do something to bring a little hope to those affected, this is a little way that we can do just that for little ones whose families have lost all of their material possessions. I’ll be sending these two little outfits off with prayers that they’ll put smiles on the faces of the little boys who receive them and that their families will soon be back on their feet looking forward to a bright future!
Bento Boxes for Real Food on the Road
 I have plans for a series on family travel to start soon, but I promised that I’d share this sweet little bento box this week! Isn’t it perfect for a family full of Lego-loving little boys?! I found it at Modes4U! It came in the same package as the fabric that I used for my little guys’ travel bags.

When you’re on the road or even just spending the day out at the park, it’s hard to take real foods with you. I had considered bento boxes before, but I hadn’t actually tried one until this trip, and now I think I need one for each member of the family. In case you’ve never heard of bento before, Lunch in a Box defines “bento” as a compact, balanced, visually appealing meal packed in a box. Historically, it’s a Japanese box lunch. And, a quick Pinterest search for “bento lunch” will make you gasp at the artistic talent that many people put into bento lunches! My bento lunch is very simple in comparison! The very top layer of this box has a freezer pack to keep the food in the top storage compartment cold. On this particular day, I packed a boiled egg, cucumber slices, grape tomatoes and cheese — a great real food lunch, and it’s gluten-free to boot!
 The divider between the top and bottom storage compartments holds a little set of chopsticks, in case you need utensils.
 The bottom storage compartment is just as roomy as the first. I really like that this bento box is BPA free and painted with food-safe lacquer. It’s really easy to keep clean and ready to go, and I trust that it’s safe storage for our foods. Because it was warm out the day I took these pictures, I didn’t have food packed in the bottom. Instead, I threw in a ziploc bag of ice and left out the middle divider to be sure that the eggs stayed cold! That was a great bonus to using a double-layer bento box!
 On other days, we packed the bottom layer with pretzels and crackers.
 We packed a lot of picnic lunches while we were traveling this time, and having this handy little box made at least one of our lunches a lot of fun. We’ll have to make sure that we have bento boxes for everyone next time! I love anything that keeps our kids excited about eating real food, especially when the vendors surrounding us are selling stuff that looks and smells good, but isn’t really at all what we want to put in our bodies!
Make for Mom with the Shaffer Sisters!
 There’s a great celebration all about MOMS over at the Shaffer Sisters’ blog this month! If you haven’t been over to check things out, you must take a few minutes to scroll through all the great guest blog posts filled with ideas for things you can create for yourself or for any other mom on your list.
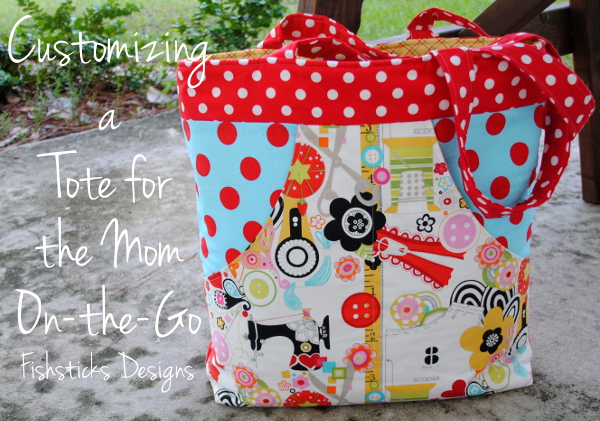 I’m visiting over there today with a tutorial that will walk you through customizing the inside of any tote bag pattern with pockets and loops — everything a mom needs to stay organized on the go!
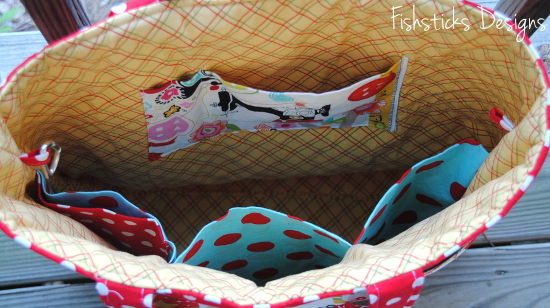 Just click on either of the tote bag pictures, and you’ll find all the details.
Charlie’s Crazy I-Spy Quilt
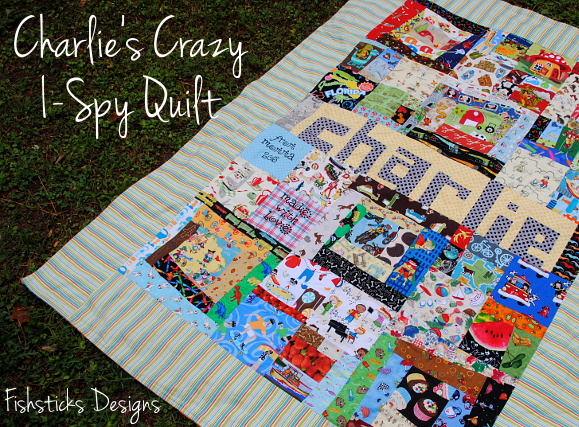 I’m so excited to show you Charlie’s finished quilt! I actually finished it the night before we left Florida two weeks ago on our family trip, and I had no time to take pictures before washing it, drying it and loading it in the car! These pictures were taken here outside the great little cottage where we’re staying right now. You’ll just have to ignore the fact that Charlie has loved this quilt well already, and it could stand another wash and a good ironing! (This is really how it will look from now on anyway!)
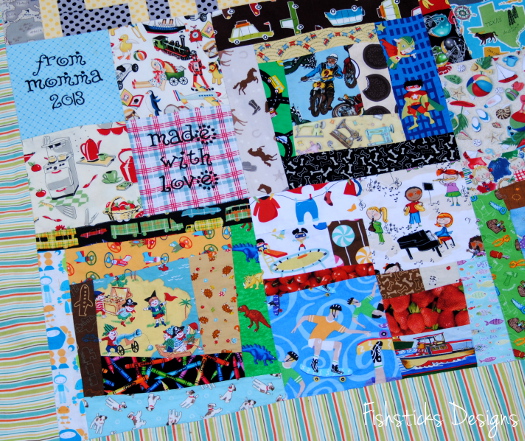
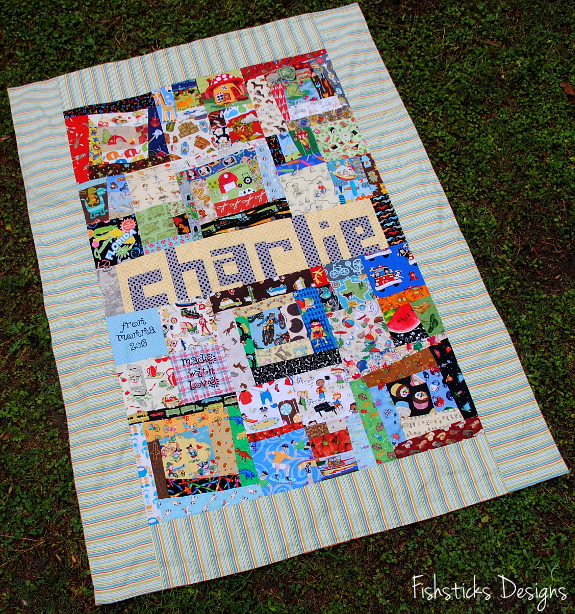 The front is constructed with the 12” crazy (or wonky) log cabin blocks that I finished last year, along with the 12” blocks that I made with the crazy I-spy mini-blocks that I’ve completed over the last few weeks during the Sew Can She Crazy Quilt Sewalong. (
Don’t forget that you have until 10 p. m. to submit your Crazy Quilt project entries for a chance to win some great prizes!)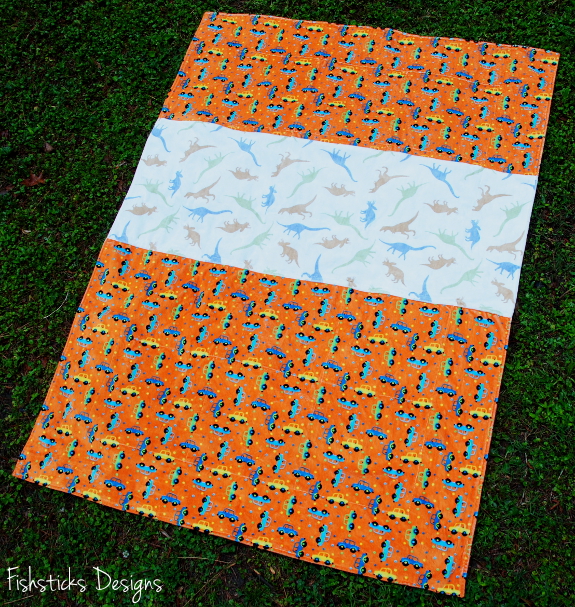 I mentioned before that this quilt is made similarly to the house-quilts that my other children have. It’s constructed with a pieced top and a minky backing without batting and quilted in the ditch. I’ve machine bound some, but since I was short on time with this one, I just turned and topstitched it. The piece of minky that I had planned to use wasn’t quite big enough, so I added a smaller piece, and I love the look that it gave the finished back! It works perfectly with the craziness of the front.
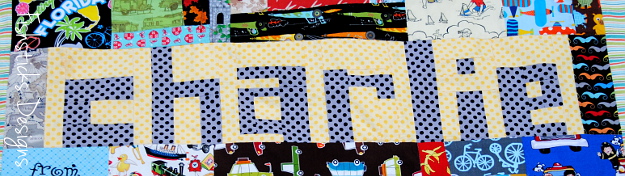 The pieced name turned out just the way I imagined it. Charlie thinks it’s, “So cool!” and so do I!
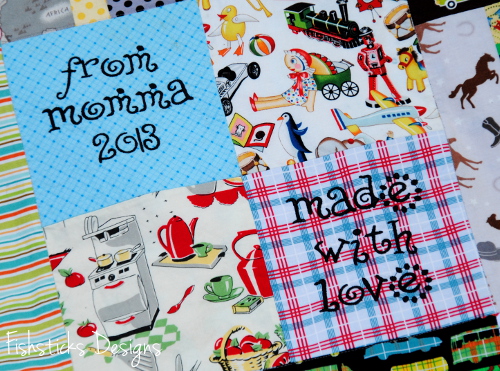 I’m also in the habit of using my embroidery machine to add a quick signature and date to these quilts. (An amusing little side note: this is the first time I’ve used my embroidery machine since we moved from Texas, and I seriously think that every single piece that I needed, from the hoop to the card to the software, was in a different unknown place. I was digging through drawers and boxes and . . . I almost gave up, but I’m so glad I didn’t!)
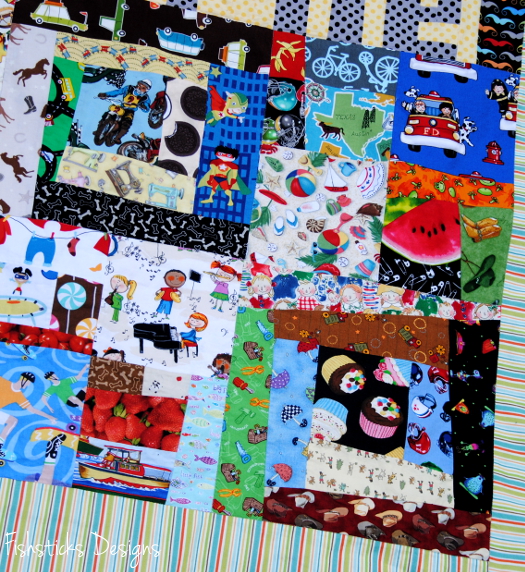
I think that covers everything. I’ll wrap up with close-ups of each section of the quilt. There’s a whole lot of stuff to spy!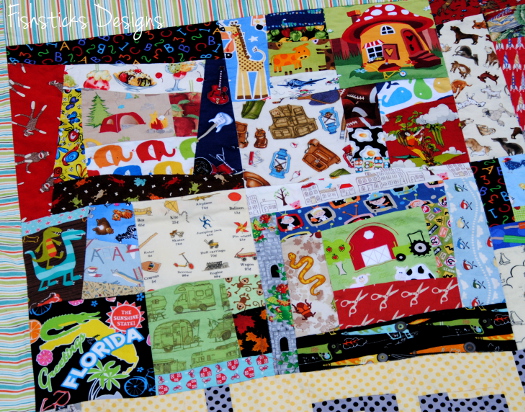

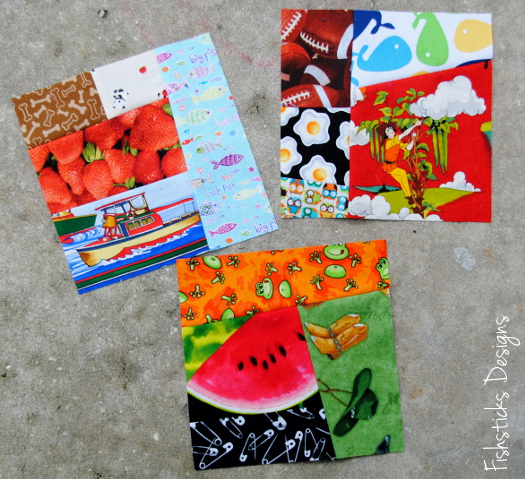
Personalizing the Crazy I-Spy Quilt
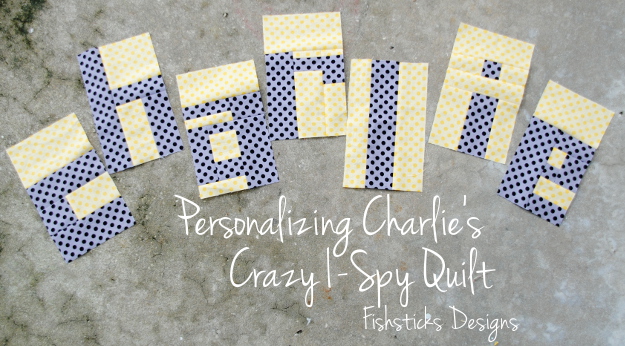 Rather than adding traditional stitching embellishments to Charlie’s Crazy I-Spy Quilt, I chose to piece his name into it! Piecing together letters like this looks complicated, but it’s actually really simple. You just need to decide on a width and height for your letters, then use basic elementary school math to determine width and length of each strip. If you want letters like mine with straight edges and right angles, just draw each letter out on graph paper before getting started. This will allow you to determine your measurements really easily, but don’t forget to add a 1/4″ seam allowance on each edge!
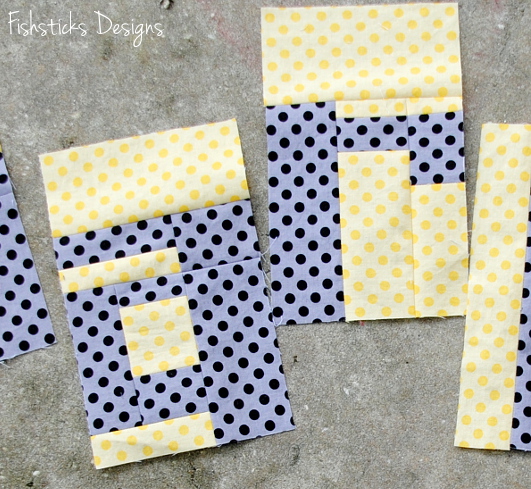 We’re on the road right now, but I finished up Charlie’s quilt before we left, and I’m planning to get pictures soon so I can share it with you before the end of the week. I did snap pictures of the remaining Crazy I-Spy Blocks before I sewed everything together:
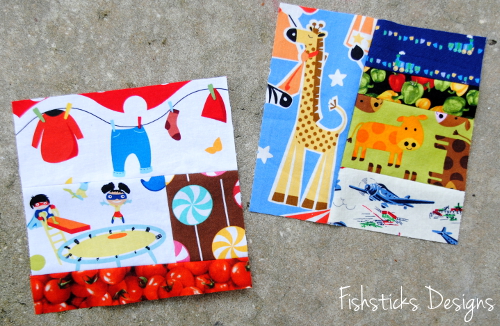 How’s your Crazy Quilt sewing going? Projects are due by 10 p. m. eastern this Saturday, May 18th. You can find all the details for entering over on the Sew Can She Blog. Even if you’re not entering, though, you might want to check out the Flickr pool for some great inspiration!