Hopeful Threads: Fluff for Foster Care
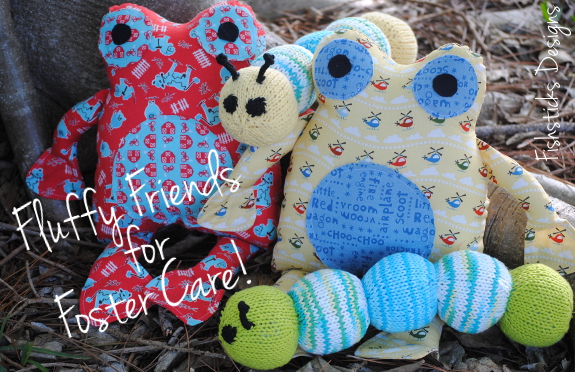 Farmer Frog and Pilot Frog went for a walk one sunny spring day. They brought along their pet caterpillars to enjoy the fresh air. Their conversation bubbled over with excitement about the mission they’d been assigned, knowing that their new jobs as friends to little ones in foster care would bring smiles to faces and joy to hearts!
Pilot Frog hoped that his trip to Hopeful Threads would lead him to the perfect little boy for him, maybe one who loves helicopters and pretending to fly!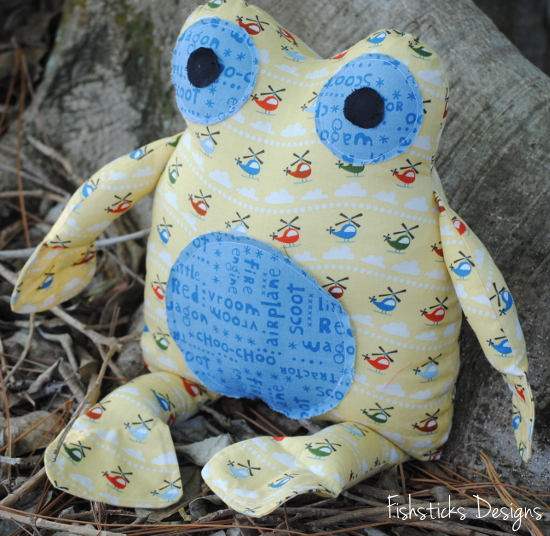 Pilot Frog’s green caterpillar would be making the trip with him. This little caterpillar dreamed of finding a new home with a little one who would love to cuddle with him day and night.
 Farmer Frog was looking forward to a much longer trip all the way to Canada! There, he would settle down in a brand new foster home and wait expectantly with the family for a child in need of their love and his companionship.
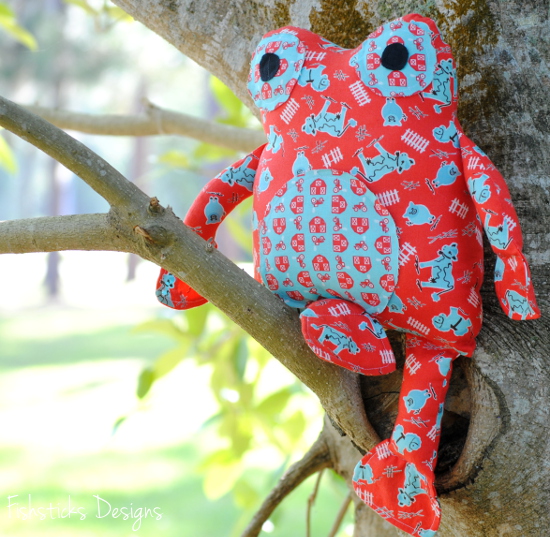 Traveling with Farmer Frog, of course, was his yellow caterpillar. The yellow caterpillar was filled with anticipation of becoming a special lovey to a wee one who would share playtime laughs and bedtime snuggles.
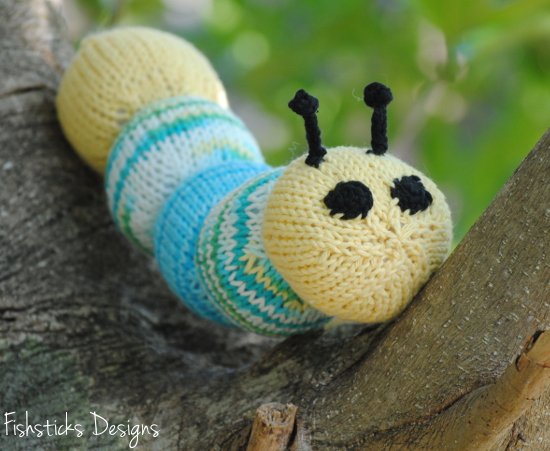 Heehee! I couldn’t resist writing a silly little story to go along with these guys. Aren’t they cute little stuffies? I sewed up the frogs using Bit of Whimsy’s Fritter Frog pattern (the Daddy Frog version). The sweet caterpillars were knit by my 15-year-old, Samantha. (I keep telling her that she needs her own creative teen blog!) She used this pattern Lion Brand Cuddly Caterpillar. Pilot Frog and his green caterpillar are shipping out to Kristy at Hopeful Threads for this month’s Fluff for Foster Care project. In the same spirit, Farmer Frog and his yellow caterpillar will be packed off to my friend, Jamie, in Canada where she and her husband are just beginning the foster family journey.
KCW Day One: Earth Day!
 Since the first day of this season’s Kids Clothes Week happens to fall on Earth Day, I felt it was quite appropriate to recycle some old grown-up wearables into a few new little-one wearables!
I started with this pile of polos that I picked up recently at a thrift shop. One of the things I love about upcycling thrifted clothing is that it’s already been washed and dried multiple times, so there’s no guessing about how the fabric will wear. The fabric in these polos was all in great condition, so I don’t worry that I’m going to put time into sewing something with it, only to have it pill after being washed and dried a few times. I fell in love with the vintage look of this first polo with its vertical stripes, and I was so excited to find that they fit perfectly on the Charlie Tee pattern in Jamie’s size. Normally, when I upcycle a cotton knit shirt, I reuse the hems to save time. The hem on this shirt was so crooked, though, I didn’t really want to use it as is. That was the first sign that something just wasn’t quite right with this shirt. Without the hem allowance, there wasn’t quite enough fabric below the placket on the original shirt for the new one, so I had to sit and seam rip the original hem.
 Once I had the pieces all cut out, including the back and the sleeves with their original hems intact, I sat down to re-hem the front of the shirt. I noticed upon close inspection that this knit looked quite strange. That would be because the shirt was sewn with the stretch going up and down, rather than around the body. So weird! But, I wanted those vertical stripes! I’d invested enough seam ripping by that point that I felt it necessary to just move forward. It’s a good think I was determined! A broken serger needle and a little bit of sewing-machine-eaten fabric later, that old polo has a sweet new life as a vintage-look striped tee for my 6-year-old. (And, it fits perfectly, even with the front of the shirt turned the wrong direction!)
 Charlie’s tee was so much faster and easier! I grabbed this pique cotton polo that was formerly sold at a high end men’s store. That means the fabric must be great, right? I definitely didn’t have to worry with crooked hems or fabric turned the wrong direction!
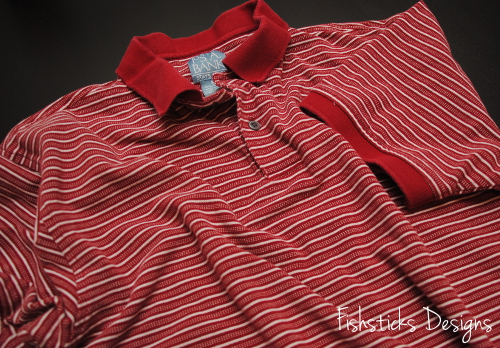 This tee took less than 30 minutes from cutting to done. I was able to use the existing hem from the old polo for the front and the back of the new tee. Rather than re-hem the sleeves, though, since the originals were trimmed with ribbing, I used the Charlie Ringer Tee sleeve option. Voila! A cute little ringer tee for my youngest from what started the morning as a used and tossed aside polo.
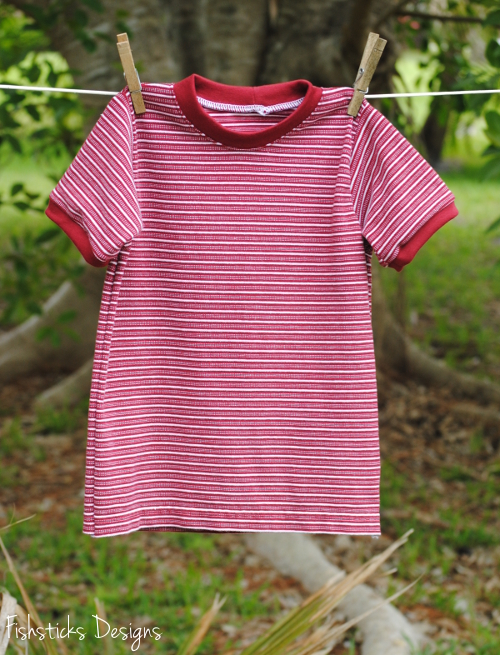 (I’m going to put off sharing modeling photos of the things that I sew for KCW until we’re on our family trip in a few weeks. I’m taking advantage of KCW this week and sewing up tops so that my youngest two will have plenty of handmade shirts to take with the jeans — and possibly winter coats — that we’ll be packing! I really hope that it warms up a bit north of here soon!)
Updates & Randomness
 Thanks so much to all of you for your patience and encouragement during our few days of messiness while we transferred the site to our new host! We are all up and running now! There may still be a few glitches, but hopefully, we’ll work through them smoothly.
 If you’re a subscriber, you didn’t get this post because my subscriber list didn’t transfer over correctly. You should receive a new confirmation email tomorrow, and you’ll need to reconfirm your subscription to stay on the list. So sorry for that extra step, but I don’t want you to miss out on anything!
 The Sew Can She Crazy Quilt Sewalong started yesterday! Have you checked in to see what this week’s task is? Leigh and I are working on organizing and readying our scrap piles. We’ll be sharing them with you later this week.
 Kids Clothes Week starts tomorrow, and I’ve got some fun sewing planned for my little guys. Are you joining in? It’s not too late! Get your patterns and fabric ready and commit to spend at least one hour each day this week sewing for your children!
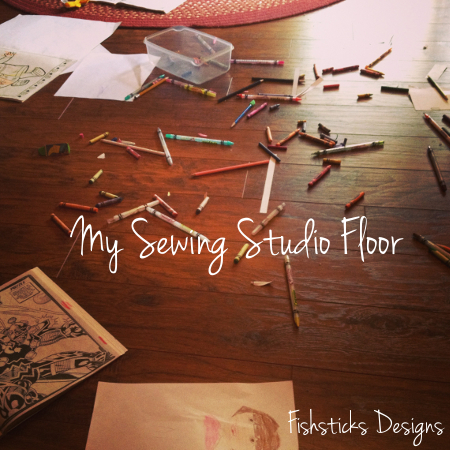
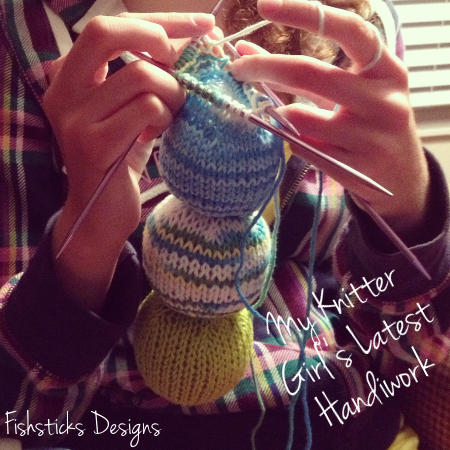
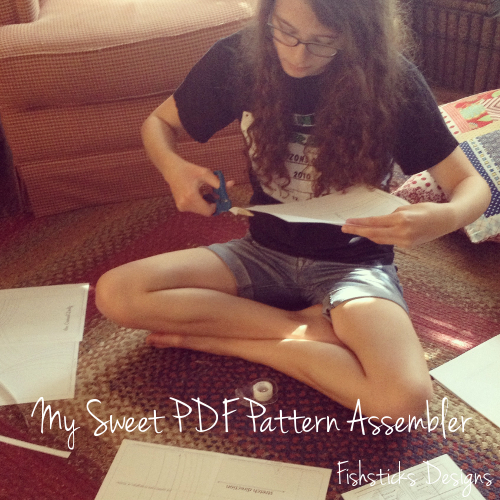
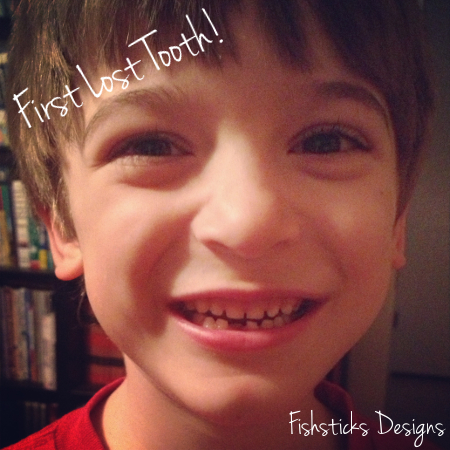
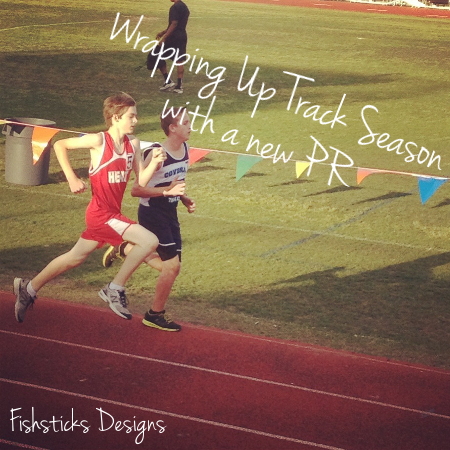 Are you enjoying my random pictures? I can’t write a blog post without pictures, so I thought I’d throw in a little life randomness via Instagram pics! This last one needs a little explanation, though. My dear friend, Heather, and her family moved way (waaaaaaaay!) out into the country last month. The kids and I drove out to visit her and see their new house for the first time this past week. It was a lovely visit. The boys had a blast just being boys, and the girls enjoyed some sewing time. We left in the late afternoon, drove down her long driveway, took a right, and about 2 minutes later, Samantha said, “Is that an alligator?!” I glanced in the rearview mirror, and sure enough it was an alligator! An alligator on. the. side. of. the. road. just hanging out. I couldn’t drive away without making a u-turn and going back to take a picture. Who would believe that I just saw an alligator on the side of the road without a picture?! Moving to the country in Florida is just a little bit different than it is in other parts of the country.

The Sew Can She Crazy Quilt Sewalong!
 Do you have a pile of fabric scraps? Have you ever wondered what to do with them? Would you love to try out crazy quilting? Are you motivated by great sewing prizes? If you answered yes to any (or all!) of those questions, then come join us as we put those scraps to use in crazy new ways in Sew Can She’s Crazy Quilt Sewalong!
 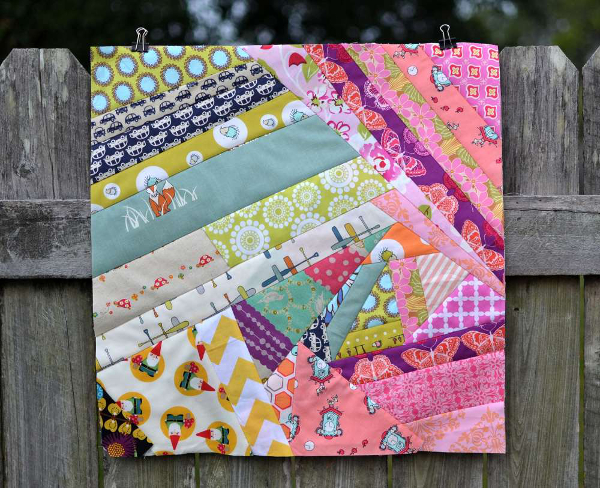 The fun starts this Saturday, April 20th. Your goal is to create something amazing with a crazy quilt block or two or a dozen. The possibilities are only limited by your imagination . . . and your fabric stash! At the end of the sewalong, you’ll have a handmade and crazy project to enjoy, and you could be the proud winner of a prize from one of these generous sponsors:
I’m excited, too, to tell you that my new assistant, Leigh, is going to be joining in the Crazy Quilt Sewalong with me and sharing here on the Fishsticks Designs blog! I’ll be back this afternoon to share her introduction with you. I think you’re going to love her!
To read all the details and join the Facebook event page for the sewalong, click right here: The Crazy Quilt Sewalong Announcement. I can’t wait to see what you sew!
The Casual Lady for Spring!
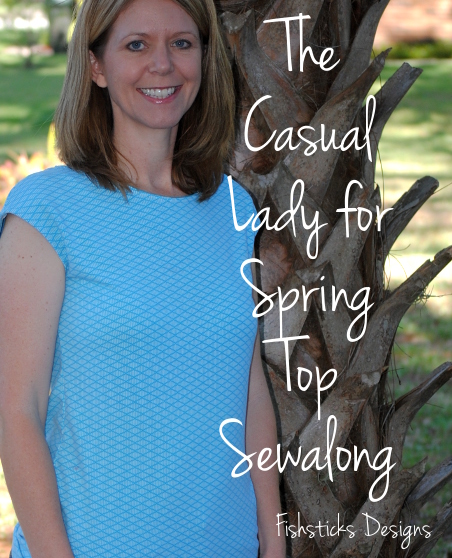
Did you know that Made by Rae‘s Spring Top Sewalong is wrapping up this week? Several years ago, I sewed a top for myself every day of Spring Top Week. How did I possibly have the time? My schedule has definitely filled up since then.

 The pattern is simple and straight-forward, and it’s such a nice-fitting top! The only little problem I had was that my lining wouldn’t stay inside nicely around the neckline, and I used a solid so it needed to. I topstitched the neckline to make it stay put, but then the whole neckline folded itself out. Urgh. I realized that I’d probably stitched too close to the edge, so I sewed a second line 1/4″ in (my original was at 1/8″), and that took care of that! Yay!
  I’m not usually one to wear sleeveless tops, but this one feels like it has sleeves because of the way it curves around and shapes to your shoulder. I think it looks like it has a cap sleeve, even though it really doesn’t. Pretty cool, huh?
My 15-year-old, Samantha, did such a nice job of taking pictures for me, didn’t she? She just kept snapping while I tried different poses. I think this picture just might be my favorite. “Jamie! You cannot hide behind me while we’re taking pictures!” Ha! When I want him in a picture, I nearly have to bribe him!
My Blue Ribbon Gluten-Free Granola Cookies
 These cookies are addicting . . . so use caution! I spent some time experimenting with granola bar recipes and breakfast cookie recipes a couple of months ago in an attempt to come up with a recipe for a healthy-ish snack that I could take along to Allen’s track meets. It had to be something that uses real ingredients, it had to have chocolate and it needed to be gluten-free. What I ended up with is a recipe that is shaped like a cookie, but has the texture and taste of a granola bar. (My kids actually call these Granola Circles.) Everyone who has tried these has enjoyed them so much, I couldn’t resist baking up a batch and entering it into our county fair. And, it won a first place ribbon!
Ready to get started?
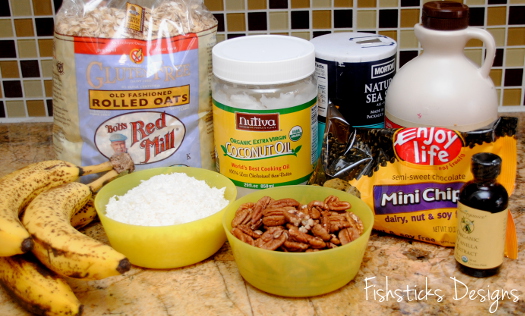
The Ingredients:
3 cups gluten-free rolled oats (If you don’t need these to be gluten-free, traditional rolled oats work perfectly, too!)
1 1/2 cups unsweetened coconut
1 tsp sea salt
1 1/2 cups of coarsely chopped pecans
3 large or 4 small ripe bananas (The riper your bananas the more banana flavor your finished cookies will have.)
1/2 cup coconut oil, warm enough to be liquid (It only needs to be about 76 degrees to melt, so don’t heat it too much.)
1/4 cup maple syrup
2 tsp vanilla extract
1 1/2 cups mini chocolate chips
Preheat oven to 350 degrees. Coarsely chop your pecans.
 In a large bowl, mix oats, coconut, sea salt and chopped pecans.

Puree your bananas. ( I use the blender. If you mash them by hand, be sure that you don’t have any chunks left.) Add pureed bananas and coconut oil to the dry ingredients. If your maple syrup is coming straight from the refrigerator, mix these ingredients in before adding the maple syrup and the vanilla. If your maple syrup is room temperature, you can mix all the liquid ingredients in at the same time. (If you pour the cold maple syrup onto the melted coconut oil before mixing it in, it will harden, and you won’t be able to mix it in. I speak from experience. )

Pour in the mini chocolate chips and mix it all well. Feel free to taste the “batter” and see what you think, but don’t eat it all!

Grab a cookie cutter and place it on your baking stone or on a baking sheet covered with parchment paper. I use a 2 1/2″ circle cookie cutter, but any cookie cutter in a similar size and shape will work. (Maybe hearts for Valentines Day or Christmas trees in December? How fun would that be?) Scoop out about 1/4 cup of the cookie batter and press it into the cookie cutter really well. It should end up being about 1/2″ thick.

Carefully remove the cookie cutter, leaving a perfect little circle (or heart or Christmas tree) behind.

Repeat until you’ve filled up your baking sheet.

Bake for 24 to 27 minutes or until they’re golden brown. Mine are always perfect right at 26 minutes.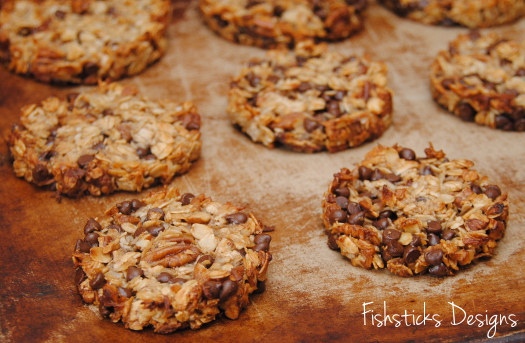
Slide the cookies off onto a wire rack to cool. You can eat them warm, of course, but I think they’re best when they’ve cooled to room temperature! 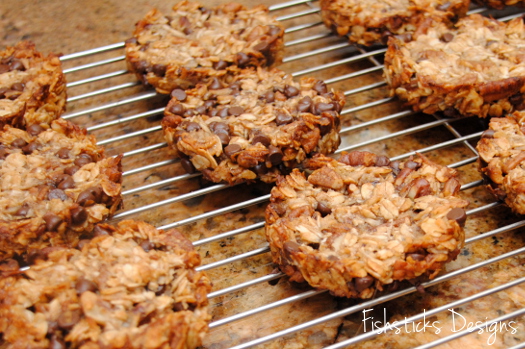
I would love to hear your feedback if you give this recipe a try! I’m thinking that it would be just as yummy if you substituted dried fruit for the chocolate chips and any other chopped nut for the pecans. I’ll be making a big batch for our family trip next month!
Covert Robin: What I Received
 Yesterday, I shared what I sent off to my Covert Robin. Today, I get to share the lovely gift that I received! Ella from Throw a Wench in the Works sewed for me, and she sent me Un-Paper Towels! These have been on my to-do list for so long, and I’ve never gotten around to making them!
 If you’ve ever read my About Me page, you know that the only paper product that we use in our home is toilet paper. I didn’t even own a paper towel holder, so I had to run out to Target and buy one! (Should I call it an un-paper towel holder?)
The towels that Ella sewed have a decorative cotton woven front and absorbent cotton terrycloth on the back. Each towel has snaps so that you can snap them together to roll them onto the holder and unsnap them to use them. When you’re done, you just toss them into the wash and reuse them. Yay! No more paper towel waste! (Not that we had paper towel waste here before, but my towels were all in a drawer. Now they can be pretty on the counter! If you use paper towels, you should make yourself some of these!) Funny story? As I finished up the pictures, my 13-year-old, Allen, reached for one of the towels to dry off his hands, and his older sister, Samantha, said, “You can’t use those. They’re too pretty. Use the towels in the drawer first!” I had to point out that the towels were made to be used, not just to look pretty! They do look pretty, though, don’t they?
Ella also sent me this beautiful fabric-covered journal which is going to get plenty of use! I carry a notebook with me everywhere I go so that I can keep all of my thoughts and lists and plans in one place.
 Thank you so much, Ella! I am thrilled with everything!
Covert Robin: What I Sent
 I had so much fun participating in the Covert Robin Swap hosted by Imagine Gnats! The Covert Robin is a mystery round-robin swap. The participants know who they’re sending to, of course, but it’s a secret who you’ll be receiving from! When you’re planning your gift, you have to be sneaky about searching for likes and dislikes of your recipient. (Can I admit that I felt a little stalker-ish when I was researching my partner? It was fun, though!)
My CR recipient was Shannon from I’m Working on a Project. My assignment arrived in my inbox while I was waiting for Allen’s track team to finish their early Wednesday morning run across the bridge, so my first look at Shannon’s blog was on my I-phone. The incredibly amazing dinosaur quilt that she finished last year is the header on her blog, and I was awestruck. Really. And, I was only looking at the tiny pictures on my phone! You have to go check out Seymour before you read any further! I can sew pretty much any clothing, but art quilts leave me with my mouth hanging open. Scrolling through Shannon’s posts, I ran across something about using a soldering iron in the construction of a quilt, and I walked around the rest of the day mumbling, “I’m supposed to sew something for someone who uses a soldering iron when she sews?!”
I took a deep breath, though, and took a peek over at her Pinterest account where I found a few ideas. Shannon likes bright colors, and I found a few things that she’d pinned and said she liked the colors, specifically turquoise and lime green. I also found that she’d pinned a couple of little credit card/discount card pouches. A little digging through my stash for scraps of some fun brightly-colored fabrics, and a trip to Joanns for some Kona cotton, and I was ready to get started!
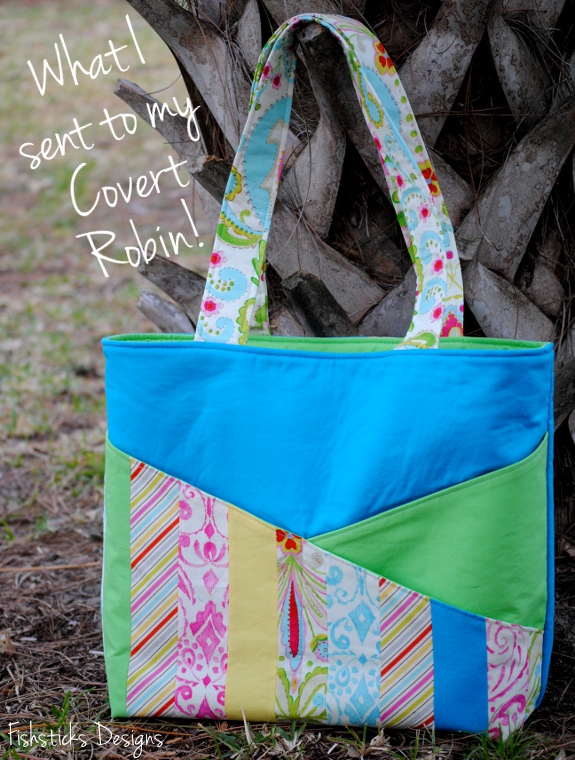
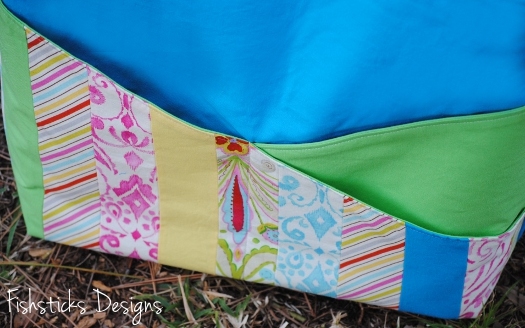
I used my Sunny Days Beach Bag Tutorial to make the main gift – the tote bag that you see above. (Everyone can use an extra tote bag, right?) I just reduced the finished size to make it a roomy tote, rather than a carry-the-whole-house-plus-the-kitchen-sink bag. For the front of the criss-cross pocket, I pieced fabric scraps in strips to add some fun interest.
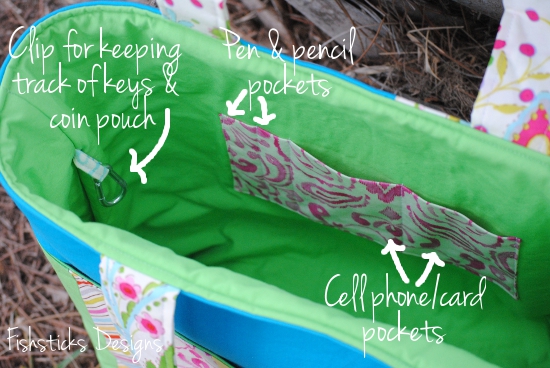
 I added a couple of inside pockets, too, and loops on the inside seams for those little clippy things. They’re great for hooking your keys or anything with a handle that you don’t want to lose in the bottom of a big bag.
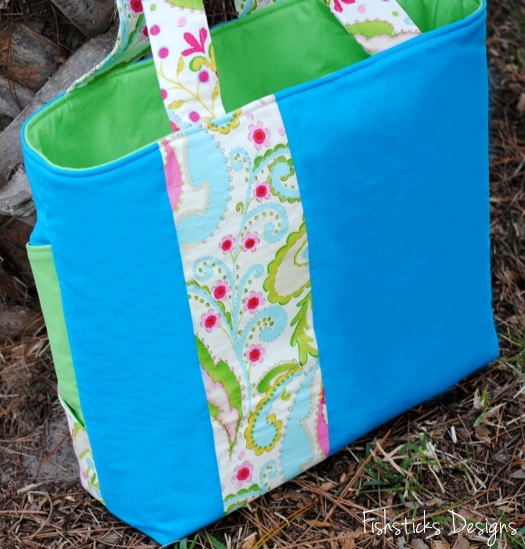
On the back, I adding in a strip of the fabric that I used for the handle to give it a little extra color.
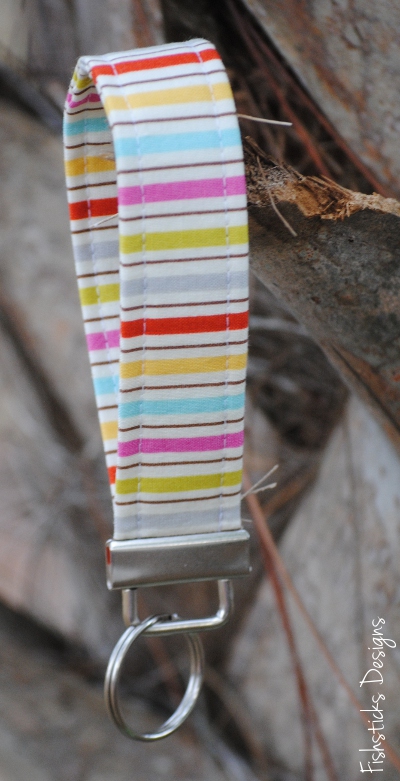
I whipped up a quick key fob to match. (The tutorial for that is right here: Fun Fabric Fobs.)
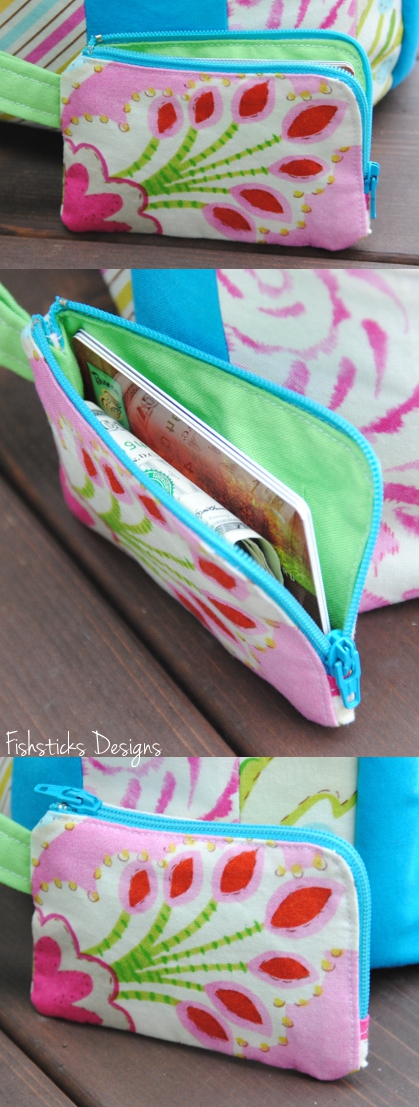
Finally, I designed and sewed a little zippered card/coin pouch with wrap-around zipper, similar to those that Shannon had pinned on her Pinterest.
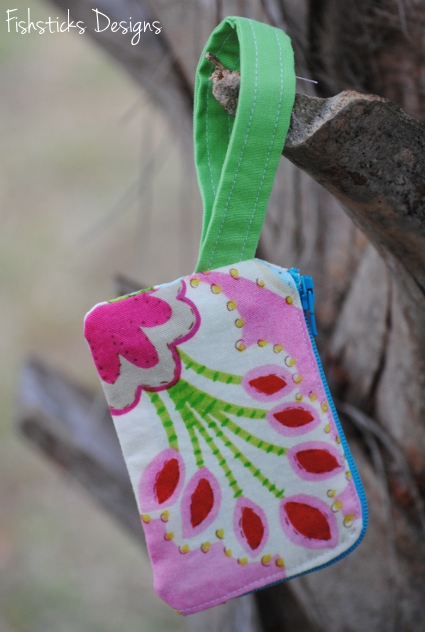
What do you think? I know that I could use something in my purse to hold all those membership cards that keep piling up! I like the way this turned out so much that I’m planning to share a tutorial for making them next week! Be sure to come back and check it out!
Lastly, I included some goodies, all wrapped up in a bow. (I figured that if she hated everything else, she could drown her disappointment in chocolate and lollipops. She didn’t hate it, though! Yay! She says she likes it all, and she’s already tucked her latest crochet project into the bag.)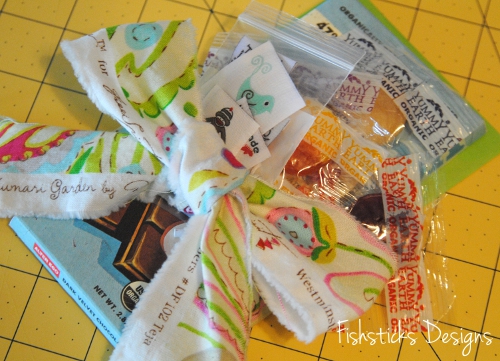
Tomorrow, I’ll share the amazing gift that I received in the Covert Robin Swap. It just arrived on my front doorstep yesterday, so I still have to get some pictures, but I love it!
Project Run & Play, RBD Chevrons & Exciting Knit News!
![]() Are you following along at Project Run & Play? Did you see that there’s a Fishsticks Designs giveaway that starts today? I’m so excited to be sponsoring this All-Star Season! It’s been so much fun already! This is Riley Blake Chevron Week at PR&P, and there are some seriously amazing designs already popping up in the sew-along. You can check them out right here: Chevron Week. The All-Star chevron projects will be posted tomorrow!
Are you following along at Project Run & Play? Did you see that there’s a Fishsticks Designs giveaway that starts today? I’m so excited to be sponsoring this All-Star Season! It’s been so much fun already! This is Riley Blake Chevron Week at PR&P, and there are some seriously amazing designs already popping up in the sew-along. You can check them out right here: Chevron Week. The All-Star chevron projects will be posted tomorrow!
Katie’s not here this week to model this sweet little number for you, and she was sick most of the week last week, so my dress form will have to do. These fabrics are all stretch jersey knits from the Riley Blake Sweetest Thing collection that was released last fall. (A little secret? The knit chevrons are coming back . . . and they’re bringing along some new friends!)![]() I’ve been working on a new collection of patterns, four patterns to start, designed specifically for stretch jersey knits. They’ll be featuring the HUGE collection of stretch jerseys that Riley Blake Designs is releasing next month! This little dress is one of the set. All of the patterns will be quick and simple to sew, and they all use various raw edge finishes to showcase that great jersey curl. They’re still about a month off, but I couldn’t resist showing you a little preview since I’ll be incorporating those great chevrons!
I’ve been working on a new collection of patterns, four patterns to start, designed specifically for stretch jersey knits. They’ll be featuring the HUGE collection of stretch jerseys that Riley Blake Designs is releasing next month! This little dress is one of the set. All of the patterns will be quick and simple to sew, and they all use various raw edge finishes to showcase that great jersey curl. They’re still about a month off, but I couldn’t resist showing you a little preview since I’ll be incorporating those great chevrons!![]()
Since we’re already chatting about the new RBD knits, have you seen them yet? You can peek at all of them right here: Riley Blake Knits – Coming Soon! There are solids, dots, and CHEVRONS in over a dozen colors!
![]()
My favorite, though, is the stripes! Stripes in not just one, but two sizes! 18 in all! I love knit stripes!
Did I say this was a HUGE collection? I feel like I’m in knit heaven!
Bit of Whimsy Fritter Frogs for Easter
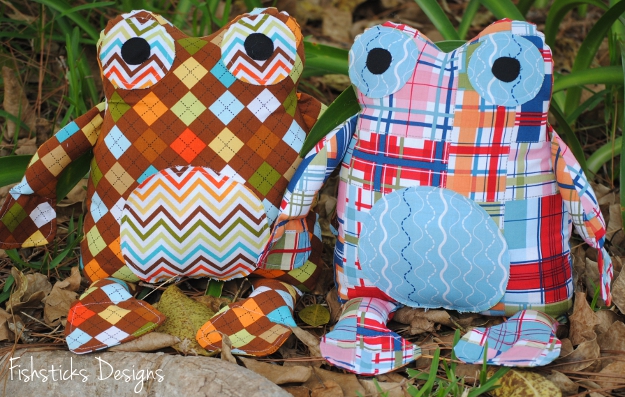 Meet Freddie and Mike (the Knight), our latest handmade cuddly family members! I stitched these guys up for Charlie and Jamie using the Bit of Whimsy Fritter Frog pattern. I chose the larger “daddy” version, and they’re the perfect size for cuddling or using as a pillow. (I’m thinking they’ll be great to have in the car for our trip next month!)
Isn’t it odd that I don’t really care for store-bought stuffed toys at all, but I LOVE creating handmade stuffed critters for my littles?  Charlie and Jamie named them. Freddie is Jamie’s frog. He likes alliteration almost as much as his mom. Mike (the Knight) is Charlie’s. He just likes Mike the Knight. (Poor Charlie is actually curled up on the couch recovering from a nasty stomach bug and watching Mike the Knight right now.)
 These two were the fastest and easiest stuffies that I’ve ever sewn. I just pinned the eyes and tummy on and stitched them down about 1/4″ from the edges using a short stitch length and leaving the edges raw. Because I used the larger “daddy” frog pattern, they’re big, and I was able to stitch the legs to the inside like the arms, leaving an opening between the legs for stuffing. Then, instead of stitching across the bottom, I closed the opening between the legs with a ladder stitch.
I actually have this pattern out on my work table so that I can cut out a few more for this month’s Hopeful Threads Fluff for Foster Care project! I just need more stuffing!


