Easter Pictures!
 I hope you were all blessed with a wonderful Easter Sunday! We enjoyed an amazing worship service, yummy food, great company and beautiful weather! I was up late two nights in a row last week sewing for our two little guys and our granddaughter. The boys ended up with khaki shorts that I ran out and grabbed at Target on Saturday night, and I was still sewing buttons on Charlie’s shirt about fifteen minutes before church started on Sunday morning! (We’re used-car shopping right now, and it takes so much time! We were out nearly all day on Saturday after spending hours of time researching for days ahead of time, and we still haven’t purchased anything. I’d really like the perfect van to just appear in our driveway so we can be done.)
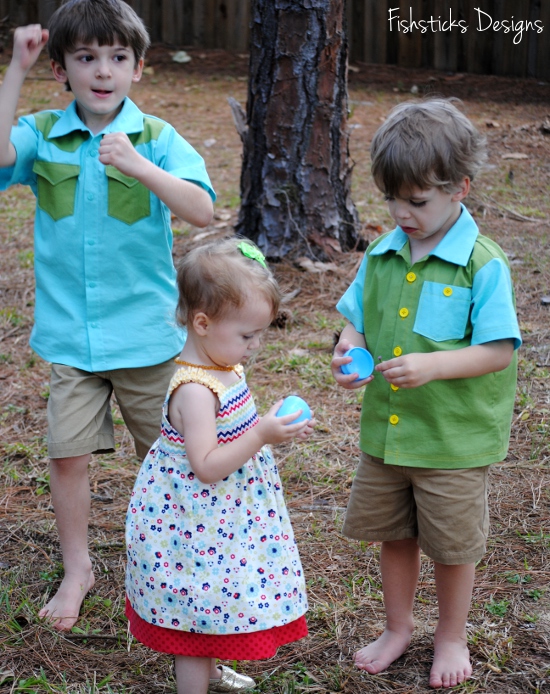
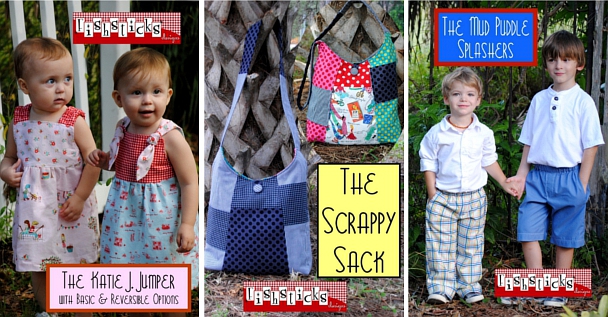
We went to the early service on Sunday morning, so we were all a little wrinkled by the time we got out to hunt eggs in the afternoon. You’ll just have to overlook the wrinkles. We also had no baskets, so the kids hunted with my reusable grocery bags! Katie’s dress is the Reversible Double-Layer Katie J. Jumper in Riley Blake Tone-on-Tone Dots and coordinates from Dress-up Days.
 Charlie got an Everyday Camp Shirt made with Timeless Treasures’ Soho Solids and yellow buttons! (Hmmm . . . how did I miss that dirty face? Just pretend that I washed it, and you can’t see that chocolate.)
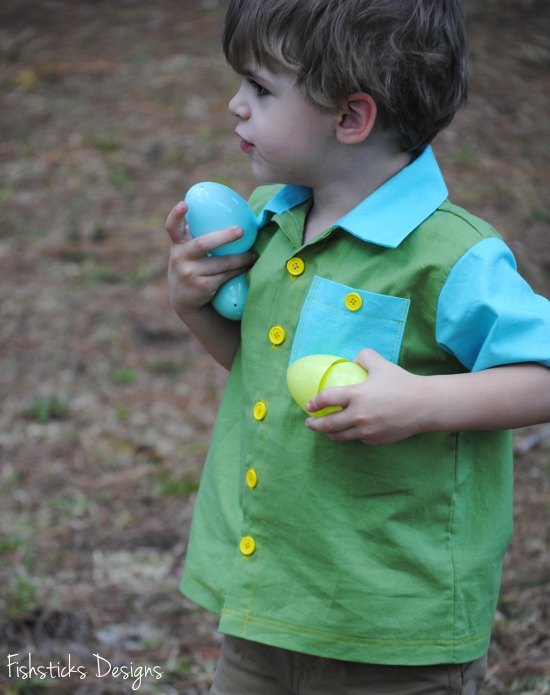 I’ll be back to share a little more about Charlie’s shirt later this week. It’s Button Week at Sew-vivor!
 Jamie’s shirt is a prototype of a new design that I’m working on. It’s a fun retro Western-style shirt.
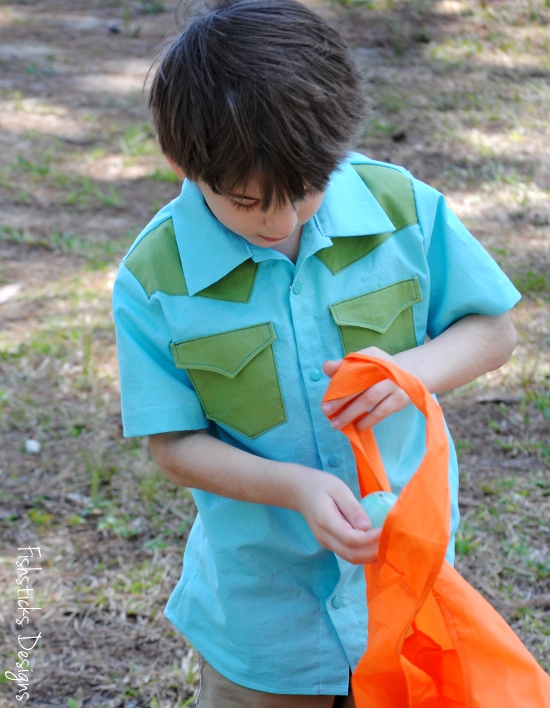 Those pocket flaps were supposed to get snaps, too, but church was starting without us! I love the shirt-tail hem on this one.
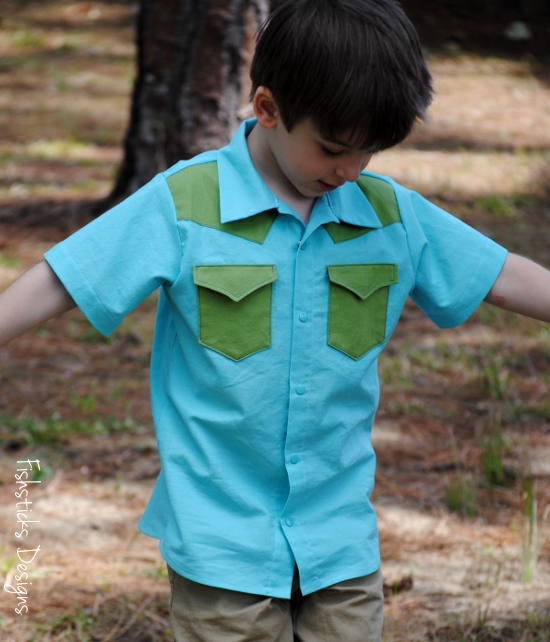 Ray and Samantha hid the eggs for us, including a few that they thought would be too high for the little ones to get to on their own.
 Bet you never knew that palm trees were made for climbing! (I certainly didn’t!)
 I attempted to get some pictures of the three little ones together.
 I also tried to get some pictures of Charlie and Jamie together.
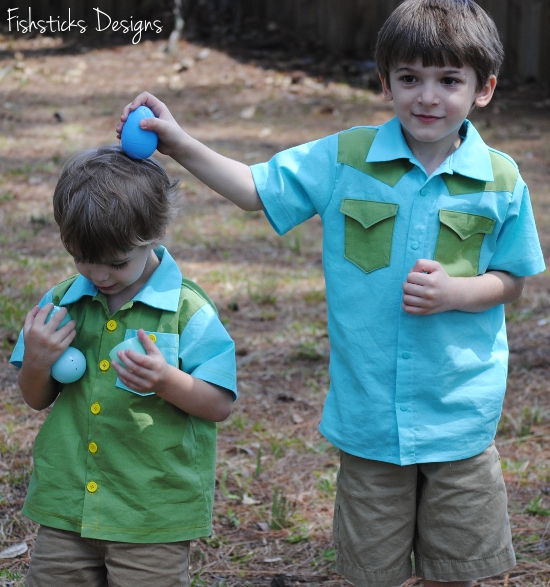 Maybe next year? I did get one really cute one of Jamie and Katie!
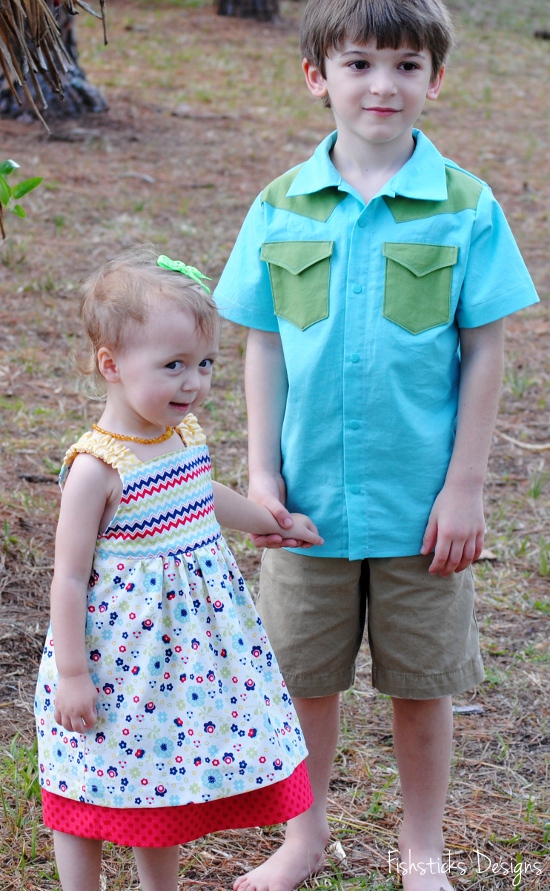 I’ll leave you with that! Happy Easter . . . a couple days late!
Project Run & Play: Inspired by a Little Boy’s Art & Imagination
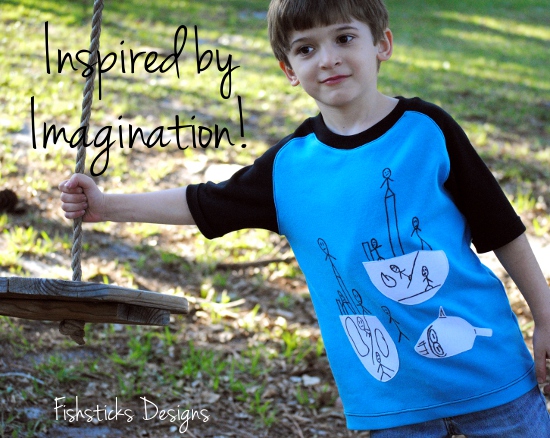 The Project Run & Play All-Star Season has begun! Are you sewing along? The first theme is Inspired by Art. In keeping with my goal to sew everyday wearables for my little ones, Jamie got a new Patrick Curved Raglan inspired by his own artwork!
 This pirate ship drawing is one that Jamie did a few months ago. I saw it hanging up when I was looking for ideas for this week, and asked him what he thought about putting it on a shirt. He couldn’t have been more excited! (Jamie doesn’t tend to get overly excited about the clothing that I sew for him anymore, so I was really excited to see what he would think when I was done!)
 I started by scanning and enlarging the picture. I printed the ships and the shark on separate pages and cut them out to make patterns for the appliques. To reproduce the rest of the drawings, I drew them freehand on to the fabric using a Frixion pen. Because Frixion ink disappears when you iron it, I was able to correct any mistakes before tracing the final drawings with a Crayola fabric marker. I did all the applique and the drawings on the front of the shirt before sewing the pieces together.
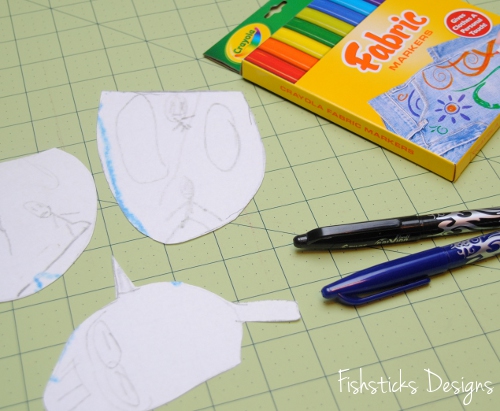 The end result?
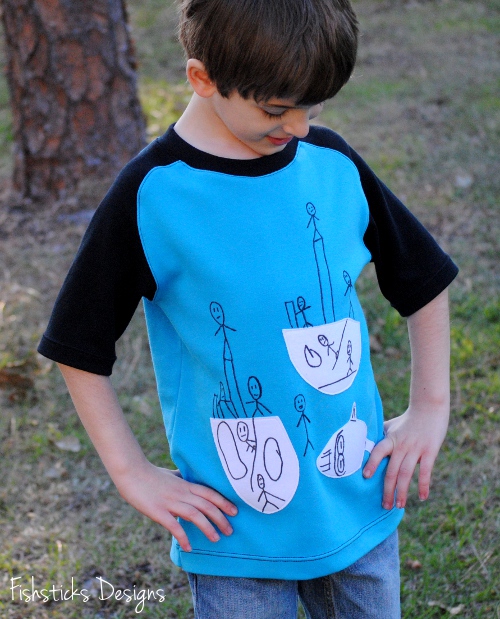 I think he likes it!
 It is his artwork! How could he not like it, right?
 Here’s Jamie’s rundown of all the parts of his artwork:
 This was so much fun to create! And, Jamie says that it’s “the coolest shirt ever”! Woo-hoo! A win for mom and for Jamie!
March Riley Blake Mystery Quilt Block – Simplicity
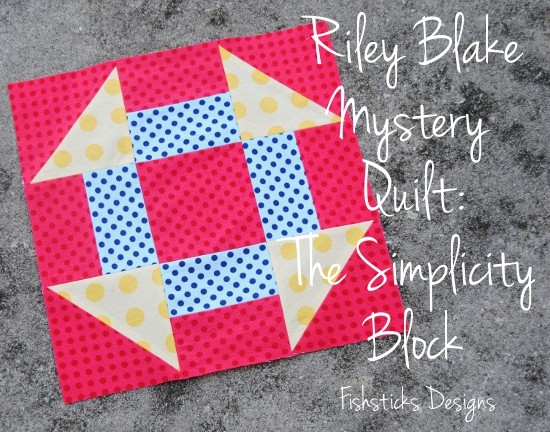 I’m moving right along with the blocks in the Riley Blake Mystery Quilt! I don’t have a whole lot to share about this month’s “Simplicity” block because it really was simple. It looks far more complicated than it is!
You start with four half-square triangles. (If you don’t want to sew these one at a time, take a look around for short-cut tutorials. Here are two from the Sew Mama Sew blog: 8-at-a-Time HSTs and 4-at-a-Time HSTs.) Add four squares made from two equal-sized rectangles. (I sewed these all at once in a strip. Since I wanted 4 – 4 1/2″ squares, I cut a strip from each fabric 2 1/2″ x 18″. I stitched the two strips together, pressed the seam allowances and cut the strip into 4 1/2″ squares. If you use this method, be sure that you’re using a short stitch length so that your seams don’t pull apart when you start piecing the blocks together.)
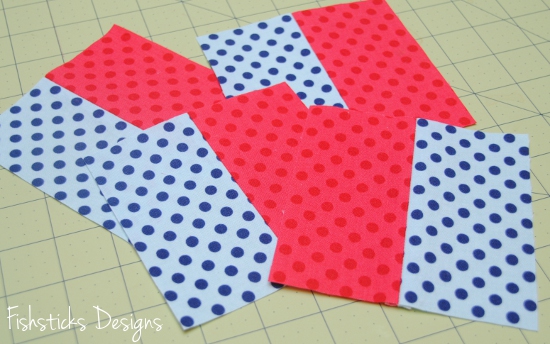 Cut a center block.
 Follow the instructions for piecing your blocks together, and you’re done!
  Here are January, February and March all together! Once I finished the first two blocks, I decided that I needed some more color so I added in some blue, still sticking with the RB Tone-on-Tone dots. I think I like it. What do you think? It seems a little off now, but once I add the other blocks with the blue mixed in, I think it will all balance out.
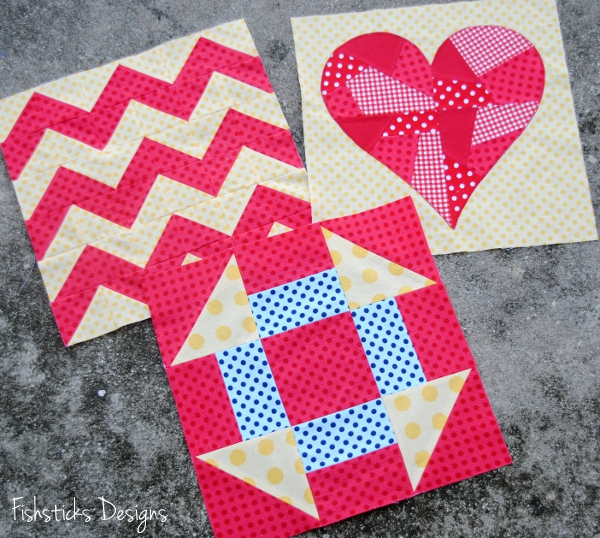
A Spring Break Pattern Sale!
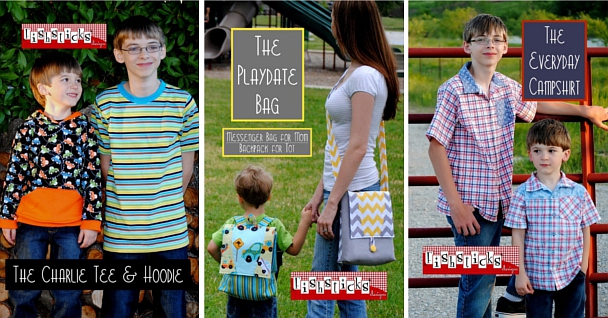
 It’s Spring Break week here, and I think it’s a great time for a sale! All this week (through midnight eastern on Saturday, March 30th) you can use the code SPRINGSALE for 25% off of paper and pdf patterns in my main pattern store: Fishsticks Designs Patterns. Maybe you’ve been holding off on grabbing those three new patterns above that I released last month? Or, maybe you’d like to try some of my favorite standbys, like these?
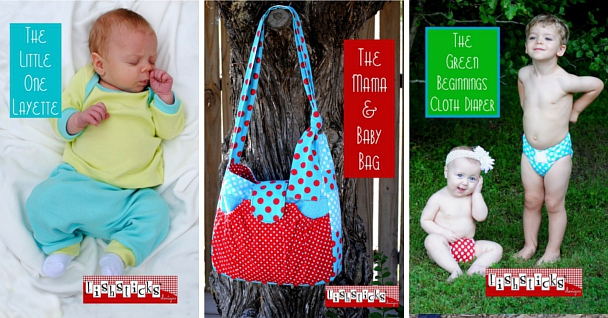
 Perhaps you have a new baby coming and need tiny clothes or itty-bitty diapers or something to carry clothes and diapers when you’re on the go?
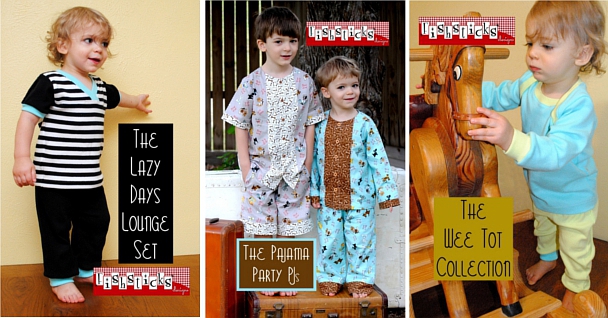
 Does your little one need spring PJs? These are all so much fun, and comfy, too!
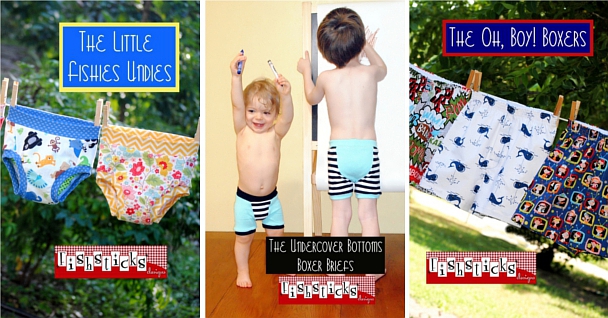
 What about undies? You can never have too many fun pairs of undies, but you can definitely have too few!
 You’ll find all of those patterns and more in the shop right now, ready for you to download and get sewing! Go shop! And don’t forget to add pictures to our Flickr album so we all can see: Fishsticks on Flickr!
Keeping Up & Joining In with the Fishsticks Fun!
So, I’m a little behind the times. I should have had easy-to-find social media buttons here a long time ago. Well, they’re here now! Look over there on the right-hand side of the page! You might have to scroll down just a little to see those cute little red buttons under that “About Me” blurb. Aren’t they sweet? A huge, “Thank you!” to Carrie from Carrie Loves Design for the freebie buttons. Do you need some? She has them in 30 colors, glitter-colors even! Go check them out right here: Free Social Media Icons. Not only did I find the free buttons there, though, I also learned how to make the buttons change colors when you hover your mouse over them! Go try it! It’s fun, isn’t it? (I sort of just want to sit here and roll my mouse back and forth across them.) You can find that tutorial on Carrie’s blog right here: Cool Hover Effect.
Okay, stop scrolling over the buttons now. I’m taking a little cue from my friend, Rachael, over at Imagine Gnats — actually, I’m pretty much outright copying her — and posting a little update to how you can keep track of what is going on here at Fishsticks Designs. The first little button that you’ll find over there in the right side column is the Email Me button. If you ever have any questions, need any help with a tutorial, want to send me chocolate . . . just email me! I try my best to respond to emails within 24 hours, but there are many times when I feel like every email I send begins with, “I’m so sorry this took so long . . . ” That said, emails do get lost, so if you’ve emailed, and I haven’t responded within a few days, feel free to email again. I promise I won’t be offended!
The second button links over to the Fishsticks Designs Facebook page. If you haven’t liked my Facebook page, you should! You’re missing out on all sorts of fun stuff! Just this week, you would have been able to follow along with the last-minute excitement that was involved with getting our family county fair projects dropped off on Tuesday. You would have even been able to give me advice on what to do when Charlie found my fair-entry banana bread loaf and broke a huge chunk off of the corner. (I did end up baking a new loaf late in the afternoon, and we barely made the drop-off deadline!)
 The third button takes you over to my poor, forlorn, lonely, nearly forgotten Flickr group page.
  Really, it needs some love. I know you guys are sewing tons with my patterns and tutorials, and I want to see! Everyone wants to see! Do I need to bribe you? Hmmm . . . maybe a Flickr contest is in order. How about a monthly prize drawing? I would love to be able to feature some of your pictures here on a regular basis, too! Wouldn’t you love to get inspiration from what other moms are sewing? How could you not be inspired by this incredibly cute dinosaur hoodie that Ananda made using my Charlie Tee and Hoodie pattern? (So it was over a year ago. It’s still cute! Go give me some new stuff to work with!)
 The first button on the second row is the Instagram button! If you want to see little peeks of what I’m working on, like my Covert Robin swap which went out in the mail today . . .
  . . . or pictures of everyday life around here, like the incredible amount of dirt my little guys cover themselves with, you should go follow me in Instagram! (Yes, his big toe still has red toenail polish on it.)
 The fifth button will take you over to my Pinterest boards! I don’t have a ton of things pinned, but I’m working on a pretty good collection. I will probably never be one of those people with 25,000+ pins, but I do enjoy finding and pinning things on a fairly regular basis.
 The last little button over there is so cute! Isn’t it? That button links up to this blog on the bloglovin’ site. If you enjoy keeping track of all your favorite blogs in one place, that is the place to go. Now that Google’s Reader is disappearing, many people are switching over. I actually never used Reader, but I recently found bloglovin’ and I’m lovin’ it! *snicker* Don’t roll your eyes at me. I really do love it! It keeps track of all of my favorite blogs and allows me to scroll through the latest posts all in one place.
That covers all of the social media buttons, but there is one other way to keep track of what’s going on here: the Subscription option. When you subscribe to this blog, you’ll get an email immediately anytime that I post anything. The email will give you the post title, the first part of the post and a link to click over and read the rest. It’s really the best way to stay in touch! You’ll find the subscription option off to the right-hand side, too, just below the “Joining In” section.
Okay, I think that covers everything! Do I have you all hooked up now? I don’t want you to miss out on any of the fun around here! Have any questions or suggestions? Now’s a great time to throw them out!
Samantha’s Apron!
 Samantha loves to help in the kitchen. Actually, she and Ray do a lot of the cooking around here together! She asked for an apron for her birthday this year. Her birthday was not quite two months ago. In my defense, though, I did take her fabric shopping on her birthday, and I took her out for lunch, coffee and book-shopping.
 She found an apron that she liked in the book, A is for Apron, by Nathalie Mornu.
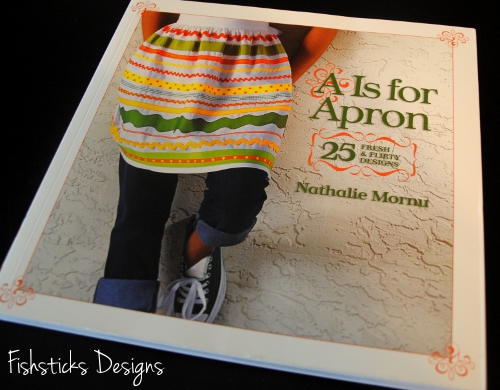 This is one of those books, though, that requires you to enlarge the patterns by 400%. I’m not totally sure how to do that. (I would love suggestions if anyone has done it!) Rather than try to enlarge the pattern, I just redrafted it, making a few little changes to make it exactly what Samantha wanted.
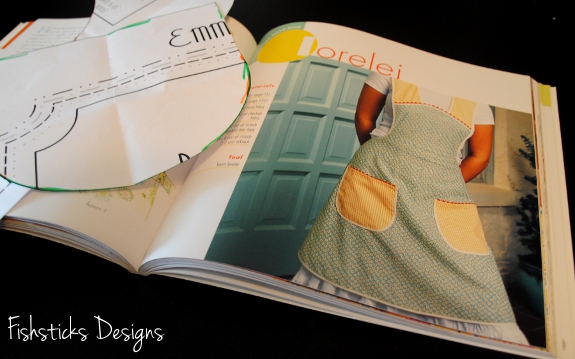 Samantha agreed to model the apron for me this morning. Can I just say how nice it is to photograph a cooperative model? She did roll her eyes a little when I handed her one of my vintage Pyrex bowls and a wooden spoon and suggested she pretend to bake cookies, but she went along with me.
 These fabrics are the ones that Samantha chose on our birthday fabric shopping trip. She loves aqua and red, and the vintage-style of the apron works beautifully with the fabrics.
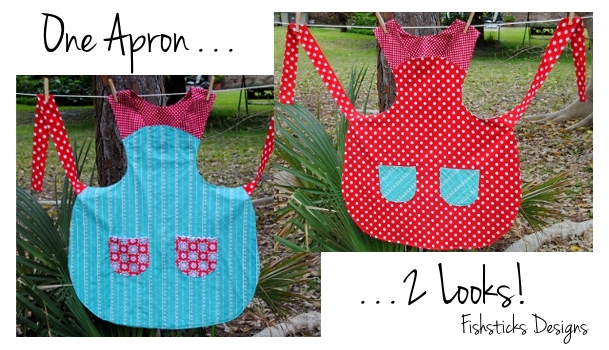
 The original apron from the book uses bias tape. I do not do bias tape. (It’s just evil . . . mean and evil.) So, I made the apron reversible! So much easier than sewing bias tape all the way around, and you get two looks in one!
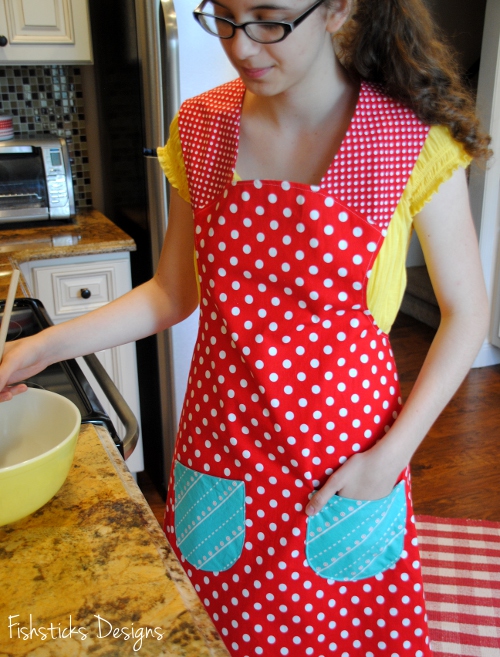 I love this pull-over collar. LOVE it! It’s so much less fussy than ties or D-rings.
 The rick-rack on these pockets was the first rick-rack that I ever sewed! I actually worked on these pockets at the Sewing Soiree a few weeks ago, and I secretly threw one of the first pockets that I cut out into the trash can after ripping it apart and sewing it back together so many times that it was going to fall apart. I just couldn’t seem to visualize the way to baste the rick-rack so that when I sewed the pockets and turned them, it would look nice. As you can see, I did finally get it! Yay!
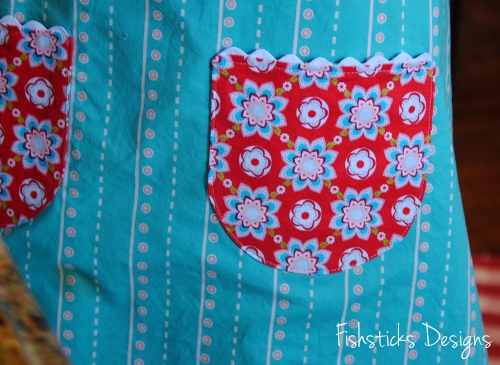 Samantha loves her apron! And she’s thrilled that I’ll actually allow her to use it now that I’ve photographed and blogged it. (Anyone else tell family members, “Here I sewed this for you, but you can’t have it until I get a chance to take pictures for my blog!”)
Hmmm . . . How long do you bake fake cookies? (I love this girl!)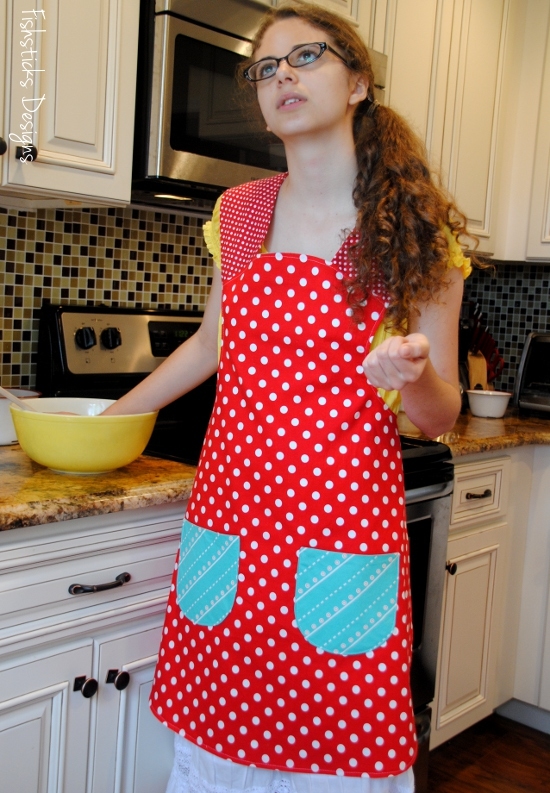
Sew-vivor Sew-along: Emerald
 Challenge #1 for Season 2 of Sew-vivor was to sew something using the 2013 color of the year: Emerald, and I’m sewing along with the finalists! (I love enjoying the motivation without the stress of the competition.) I’m currently planning summer wardrobes for my two little guys so I focused on making some everyday wearables for each of them. It was so nice that the Emerald theme fell on this week since the Celebration of Life for my friend, Sheri, was held this past weekend. Sheri loved sewing and the color green, and since I wasn’t able to attend the service in Dallas, I enjoyed honoring her memory by sewing green tops for my little guys (and sneaking in the turtles that she loved, too)!
  We headed out to the zoo yesterday after church to enjoy the beautiful weather. I had high hopes of getting good pictures of the boys in their shirts, but the sun was high in the sky, and neither one of them was in the mood for being cooperative. I did get a few pictures, though. (I loved that yesterday was St. Patrick’s Day, so the whole zoo was filled with green! It made me smile to think that people were celebrating Sheri’s memory along with us without even knowing!)
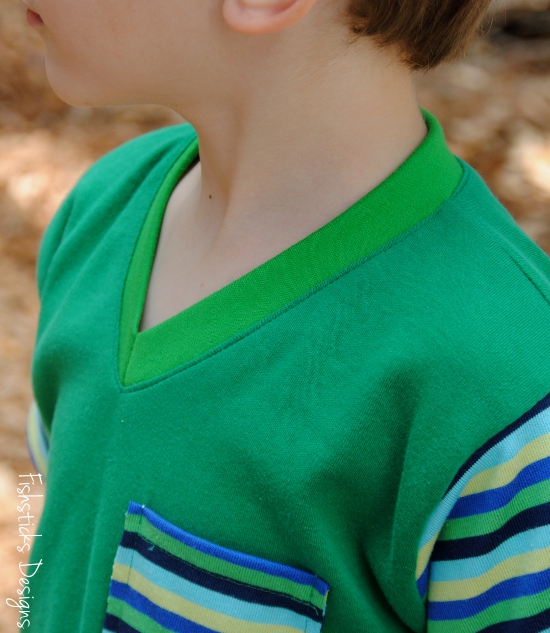 These v-neck pocket tees are my first drafts of a new pattern, so they need a little tweaking, but I’m so excited about having another option for quick and easy knit tops for my little guys.
 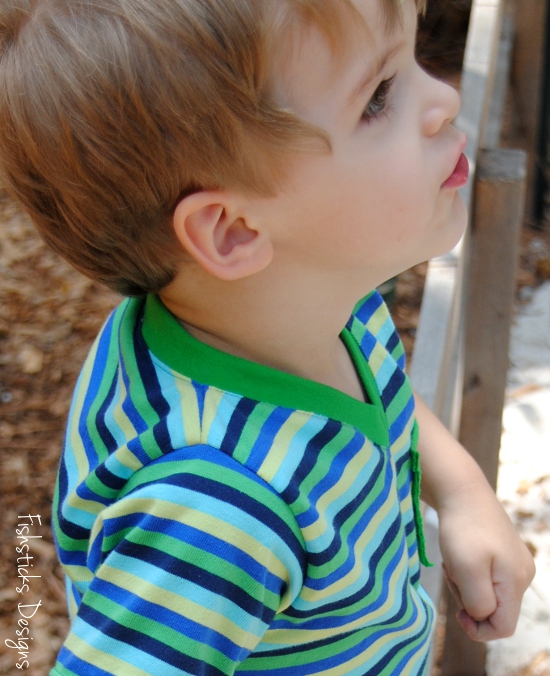 The raw edge pocket is so simple to sew, and that little bit of curl that you get on the edges adds some casual fun! (The curl gets better with washing, especially if you’re using jersey.)
 Those pockets are also great for storing any little treasures that you find along your path. (Charlie’s pocket was full of crushed, dried leaves when we came home last night.)
 I couldn’t resist finishing these tees off with one more little reminder of Sheri, these sweet “Mama Made” turtle tags! I need to get back in the habit of sewing tags onto my handmades. They really do finish them off nicely!
 Anyone else following along or sewing along with Sew-vivor? Did you sew anything green for St. Patrick’s Day?
This Time it Really Was Blood
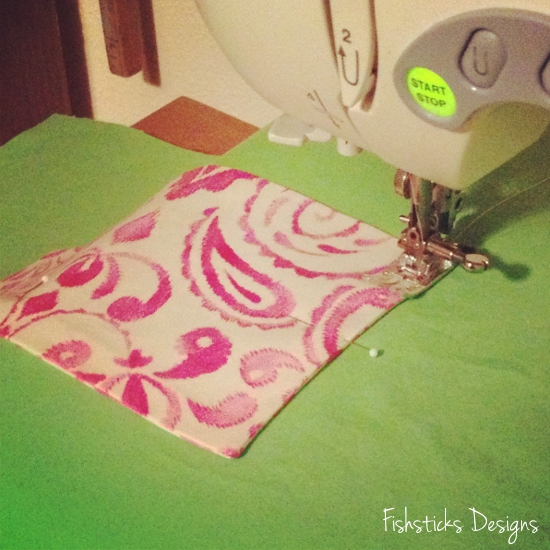
After last week’s nail polish scare, I couldn’t not post about last night’s adventure in parenting. This time there really was blood. (No gory pictures, I promise!) When I arrived home after several hours in the emergency room with my three-year-old daredevil, I found my sewing machine exactly as pictured above. Apparently, that’s exactly where I was in the process of sewing my Covert Robin project when I heard the scream. Oddly enough, the scream came from the six-year-old not from the little guy whose head was gashed open thanks to a pretty hard smack with the wooden tree-swing in our backyard.
He was so cute in his little hospital gown in the ER . . . at least until he got tired of sitting in a tiny room waiting. The staff was amazing, though, so I really can’t complain at all!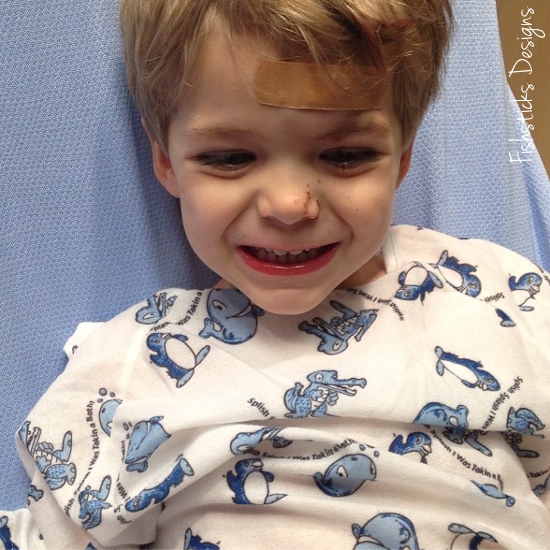 Charlie had a great nurse. He thought it was hilarious when he asked Charlie how old he was, and Charlie responded without skipping a beat, “14.” Really, he thought it was so funny, he brought other people to the room just to make them ask Charlie how old he was. Then he snickered and said, “He’s a little small for his age.”
The funniest part of the whole night for me was when the doctor looked down at Charlie’s big toe as he was finishing up the stitches and asked, “Did you get blood on your toe? Oh, no. That’s nail polish. Did your sister paint your toe?” “Nope. Me did it.” Three stitches and a good night’s sleep, and we’re all good to go. He’s actually hanging out with me right now in our church’s coffee shop while I blog and his older brother and sister attend their homeschool co-op writing class.
 Here’s another little peek at that Covert Robin project. I finished it up this morning! I have a few more little things to add, and it will be off to it’s secret recipient next week. Do you have any sewing plans for the weekend?
The Bibs in All Sizes Tutorial
 I mentioned that I had a Thank-You gift for all of the hard work that you guys put into sewing bibs for last month’s Dinner for Two project, and here it is!
 I’ve sized the Big Kid Snap Bib down to Infant and Toddler sizes and put all the sizes (even the Grown-Up Bib) into one pdf file! I even added the Serged in Seconds Tutorial. Bibs in all sizes, all in one place! What more could you ask?
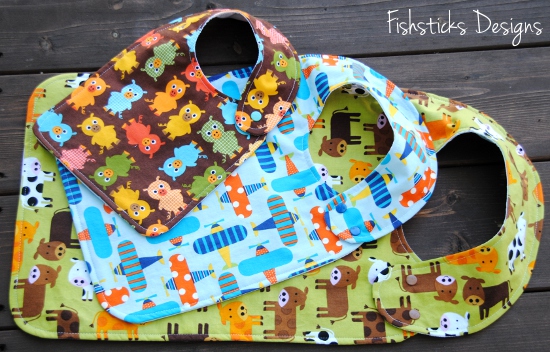 Find the pattern download right here: The Bibs in All Sizes Pattern.
Bibs, Bibs, Bibs!
 I cannot possibly thank you enough for sharing your time, your talents and your fabric by sewing so many bibs for last month’s Hopeful Threads Dinner for 2 project!
  Opening your packages has been so much fun! It’s so cool to see the love and care that was put into each bib.
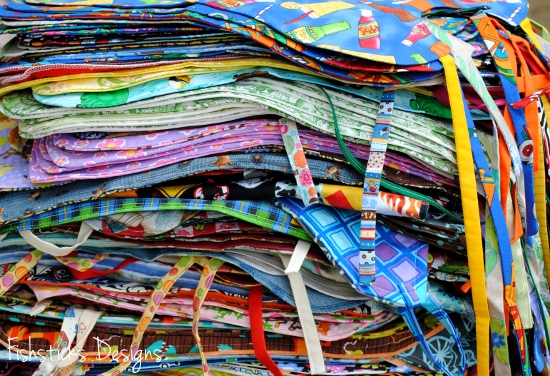 Over 160 bibs are packed in a suitcase, ready to fly off to China where they are going to be a huge blessing to the children at Hidden Treasures Foster Home. (No worries, though, if you haven’t shipped your bibs yet. You can still send them, and we’ll make sure that they make it over on the next trip!)
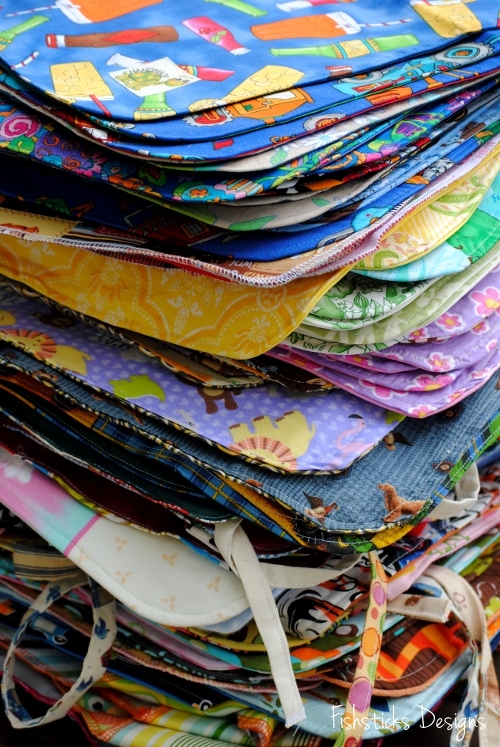 I’m working on a little “Thank-You” gift that I hope to have for you tomorrow!


