Bundle Up Boys ~ Today is the Day!
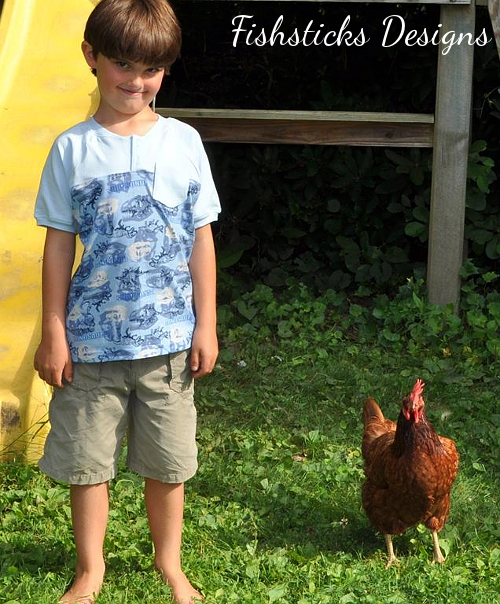
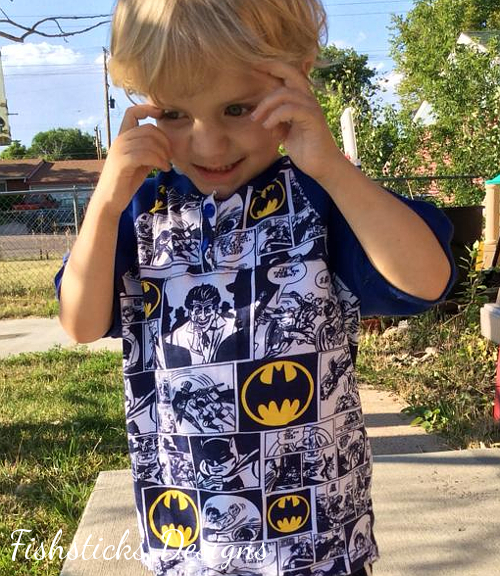
![]() Today is the day that the Bundle Up Boys Collection is available for sale! You’ll have one week to pick and choose from all 12 patterns to customize your bundle. Find all the details right here: Bundle Up Sale. My testers did such a great job on my contribution to the collection: the Honor Roll Raglan Henley. Here are a few of their photos:
Today is the day that the Bundle Up Boys Collection is available for sale! You’ll have one week to pick and choose from all 12 patterns to customize your bundle. Find all the details right here: Bundle Up Sale. My testers did such a great job on my contribution to the collection: the Honor Roll Raglan Henley. Here are a few of their photos:
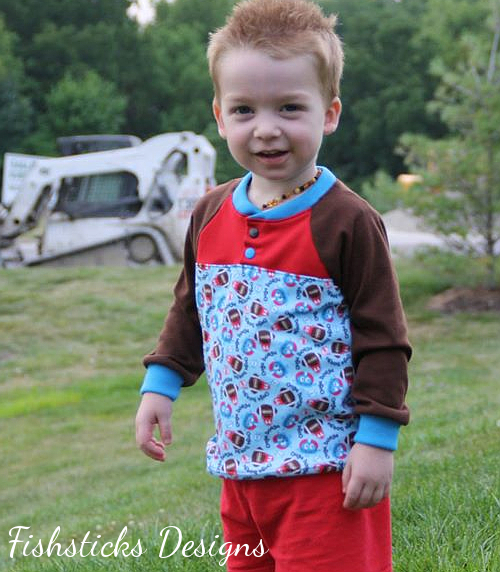
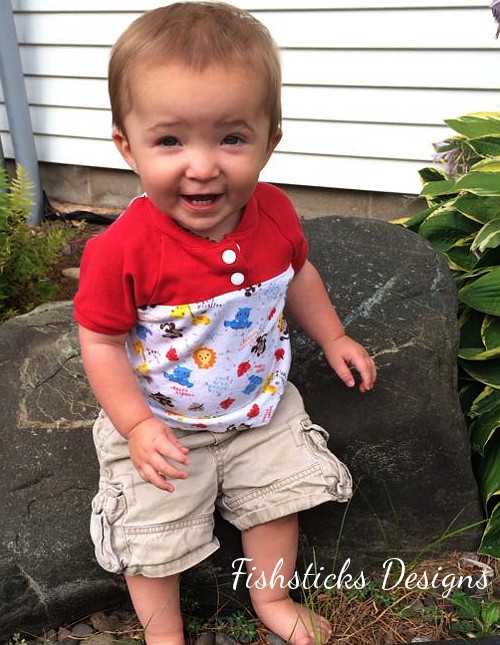
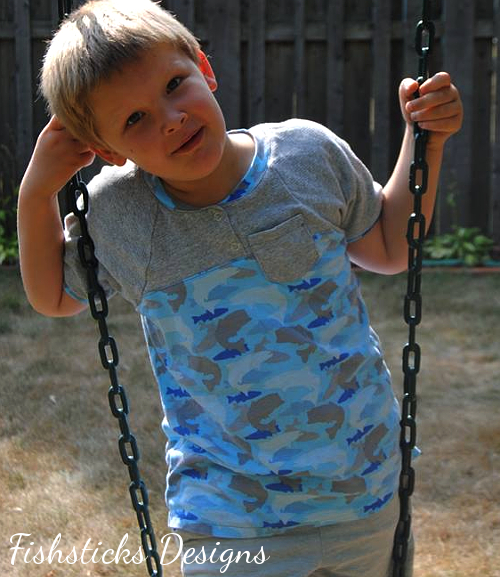

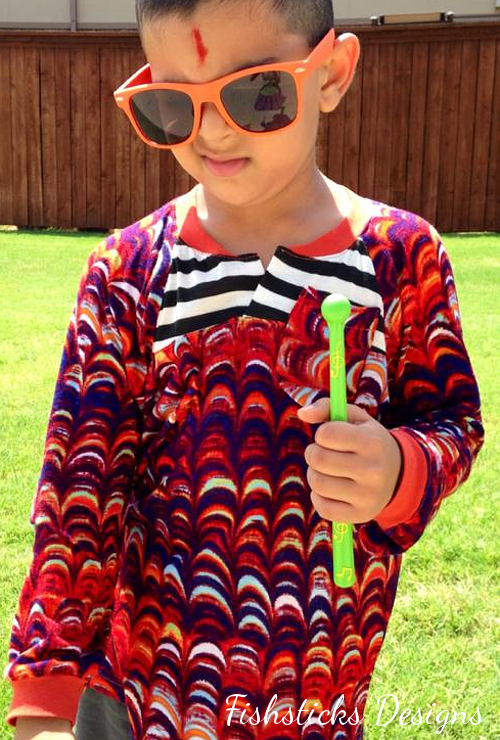
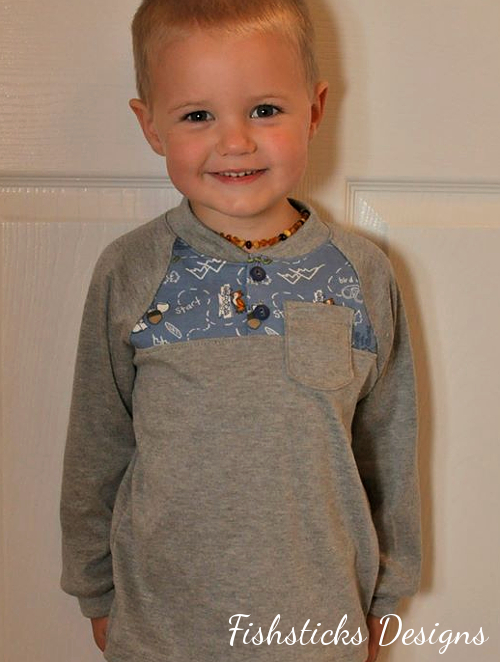

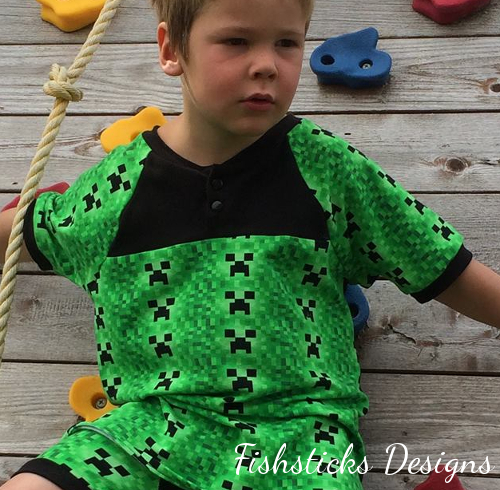
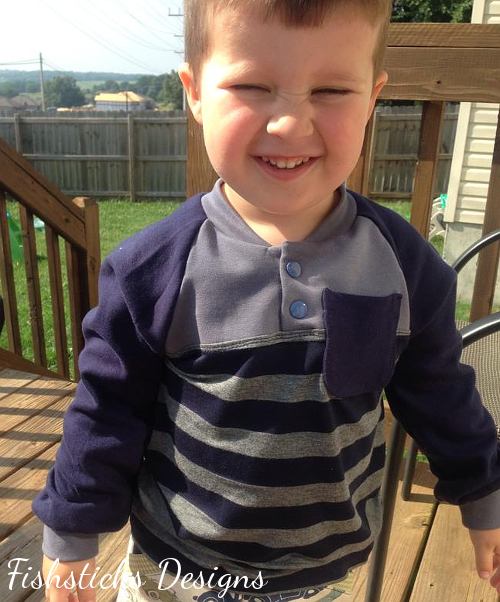
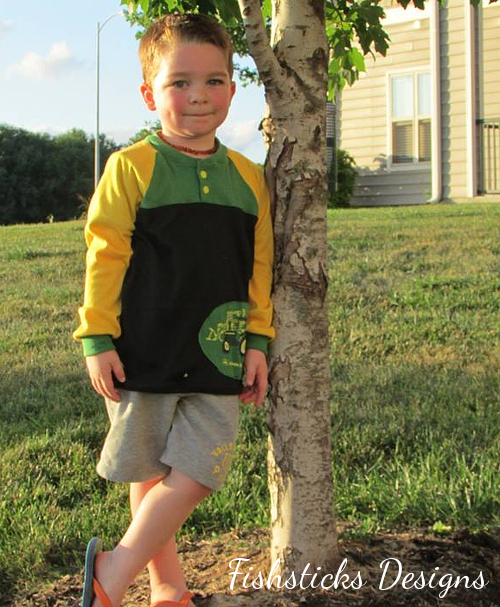
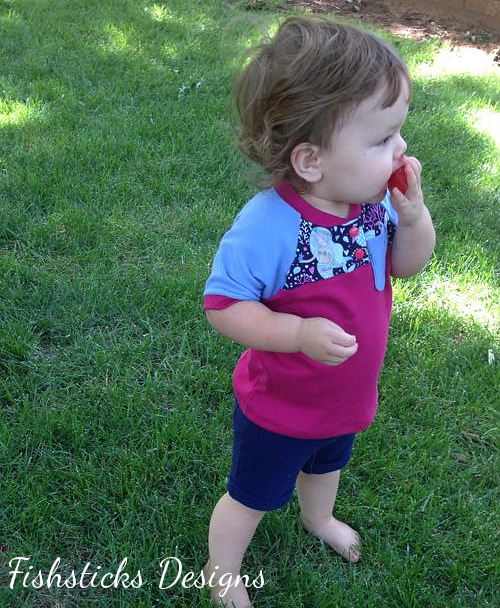
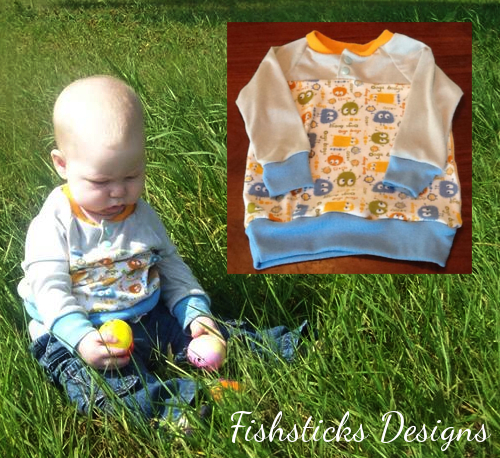
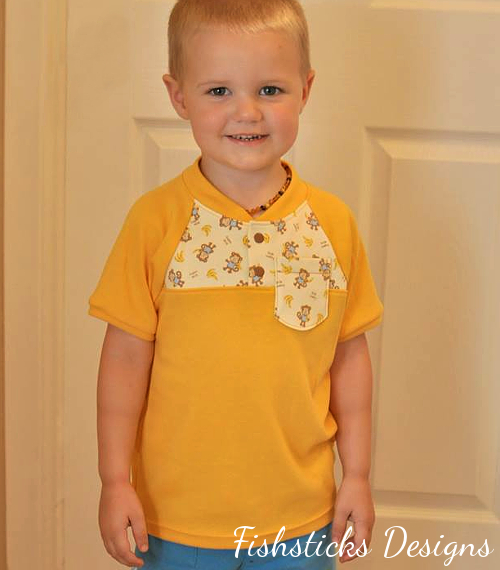 You can click on the photos to see larger versions, if you’d like. The top with the band at the bottom was made using the waistband from my Charlie Tee to give the top a slightly different look, and I sneaked in a girly version so you can see how easy it is to make this top more feminine with the right choice of fabrics!
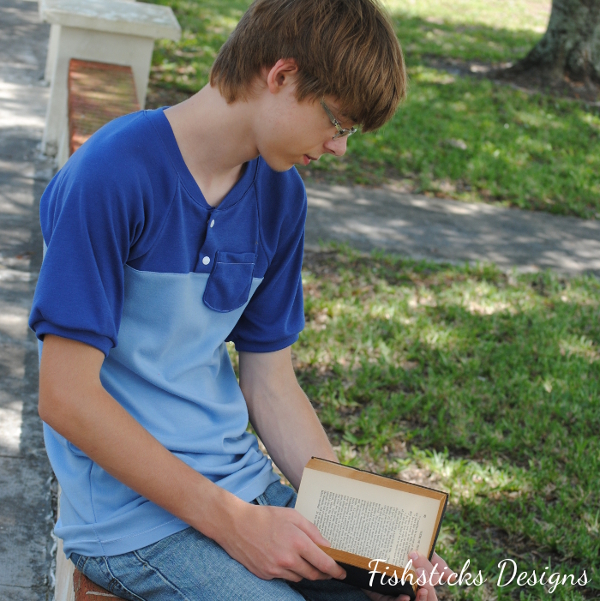
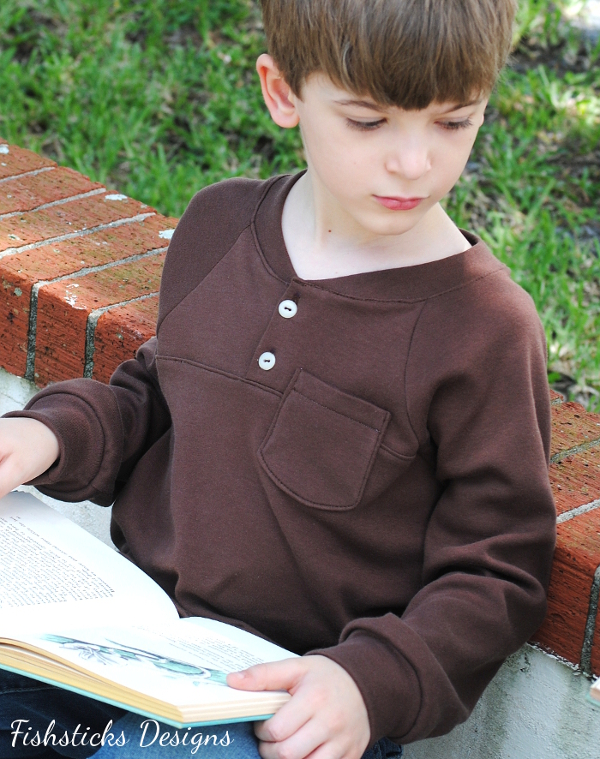
Here are a few of my favorite shots of my boys looking studious in their Honor Roll Raglan Henleys!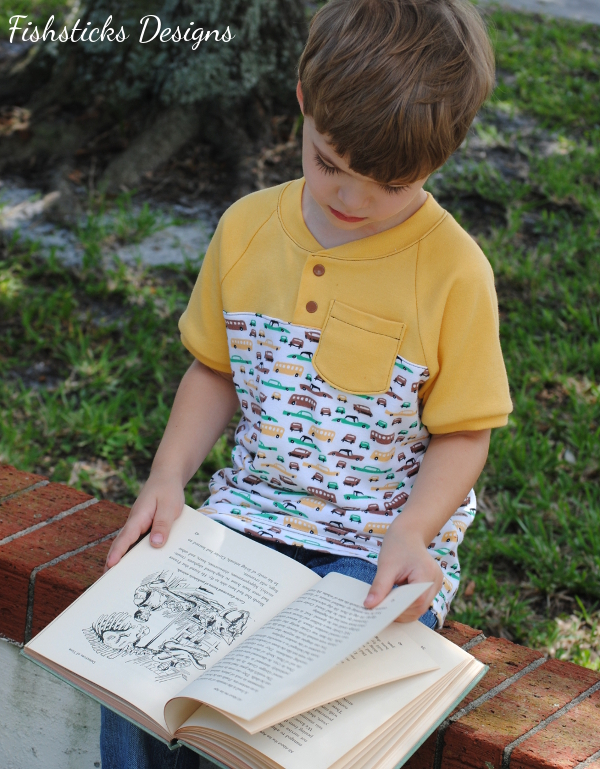
 Now is the time to build your boys’ pattern bundle, so you’ll be ready to stitch up an amazing fall or winter wardrobe for your little guys! Just click here to get started.
Sale Sale Sale – The Kids Are Back in School!
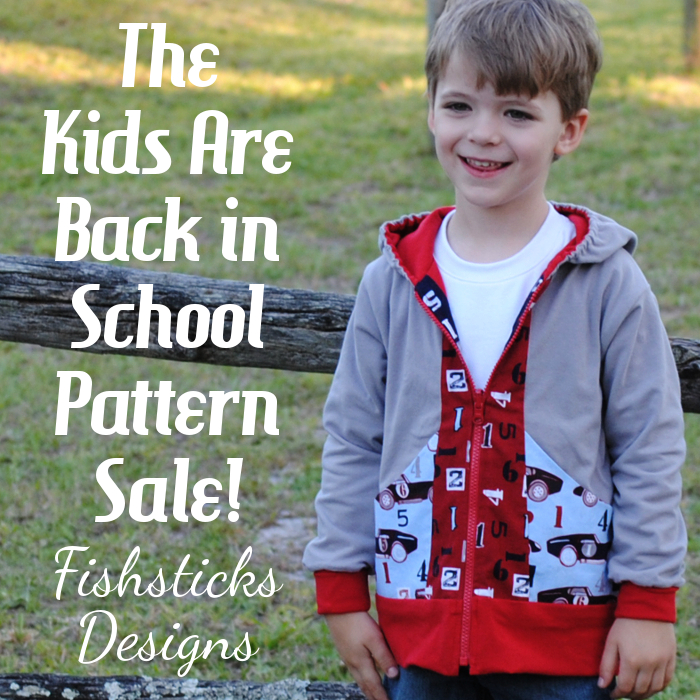 Now that our kids are back in school, whether you’re back on a regular homeschool schedule like us or you wave goodbye to that big yellow school bus in the mornings, it’s easier to fit in time to sew! Now is a great time to stock up on the patterns that you need for fall and winter sewing with a 40% discount code!! Use the code: SEWINGTIME in the Fishsticks Designs Pattern Shop or the Fishsticks Store at Etsy through midnight eastern on Thursday, 8/21. (This code is not stackable with the Buy 4/Get 1 special.)
The Boys Bundle Up Pattern Collection ~ Details & Giveaway

I’ve got a new boys’ pattern coming, and it’s part of an amazing collection of a dozen brand new PDF patterns for boys – a collection that you can purchase at a great price! The Boys Bundle Up will be available for one week from August 22nd through August 29th. (After the sale, you’ll be able to buy the individual patterns from their designers at the regular price.)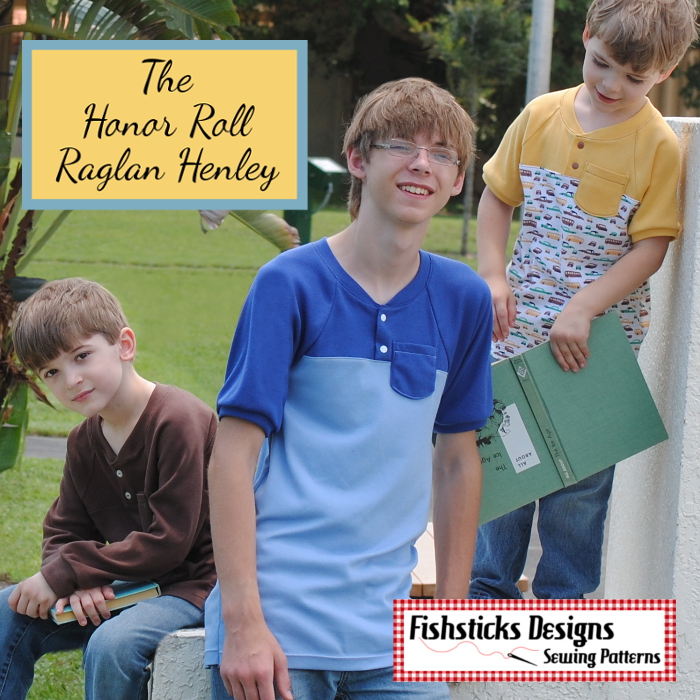 My contribution to the Boys Bundle Up is the Honor Roll Raglan Henley! This top has a huge range of sizes, starting at 12 months and going all the way to 16. It’s a knit top that combines the traditional Henley with a modern curved raglan sleeve and an optional pocket. When the collection is ready for sale, you’ll find all of the details right here: Bundle Up Sale.

While you’re waiting for the sale to start, you can check out the ongoing review posts on the Pattern Revolution Blog. That’s not all, though, you can enter to win the whole set of patterns before you can even buy it!! Just fill out the Rafflecopter at the bottom of this post. Before you enter, though, check out all of the other amazing boy patterns that are included:

.jpg "12 awesome new boy's patterns coming Aug 22-29 at www.bundleupsale.com. Get hot new patterns 50% off. The more you buy, the more you save.")


Indygo Junction’s Newest Book: Dimensional Denim
 Amy Barickman of Indygo Junction recently released a new book called Dimensional Denim, and I got to check it out! Here’s what Amy says about the book, “I was inspired to create this book after I noticed the recent trend for textural home decor and accessory items. While trend shopping I saw more and more items that created texture and interest through fabric manipulation.” The creative ideas in the book combine beautifully with Indygo Junction’s Crossroads Denim, but the book includes some great ideas for recycling old blue jeans, too!
I’ve worked with Crossroads Denim before, and it’s wonderful for denim pants, skirts and jackets, but I hadn’t really thought about using it for home decor projects. My husband and I recently finished a bench that we upcycled from our youngest daughter’s old bed, and since it really needed a toss pillow, that’s what I chose to make!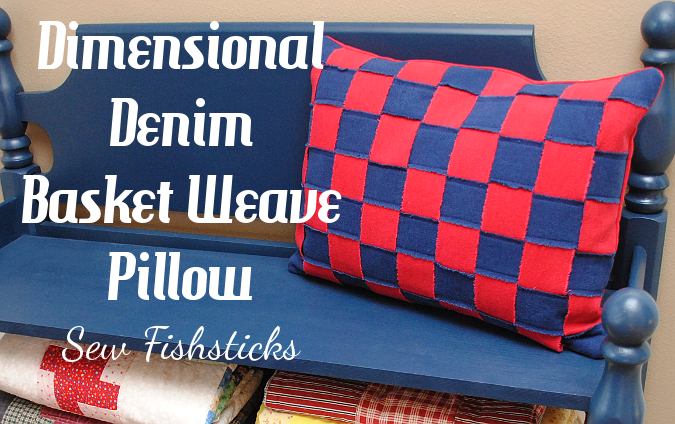 Because of the vintage look of the bench, I thought the Basket Weave Pillow would be just perfect here. I used two colors of Crossroads Denim – Fire Red and Weathered Indygo. (I sort of wish that I’d thrown in some French Vanilla, too, for even more color and interest. The book has instructions for making this pillow in two colors or three.)
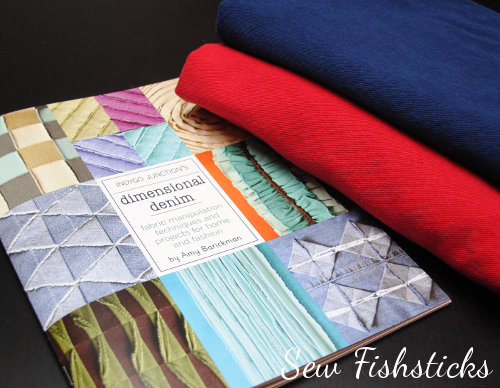 My favorite part of this project might have been tearing those strips. There’s something so satisfying about the ripping sound and that perfectly straight line that you get when you tear along the grain. I got a little carried away, and ended up with plenty of strips for a future project – maybe a vintage-y fabric checker board?
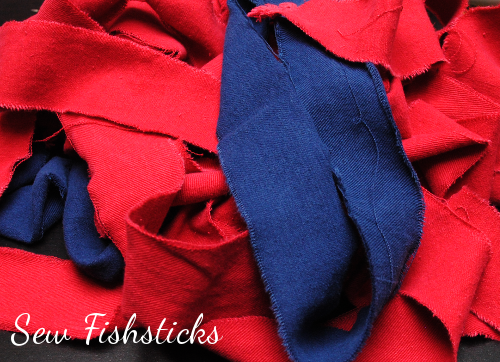 Amy says, “A simple woven design is probably one of the first craft projects most children make in school.” Whether or not you learned this technique in grade school, it really is easy enough that a child could do it, and the end product has a lovely dimensional look.
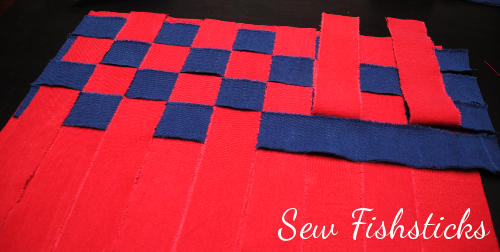 I did have to do a little math to come up with the right length and quantity of strips for my pillow since I was reusing an odd shaped one that I already had on hand. Amy includes all of the details for making a 19″ x 19″ pillow with three fabrics, so you don’t have to do math if you don’t want to. One of the things I really like about the book is that each section teaches you the technique first, followed by an actual project, but it also offers ideas for using that technique for your own projects. It sort of gives you freedom to expand on what you’ve learned!
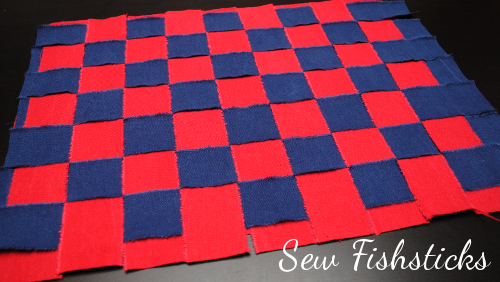 I modified the stitching on my pillow just a little bit because I was afraid my rough and tumble boys might just grab those woven strips and pull them apart. Instead of stitching the X pattern that Amy recommends on random blocks, I topstitched down the torn edges of all of my blue sections and left the red ones loose. Hopefully, those red loops won’t end up being home to too many little action figures. I’m sure that they’ll hold up beautifully, though, if they do!
I adore my finished pillow!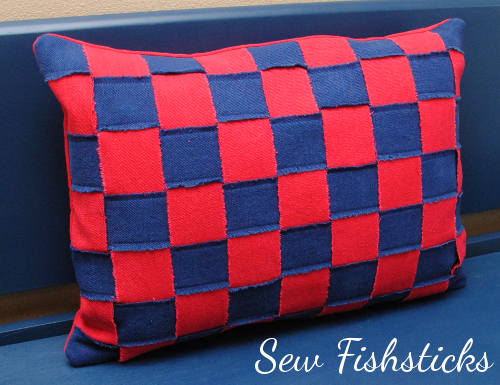
You can enter to win your own copy of Dimensional Denim by clicking over to the Indygo Junction blog, or you can grab a copy right now for 30% off using code DDBT14 at checkout! Be sure to follow along with the rest of the blog tour schedule below!
8/4 Indygo Junction
8/4 Kollabora
8/5 Amy Barickman
8/6 Fishsticks Designs
8/7 Cool2Craft
8/8 The Sewing Loft
8/11 Nancy Zieman
8/12 Skip to My Lou
8/13 Inventive Denim
8/14 Whipstitch
8/15 Coats and Clark
You can find Crossroads Denim at all of these online stores:
This Week on American Patchwork & Quilting Radio!
 In case you’re not busy this afternoon …. I’ll be joining Pat Sloan for her live weekly radio show. You can listen live right here: American Patchwork & Quilting Radio. The show airs at 4 p.m. eastern/3 p.m. central. I’m the third of today’s four guests. Don’t worry if you miss the live show, though! You can listen to the podcast any time by clicking on the above link to listen on your computer or by subscribing on iTunes (just search American Patchwork & Quilting).
The Sew in Style Book Tour, Giveaway & a Dolly Tardis Dress!
 My youngest daughter and I get to share a new book with you today, and it’s a great one for those of you who have girls learning to sew! Samantha and I met Erin Hentzel at Spring Quilt Market in Pittsburgh while we were setting up our booth, and we enjoyed chatting with her about sewing and the sewing industry and her newly released book!
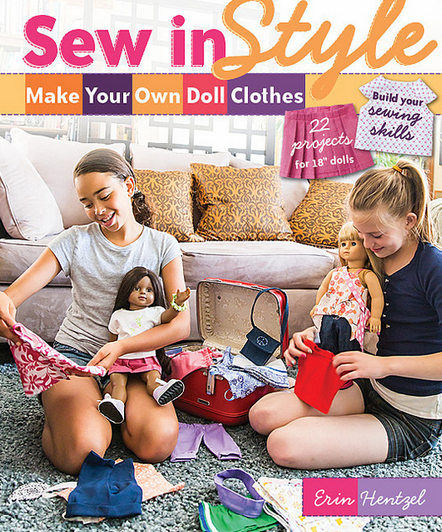 Sew in Style – Make Your Own Doll Clothes was written to teach girls to sew for their own 18″ dolls, and it does a beautiful job of doing just that. At 16, Samantha is probably a little older than the target audience, but she gladly pulled her well-loved American Girl Samantha Doll out of storage and started planning as soon as she saw the book. (Her Samantha Doll is not making an appearance here because when I say “well loved” I mean she looks like she slept with a little girl who loved her very much for many, many years! Instead, we opened up an AG Doll that we picked up on sale a few years ago and kept for some special little girl that we have yet to meet. Is that a little odd? I just know that we’ll meet someone someday who will just be overjoyed with this doll.)
 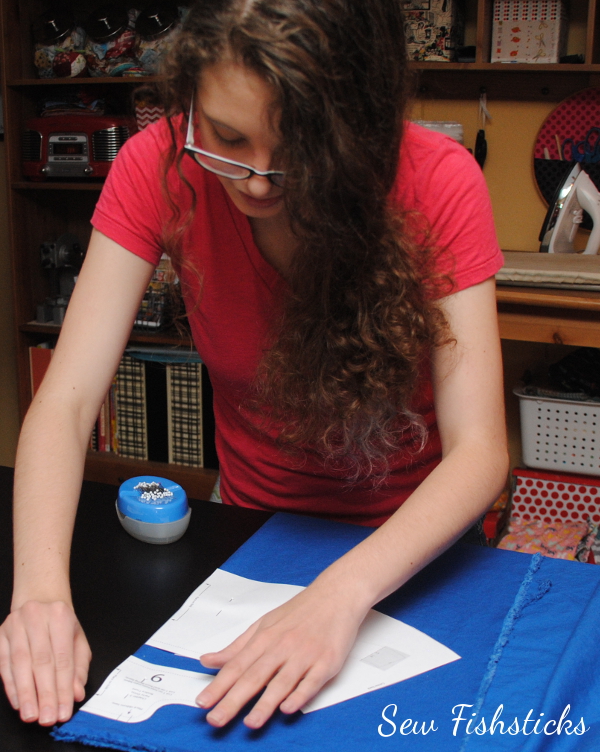 C&T Publishing sent us an eBook copy of the book for this review. This was my first time using one of their eBooks, and I really appreciated the layout. It’s super easy to find what you need, and all of the full-size patterns are included in easy-to-print-and-tape-together format. Samantha scrolled through the book on the computer, and then we printed just the pages she needed.
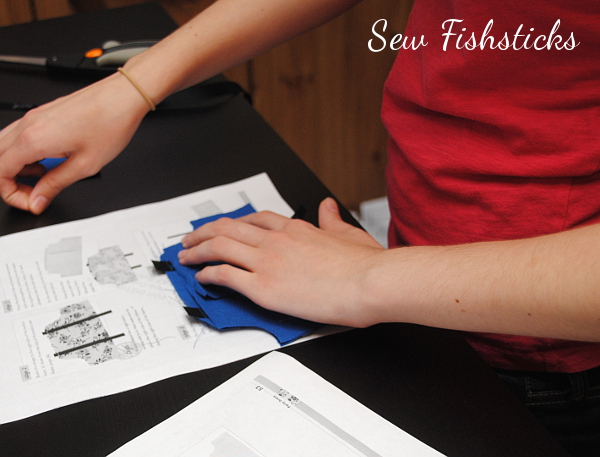 My favorite thing about this book is that I just handed it all over to Samantha and let her go with it. The beginning of the book teaches basic sewing skills with plenty of tips and guidance. Really, the only thing I helped with was brainstorming how to turn the book’s Party Dress into a Tardis Party Dress!
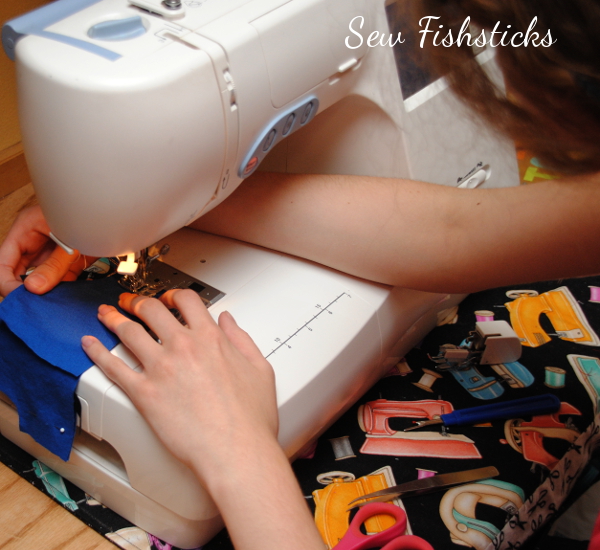 Things have been a little bit Doctor Who crazy around here lately. We started watching the Doctor a few months ago as a family, and I feel like I’m raising a houseful of Whovians at the moment. My two little guys run around the house now battling invisible Daleks and opening things with imaginary sonic screwdrivers, and my teenagers amuse themselves by turning pieces of furniture into police boxes:
Samantha’s idea for designing a dolly Tardis dress did not surprise me at all!
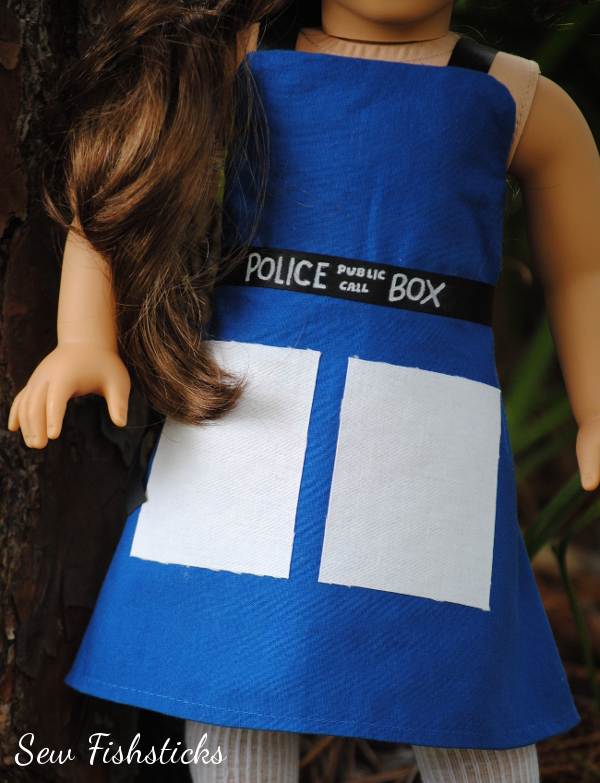 To make this dress, Samantha chose the closest-to-Tardis blue Kona cotton that she could find and black ribbon. She used a white paint pen to inscribe the words “Police Public Call Box” on the ribbon, and she used Wonder Under to iron on the white window patches. I think it turned out really well! What do you think? (We even think that if this particular doll had red hair, she could pass as Amy Pond, and the irony of this whole thing is amusing since Doctor Who is a British series and this is an American Girl Doll.)
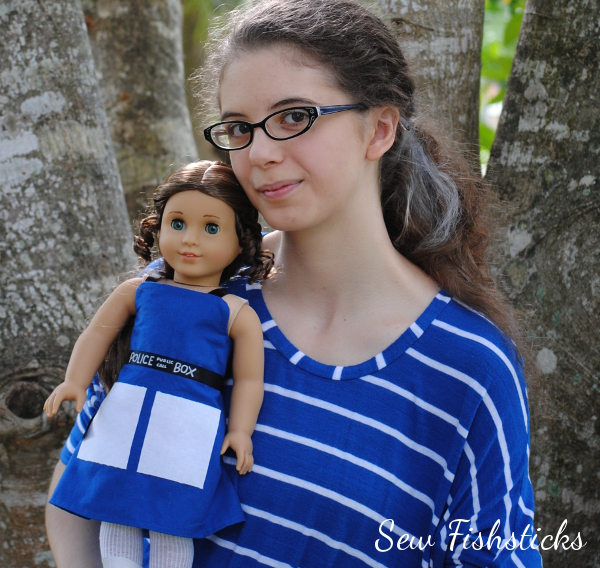 Giveaway is closed! And the winner is lucky #13! Comment #13 was from Heidi K! Congratulations!
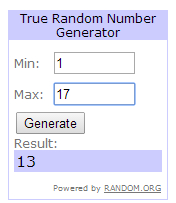
Giveaway ends July 27th, 2014 at 8:00 PM EST. Giveaway is open to U.S and international residents who are 18 years of age or older. One entry per person. Winner will be selected by Random.org. Winner will be announced using the winner’s public username on or before 12:00 PM EST on August 1st, 2014. Prize will be emailed to the winner who must be contactable via email. Email addresses will never be shared.
Katie’s Cowgirl Dress & Third Birthday Party
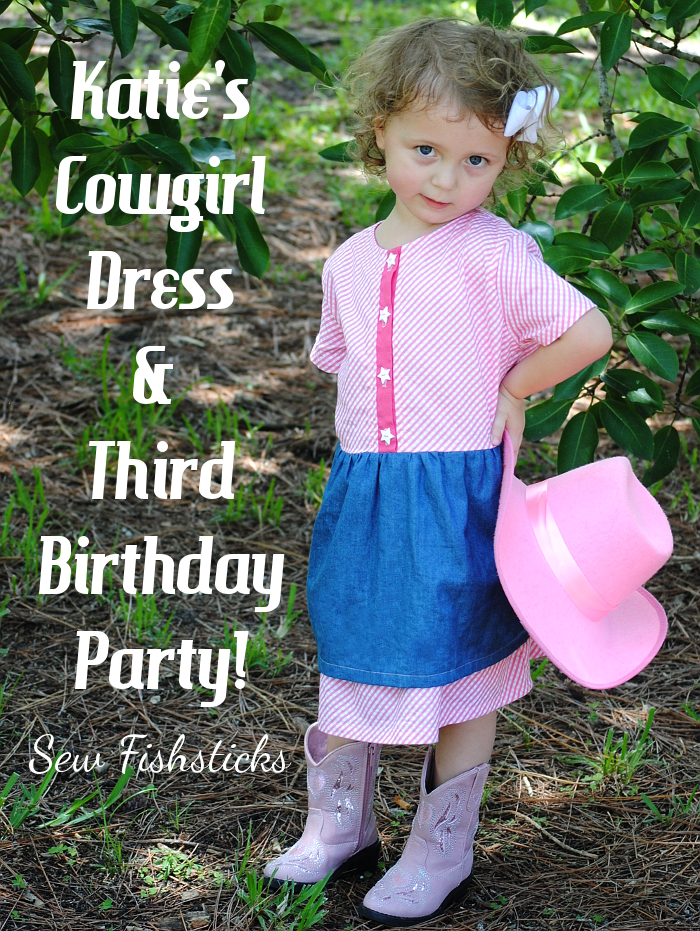 Our granddaughter, Katie, turned three this month, and we celebrated last weekend with a Sheriff Callie-inspired birthday party. It’s sort of a given that I’ll get to sew her party dress (YAY!), and I had so much fun with this one!
 Katie’s momma shared with me ahead of time that they were planning for her to wear pink boots and a pink hat, so pink was definitely the color. I took Charlie with me to shop for fabric and buttons a couple of weeks ago. I was picturing a pink gingham and chambray mix, so I was thrilled to run across this Riley Blake bias-print gingham fabric at The Quilt Place.
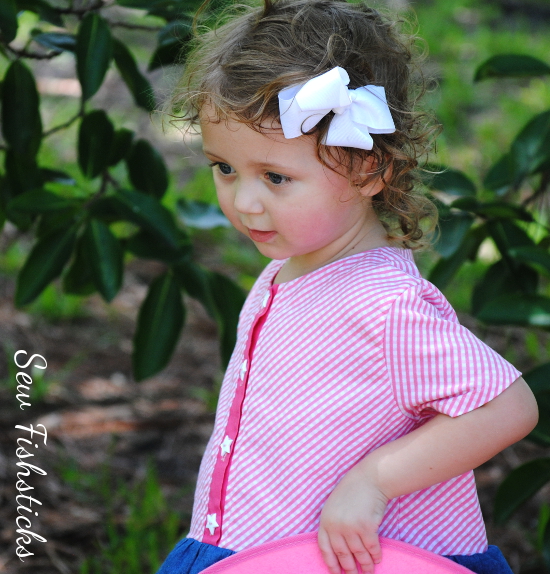 Charlie picked out the white star buttons at Hancock Fabrics, and the chambray fabric was a Joann Fabrics purchase. (We really did drive all over town for all of the supplies! Charlie was sort of done after finding the buttons, but the promise of a cake pop and chocolate milk got us through our last stop without a tantrum. Four-year-olds need something to look forward to! Actually, we all do — I enjoyed the coffee break, too.)
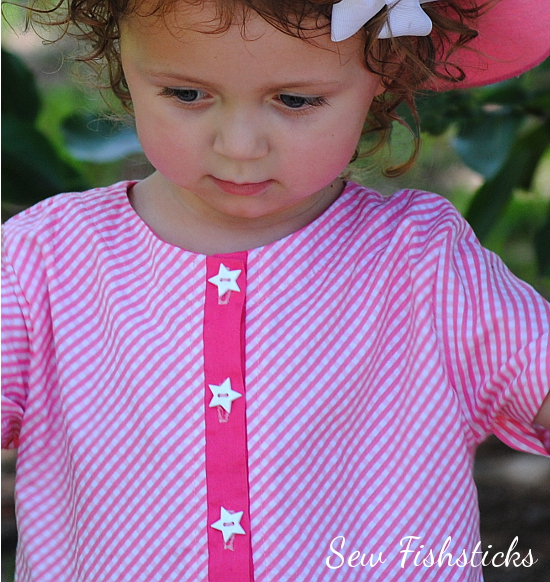 I used the top from my in-progress shirtdress pattern (It’s with my testers right now!), and combined it with a gathered two-layer skirt. (Adding a gathered skirt to a top is easy-peasy stuff. Just measure the width of the bottom of your top, cut your skirt about 1 1/2 times that width by whatever length you want, gather and attach it. That makes sense, right? Maybe I’ll do a tutorial later.)
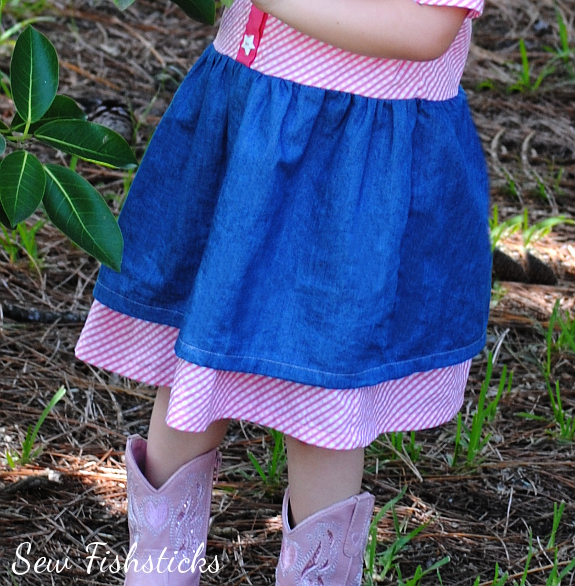 We all had to laugh a little because we put a lot of planning into Katie’s party last year with decorations and pretty food: Katie’s 2nd Birthday. I got a notice a few weeks ago that I’d been given a PartyPail.com award for Best Decorations!

Pretty cool, huh?
This year, our party was a little less Pinterest-worthy and a bit more let’s-just-have-fun! Of course, there’s nothing at all wrong with doing things either way. Both definitely have their advantages.
Katie’s friends enjoyed bouncing in the bounce house that was so kindly provided by a close family friend.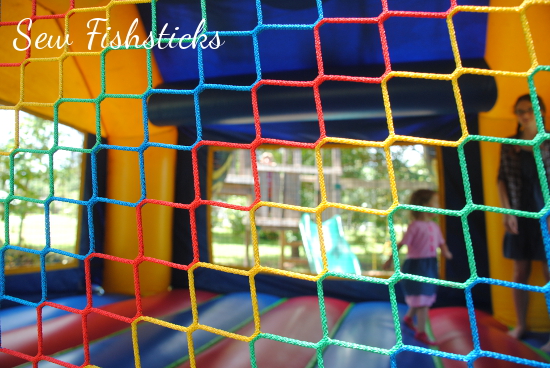 There was a slight misunderstanding, though. Our friend thought that the party was for one of our boys, so the bounce house was a monster truck! Hahahaha! Thankfully, Katie loved it!
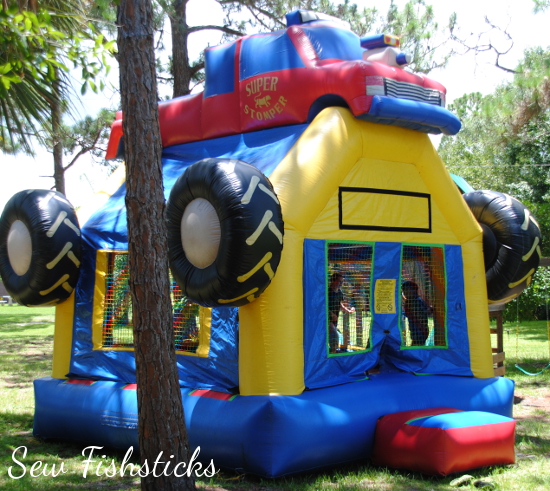 We kept the snacks simple and served iced water with fruit to drink. (It was really, really hot, so we all drank tons of water!)
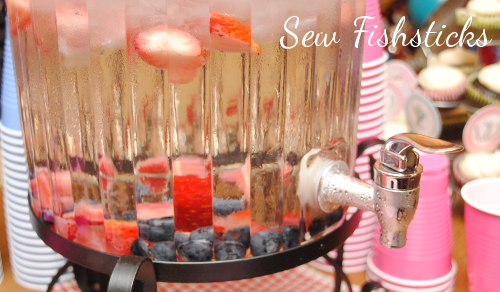 Katie was thrilled with the simple printable Sheriff Callie cupcake toppers that we found at EasyPartyPrintables.
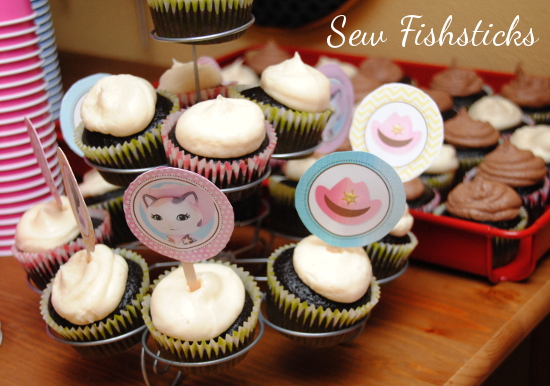 And, of course, she had a blast opening presents …
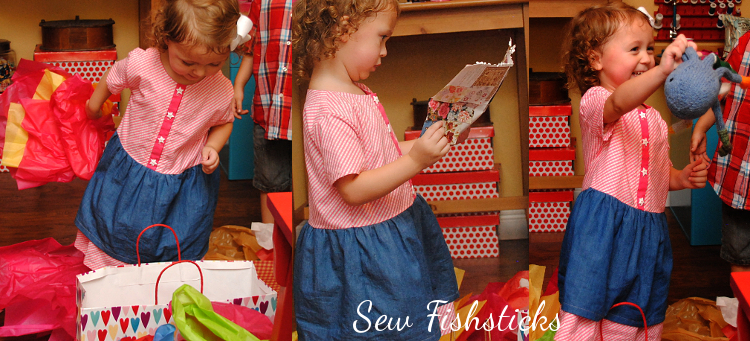 … and eating cake!
 I’d say it was a pretty successful party! Happy birthday, Katie! I pray that your next year is full of lots of love, loads of fun and plenty of new discoveries.
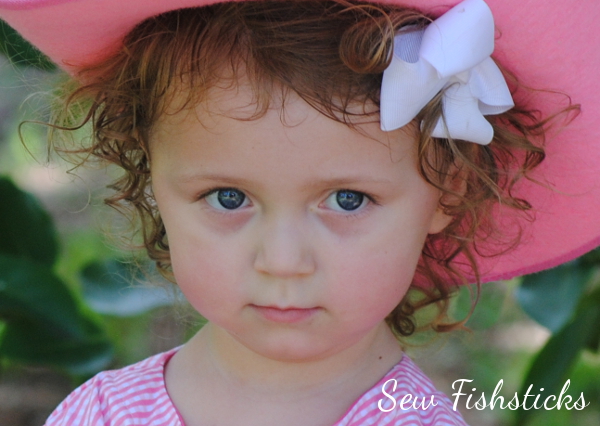 I was planning to link up with Challenge Create: Geometric Week at Skirt Fixation, but I totally missed the deadline! Next week, I am planning ahead better so I can join in for Knit Week. You should, too! You can still pop over to Skirt Fixation and vote for your favorite contestant and your favorite sew-along entry: Challenge Create: Geometric Week. Oh, and a quick huge, “Thank you!” to all of you who voted for my winning Custom Linen Handbag last week!
Also, Kids Clothes Week starts on Monday! Are you joining in? I have a few things planned!
Introducing the Sand & Sidewalk Boardshorts and Skate Pants!
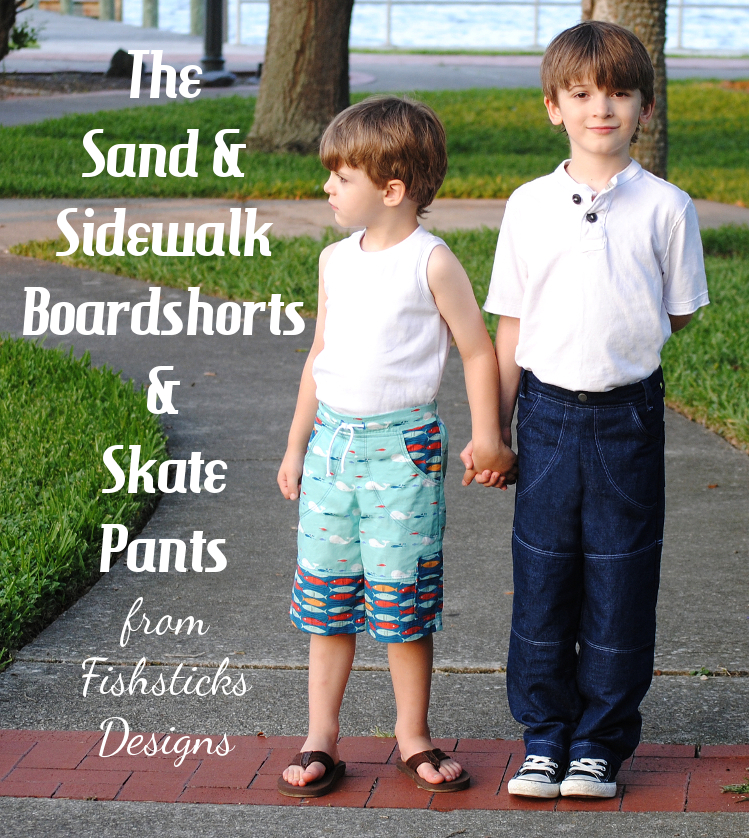 I can’t wait for you guys to read all about my latest pattern release! This one has already become a wardrobe staple for my two little guys, and I hope it will do the same for you! Allow me to introduce the Sand & Sidewalk Boardshorts and Skate Pants pattern! (As you go through, be sure to click on the images for larger pop-up versions.)
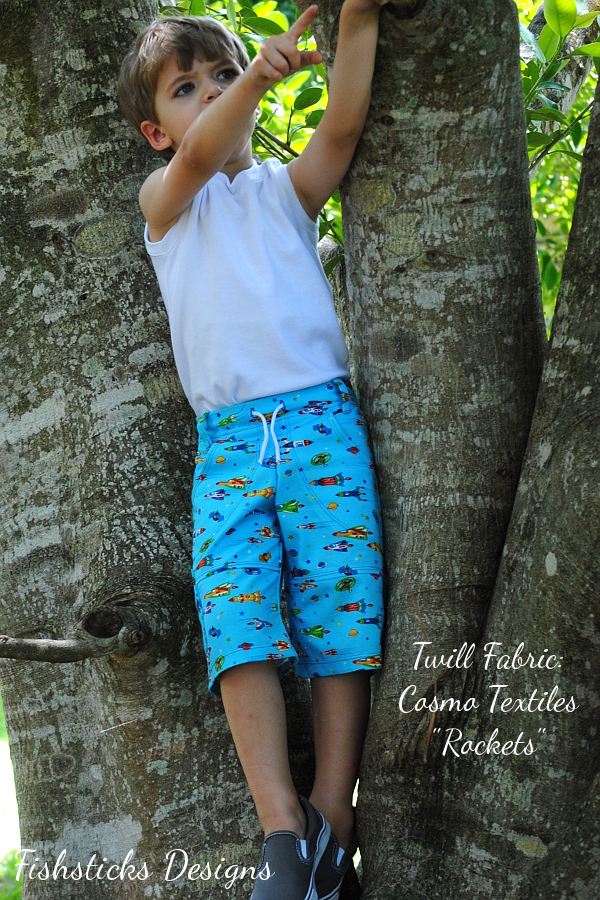 You can sew this pattern in both pants length and boardshort length. The boardshorts are designed to fall just below the knee, and the front of the leg is done in two parts for a stylish, modern look.
 Both the boardshorts and the skate pants feature an abundance of detailing provided by topstitching! It’s like ruffles and rick rack, only for boys! When you’re sewing for boys, it’s those little details that give your sewing that beautifully finished look. Don’t be worried that it’s hard, though. I’ll walk you through each step. (If you need a little extra help using a twin needle, be sure to check out my tutorial here: Using a Twin Needle.)
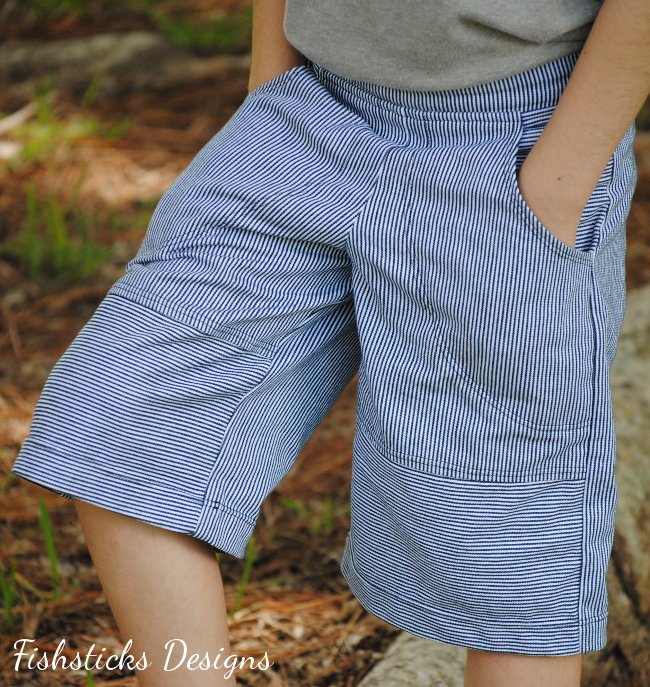
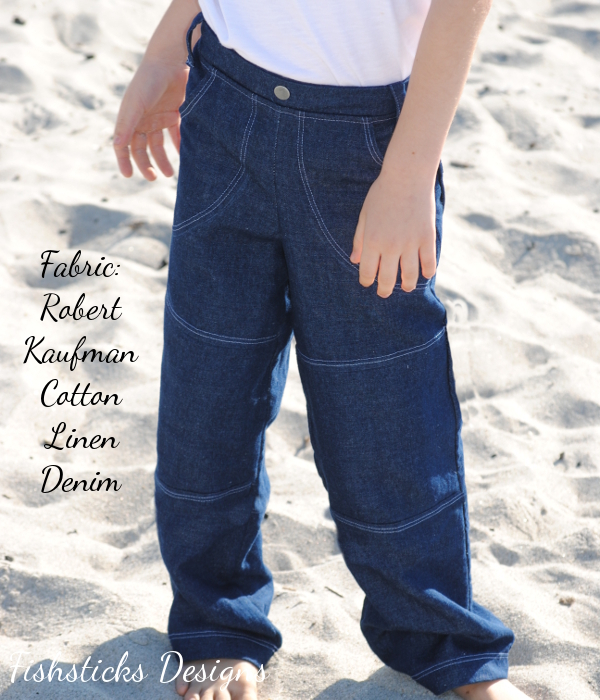 This pattern has a slimmer fit through the hips than traditional elastic-waist pants for a more updated look. The fit is slightly wider than a skinny jean fit but narrower than a straight jean. A measurement chart and multiple suggestions are included to help you choose the perfect size!
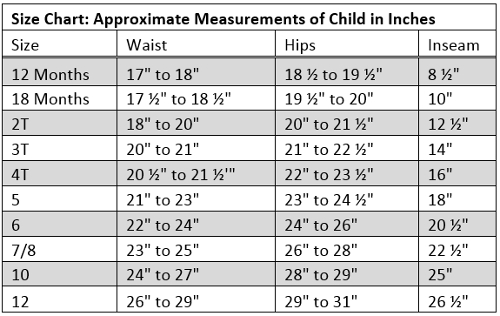 The skate pants include a double-knee panel which is great for making pants more durable for little boys.
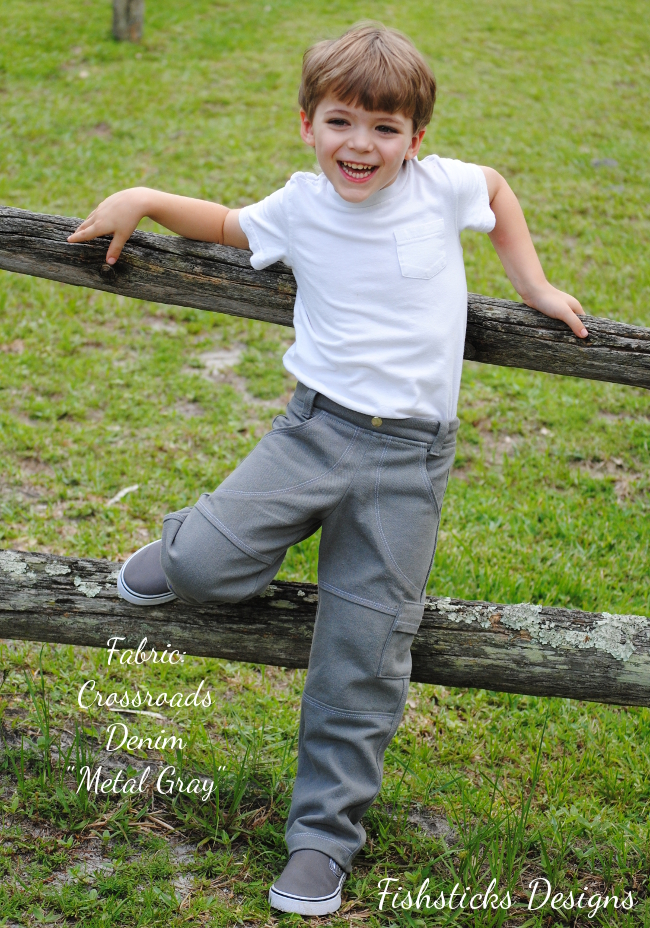 The pants pattern has two leg-width options.
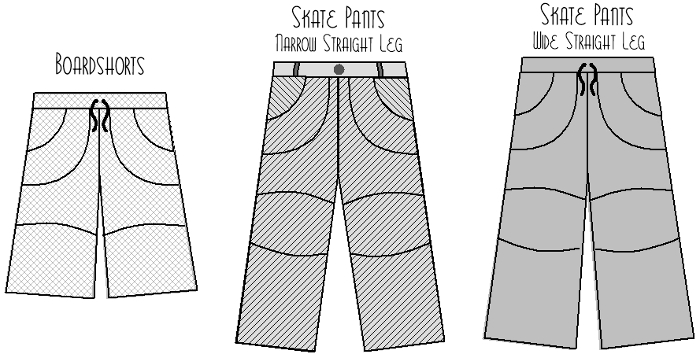 While both are straight legs, the narrower option tapers in slightly at the thigh for a closer fit through the leg, and the the wider option falls straight down through the thigh and the leg for a looser fit in the leg.
 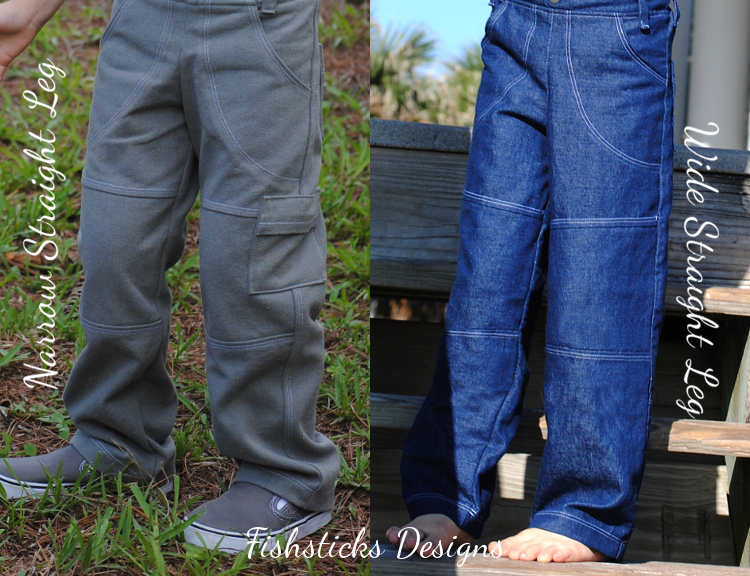 These pants and shorts have a whole list of mix-and-match features so that you can customize them just the way you like, and so that you can sew the pattern over and over, getting a different look each time. For the waistband, you can choose belt loops and a faux snap or a drawstring pulled through buttonholes or eyelets.
 The unique one-piece cargo pocket can be used for back pockets …
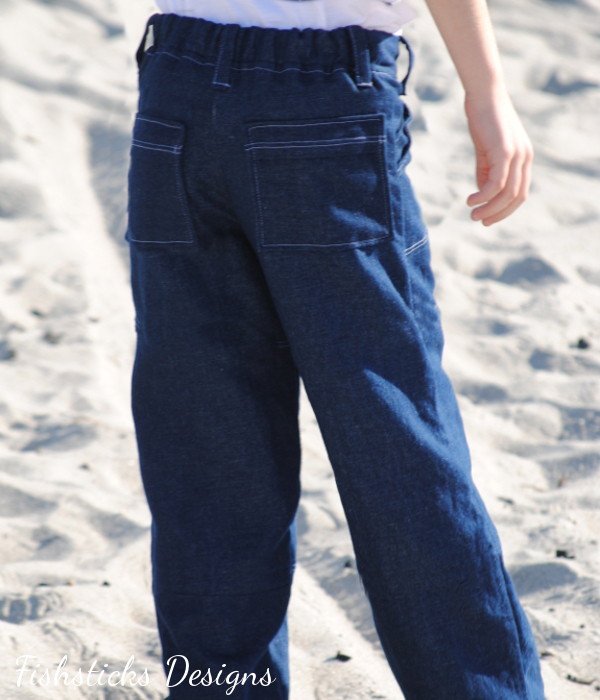 …or placed on the side seam.
 For even more interest, you can mix and match fabrics or try cutting the knee panel across the grain.
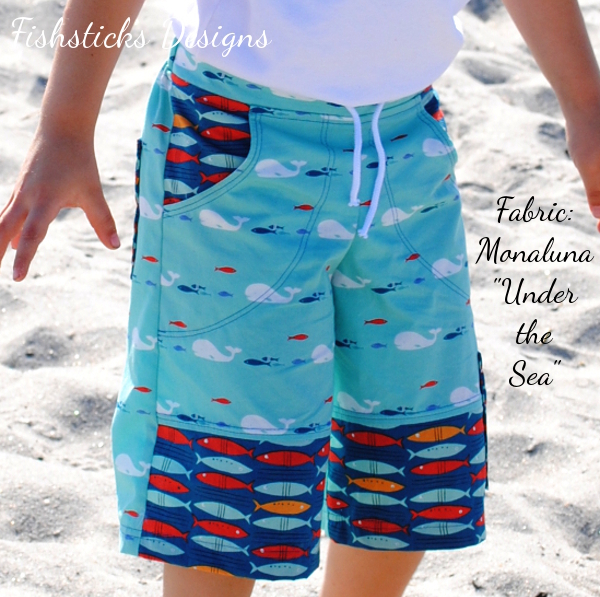
 Finally, the flat front/elastic-back waistband gives these bottoms a clean look and a comfortable fit.
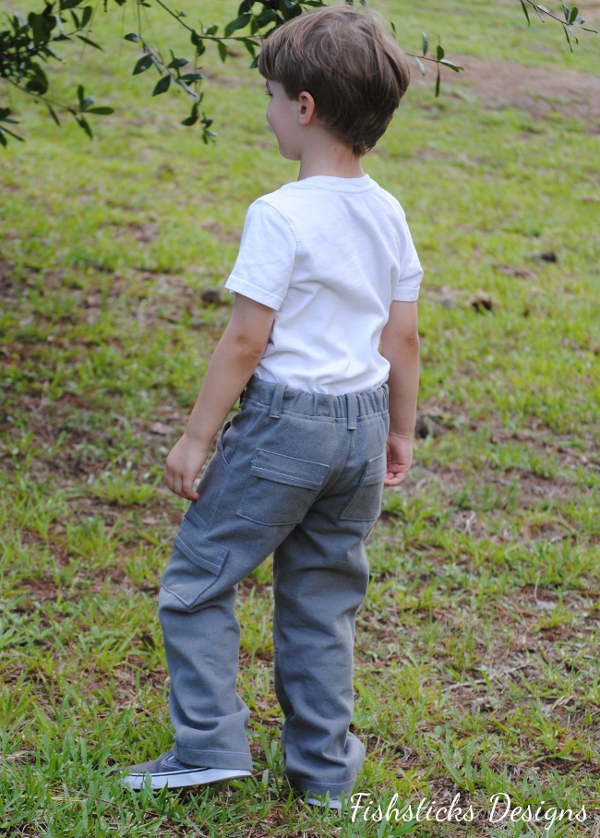 Where will your little guy wear his Sand & Sidewalk Boardshorts or Skate Pants first? Will he spend the day on the beach or perhaps take off to the local skate park? Maybe, like my little guys, he’ll hang out in the trees or spend the day exploring his own backyard. You can grab your own copy of the PDF pattern right here: The Sand & Sidewalk Boardshorts and Skate Pants or visit your local quilt shop for the paper version of the pattern!
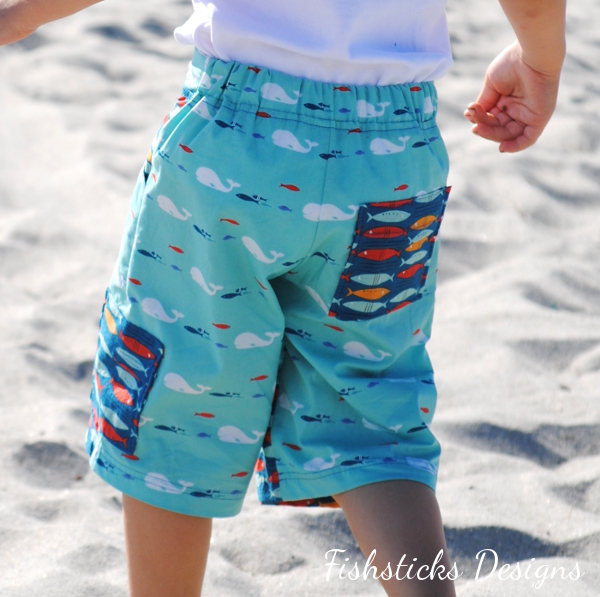
Challenge Create – The Linen Edition
It’s been quiet around here lately, hasn’t it? I’ve been busy working on testing new patterns and finishing up some projects around my home, but today, I am thrilled to be a contestant in Challenge Create: Fabric Swap Edition at Skirt Fixation. Each week of this four-week contest is focused on a different type of fabric. I’m participating in Linen Week! (You can join in the fun, too, by sewing and adding your photos to the sew-along post each week. There are some great prizes! And, be sure to pop back over to Skirt Fixation on Friday to vote for your favorite entry from this week.)
This Challenge Create is called the Fabric Swap Edition because the contestants each received fabric from another contestant to use for their entry. Janice from So-Cal Sewing Mom sent me these great linen solids in one of my favorite color combinations: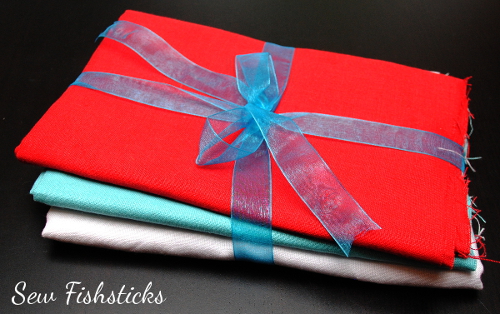 She packaged them up beautifully and tied them with a bow, too. Isn’t it fun to get pretty mail?
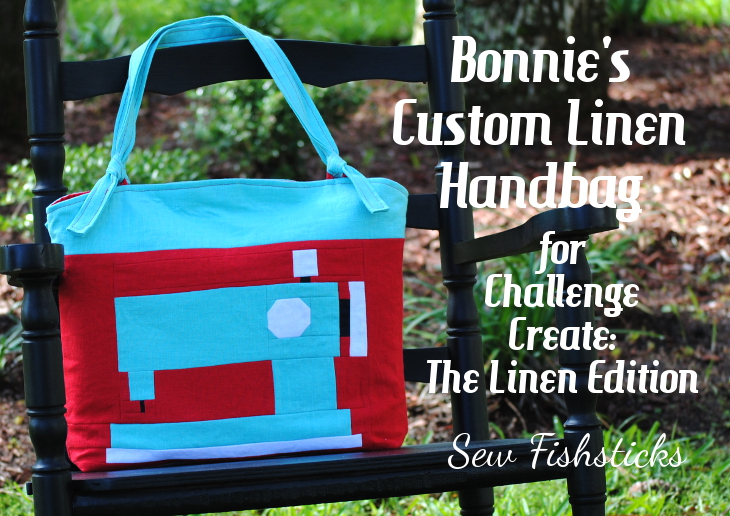
I knew as soon as I received the fabric, that I wanted to make it into a new handbag for me, but it took me way too long to decide how exactly I was going to do that. (I seem to be the queen of the last minute dash to the finish!) Thankfully, once inspiration struck, the bag came together just the way I imagined. I started by turning the sewing machine logo that I designed for my website into a paper pieced “quilt” block. 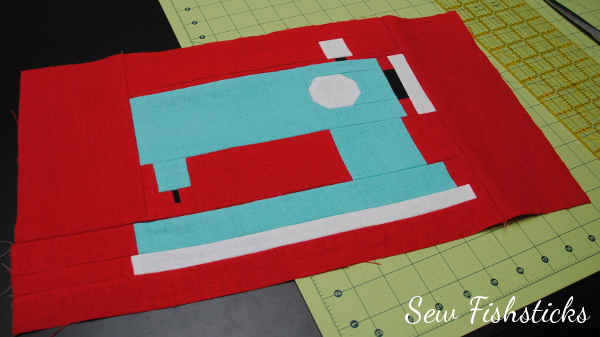 I used the same freezer paper method that I demonstrated in the My House is a Little Wonky quilt block tutorial. Watching these blocks come together is so much fun!
 Once, my sewing machine was ready, I sort of made up the bag pattern as I went along. I love having a zippered pocket in my bags. This pocket stretches the width of the back of the bag for plenty of storage space.
 Since it was really last minute, and I didn’t have a zipper the right color on hand, I upcycled one from an old laptop bag. My re-used zipper has the advantage of having the perfect shape for decorative fabric pull. I lined the I added a zippered pocket with white linen to make it easy to find little things that might sink down to the bottom.
 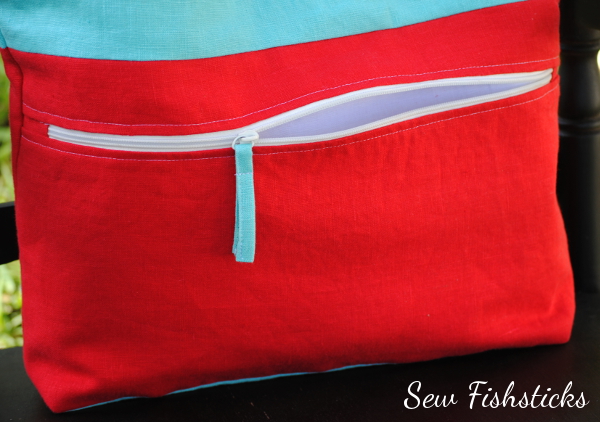 I’ve used these little loops for tie-on straps before, and I just couldn’t resist adding them to this bag. They add a unique detail, and they make the straps adjustable. They also allow the straps to be easily changed when you just want something a little different.
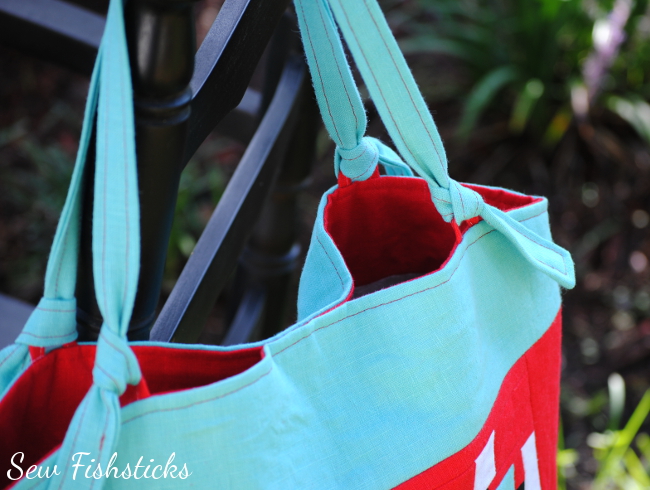 Inside, I hid two cell-phone sized pockets and two pen/pencil pockets in a whimsical print. (There’s a magnetic snap in there, too.)
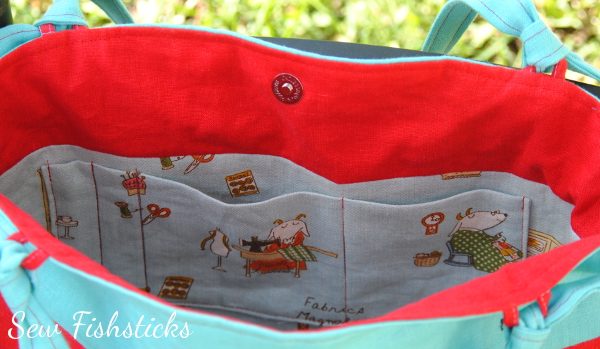 When I first started sewing seriously a number of years ago, I joined an online sewing community that became like a second family to me. There was a running joke on the board about goats eating posts (sometimes on purpose and sometimes just in random website glitches) — when I ran across this linen-cotton blend fabric covered with sewing goats, I knew I had to have it. I’m sure it will make me smile every time I peek inside. Isn’t it perfect?
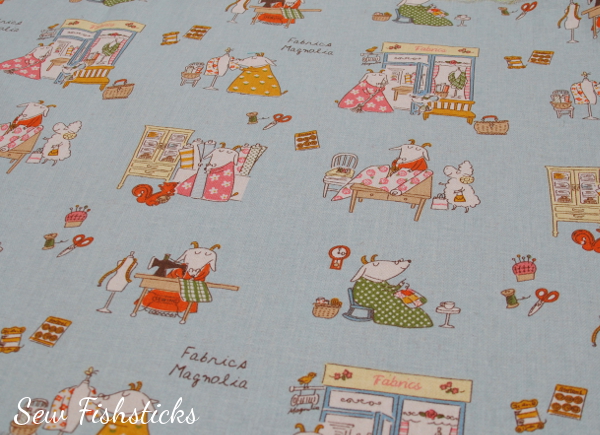 A huge thank you to the Skirt Fixation team for inviting me to join in the competition … and the fun! Thank you, too, to Janice for the perfect linen fabric for my new bag — I LOVE it!
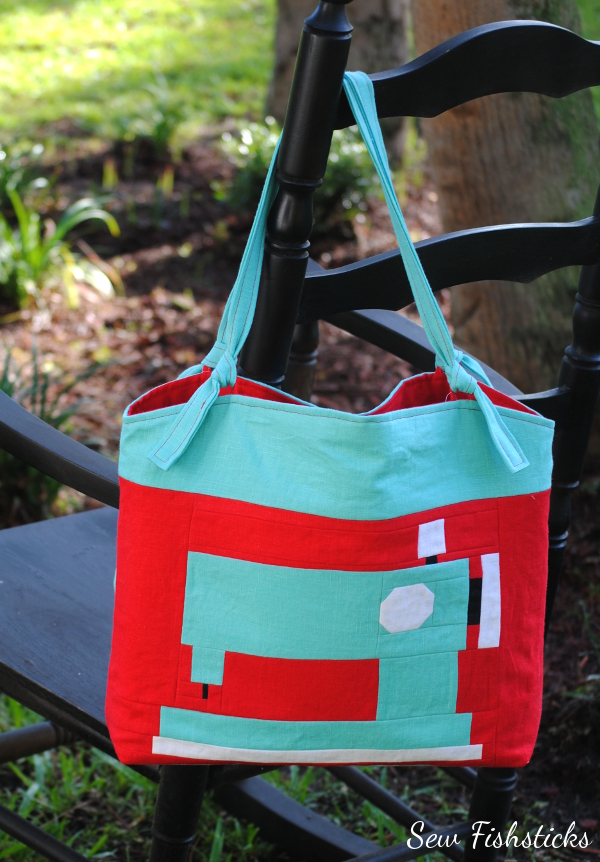
Why I Sew

This week, I’m joining in with a wonderful group of sewing bloggers and PDF sewing pattern designers and sharing Why I Sew! It’s interesting that just a few months ago, I happened to overhear a woman and her husband chatting while I was browsing a local antique mall. The wife said, “I am not going to sew for them. It costs too much. Why would I sew for them when you can buy clothes from the store for the same price?” So many thoughts ran through my mind! The most prominent, though, was concern that people would really walk away from traditional crafts just because its less expensive to buy something ready-made. While I know many people do sew to save money (and there are plenty of ways to do so), I like to think that most of us sew for more important reasons! I posed this question on the Fishsticks Designs Facebook page, and I was so encouraged by the answers I received.
I sew because I love to!
I sew because its therapeutic for me.
I can make my kids and myself, one of a kind clothes that we love.
I do it because God has given me something to do that I can enjoy and love on others with.
I sew to grow as an adult.
Sewing is one of my many creative outlets.
I love the gratification when I finish something I worked hard on.
Creating quiets the chaos.
It is so satisfying to hear my son tell people, “Mommy made that for me.”
I love seeing something come from nothing.
Therapy costs more!
Sewing relaxes me and gets me to slow down.
We are created in His image and He is the Creator, therefore I was created to create.
I like to create and baking has too much fat.
It’s fun.
I love to give handmade gifts.
Sewing is cheaper than therapy or drinking.
I sew because I can…
and, my favorite, “You never eat when sewing either as it dirties the fabric so the more sewing you do the less you eat?” Hahahaha! We could start a new diet fad — The Sewing Diet — don’t eat that brownie! Go sew something instead!
Really, there were so many great answers, and I loved them all! You can read the whole list right here: Why Do You Sew?
One of the things we were asked to do as part of this series is to share some of the things we sewed when we were first starting out. I went hunting last week for the old Photobucket account that I used when I first joined an online sewing board, and I discovered these gems. I was sewing a whole lot of cloth diapers back then!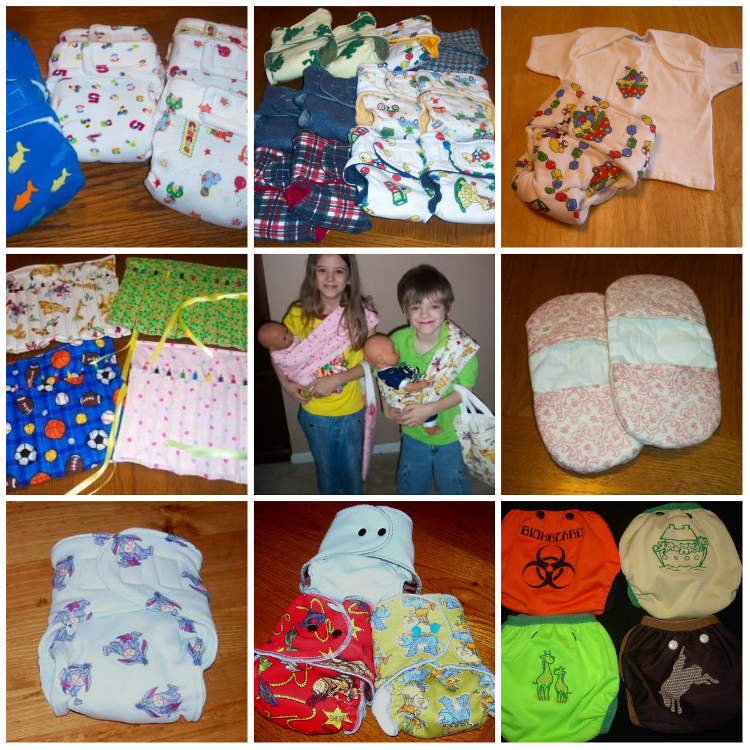 It makes me laugh a little now, but it really was sewing cloth diapers for our fifth child that got me excited about sewing! I learned to sew in Home Ec in Jr. High, and I sewed bits and pieces here and there, but I was in my 30s when it became a passion.
Quite a few people in my little survey above mentioned sewing as a type of therapy, and I can testify myself that sewing helped bring me through a difficult period of time. When I first started this blog, I was far away from family and friends, feeling like I didn’t quit fit in where I was, and I threw myself into this creative outlet. While I don’t recommend doing that forever, I think it played a huge part in keeping me sane during that period of time! Designing, redesigning, cutting, stitching, ripping, altering and finally finishing something gives such a sense of satisfaction. I can’t think of anything else quite like it. My sewing skills have progressed so far since those first cloth diapers. (My photography skills, too, but that’s another post!) Even those first things that I sewed, though, were useful, and they were beautiful because they were made with love, and I learned with every single stitch. As we grow older, I think we often forget how much value there is in learning, in forgiving ourselves when things don’t turn out perfectly, and striving to do a little bit better each time we complete something. I wrote a guest post for Hopeful Threads last year about creating for family and imperfection: Imperfection and Leaving a Legacy.
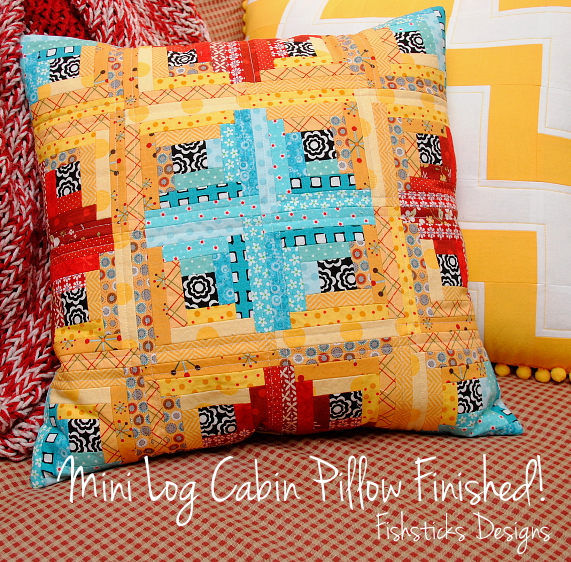
I sew because I love to create. I sew because something handmade holds a part of the giver forever. I sew because I enjoy giving a part of me to those that I love. I sew because my nieces enjoy telling their friends that the bags they received for Christmas are one-of-a-kind and made just for them!
 I sew because my little guy asks me, “Are you making that for me?” (And, just for my blogger friends, that question is usually followed with, “I’ll let you take pictures of me if you give me a lollipop!”)
 I sew because it gives me an outlet to give to people in need.
 One of my favorite things about sewing, though, is sharing my love for sewing by teaching others! There’s something amazing about passing on not only the skills, but the desire to create something with your own hands. I get just as excited to see pictures of something that someone has sewn with one of my patterns or tutorials as I do when I finish my own projects … maybe even more! Just last week, I followed along while a few of my sweet customers answered questions posed by someone new to my patterns, and I loved reading, “Bonnie’s patterns are the reason I started sewing,” and, “I learned to sew with the Patrick Raglan!” Sharing my love of sewing has brought me more joy than I could have imagined! And, you don’t have to be a pattern designer to share in that joy — teach your children to sew, invite your neighbors over for a sewing party, or organize a sew-along in an online community.
Now that you know a little about why I sew, check out these other great bloggers who are sharing why they sew, and then join in our link party below to share why you sew! We all want to know!
6.23.14 | Boy Oh Boy Oh Boy | Nimble Phish | Sprouting Jube Jube | Paisley Roots | Made For Mermaids | Glitter and Wit | Peek-a-Boo Pattern Shop | Rae Gun Ramblings |
6.24.14 | Shaffer Sisters | Sew Like My Mom | Bebe Lambs | EYMM |
6.25.14 | The Sewing Geek | GYCT | Lulu and Celeste |
6.26.14 | Ruby and Jack Patterns | Muse of the Morning | Fishsticks Designs | Little Kids Grow |
6.27.14 | Make it Handmade | Rebel and Malice | Ali Cat & Co. |


