Love for Clara
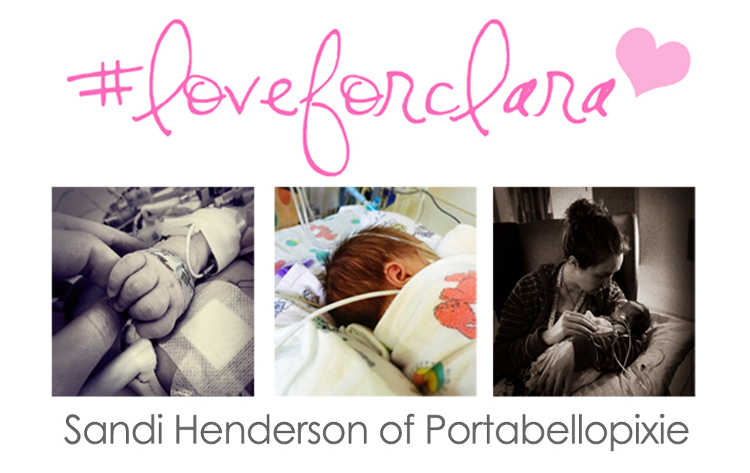 Please join us for a fundraiser/giveaway for our friend, fabric and pattern designer, Sandi Henderson of Portabellopixie, who just welcomed sweet little baby Clara into the world. She was born in May with a congenital heart defect, pulmonary stenosis with an inssificent tricuspid. Her little body has recently undergone a 5 hour heart surgery that went well! She is now in the healing process, but still needs much love and care. Sandi, her husband Dustin, and little Clara are at a special hospital in Seattle Washington where Clara is being treated and watched over, while their family and other two children are patiently waiting for them to return home to Montana.
Funds earned will be donated to the YouCaring site that has been set up especially for the Henderson Family to help with medical costs, future travel to and from Montana and Seattle, and to help Sandi and her family get into a separate home where they can live together and heal.
With your donation, you will be entered into a drawing to win some amazing prizes from various designers! Please visit the blog for more information: Love for Clara.
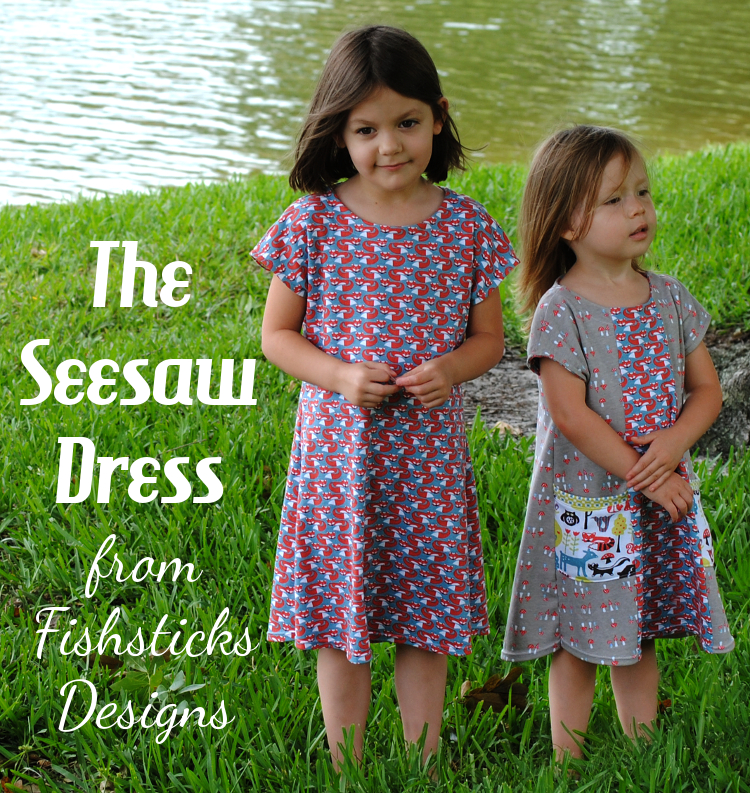
The Seesaw Dress Is Coming Tomorrow!
 There’s a new Fishsticks Designs pattern
 coming tomorrow! Update: It’s available now, right here: The Seesaw Dress! The Seesaw Dress in sizes 12 months to 7/8 is an all-knit dress that is a great choice for those of you who are new to sewing knits, as well as those who already love knit sewing. This casual, modern dress features two options: the Basic Dress and the Pocket Dress. Because of the dolman-sleeve styling the basic dress has only four pattern pieces and a quick, easy finish. It’s a comfortable dress that can go from the classroom to the playground with ease.
 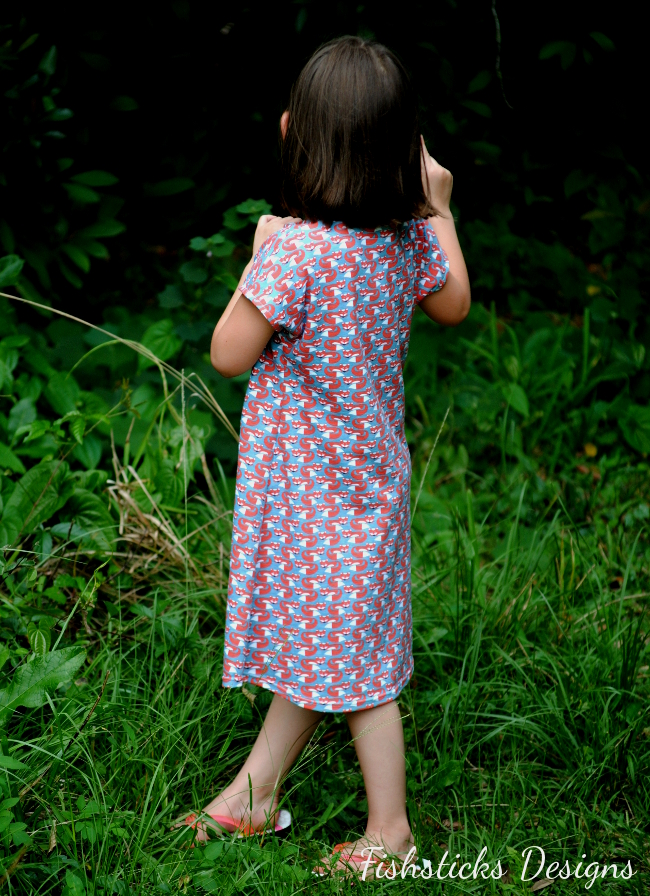 With just a little bit of extra work, you can add interest and POCKETS to this sweet dress!
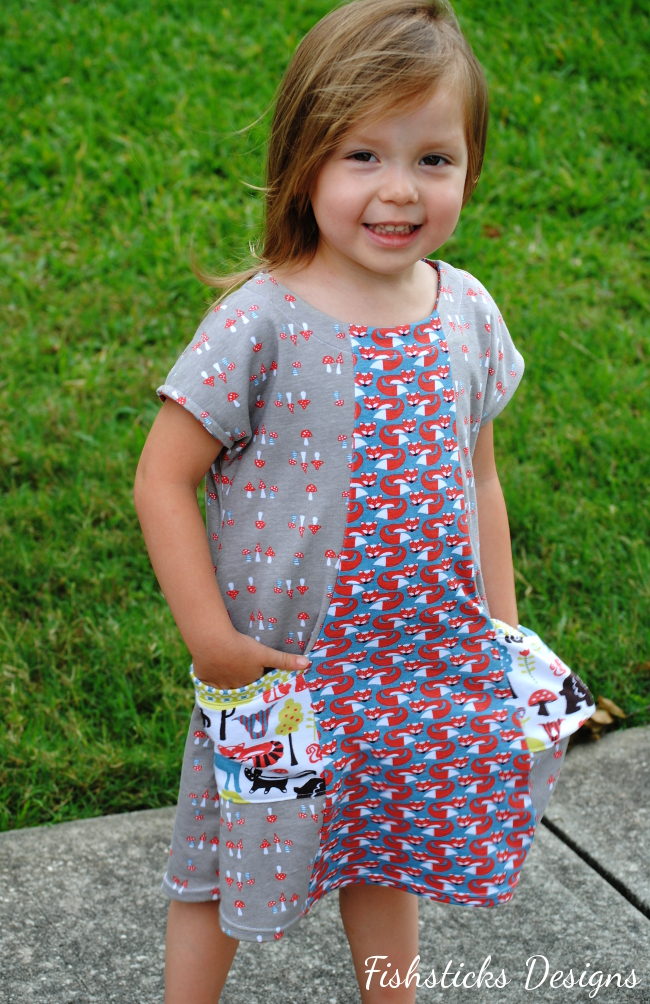 The pockets and inset are perfect spots to feature small pieces of favorite fabrics, and what little girl doesn’t need a place to keep the treasures she collects through the day?
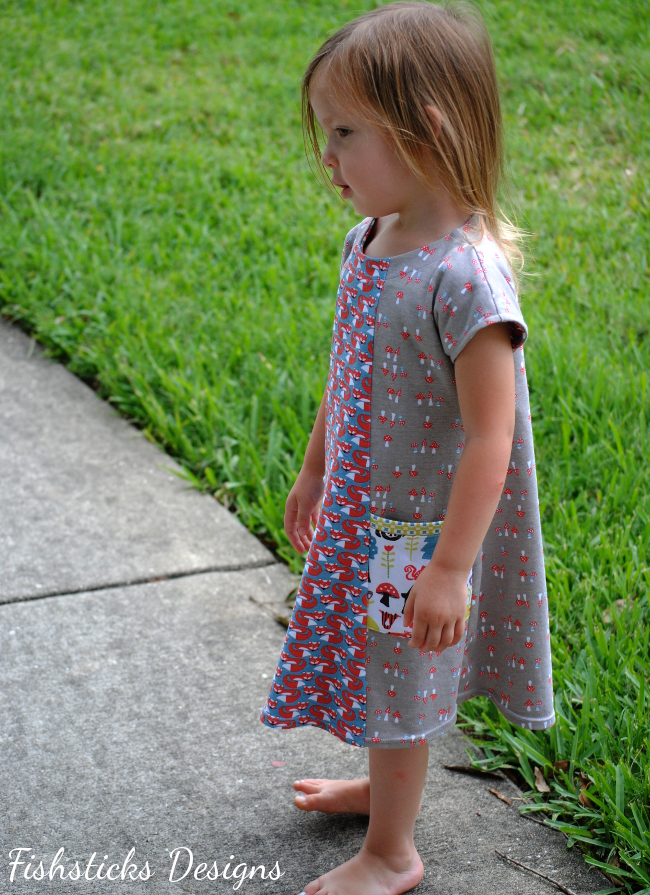 The instructions for the Seesaw Dress walk you through two different options for putting the dress together. Each method has different advantages, but both teach you a simple way to get a finished edge on the neckline and sleeves. The PDF version of this pattern includes all the latest Fishsticks Designs updates – nested sizes, individual sizes and a full-size pattern option.
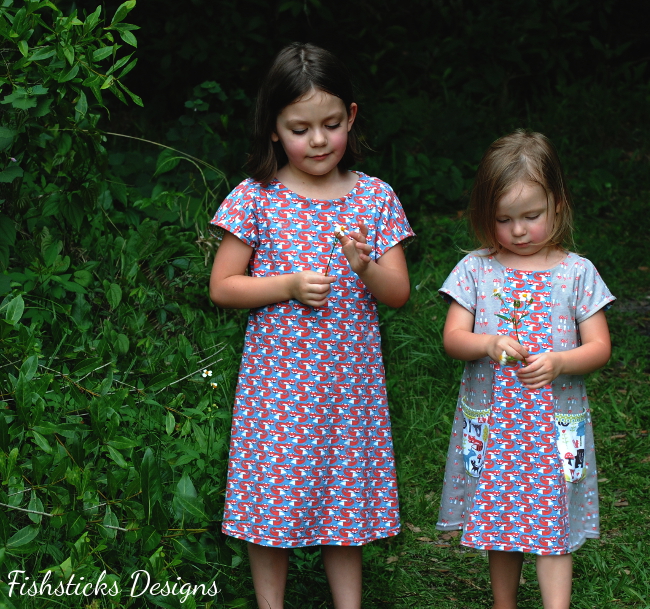 The PDF version of this pattern will be available tomorrow at noon eastern in the Fishsticks Designs pattern shop. Look for the paper version at your favorite local quilt shop beginning next week!
Around the Block with Patchwork Posse: Block #12
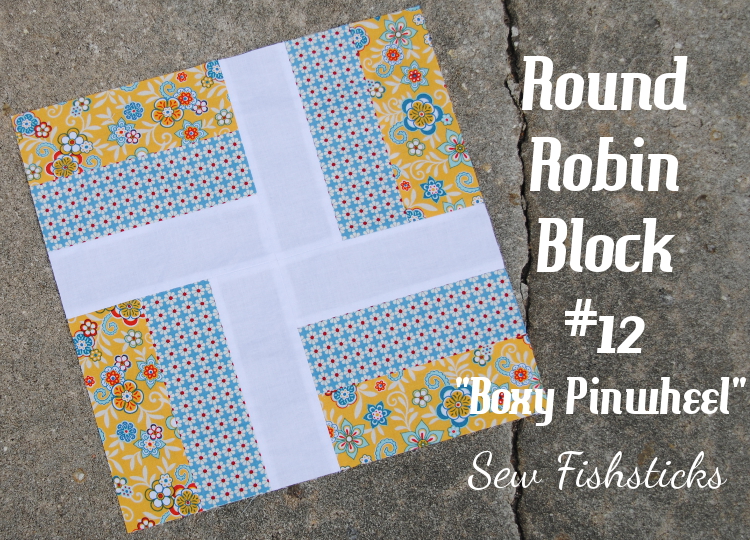 Woohoo! I finished all twelve of the blocks in the Patchwork Posse Around the Block Round Robin! All that’s left to do is piece them all together with sashing … and then add the border, and then the quilting, and, of course, the binding. I will finish this quilt! It just might take me a little bit. This final block was super fast and easy — my favorite kind. The Boxy Pinwheel Block tutorial is from Susan at Living with Punks.
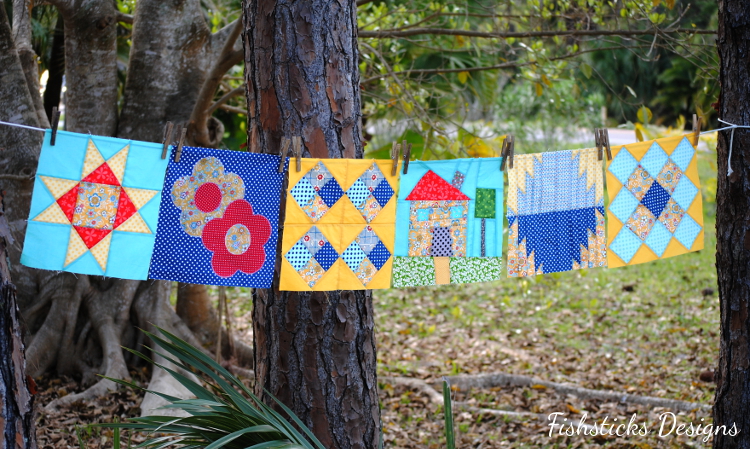
I’m really excited to see how the whole quilt comes together! Here are my final six blocks: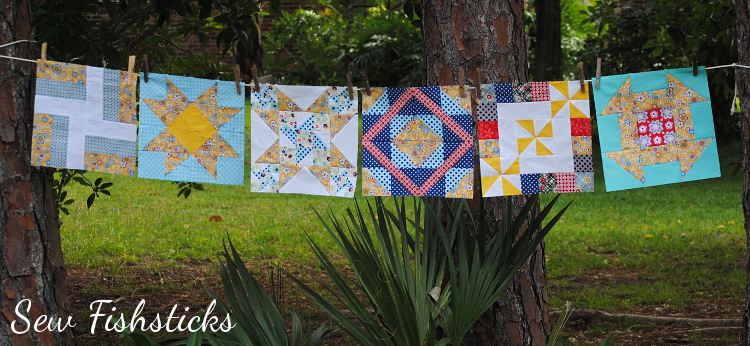 And, another look at the first six blocks:
The Winner of the Spring 2014 Go Fish Six Pack Is ….
 Thank you so much to everyone who commented on my Spring Market Booth post! Random.org chose comment #61 as the winner.

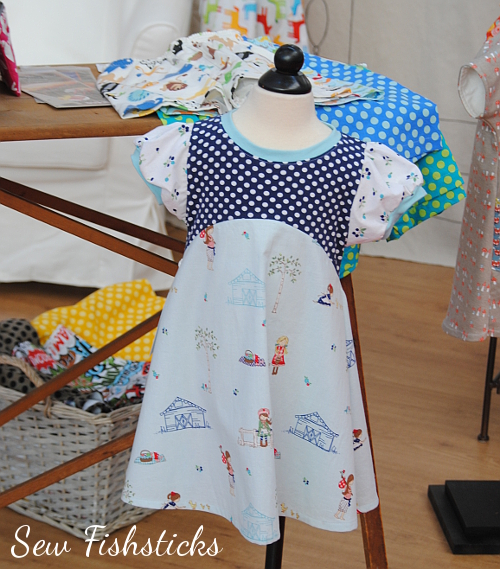
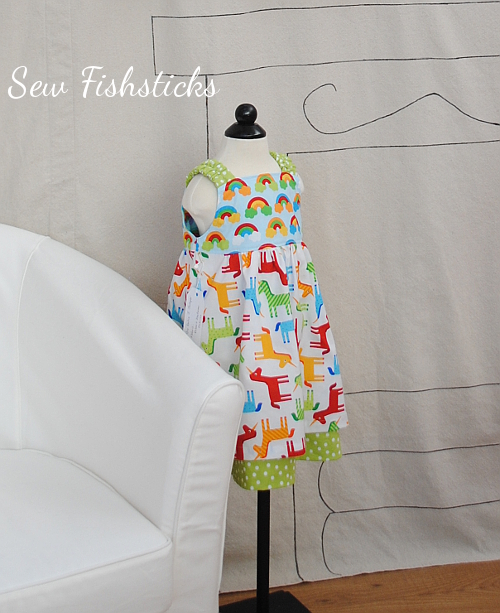
And, comment #61 was made by Marie-Aude!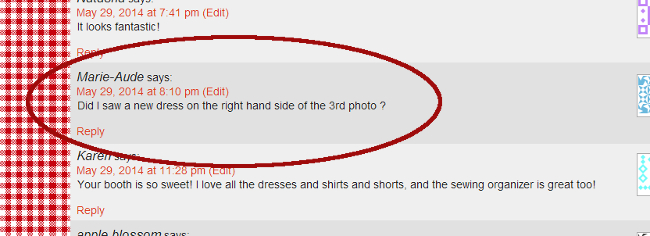 Marie-Aude asked in her comment if there was a new dress on the right-hand side in the third picture. There is! And, it’s pretty cool that she asked because that pattern is set to be released later this week! More pictures are coming soon.
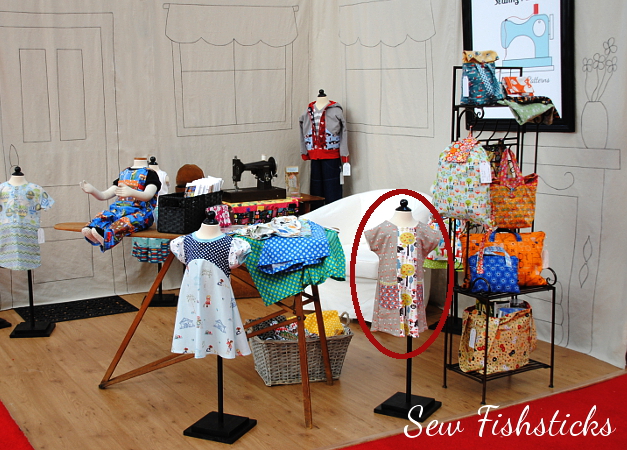 While you’re waiting, though, don’t forget that you can get your own Spring 2014 Go Fish Six Pack for only $15 through this Thursday: GF Six Pack Special.
Spring 2014 Go Fish Patterns
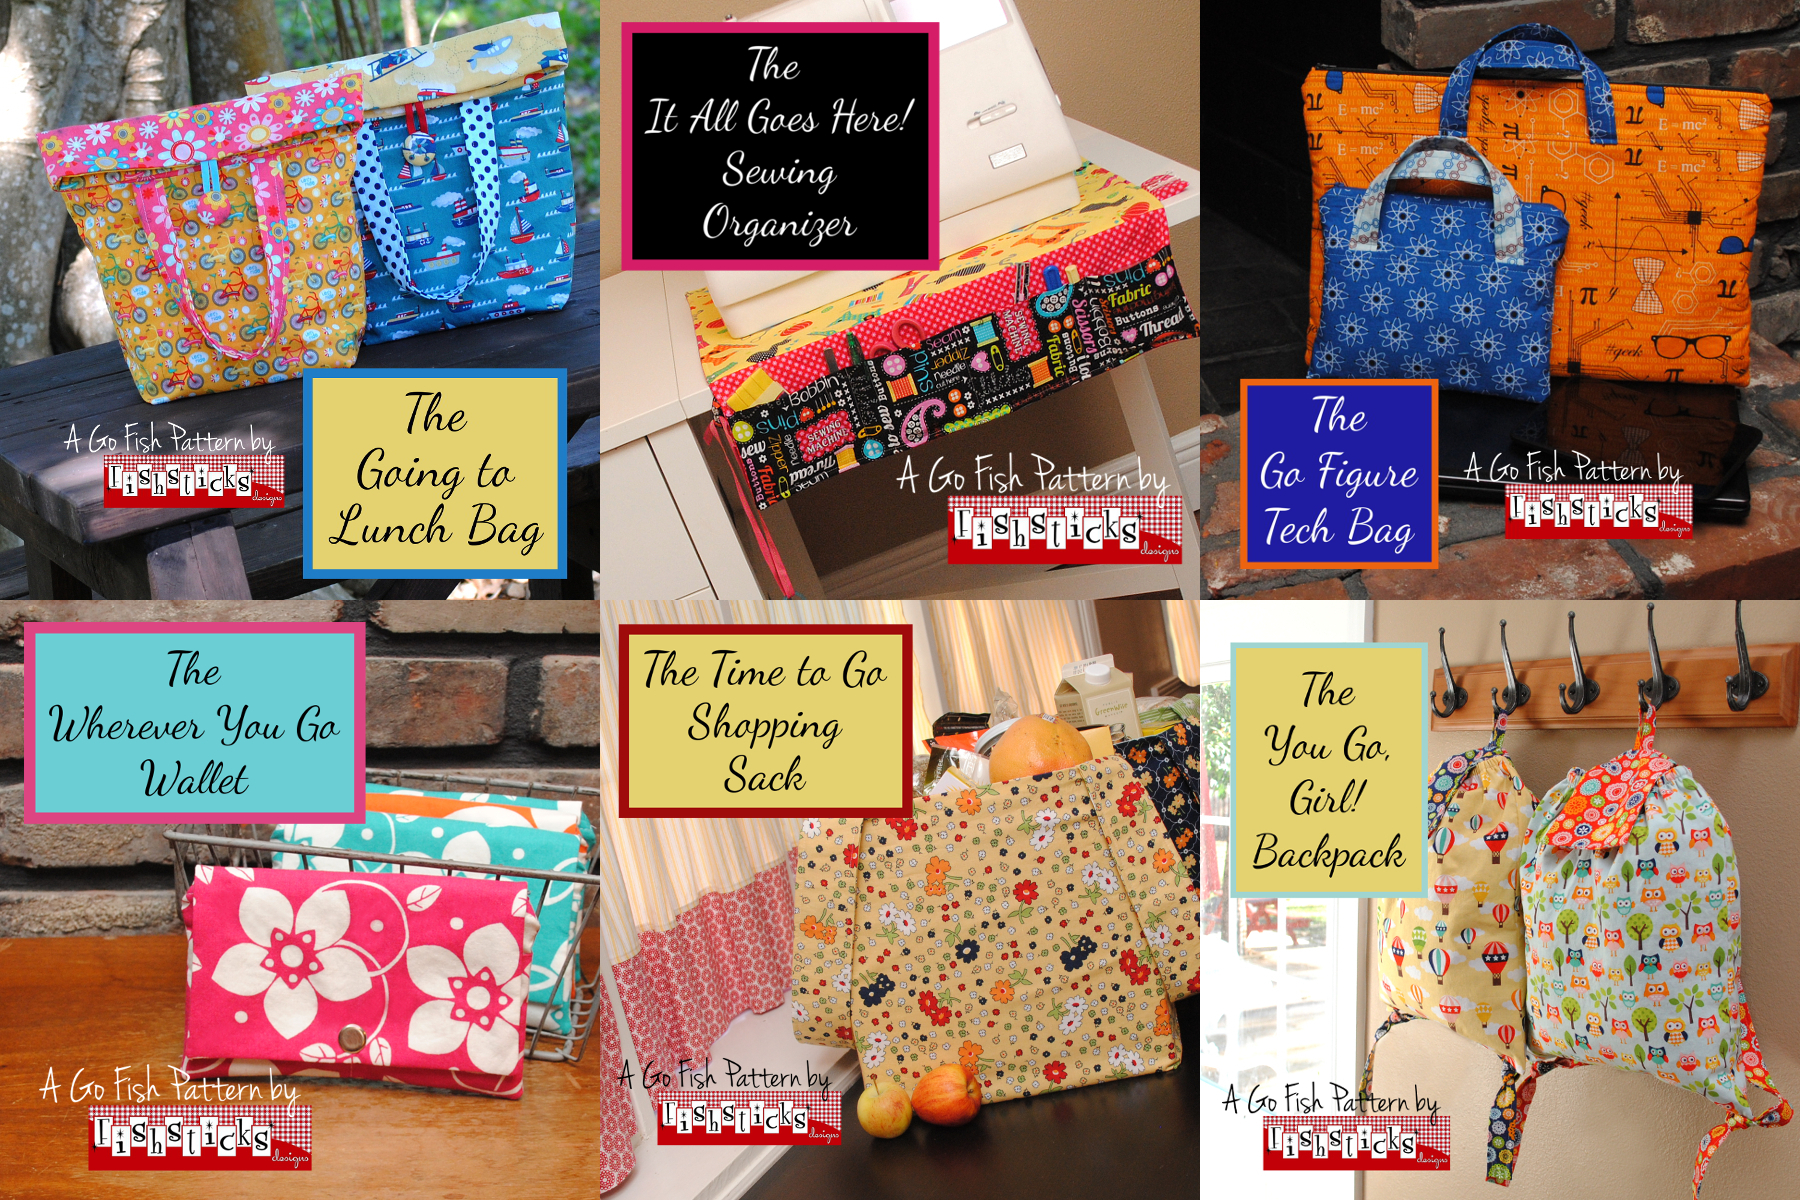
I introduced the Go Fish Series last fall, and I’m thrilled that all of you seem to enjoy these “instant gratification” projects as much as I do! They’re definitely my favorite type of sewing. In case you’re not familiar with them, these quick-to-finish projects are also eco-friendly with no pattern pieces to print. You just measure and cut using your quilting mat and rotary cutter following the included measurements or instructions. They are easy projects, but they aren’t completely “no frills” projects. Each one has something new to learn or a way to challenge yourself if you’re still learning. They are great for beginners, though! These little patterns are available as PDFs on my site and as tri-fold sewing cards in your favorite local quilt shop. Both are priced at $4.25 each.
For just one week, in celebration of the release of these six new Go Fish Patterns, I’m offering a six-pack bundle of the PDF versions of all six new GF patterns for just $15. That’s more than a 40% discount, and it’s only available for one week! You can find it right here: The Spring 2014 Go Fish Six Pack. Also, don’t miss your chance to win all six of the newest Go Fish patterns by commenting on yesterday’s Quilt Market post! (If you buy the six pack and then win them, I’ll be happy to send you a refund!)
Without further ado, here they are!
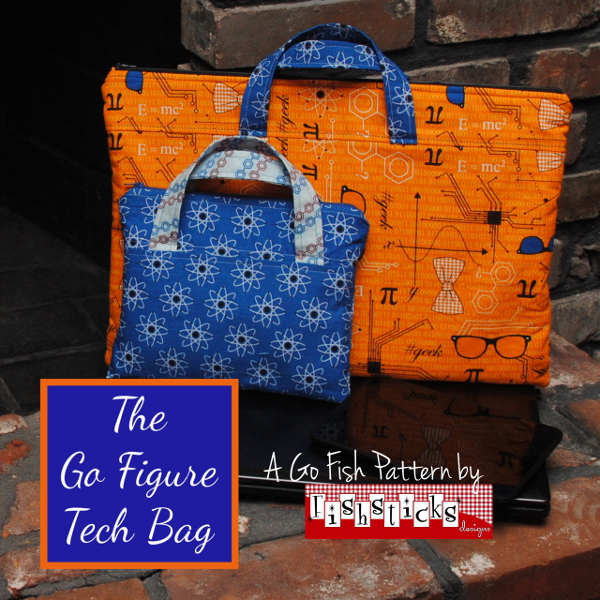 First on the list is the Go Figure Tech Bag. This bag has a zippered top, and it’s padded with fusible fleece to give a bit of extra protection to your electronic devices. This pattern is designed to fit any device from e-reader size to laptop size with customized measurements. The instructions for measuring and figuring are really simple — I promise!
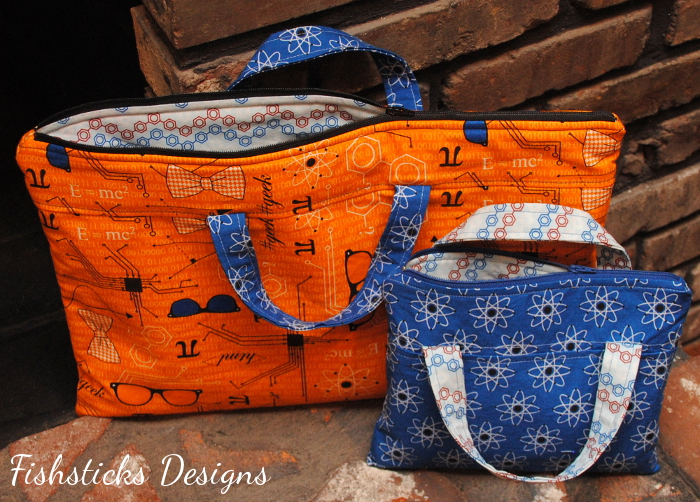
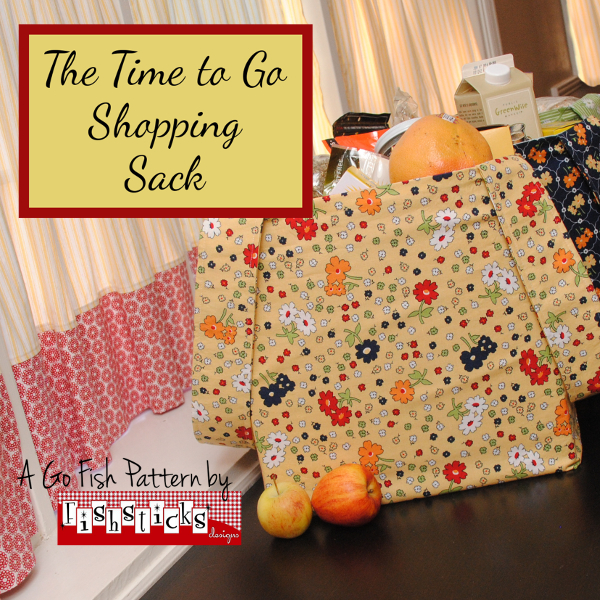 Next up is the Time to Go Shopping Sack. I’ll admit that I really wrote this pattern for myself! I love having pretty reusable grocery bags to use for shopping, but I’d never found a pattern that was just what I wanted. These bags are super roomy with wide handles.
 The gusset allows them to lay flat for easy storage and open up to a full 4″ wide for holding big boxes. They’re also finished with a french seam at the bottom to keep your produce and canned goods safely inside!
 The It All Goes Here Sewing Organizer is perfect for keeping things right where you need them while you’re at your sewing table. (It also folds up nicely with your sewing notions in the pockets in case your sewing space is one that comes and goes with breakfast and dinner!) This organizer has four large pockets and four small pockets to hold your trimming scissors, seam ripper, screw driver … whatever you need on hand.
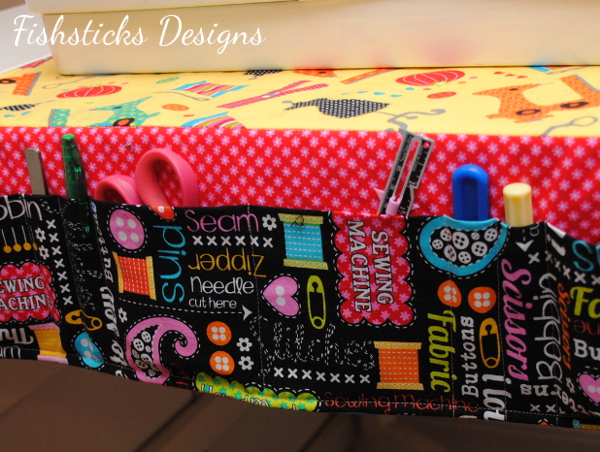 There’s a small loop on one side that you can use to tie a pair of scissors where they won’t walk away.
 And, my favorite feature of the Sewing Organizer is this little magnetic pin holder! I love that I have far fewer pins landing on the floor these days. The magnet is removable so the whole organizer can be thrown into the wash whenever it needs to be.
 The Wherever You Go Wallet is quick and easy to sew, but it still offers plenty of storage and organization space. It has a zippered top, a flap closure with a snap and four credit-card sized pockets.
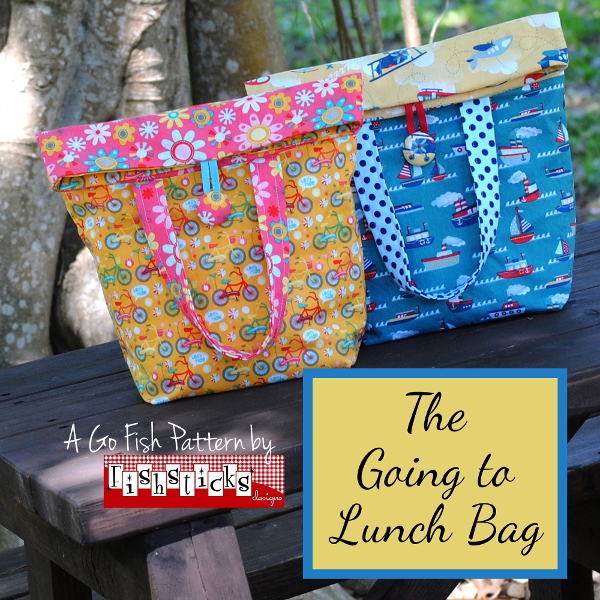 The Going to Lunch Bag is sized just right for grown-ups and kids alike, and it’s the perfect take-along for lunch at school, work or a day at the zoo!
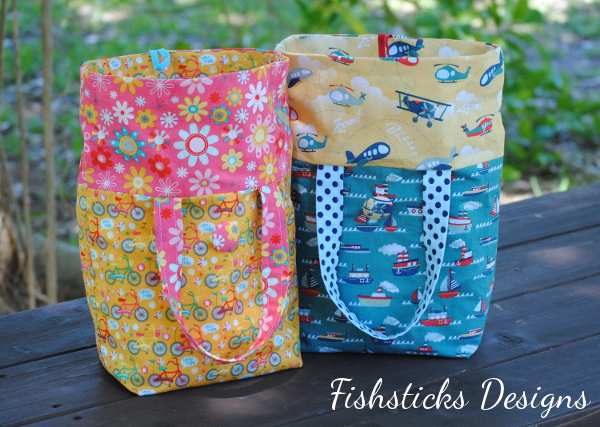 The roll-down top stays open on it’s own when rolled up to make filling the bag easy, and when it’s packed and ready, it rolls down and fastens easily for both adults and children alike. You can make it with your choice of fabrics and interfacing to add insulation or water resistance, too.
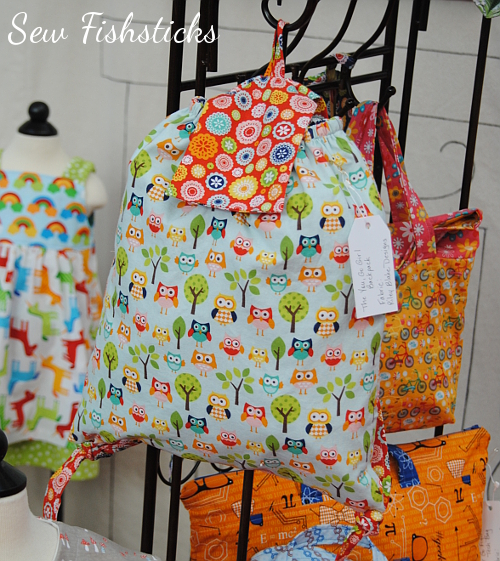
 Finally, the You Go, Girl! Backpack is the perfect carry-along for teens and preteens. The tie-on straps are my favorite feature of this bag. They add a bit of modern detail and fun, and they make it much faster to sew than if you were adding hardware. This backpack also features an elasticized top and a fold-over flap with a magnetic snap closure.
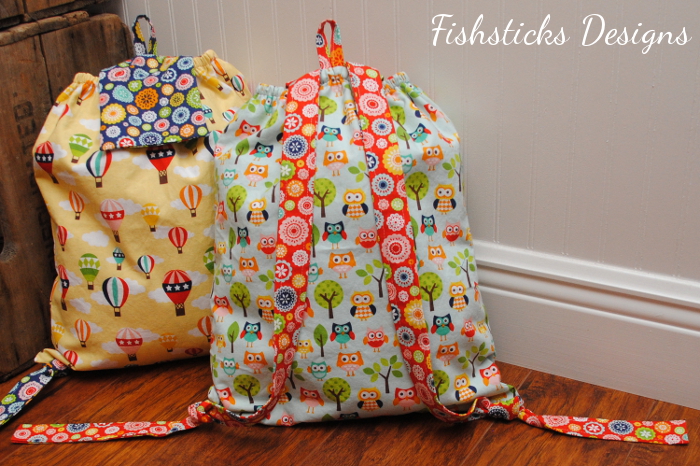
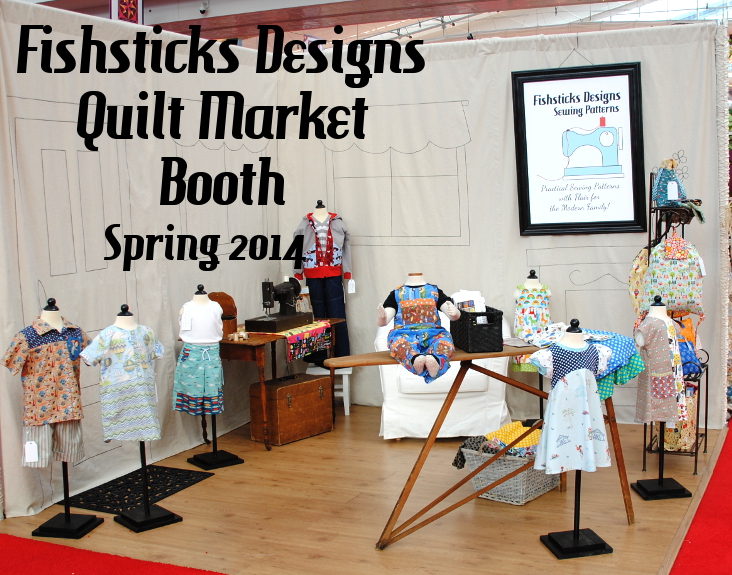
The Fishsticks Spring 2014 Quilt Market Booth & a Giveaway!
 I know, I know! I said I was going to share Quilt Market pictures last week. Last week was a whirlwind of driving and visiting and cuddling and then finishing and testing and printing and … well, you get the idea! As a reward for patiently waiting, there’s a giveaway at the end of this post. Just keep reading!
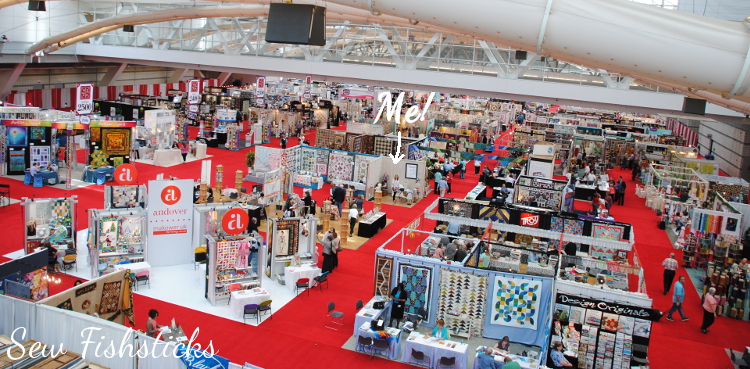 I used canvas dropcloths for the hand-drawn walls of the booth, and except for that weird wrinkle at the seam in the curtains (the one that I sort of hid behind the letters in the title picture at the top), I loved the way it came out! Here’s what that wall should have looked like:
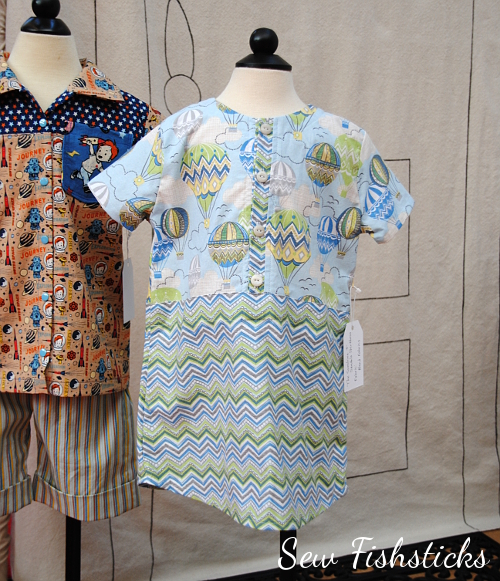
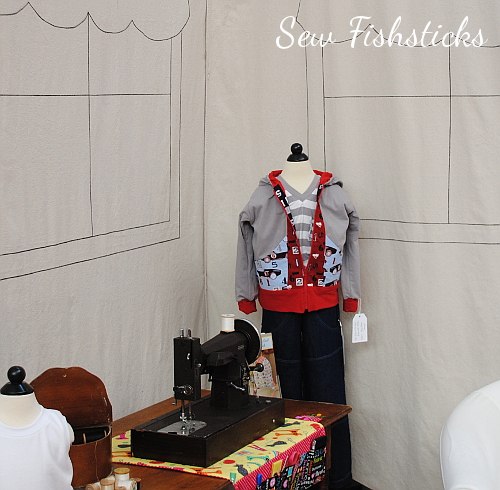
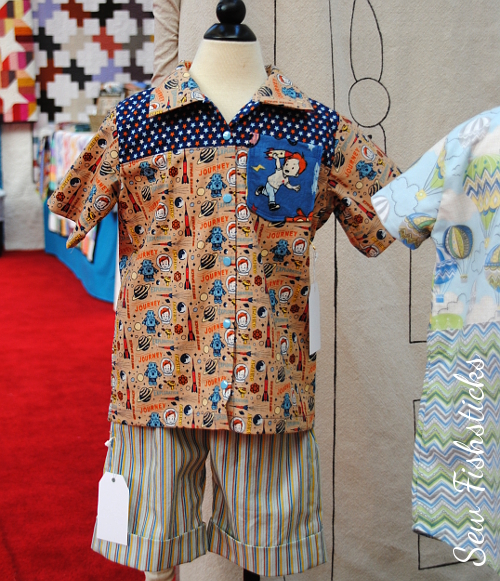
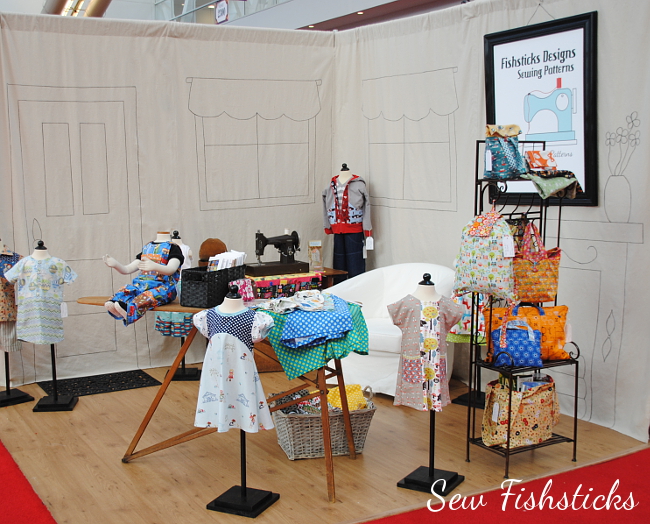 Yes, I edited out the weird wrinkle in the curtain. I totally considered editing it out of the title picture, too, but, really, life is better when we share our imperfections instead of pretending they don’t exist, right? That said, though, if you see any pictures on other blogs of my booth, feel free to pretend this is what you see. Moving on … What I’m hoping that you really want to see is pictures of the samples in my booth, including some favorite classic patterns, some recent releases and a collection of new patterns that I’ll be releasing over the next few weeks!
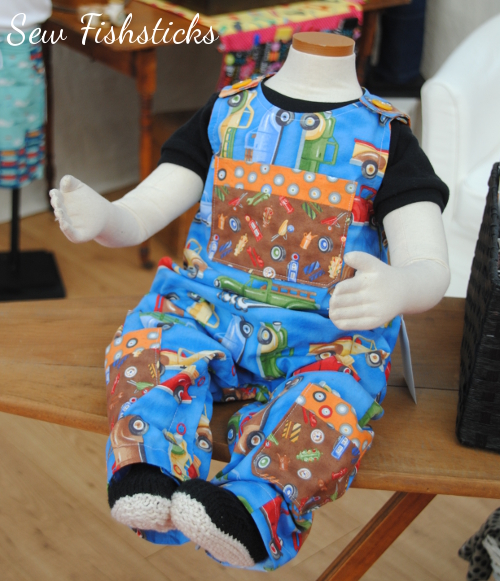


 See anything that you like? I hope so! Okay, tomorrow morning, I’ll be sharing and releasing six new Go Fish patterns. If you scroll through, you’ll see them all here in this post, but you’ll have to wait until tomorrow for the details.
 Would you like to win a set of all six new Go Fish PDF patterns? Just comment below for an entry. If you’d like a question to answer, I’d love for you to tell me what you saw in this post that you’re excited to sew. I’ll keep the giveaway open through Sunday (6/1) at 8 p.m. eastern and announce the winner on Monday. Contest is now closed!
Giveaway ends June 1st at 8:00 PM EST. Giveaway is open to U.S and international residents who are 18 years of age or older. One entry per person. Winner will be selected by Random.org. Winner will be announced using the winner’s public username on or before 12:00 PM EST on June 2nd. Prize will be emailed to the winner who must be contactable via email. Email addresses will never be shared.
The Casual Straight Skirt Tutorial @ Cutting Corners College
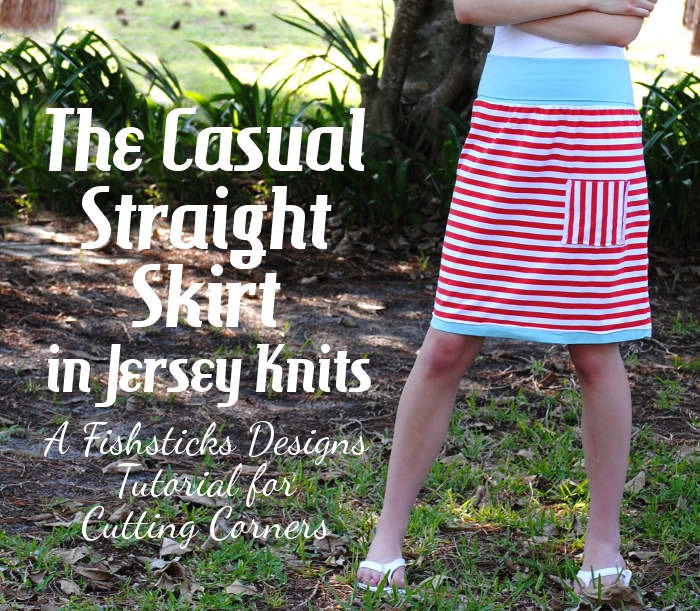 I’ve got a brand new tutorial up at Riley Blake’s Cutting Corners College! The Casual Straight Skirt is a stylish and comfortable skirt that sews up in no time at all.
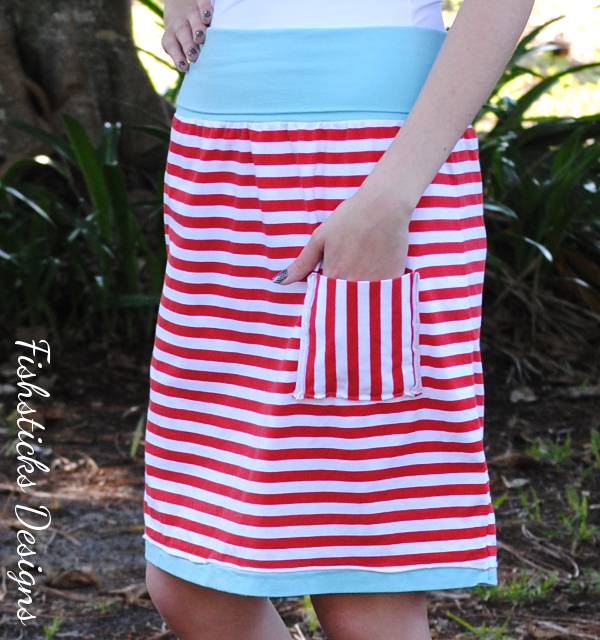 The skirt is made with stretch jersey and takes advantage of those great curling edges in some fun details, and you can make it to fit from toddler to misses with just a few measurements!
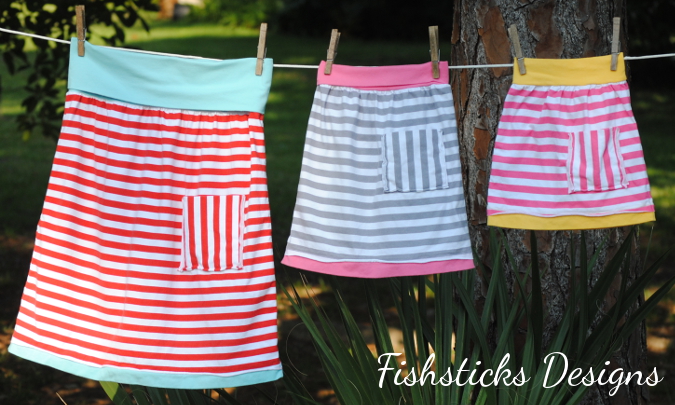 Find the tutorial right here: The Casual Straight Skirt in Jersey Knits.
Around the Block with Patchwork Posse: Block #11
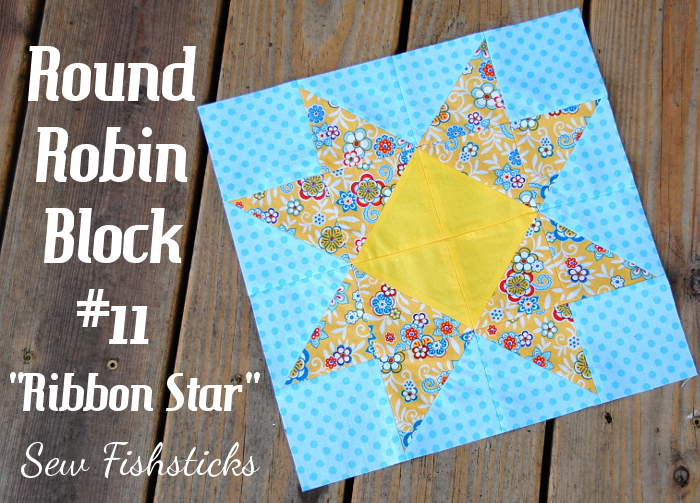 Did you think that I’d given up on the Patchwork Posse Around the Block Round Robin? No way! I just got a little bit waylaid by Quilt Market. I’ll be a bit late finishing up, but I’m going to do it!
Block #11 is the Ribbon Star block from Jennifer at Ellison Lane. I’m so happy with how well this block came together! My points lined up so nicely, and all I did was follow Jennifer’s instructions very closely. My “need for speed” was very pleased by her directions for sewing four half-square triangles at once, too!
Getting Set Up for Market … and a Quick Sale!
It’s been a really long time since I had a sale, and I think it’s time for a new one! Now would be a great time to stock up on PDF patterns for summer vacation sewing!
I’ve been busy the last few days in this place … … transforming this …
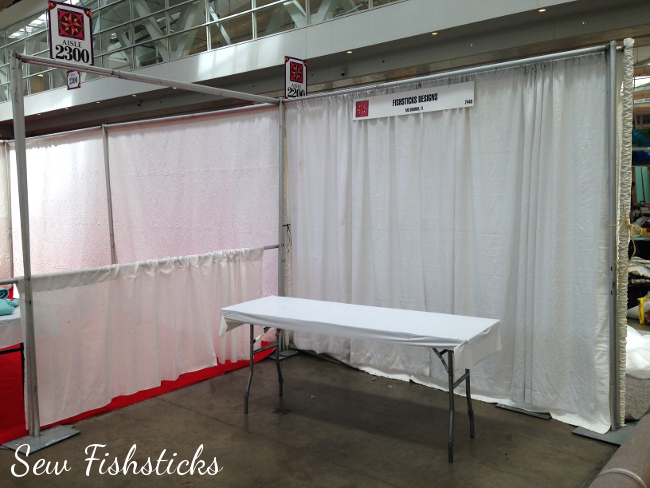 … into something fun! I can’t wait to share it with you, but you’ll have to wait until Monday. (If you follow me on Instagram, though, you just might see a few sneak peeks: Fishsticks on Instagram.)
While you wait to see what new things I have in store, enjoy 40% off of all of my current PDF patterns for the next 24 hours (through 10 a.m. eastern on Saturday, May 17). Just use the code MARKET in both my main store: Fishsticks Pattern Shop or my Etsy store: Fishsticks on Etsy.
In case you haven’t heard, I’m almost finished updating all of my PDF patterns to include options for printing the traditional nested version, individual sizes and options,
 or a full-size pattern.
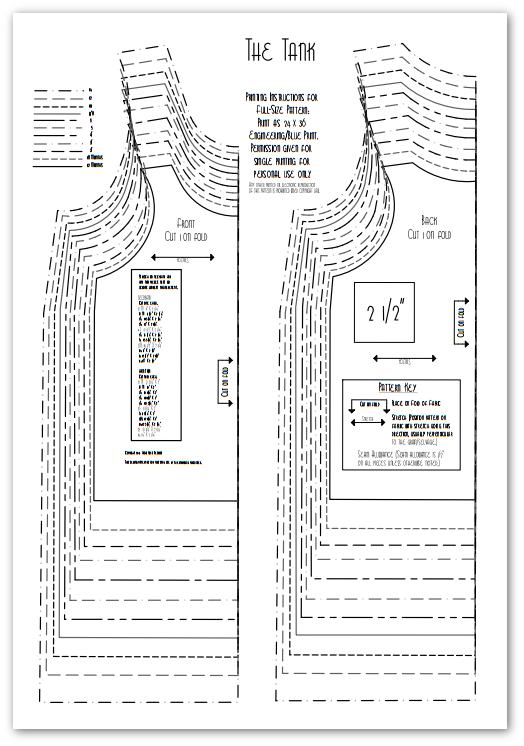 You can read more about the update here: Pattern Updates are on the Way and check to see what patterns are finished and which are scheduled here: 2014 PDF Pattern Updates. If you purchase a pattern that is not yet updated, you will receive the update free-of-charge automatically when it is finished.
Note: The Buy 4/Get 1 Promotion does not work with this coupon code.
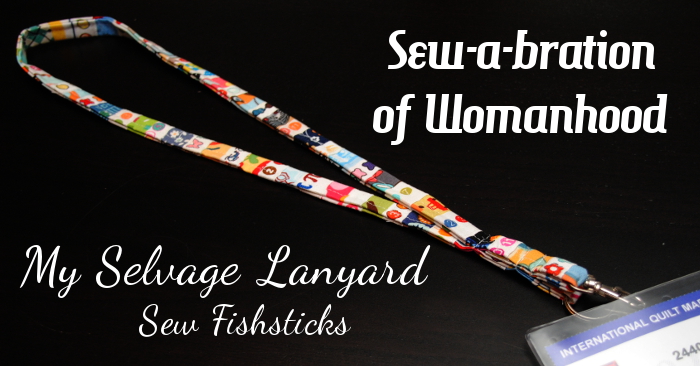
Sew-a-bration of Womanhood:
Something Pretty (& Practical) for Me!
 The Sew-a-bration of Womanhood is happening all this month at The Shaffer Sisters and Call Ajaire! To read more about this series, check out this post: A Big Announcement. Each day of May, different bloggers are sharing projects that they’ve sewn for themselves and other women in celebration of women and our common threads.
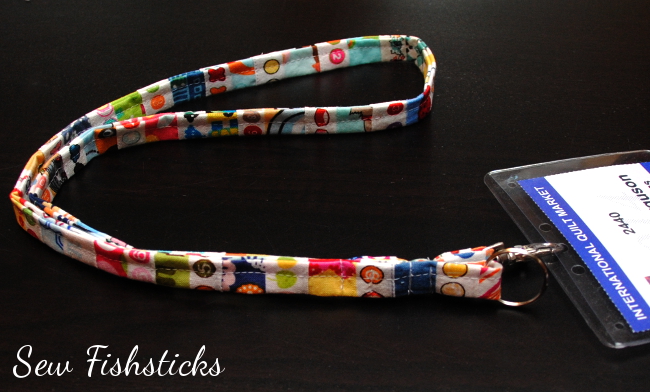
I love working with Ajaire and the Shaffer Sisters, so I jumped at the chance to be involved with this series again. (Last year it was the Make for Mom Series.) What I didn’t consider at the time is that I would be super busy prepping for Spring Quilt Market this week. (Quilt Market is the sewing and fabric industry’s huge bi-annual trade show.) This project needed to be a quick one. In order to find the time to do it, I got up an hour early one day so I could sew in the early morning while the rest of the house slept. (When you really want to sew something, you do what you have to do to find the time!) Because of the theme, I also really wanted it to be something that is all me. I like practical, I adore bright colors, and I love sewing. Since next week is Market, and I’ve always worn these lanyards with my nametags … … I decided that a handmade lanyard for my nametag was the perfect choice! I checked out Pinterest for tutorials and found this one at Two Peas in a Pod that looked like just what I wanted. As I started to look through my scrap bin, though, I remembered seeing lanyards made from selvages at Market last year, and I have an ever-growing collection just waiting for a fun project!
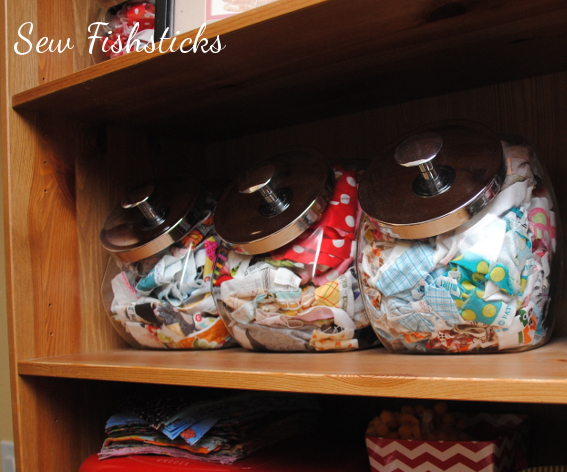 I started pulling out selvages that I wanted to use, and decided that since I was only using 2″ of each one, I would choose just those sections that have the color coding thingies. I’m sure those have an official name, but I have no idea what it is.
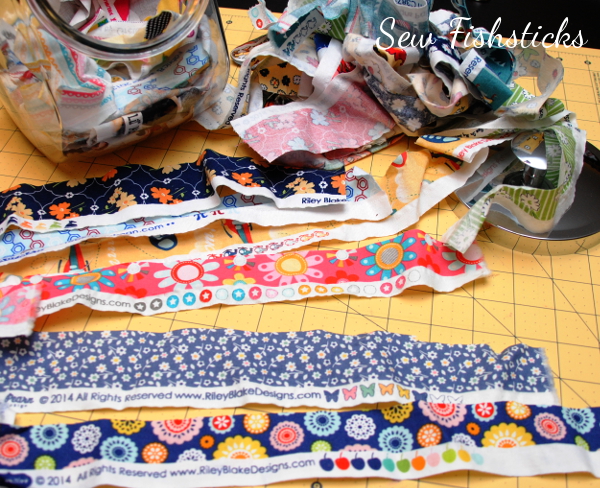 I cut each one 2″ wide per the tutorial instructions and left about 1″ of fabric above the selvage. I arranged them overlapping as I cut each one and kept measuring until I got to the needed 37″.
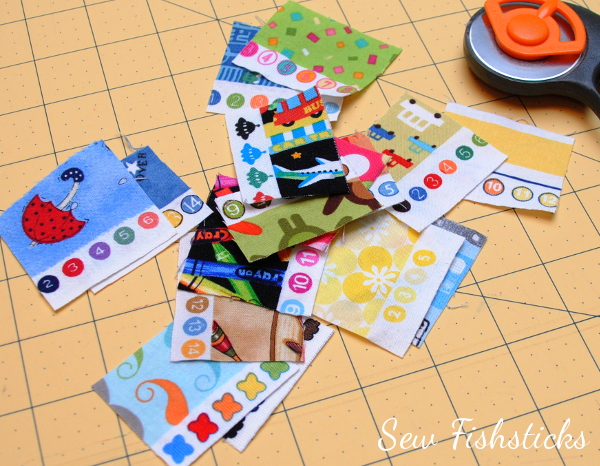 I started out pinning them in sections, and then stitching along each pinned edge, right on the very edge. After the first strip, though, I decided it would go faster if I just brought the whole pile of selvage pieces over to the machine and slapped one on, stitched it, moved on to the next one. I even gave up pinning altogether. Time was of the essence here!
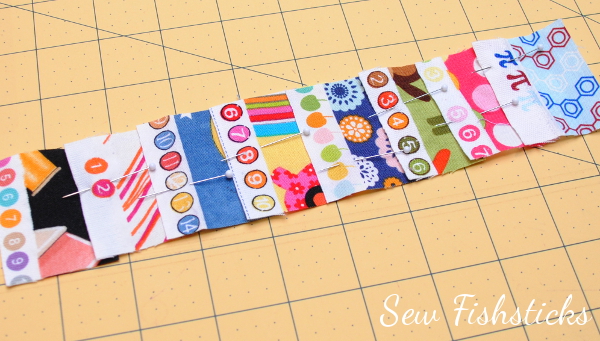 Thankfully not too far into stitching these little buggers together, I realized that if I kept going this way, half of my lanyard would be upside down! So, instead of one long strip of selvages, I made two and stitched them together right sides facing so that each side is turned the right direction.
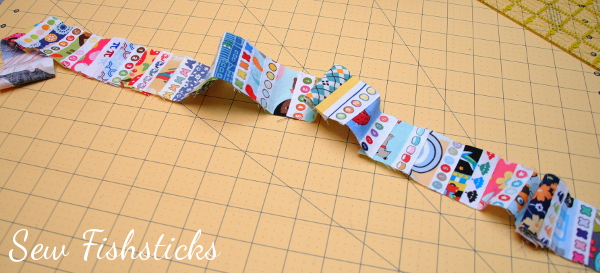 From here, I just followed the tutorial directions! I did, however, only stitch down the open side of the folded layers. It’s such a narrow piece, and, well, there was the time thing.
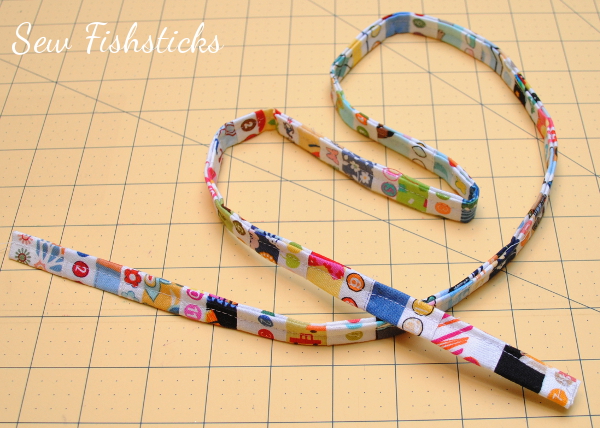 The only place I had any trouble was with sewing a square above the hardware. My machine wasn’t having any of that, so I just stitched across several times to secure the ends. (An added bonus of using the selvages is that there are no raw ends tucked up in that finished piece!) I was in a hurry, so I didn’t stop before this part to replace my regular needle with a denim needle, and, of course, I broke my needle on the first pass. Ugh! Once the denim needle was in, stitching across and back was no problem!
 In less than an hour, I was done! Wheeeee! I’m so excited to get to use this next week! A successful project that is pretty, practical and quick — what more could you ask? No more boring gray, disposable lanyard for me!