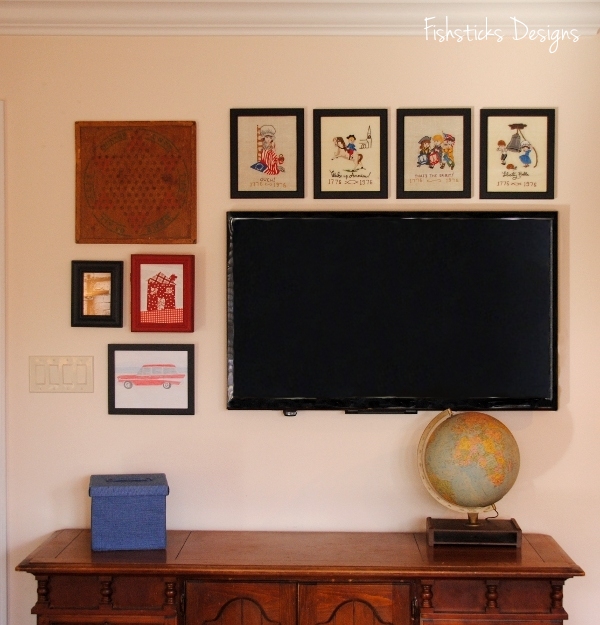
Handmade Decor
All Around the World Boys’ Room
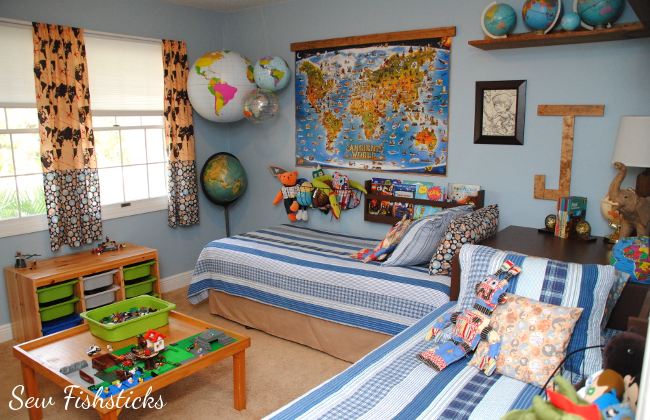
 We’ve been working on decorating the room that Charlie and Jamie share for months now, and it’s finally done! I think it turned out so well! (I sort of want to just go stand in the doorway and enjoy it’s finished-ness. Am I the only one who does that?)
My husband, Ray, has this ever-growing collection of vintage globes, and since we’ve run out of room for them elsewhere, we thought they’d make a great jumping-off point for the decor in our boys’ room. We added maps to the theme because there are some amazing kid-friendly ones, and what mom could resist making her child’s room as educational as it is fun? The boys love their new room, and I’m hoping that it can grow with them for a few years!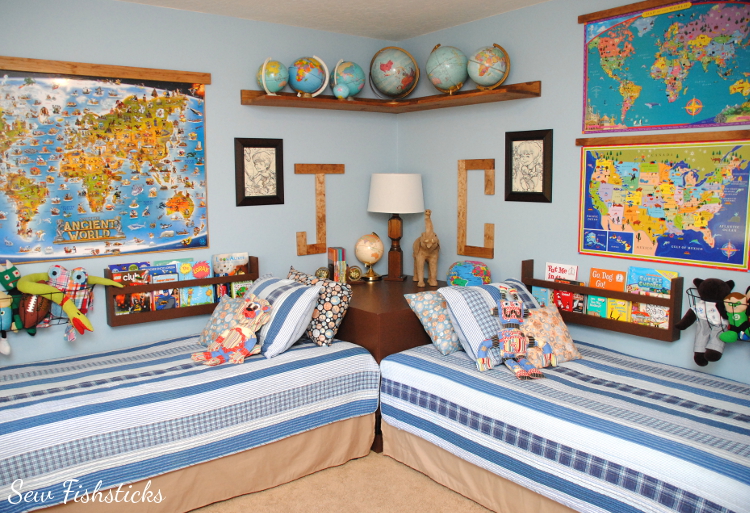 Ray and I worked together on the wood-building in here. He did the majority of the construction work while I did the sanding, painting and staining, and we did the final installation together. Ray’s such a great sport when I start throwing ideas out at him or emailing him Pinterest links.
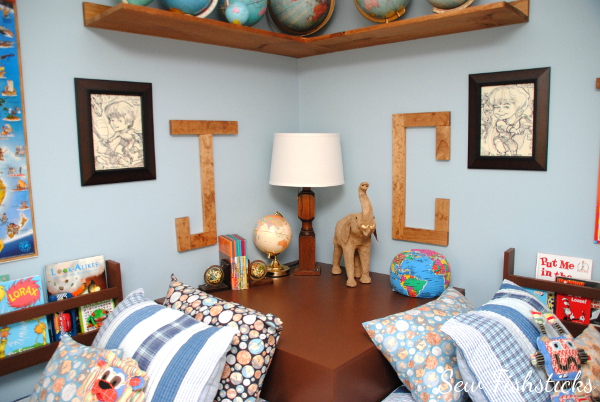 The huge box in the corner between the two beds is just painted MDF. (I think it’s so funny that it’s enormous and takes up a ton of room, but the room is so much more wide open with this layout than it was before when we had the two beds side by side.) The giant letters are simple 1x3s, cut at Lowes, sanded and stained by me, then assembled with metal braces and hung with D-ring picture hangers. (I used a whole lot of D-ring picture hangers in this room!) The caricatures that we had done of the boys at our local education store last year make perfect wall art in this corner. (Except for the frames, they were free!)
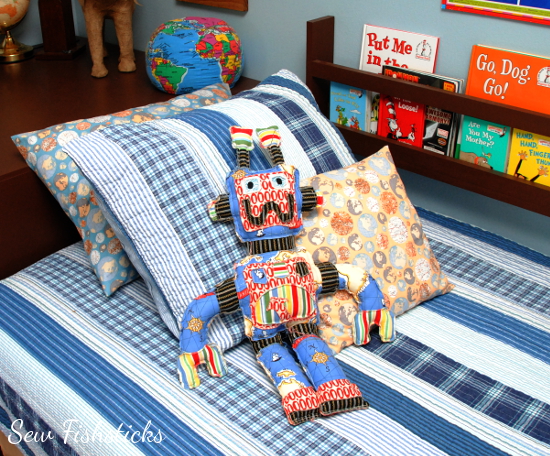
Each of the boys got a wall-mounted book rack above the bed, plus hanging stuffed-animal storage. Those are just window-box wire baskets from Lowes. The book racks were made using a modified version of these plans from Ana White: Flat Wall Book Shelves. Ours are obviously a lot simpler, but they work well in this room. 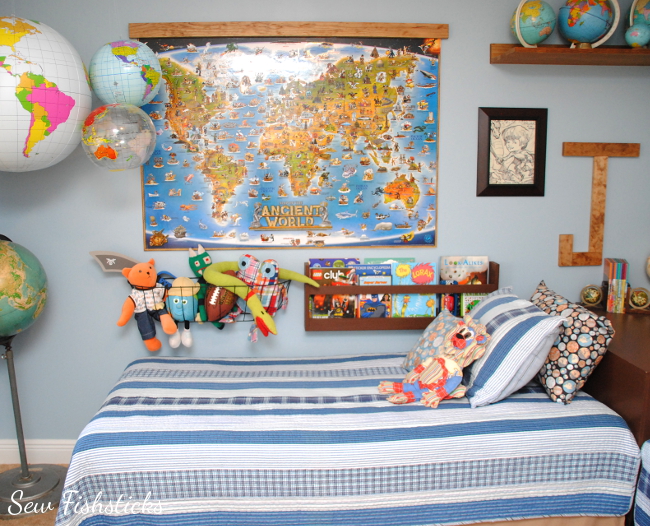 The maps mounted over each bed were a bigger project than I originally thought they would be, but so worth the extra work. Lesson learned: doing a bit of research before jumping into a project will save you lots of work and a few dollars later!
  On Charlie’s side of the room, we added a row of time zone clocks.
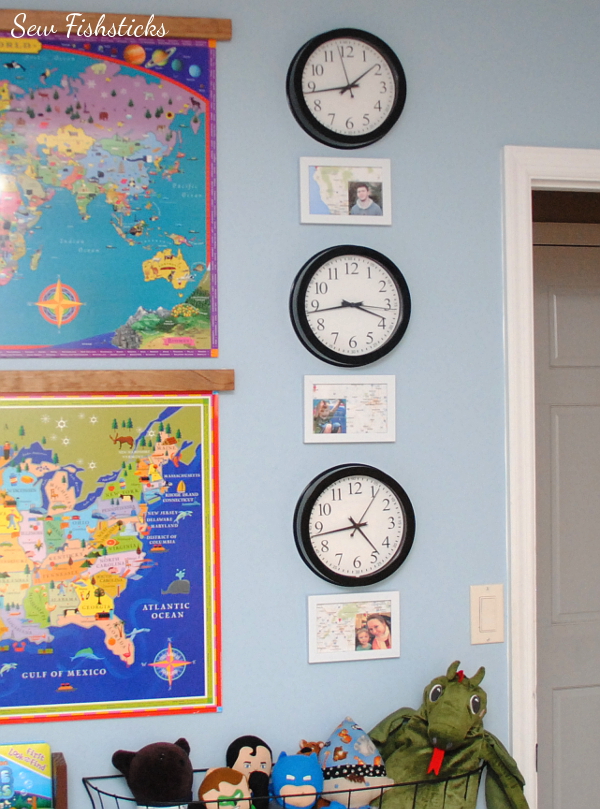 Seven-year-old Jamie had this great idea for the clocks. Instead of putting the cities under the clocks, he asked if we could put framed pictures of our loved ones who live in those time zones under them. How cool is that? And, he’s seven! I went a tiny step further and printed the pictures on top of maps of their cities. (This might be my favorite thing in the whole room.)
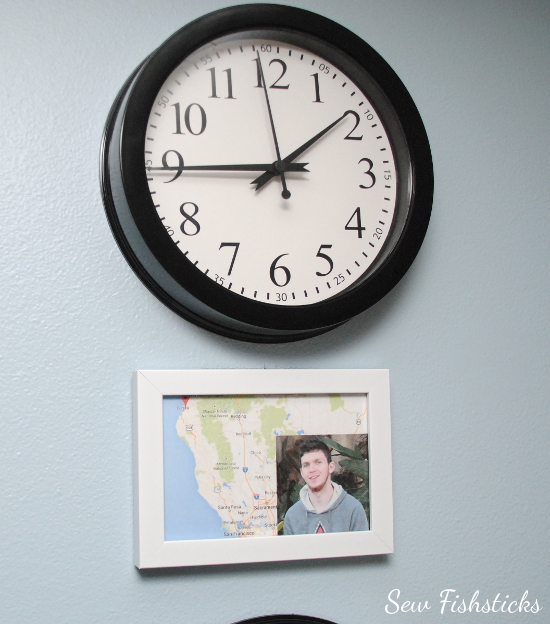 The clocks are simple $5 ones from Target. They’re perfect for little ones who are learning to tell time, though, because they have the numbers printed for the minutes, as well as the hours.
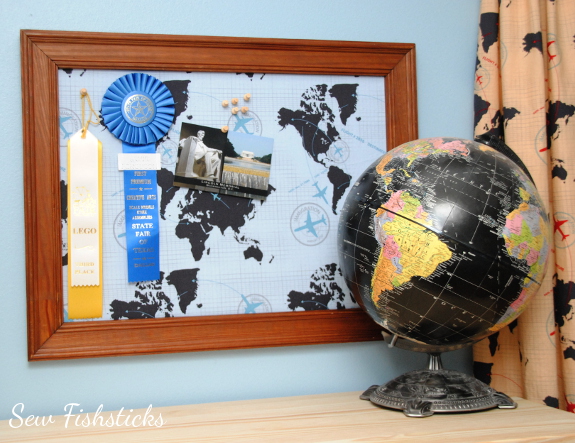
Back on Jamie’s side of the room, is our hanging feature. I like the added interest that you get by hanging something from the ceiling in a room, in kids’ rooms especially. When we were tossing around ideas, we considered disassembling some of the globes we have that are in poorer shape and constructing a mobile of sorts. In the end, though, since this room will be inhabited by little boys who just can’t resist the urge to bat around something hanging from the ceiling, we went with soft and safe inflatable globes instead.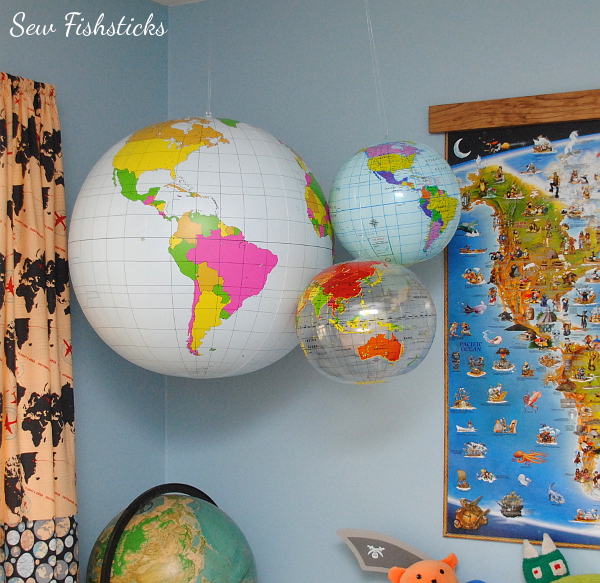 I was on the hunt for fabrics for this room for quite some time, so when I ran across the Detour fabric line by Bo Bunny for Riley Blake, I was thrilled! Isn’t it absolutely perfect for this room! Perfect! And, my sweet friends at Riley Blake Designs were so kind to send us enough for curtains, pillows and a great little framed bulletin board.
 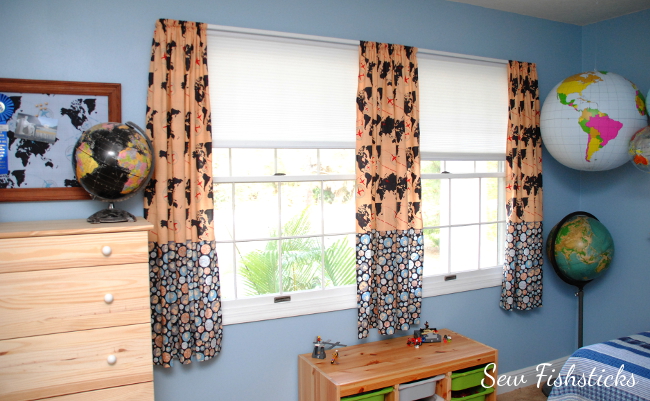 I love how adding a few simple handmade items in coordinating fabrics pulls a room together. I knew if I was going to get this room done before my boys went away to college, I need to forego making the quilts myself, so I purchased the quilts from Overstock.com and threw in some accent pillows instead.
 On the opposite side of the room are the boys’ dressers. They’re simple, unfinished Tarva chests from IKEA that I may decide to stain or paint at some point, but for now natural works.
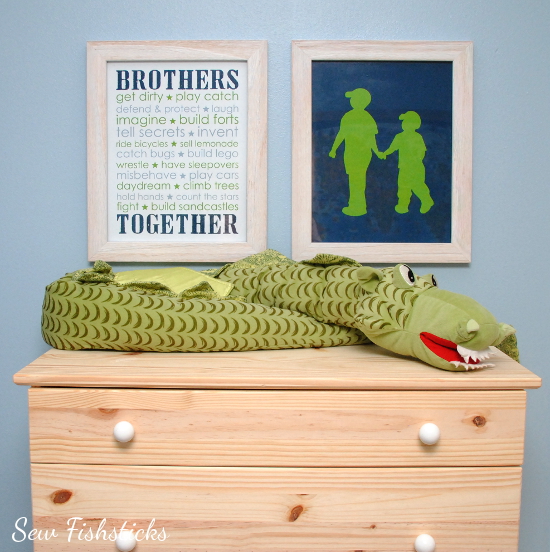
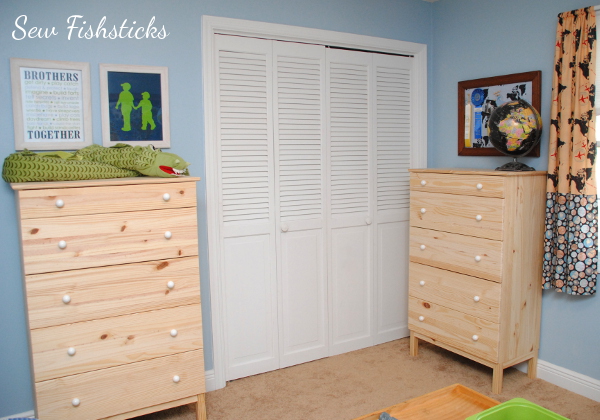 The artwork over Charlie’s dresser is a set of framed printables from Willow Lane Prints.
 And, over Jamie’s dresser is the framed fabric bulletin board that I mentioned earlier. I’ll have a tutorial for it right here tomorrow! It’s a super quick and really simple project that adds a great little splash of fun to a room — a great practical way to feature a favorite fabric.
 Here’s one last peek at our Around the World Boys’ Room on the way out the door!
 What do you think? Have you decorated a child’s room with a specific theme? Our teenage son’s room is up next here, and he’s asked for us to use steam punk inspired decor!
It’s a New Year Sew-along at Sew Can She: My Finished Pillow
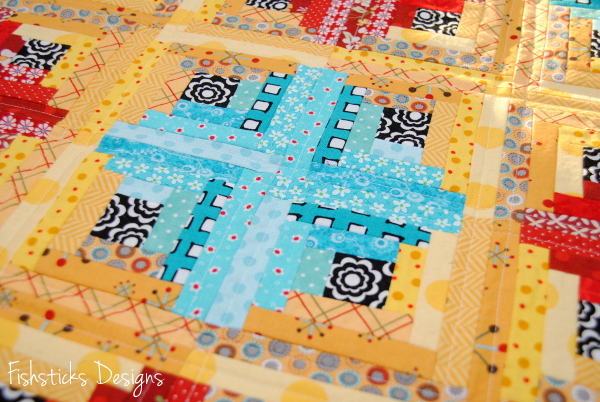
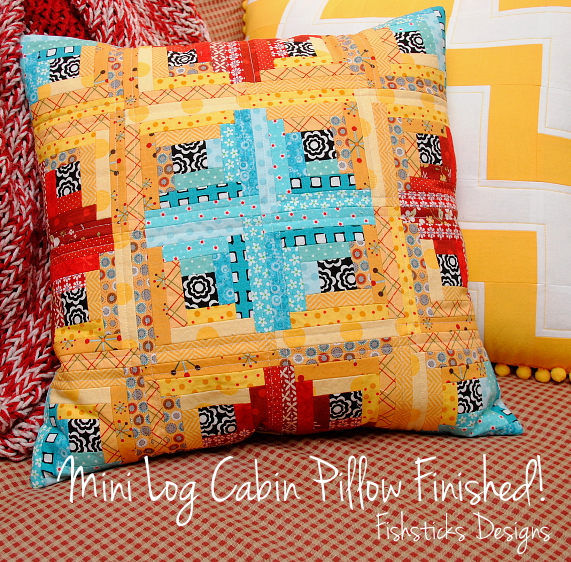 I am so excited to share my finished It’s a New Year Sew-along pillow. I adore it! This is definitely one of those projects that I needed the motivation of a sew-along to finish, though. I am so not one to tackle sewing anything that requires lots of tiny pieces. There was a bit of grumbling in my sewing studio over how teeny these finished blocks were, but I am so glad to have done it. I’m in awe of the ladies in this sew-along who made whole quilts!
Once I had all of my blocks finished, I started playing around with the layout, and I was amazed at how much the whole look changed when the blocks were arranged differently.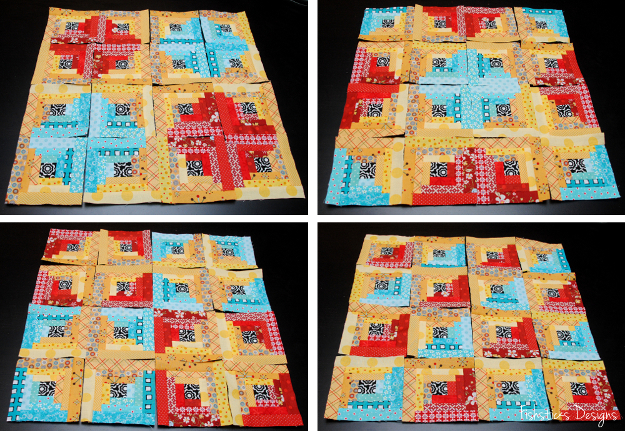 Isn’t that cool? In the end, I went with the top right layout.
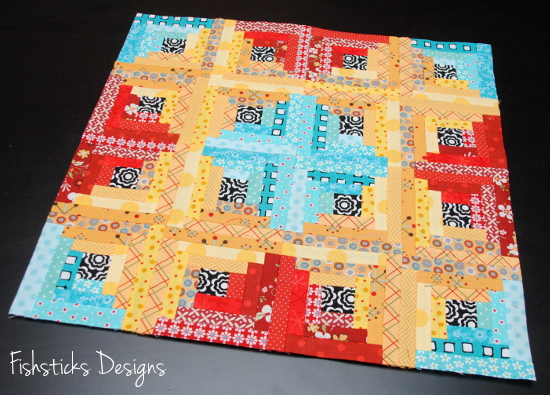 Once my blocks were all pieced together, I added a piece of cotton batting and quilted down the middles of the outside strip in each block.
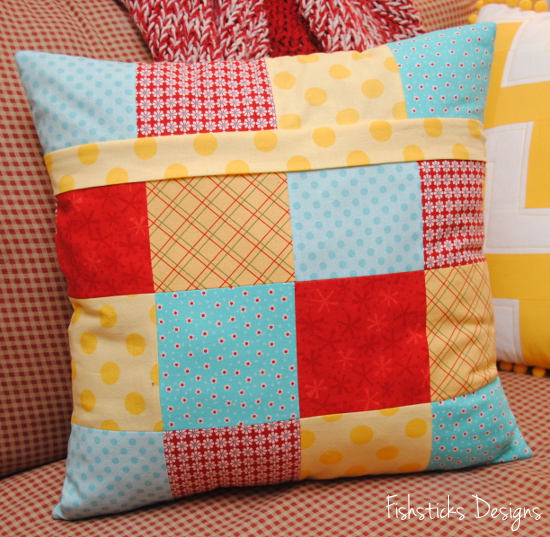
 After spending so much time on the front of the pillow, I felt like I had to do something exciting with the back, so I went hunting on Pinterest where I found this tutorial from Pile o’ Fabric: Adding a Zipper to a Quilted Pillow Sham. I generally just do cross-over sham-style closings, but this seemed easy enough to try out, and I loved the finished look that it gave the pillow.
 Seriously? This was so simple, I feel a little foolish that I haven’t been making pillow shams this way all along! (Feel free to ignore the fact that my top row does not line up with the rows under the zipper.)
 Here’s my finished mini-log cabin pillow doing a beautiful job of decorating the loveseat in my sewing studio.
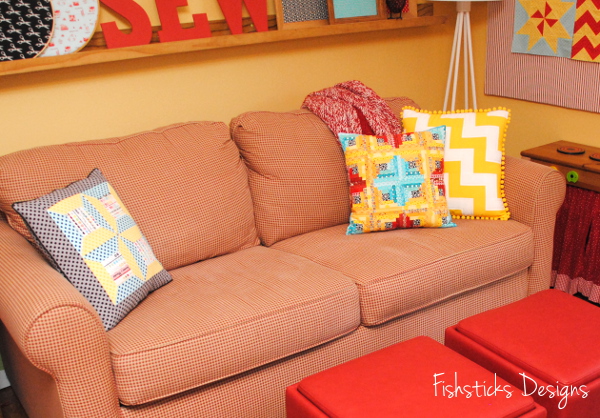 She has a few friends that I was inspired to stitch up, too! I’ll be sharing more about them next week.
Handmade Christmas – Quick Pillow Cover Tutorial
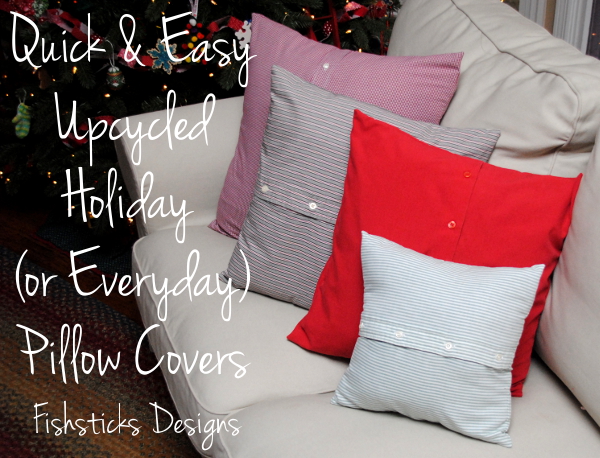 With Christmas less than two weeks away and my sewing barely begun, I needed a quick and simple project this past weekend to give our livingroom a little extra Christmas cheer. A few new toss pillow covers in Christmas red and green made from thrifted button-down shirts filled that need quite nicely! In colors to match your decor, these pillow covers would actually work as beautifully year-round as they do for the holidays. Want to make a few of your own? Just read on.
 To get started, you need a pile of men’s button-down shirts. I found all of these at our local Goodwill store for around $2 a piece. For larger pillows, of course, you’ll need larger shirts. You also need toss pillows. I used the ones that were already on my sofa.
 The first step is to remove the pocket from the shirt that you’re working with. Just grab your handy seam ripper and carefully rip it off. (If you cut the stitches on the pocket side rather than the shirt side, you run less risk of damaging the shirt.) Once the pocket is off, if you have tiny needle holes remaining, either spray them down with water from a spray bottle and press well with a hot steam iron, or place a damp cloth over the area with the holes and press well with your steam iron. Cut the front and back of the shirt apart.
 Measure your pillow. Mine measured 17″ square. Most shams are made to the exact size of the pillow, but since I like mine to be just a little bit snug, I’m going to make my sham 16 1/2″ square. Because I’m using a 1/2″ seam allowance, I’ll add 1″ to that measurement (seam allowance times two), and cut my front and back pieces 17 1/2″ square.
 With the shirt front buttoned, measure and draw your piece. I centered my button placket, but you could place it off-center if your shirt is large enough. You will want to center the individual buttons, however. To do this, I just move my see-through ruler up and down until I have the correct full measurement and an even amount above the top button and below the bottom button. Be careful not to get the top and bottom buttons too close to your seam allowance. You want them to be at least 1 1/2″ in.
 Cut a second piece from the back of the shirt for the back of your pillow sham.
 Pin the front and back pieces right sides together.
 Sew all the way around at 1/2″. I serged the edges after sewing, but since no one is likely to see inside these shams, you don’t really need to.
 Once the two pieces are sewn together, just reach through between two of the buttons and unbutton one to turn the sham right side out. Push the corners out neatly, unbutton the cover completely, slide your pillow in, button it back up and toss it on your couch!
Front Porch Decorating: the Good, the Bad & the What Were We Thinking?!
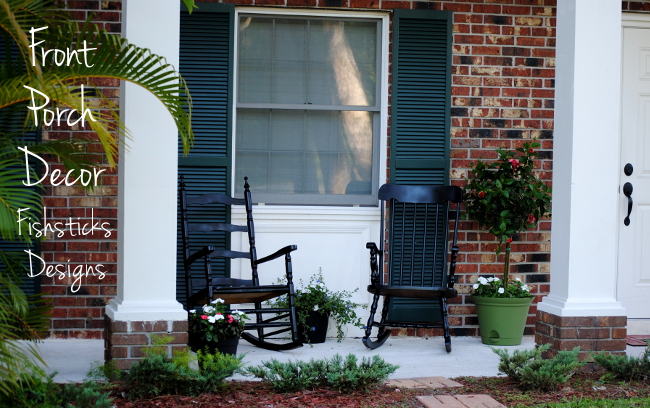 We’ve been doing some work around the outside of our house the last few weeks. I think the appearance of the outside of a home really sets a tone for visitors, and I want ours to be warm and pretty and welcoming, but still simple and uncluttered. We have this great front porch area that we weren’t using at all, and I loved the idea of putting rocking chairs out there. I didn’t have a huge budget for this project, though, and rocking chairs can be expensive. I searched Pinterest for ideas and ran across several photos of front porches adorned with mismatched rocking chairs that were painted to match. I LOVED the look! With that idea in mind, I set out on a hunt at our local thrift shops and on Craigslist for well-priced wood rocking chairs that I could paint to match.
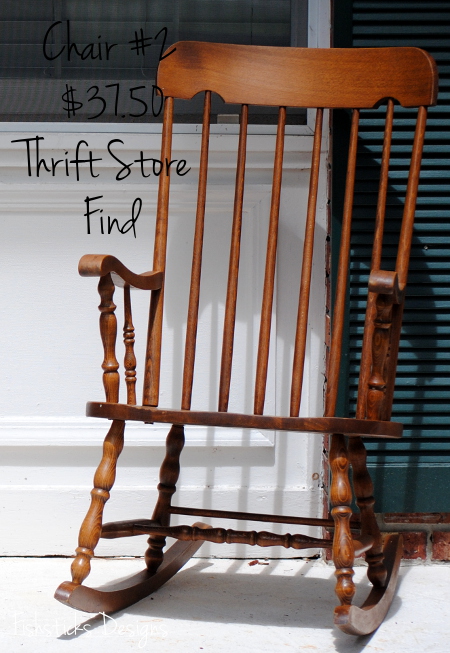
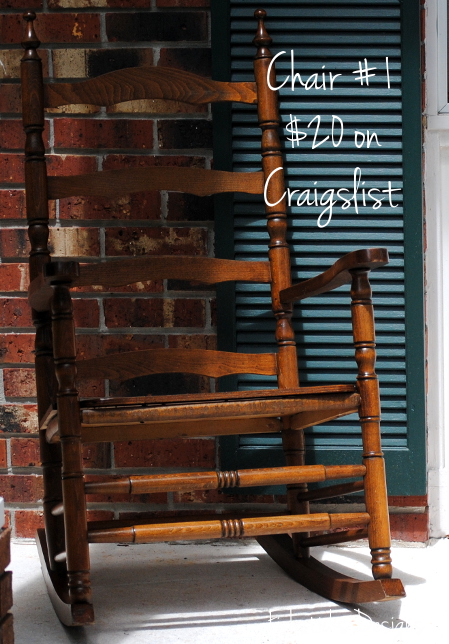 Rocking chair #1 is a Craigslist find. It was listed at $25, but I only had two $20 bills and the owner had no change, so it went home with me for $20! Score! I found rocking chair #2 in one of my favorite thrift shops, but it was priced at $75 . . . definitely more than I was willing to spend. As I was walking out of the store, though, I noticed that the day’s sales included a 50% discount on all furniture making this chair only $37.50. Woo-hoo!
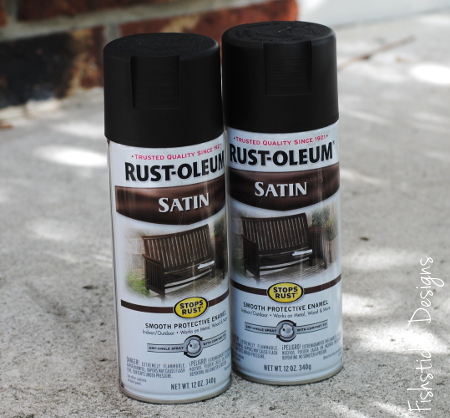
 Both chairs had a similar wood stain, but I thought it looked dated, and since they’ll be outside, they needed some protection from the elements. This Rust-Oleum enamel spray paint looked like a good choice since it’s designed for use on wood or metal and for indoor or outdoor use.
  It was a bit windy the day that I set aside to do this project, so we pulled the van out of the garage, and my husband set up a tarp for me just inside. Things seemed to be going well until I realized that the bottoms of my bare feet were starting to stick to the tarp. Then I stepped off of the tarp and left a lovely black footprint on the garage floor! Eeek! I called for help and someone brought me an old pair of socks so that I could walk through the house to the kitchen sink. When none of my attempts to wash off the paint worked, my wonderful husband Googled a solution for me, but not until after he grabbed my phone and snapped a few pictures of me sitting on the kitchen counter with my black feet in the sink.
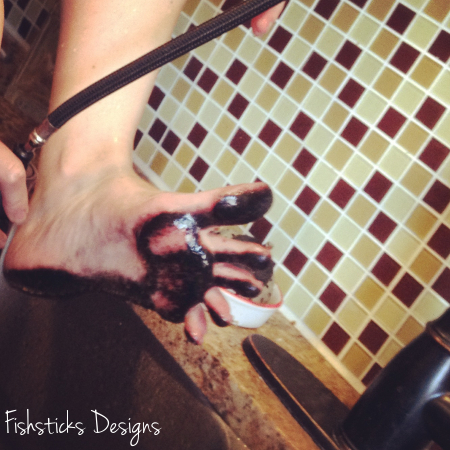 Sweet, huh? In case you’re wondering, olive oil is what did the trick. Even better than my temporarily painted feet, though, is my permanently painted garage floor. This definitely falls in the “What were we thinking?!” category. The over-spray from the spray paint coupled with the breeze coming in through the garage door sent a fine mist of paint through the entire garage. The only space that isn’t slightly gray now is the area where I had the tarp. Feel free to learn from my mistakes.
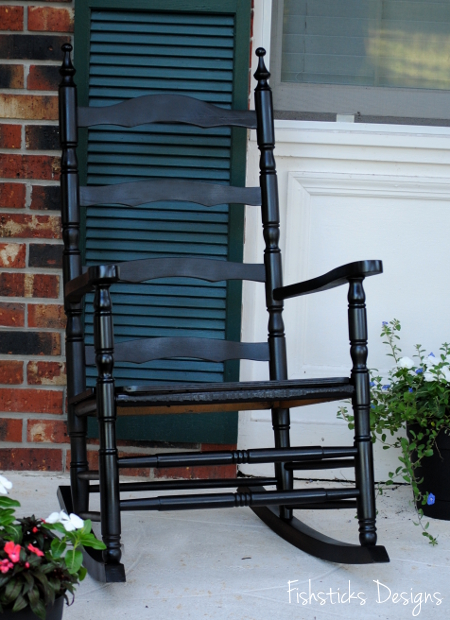 I did eventually end up with two beautifully updated black rocking chairs for my front porch! (I’m thinking, though, that my plan to add a few more may not ever happen!)
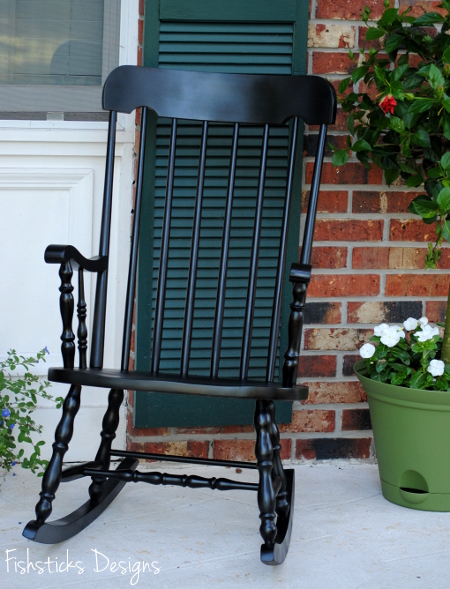 We added a few potted plants for a nice finishing touch, and our simply decorated porch is ready to welcome all of our guests. What do you think? Are you working on any outdoor projects this summer?
Handmade Decor: Handmade with History
 I’ve been sharing the pieces that make up the TV gallery wall in our livingroom over the last few weeks, and I’m wrapping things up today with a couple of handmade things that I didn’t make myself. Ray and I ran across this set of six Bicentennial embroidery pieces in a thrift store many years ago, and we couldn’t pass them up. We’re always drawn in by patriotic handmade pieces, especially pieces as beautifully done as these.
 All six designs were framed in these plastic wood-look frames, and they’ve been displayed here and there around our various homes since we purchased them. I finally decided, though, that it was time for the outdated frames to go.
 The backs of a few of the pieces were inscribed with the name of the embroiderer and the date that they were done. I was curious, so I Googled her name and found a Catherine Bischoffberger who was born about 1914 and lived in Kings, New York when the 1940 census was taken.
  I have no idea, of course, if it’s the same Catherine Bischoffberger, but it’s possible since she would have been about 61 in 1975. I love decorating our home with pieces that have a story, but I’ll admit that it saddens me sometimes to run across things like this in a thrift store. I wonder what happened to her family. What would lead them to give up a treasure like this? I can almost see her rocking in a comfortable chair, cup of tea by her side, needle in hand, hour after hour, pouring herself into these beauties. I hope that she would be glad to know how much I enjoy looking at her work each day, how much I appreciate the time and the skill put into each piece. I wish I could ask her why she made them. Did she make them purely for love of country? Were they a gift for someone? One thing, I know for sure, she probably never imagined that someone someday would be sharing pictures of them on something called a blog on this thing known as the Internet!
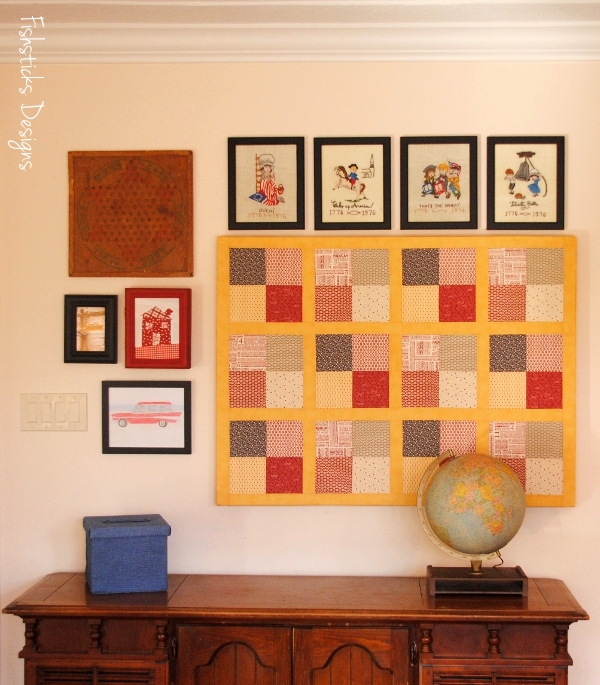
 A few of you have pointed out the vintage Chinese Checkers board in the upper left-hand corner of the wall. That was a thrift store find, as well. I like the bit of whimsy that it adds to the gallery.
 The last handmade piece is this sweet drawing that I commissioned Samantha to complete for me. A few months back, we ran across a restored Chevy Nomad in a parking lot, and she snapped a picture with plans to sketch it later. When I asked her to draw something for me, she went right to that picture and asked what I thought. I think it’s perfect!
 And, that wraps up this wall, for now. I’d love to switch out the slightly cheesy “F” picture for something different, but I’m still looking for the perfect replacement. I think it needs something else, too, on the credenza to the right of the box. Something tall and red, maybe? Like a tall candle stick or a bird cage? I’ll let you know when I run across whatever it is!
 If you haven’t yet, be sure to click over to yesterday’s post and enter the It’s a Snap Source Giveaway!
Handmade Decor: The Hidden Thermostat
 I showed you my TV wall last week along with my solution for making the television disappear: The Great TV Cover-up. Before we even placed the TV on the wall, though, there was another eyesore to deal with.
  Who put that thing there and why? There are so many more appropriate places for the thermostat. How about the stairway wall right across from here or maybe one of the hallways or almost anywhere else? Ray and I did discuss cutting holes in the wall and dragging the thermostat closer to the edge of the wall to make it a little less noticeable, but late one evening, inspiration struck!
We have this little box that is designed to hang on the wall and hold your keys. I didn’t take a picture of the inside, but inside there were little knobs mounted to a solid back. I enlisted Ray’s help to remove the back while I headed down to my sewing studio.
 First, I removed the glass and the print from the box, then I took a few minutes to paint the box red. While the paint was drying, I dug through my stash and pulled out a pile of red and white fabrics. In no time at all, I had pieced together a wonky house block, just the right size for the frame on the front of the box. (How is it that sewing something so small, can result in a mess this big?)
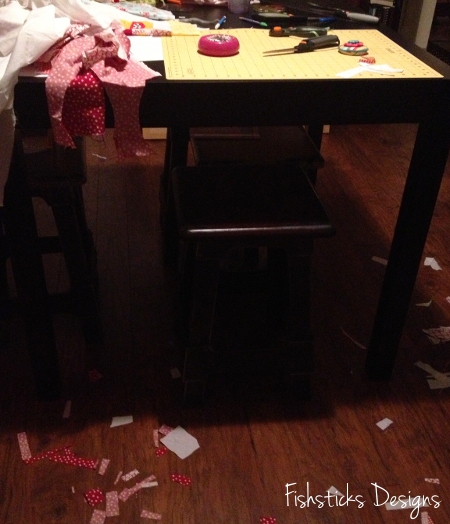 What do you think? Oh, how I love re-purposing something old into something beautiful with purpose!
 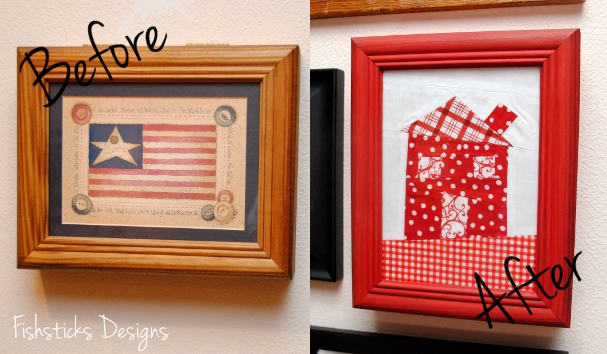 With the back removed, I simply placed a few screws right above the thermostat for the top of the box to sit on, and the door allows us to access the thermostat whenever necessary.
 Here’s one more look at our TV wall with the television and the thermostat hidden away. (Next week, I’ll share a little about the framed embroidery pieces above the television!)
Handmade Decor: The Great TV Coverup!
 This might be my favorite home decor project ever, and I can’t wait to share it with you! As many of you know already, we moved into a new-to-us house this past fall, and we’ve been working since then on decorating it to make it truly ours. We have a very limited decorating budget, so I’m doing my best to create decor as much as possible. I love handmade things, so handmade decor works perfectly for us! I thought I’d try to start sharing a handmade decor idea here on my blog once a week . . . at least until I run out of house to decorate.
That’s our TV wall above. It’s one of the first things you see when you walk in our front door, and while my family enjoys owning and watching television, I don’t like having it on display when we have guests over. I knew that we couldn’t really purchase a piece of furniture to hide the TV, so I went hunting for ideas to cover it up when we wanted to do so. I found some great ideas on Pinterest, including several that balanced a canvas print on the television using brackets attached to the print. I liked that idea because it’s simple and cheap, but I thought maybe I could take it a few steps further.
We started by mounting our television and pulling the cords into the wall so that they’re all hidden. (I say “we”, but really, Ray did all of that work while I stayed out of the way!) Once the TV was mounted, I checked all the measurements: length, width and depth from wall. With measurements in hand, I went hunting for the perfect canvas. I found that when you’re looking for a larger canvas, it’s usually less expensive to purchase one with a print on it rather than a plain white canvas. The canvas that worked for us started out as an alphabet print from Hobby Lobby. (I promise I took a before picture, but I have hunted everywhere and cannot find it.) On clearance, I paid $25 for the canvas.
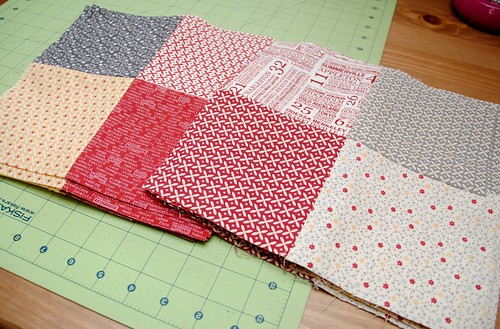 I had this stack of quilt blocks that I pieced early last year during a quilt-along, a quilt-along that I failed to completely quilt along with. That’s okay, though, because these blocks were ready and waiting and perfect for this project. I measured everything out to determine the width that I needed for my sashing and a border wide enough to wrap all the way around the back of the canvas. Once the quilt top was pieced together, I was ready to to assemble my “canvas quilt”. Because the canvas print was pretty bright, I covered the canvas with white cotton fabric then stretched my quilt top over it and stapled it in place.
  I wanted the canvas to slide completely over the television, but the back had some braces that needed to come out for that to be possible. I called in Ray’s help again. (I feel like I should add here that he was worried the frame might not hold it’s angles well without the support, but he was willing to saw out the supports as long as I knew that was a possibility. Thankfully, the frame held together beautifully!)
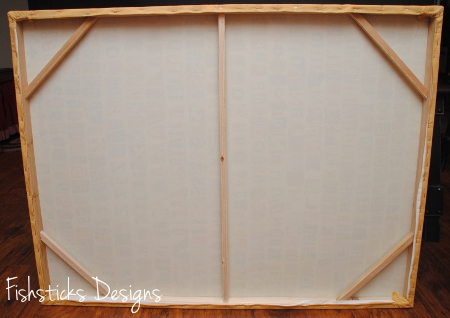
 With that, this project was done! Because you can see the TV from all sides in our home, I love that this cover mounts all the way over the TV. It’s also really lightweight, so I don’t worry that it will cause any harm to the television.
 We had friends over last week, and late in the evening, someone asked me, “Do you own a television?” She happened to be standing right next to it and had no idea! Exactly what I was hoping for!
