My Patterns
Sew Mama Sew Giveaway Day!
 It’s Giveaway Day at Sew Mama Sew, and it’s been a little while since I joined in the fun! If this is your first time here or your one hundredth time visiting, WELCOME! If you’ve found your way over from the link-up at Sew Mama Sew, I hope you’ll browse around a bit, say, “Hi!” and take away a little inspiration.
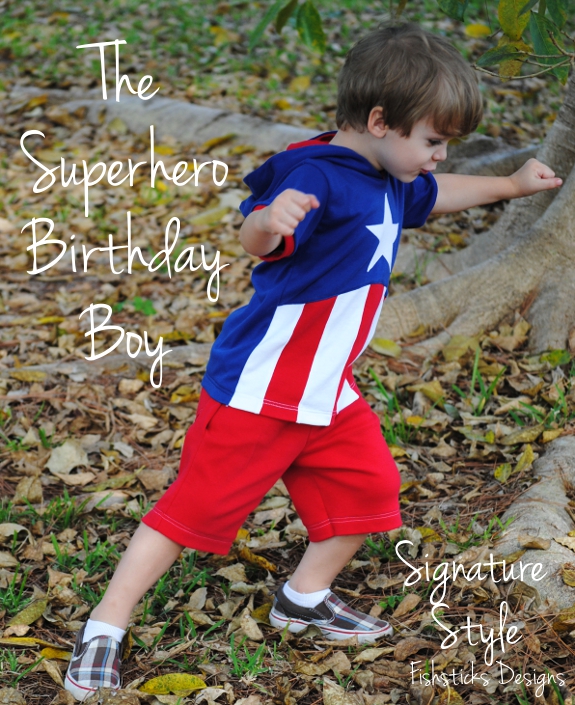 My name is Bonnie, and I’ve been blogging here for many years, sharing the things that I sew for my little ones, for my family and for my home, along with a few recipes now and then, and a little bit about life in general. Recently, my assistant, Leigh, has joined me in sharing some of her projects, as well. (You can find Leigh blogging regularly over at Rooibos Mom.)
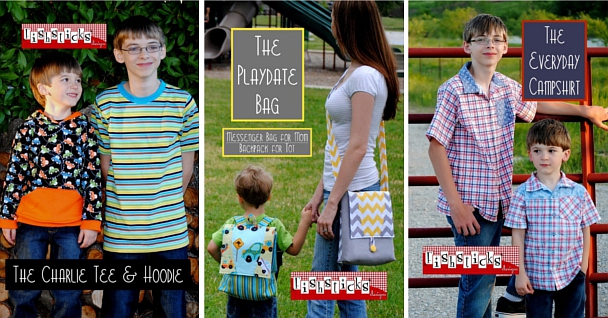
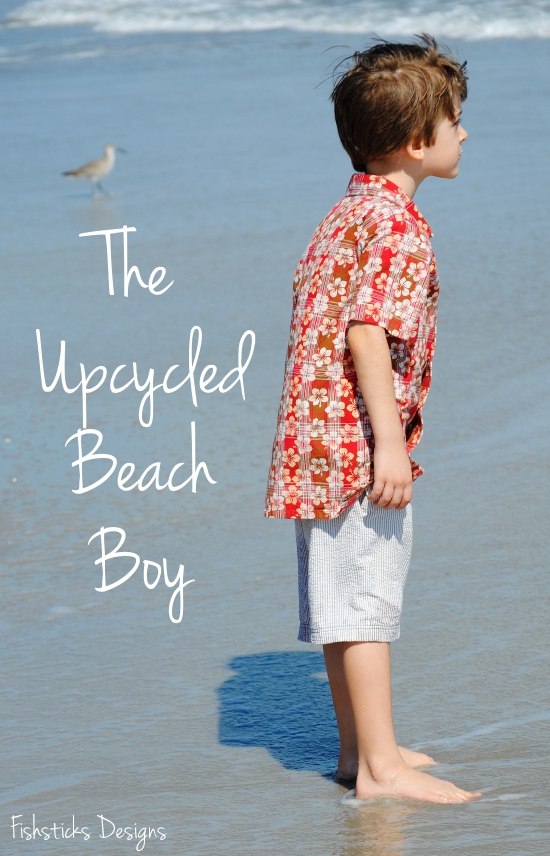 I’m the designer behind Fishsticks Designs sewing patterns. I primarily design patterns for children’s clothing and for accessories. I really enjoy focusing my designs on things that are practical and things that work for little boys (although, I’m slowly adding little girls’ clothes, too).
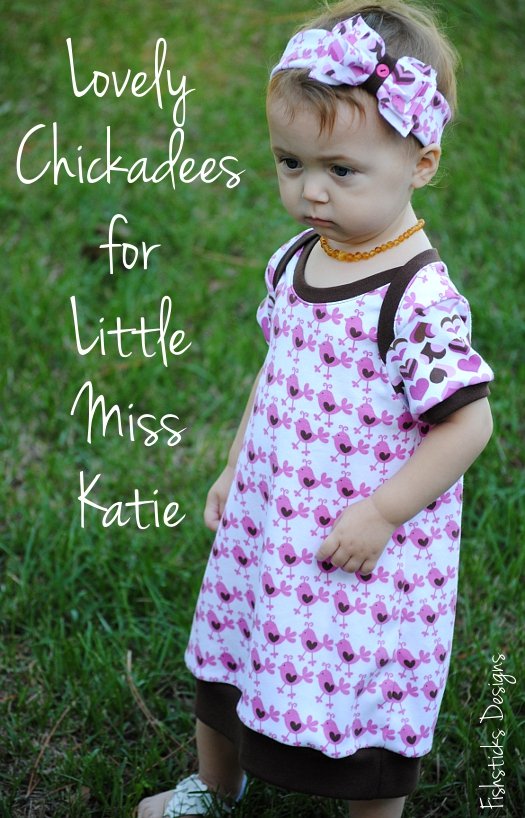 I’m giving away the winner’s choice of three of my pdf patterns this week, and since you’ll need fabric and notions to sew those new patterns, I’m adding a $25 gift card to the winner’s favorite online fabric store! There are thumbnails of all of my patterns along the right-hand sidebar here, and you can find details about each of them in the Fishsticks Designs Pattern Store if you want to take a closer peek at what you’re entering to win.
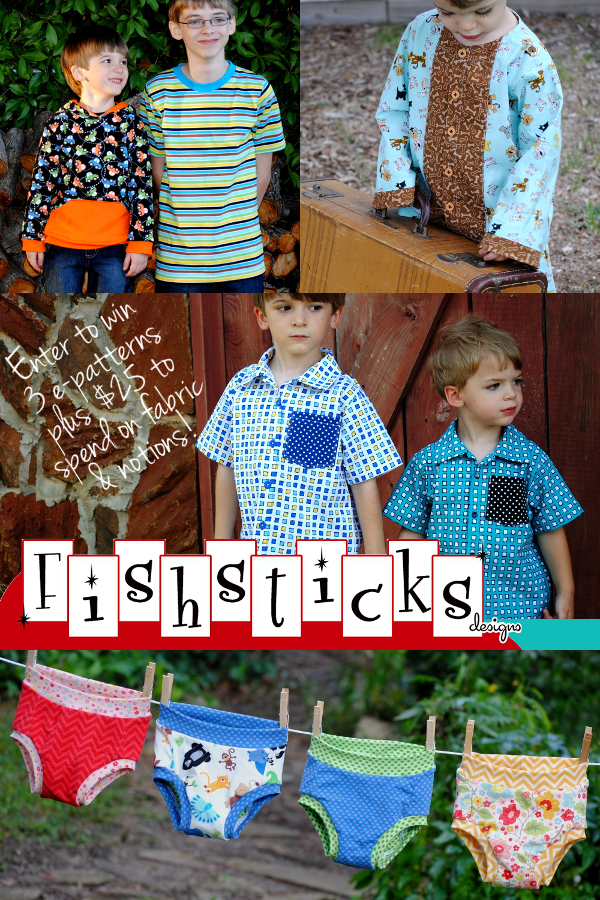 I’m using a Rafflecopter for entries because it’s easy for you to use, and it makes choosing a winner complication-free for me. To enter, simply leave a comment on this post telling me what your favorite thing is to sew for your loved ones then click on the Rafflecopter to confirm your entry. (Don’t miss the bonus entries for Facebook fans and blog/newsletter subscribers!)a Rafflecopter giveaway
KCW Day One: Earth Day!
 Since the first day of this season’s Kids Clothes Week happens to fall on Earth Day, I felt it was quite appropriate to recycle some old grown-up wearables into a few new little-one wearables!
I started with this pile of polos that I picked up recently at a thrift shop. One of the things I love about upcycling thrifted clothing is that it’s already been washed and dried multiple times, so there’s no guessing about how the fabric will wear. The fabric in these polos was all in great condition, so I don’t worry that I’m going to put time into sewing something with it, only to have it pill after being washed and dried a few times. I fell in love with the vintage look of this first polo with its vertical stripes, and I was so excited to find that they fit perfectly on the Charlie Tee pattern in Jamie’s size. Normally, when I upcycle a cotton knit shirt, I reuse the hems to save time. The hem on this shirt was so crooked, though, I didn’t really want to use it as is. That was the first sign that something just wasn’t quite right with this shirt. Without the hem allowance, there wasn’t quite enough fabric below the placket on the original shirt for the new one, so I had to sit and seam rip the original hem.
 Once I had the pieces all cut out, including the back and the sleeves with their original hems intact, I sat down to re-hem the front of the shirt. I noticed upon close inspection that this knit looked quite strange. That would be because the shirt was sewn with the stretch going up and down, rather than around the body. So weird! But, I wanted those vertical stripes! I’d invested enough seam ripping by that point that I felt it necessary to just move forward. It’s a good think I was determined! A broken serger needle and a little bit of sewing-machine-eaten fabric later, that old polo has a sweet new life as a vintage-look striped tee for my 6-year-old. (And, it fits perfectly, even with the front of the shirt turned the wrong direction!)
 Charlie’s tee was so much faster and easier! I grabbed this pique cotton polo that was formerly sold at a high end men’s store. That means the fabric must be great, right? I definitely didn’t have to worry with crooked hems or fabric turned the wrong direction!
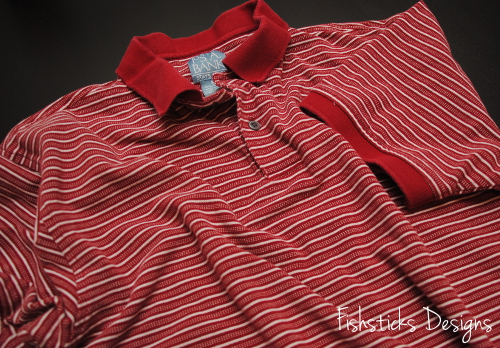 This tee took less than 30 minutes from cutting to done. I was able to use the existing hem from the old polo for the front and the back of the new tee. Rather than re-hem the sleeves, though, since the originals were trimmed with ribbing, I used the Charlie Ringer Tee sleeve option. Voila! A cute little ringer tee for my youngest from what started the morning as a used and tossed aside polo.
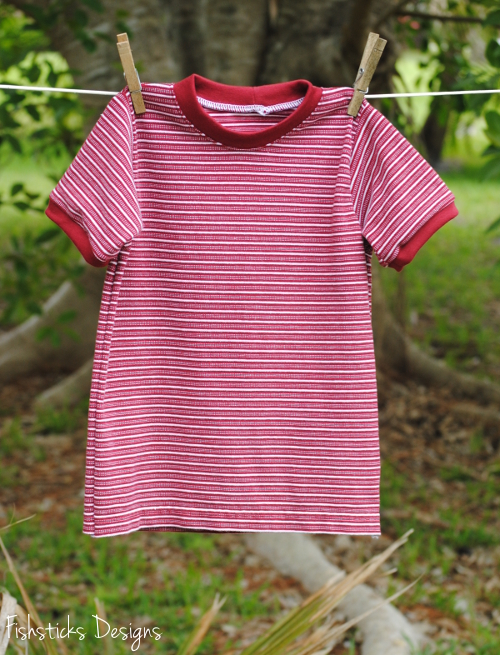 (I’m going to put off sharing modeling photos of the things that I sew for KCW until we’re on our family trip in a few weeks. I’m taking advantage of KCW this week and sewing up tops so that my youngest two will have plenty of handmade shirts to take with the jeans — and possibly winter coats — that we’ll be packing! I really hope that it warms up a bit north of here soon!)
Easter Pictures!
 I hope you were all blessed with a wonderful Easter Sunday! We enjoyed an amazing worship service, yummy food, great company and beautiful weather! I was up late two nights in a row last week sewing for our two little guys and our granddaughter. The boys ended up with khaki shorts that I ran out and grabbed at Target on Saturday night, and I was still sewing buttons on Charlie’s shirt about fifteen minutes before church started on Sunday morning! (We’re used-car shopping right now, and it takes so much time! We were out nearly all day on Saturday after spending hours of time researching for days ahead of time, and we still haven’t purchased anything. I’d really like the perfect van to just appear in our driveway so we can be done.)
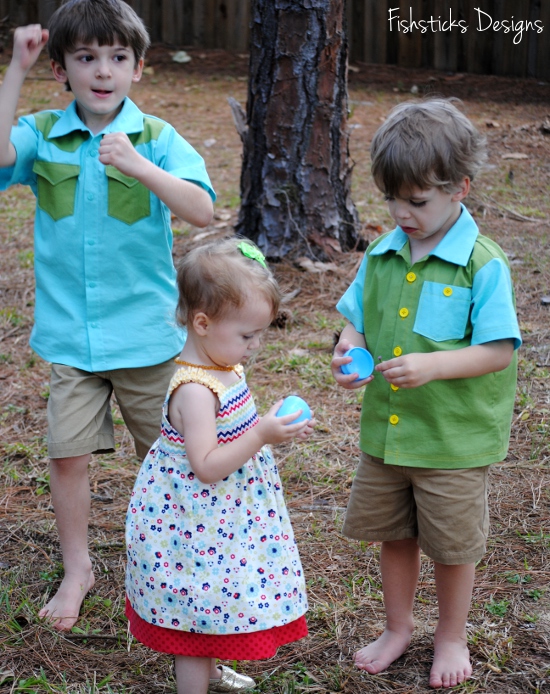
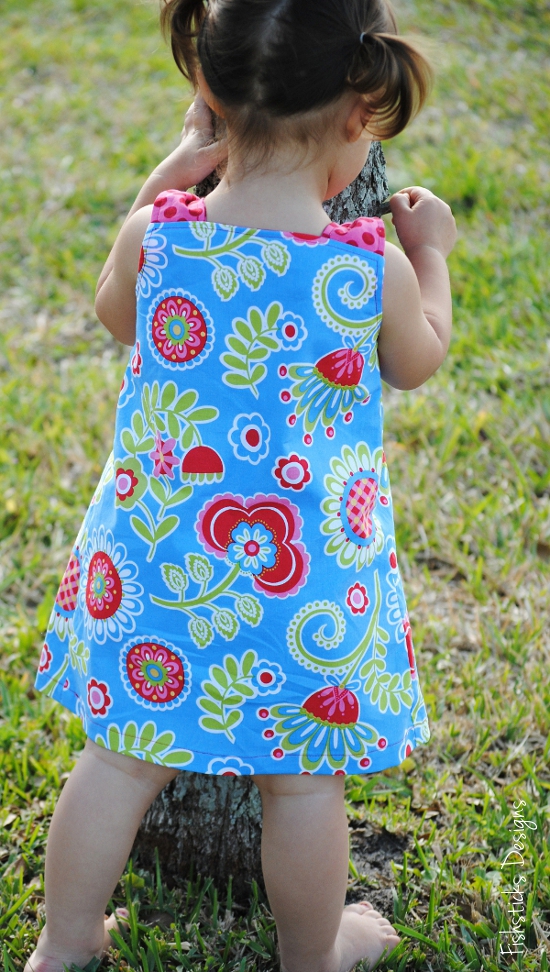
We went to the early service on Sunday morning, so we were all a little wrinkled by the time we got out to hunt eggs in the afternoon. You’ll just have to overlook the wrinkles. We also had no baskets, so the kids hunted with my reusable grocery bags! Katie’s dress is the Reversible Double-Layer Katie J. Jumper in Riley Blake Tone-on-Tone Dots and coordinates from Dress-up Days.
 Charlie got an Everyday Camp Shirt made with Timeless Treasures’ Soho Solids and yellow buttons! (Hmmm . . . how did I miss that dirty face? Just pretend that I washed it, and you can’t see that chocolate.)
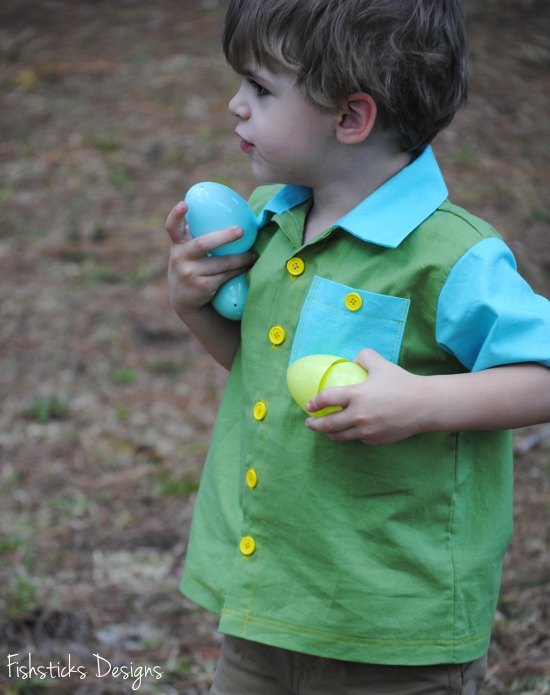 I’ll be back to share a little more about Charlie’s shirt later this week. It’s Button Week at Sew-vivor!
 Jamie’s shirt is a prototype of a new design that I’m working on. It’s a fun retro Western-style shirt.
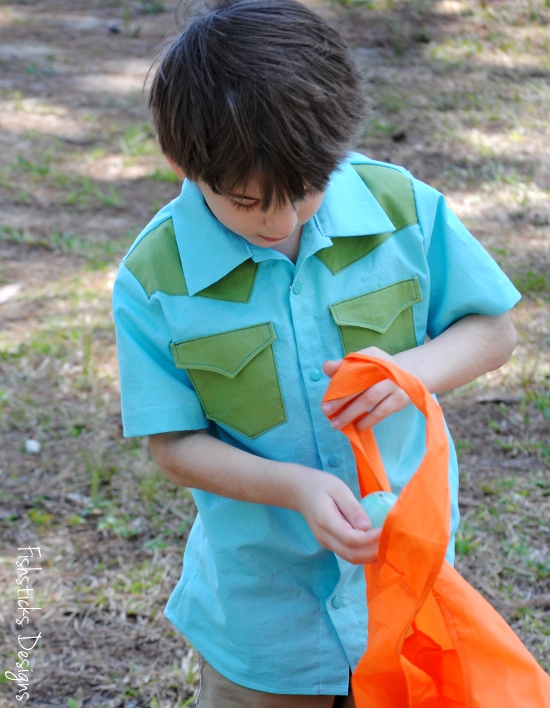 Those pocket flaps were supposed to get snaps, too, but church was starting without us! I love the shirt-tail hem on this one.
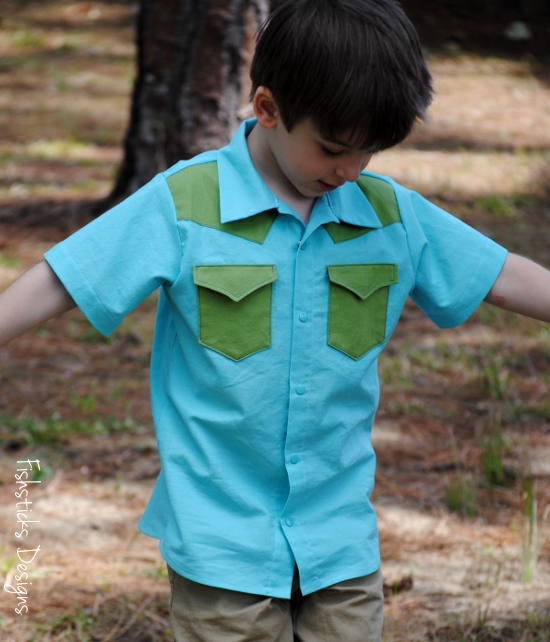 Ray and Samantha hid the eggs for us, including a few that they thought would be too high for the little ones to get to on their own.
 Bet you never knew that palm trees were made for climbing! (I certainly didn’t!)
 I attempted to get some pictures of the three little ones together.
 I also tried to get some pictures of Charlie and Jamie together.
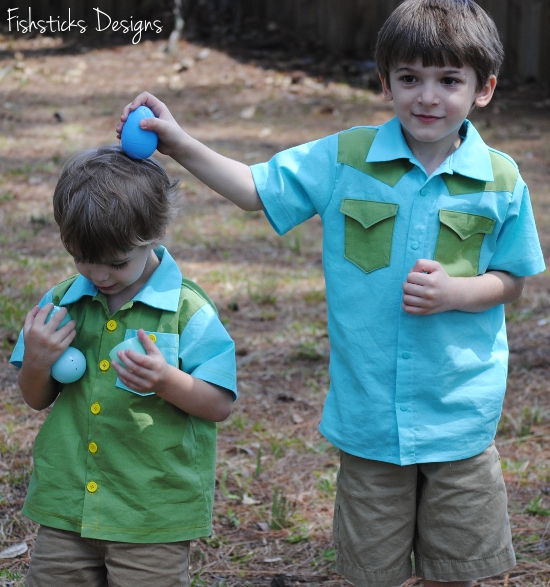 Maybe next year? I did get one really cute one of Jamie and Katie!
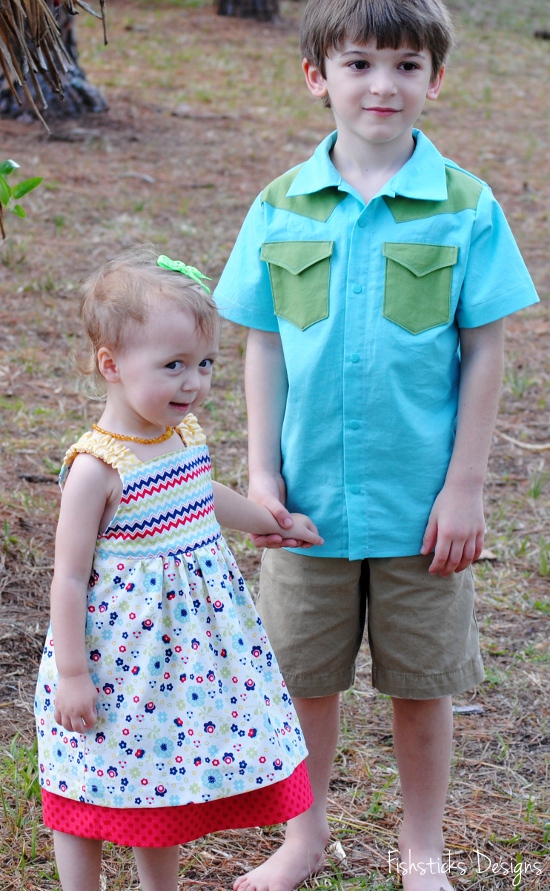 I’ll leave you with that! Happy Easter . . . a couple days late!
Project Run & Play: Inspired by a Little Boy’s Art & Imagination
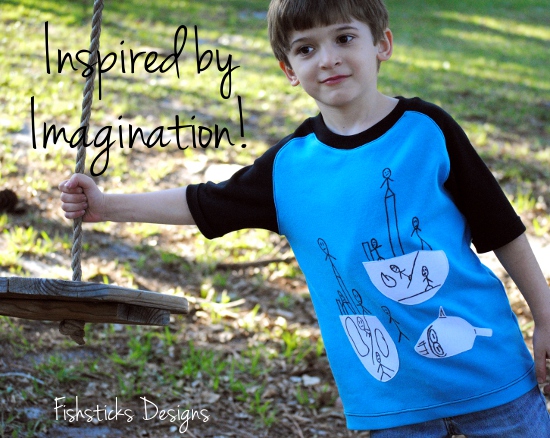 The Project Run & Play All-Star Season has begun! Are you sewing along? The first theme is Inspired by Art. In keeping with my goal to sew everyday wearables for my little ones, Jamie got a new Patrick Curved Raglan inspired by his own artwork!
 This pirate ship drawing is one that Jamie did a few months ago. I saw it hanging up when I was looking for ideas for this week, and asked him what he thought about putting it on a shirt. He couldn’t have been more excited! (Jamie doesn’t tend to get overly excited about the clothing that I sew for him anymore, so I was really excited to see what he would think when I was done!)
 I started by scanning and enlarging the picture. I printed the ships and the shark on separate pages and cut them out to make patterns for the appliques. To reproduce the rest of the drawings, I drew them freehand on to the fabric using a Frixion pen. Because Frixion ink disappears when you iron it, I was able to correct any mistakes before tracing the final drawings with a Crayola fabric marker. I did all the applique and the drawings on the front of the shirt before sewing the pieces together.
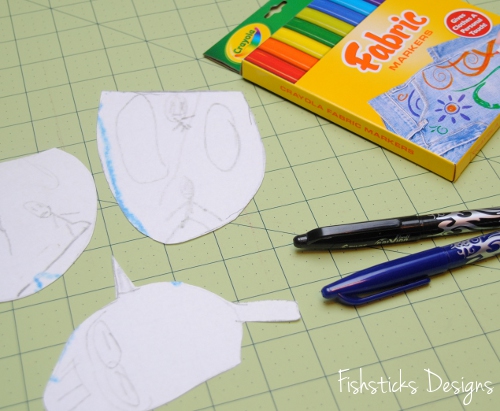 The end result?
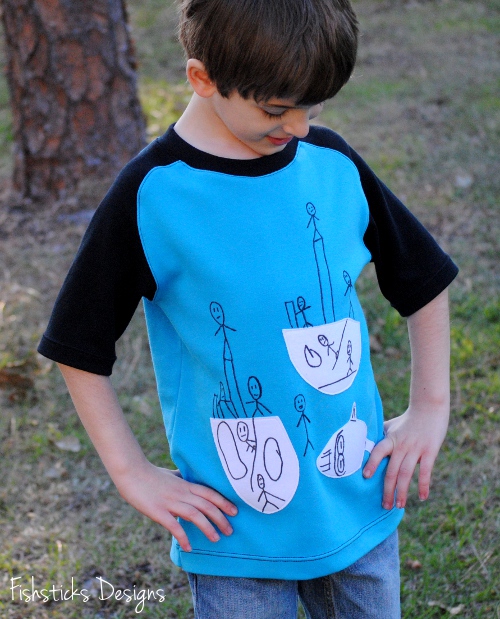 I think he likes it!
 It is his artwork! How could he not like it, right?
 Here’s Jamie’s rundown of all the parts of his artwork:
 This was so much fun to create! And, Jamie says that it’s “the coolest shirt ever”! Woo-hoo! A win for mom and for Jamie!
A Spring Break Pattern Sale!
 It’s Spring Break week here, and I think it’s a great time for a sale! All this week (through midnight eastern on Saturday, March 30th) you can use the code SPRINGSALE for 25% off of paper and pdf patterns in my main pattern store: Fishsticks Designs Patterns. Maybe you’ve been holding off on grabbing those three new patterns above that I released last month? Or, maybe you’d like to try some of my favorite standbys, like these?
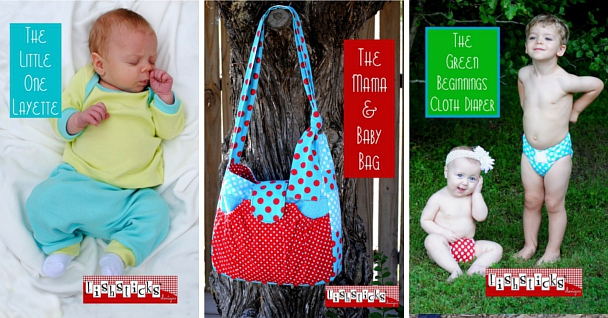
 Perhaps you have a new baby coming and need tiny clothes or itty-bitty diapers or something to carry clothes and diapers when you’re on the go?
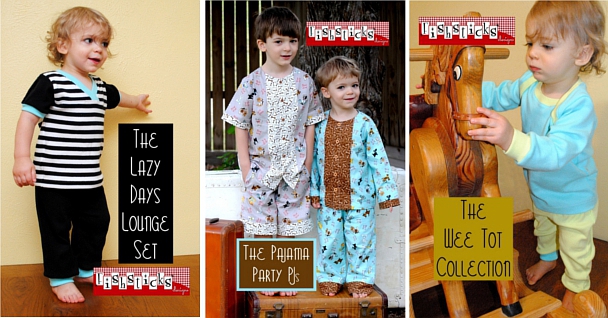
 Does your little one need spring PJs? These are all so much fun, and comfy, too!
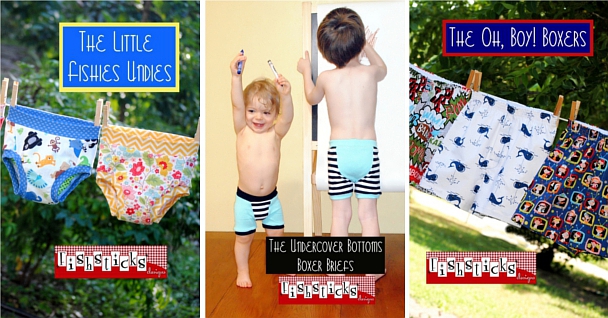
 What about undies? You can never have too many fun pairs of undies, but you can definitely have too few!
 You’ll find all of those patterns and more in the shop right now, ready for you to download and get sewing! Go shop! And don’t forget to add pictures to our Flickr album so we all can see: Fishsticks on Flickr!
The Mud Puddle Splashers!
 Good morning! I know I said I was going to be back at naptime yesterday, but I got distracted by cookies — all-natural, gluten-free, coconut flour, chocolate chip pecan cookies. Yum. I need to tweak the recipe a little and then maybe I’ll share!
  Really, I got wrapped up packaging up a couple of wholesale orders and answering emails, and the afternoon got away from me, but I did bake cookies. My kids needed some mama-time.
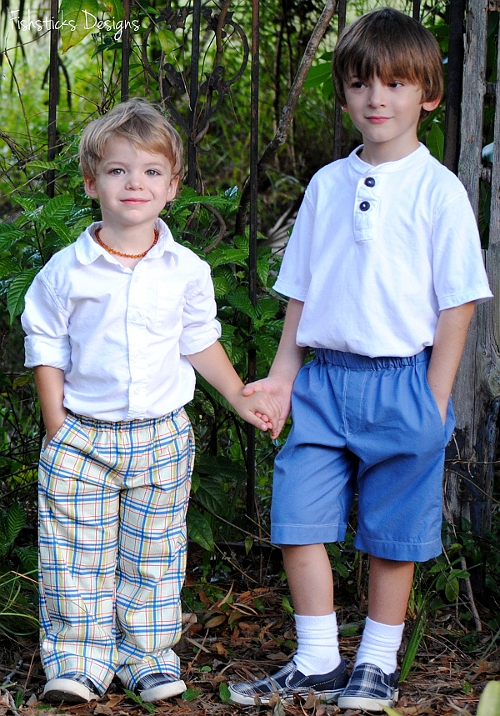
Back to the subject at hand! The complete Mud Puddle Splashers pattern is done! I hope you enjoy it as much as I do. It’s become my go-to for quick and simple basic pants and shorts for my two youngest boys. I love that the little extras don’t take much time, but they make a huge difference in the finished look and the practicality of the pants. The side seam pockets are a huge hit with my little guys. Pants are just not pants without pockets for your hands or your pennies. (Remember, if you have a big enough piece of fabric, you can cut the pockets and the legs in one piece. You’ll find instructions right here: Naptime Mud Puddle Splashers.)
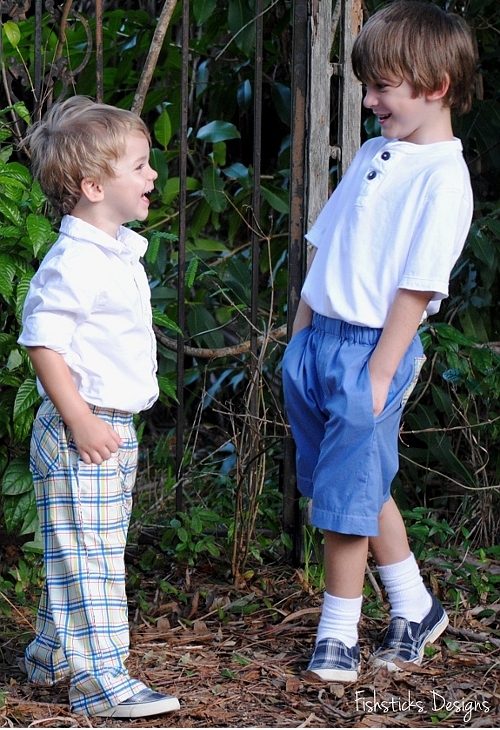 The faux fly gives the look of a zipper without the fuss. Little ones appreciate the ease of the elastic waist and big kids like the comfort.
  The back pockets are the perfect finishing touch. I’ve said before that I think back pockets make the difference between a pair of pants looking not-quite-done verses properly-finished. (My husband is actually the one who originally expressed that opinion to me when he asked me to be sure and add back pockets to our boys handmade bottoms.)
 And, the cuff! Experienced moms know that kids tend to grow up faster than they grow out. How many times have you looked at your child and thought how did those pants get so short so fast? The optional cuff really extends the life of these pants so you get more wear-time for the work that you put into the sewing. (I can certainly appreciate that!)
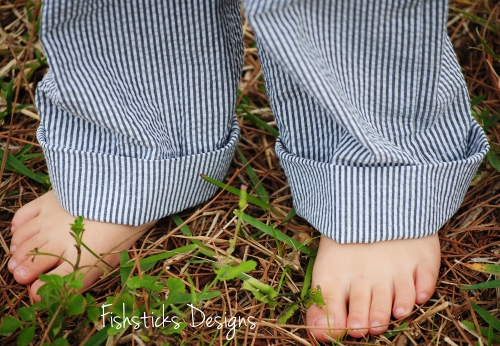 I mentioned last week that I had plans to donate a portion of the proceeds from the MPS to charities that benefit at-risk children. I still absolutely want to do that. I originally designed this pattern for charity, and I want it to continue to have that purpose. I’m actually glad that I put off posting this introduction, though, because I needed to research the laws about businesses giving a portion of the profits of something to charity. I’m still not sure if Florida has a specific law, but most states do, and I’m not big enough to pay an attorney to help me out with it. So, for now, I’m going to have to remove that wording from the pattern listing and the paper-pattern cover. I’ll just have to continue to look for other ways to give and encourage you to give! (There are still two days left to sew bibs for the February Hopeful Threads Dinner for 2 project!)
I’ll wrap up this post with a little reminder of where this pattern got started! If you want to read more about the project that we completed last July or where the Mud Puddle Splashers name originated, including why in the world I made mud puddles in the backyard and let my children jump in them, just click over to this post: Boys Shorts Month at Hopeful Threads. You can find all of my patterns, including these three new ones, in my pattern store: Fishsticks Designs. The patterns are arranged in alphabetical order, and the new ones have a little white banner in the upper left-hand corner so they’re easier for you to find.
The Scrappy Sack!
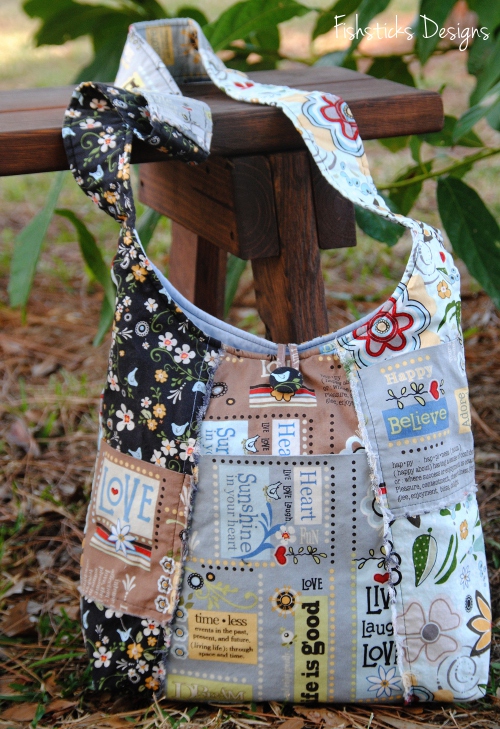 Do you have a pile of favorite fabric scraps that you’d love to put to use? How about sewing up a Scrappy Sack? You can use pieces of every size! (The care-free look of this bag even lends itself well to pieced together pieces. If you look closely at the pictures in the instructions, you might see that I pieced together a couple of the strap pieces and the back of the main front pocket. Except for the solid inner, I made this whole bag with stash scraps from ADORNit’s Vintage Groove Collection.)
The Scrappy Sack has three raw-edge pockets on the front that give it that fun frayed-edge look. There are two small cell-phone-ish sized pockets and a larger middle pocket that is perfect for many e-readers or other things that you need to grab quickly. With a finished size of 13 ½” x 14″ x 4″, this bag is not small at all, but it’s not so big that you feel as if you could carry the kitchen sink. 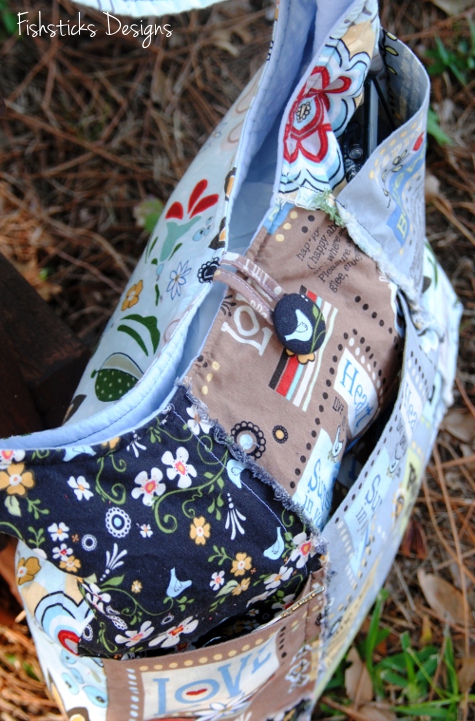 The fabric-covered button and loop are great little places to showcase your tiniest bits of favorite fabric. I love the little bird on this one!
The Basic Bag strap is designed to be worn across the body, low on the hips, but instructions are included for shortening the strap to the perfect length for you. Inside, the Basic Bag has four pockets: two business-card pockets and two pen/pencil pockets.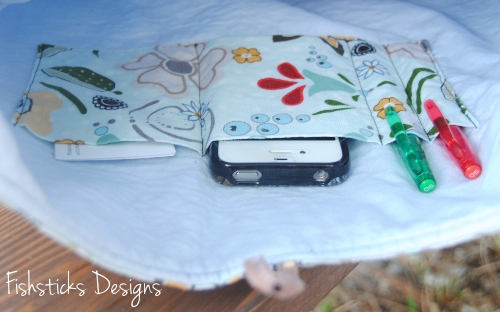 But what if you want a bag that you can use no matter where you are? We can’t be happy-go-lucky all the time, right? Sometimes, you just have to be a little more sophisticated. How about a reversible Scrappy Sack?
The Reversible Scrappy Sack uses the same pockets on the reverse side as the Basic Bag but with finished edges. Of course, you could sew the Basic Bag with finished edges, too, but where’s the fun in that? I think my favorite thing about the reversible bag is how the bright and cheery, happy side peeks out just the tiniest bit even when that classy, sophisticated side thinks it has it hidden away! I’ll be sharing more about the Mud Puddle Splashers Shorts & Pants Pattern during naptime this afternoon! You can find all three of my new patterns, and all of my other current patterns in my pattern store right here: Fishsticks Designs Pattern Store.
The Katie J. Jumper!
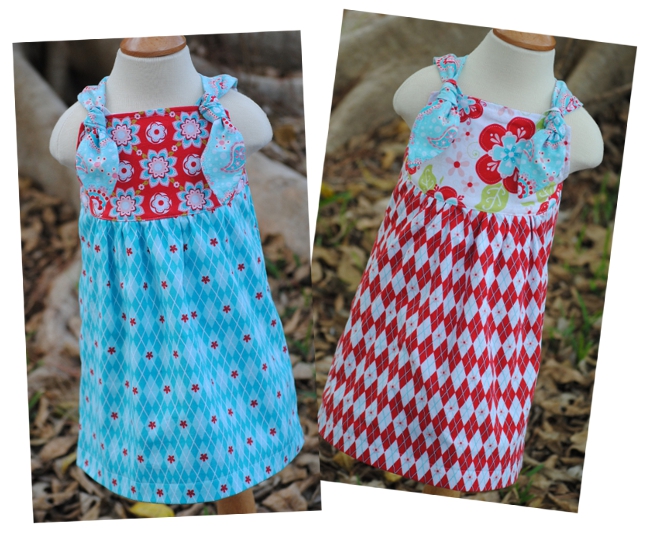
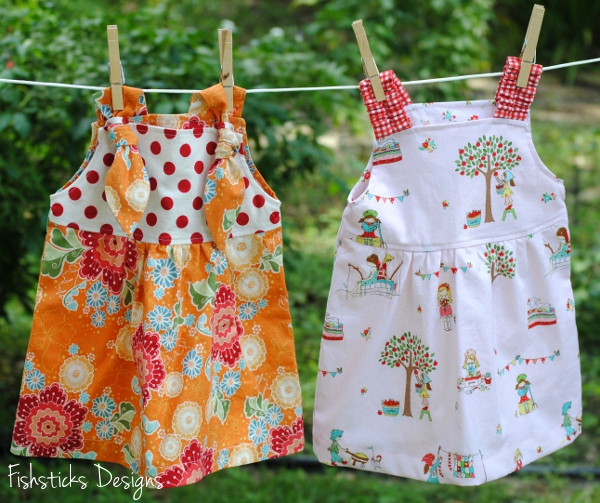 My three newest patterns are all ready for you and available now as downloadable e-patterns in the Fishsticks Designs Pattern Store! First up is the Katie J. Jumper. I love all the options that this simple little dress offers! You can see the two strap options above. The stretch strap is elasticized and has a pretty gathered look. My oldest daughter, Morgan, loves this one for our granddaughter, Katie, because it’s cute and easy to get on and off!
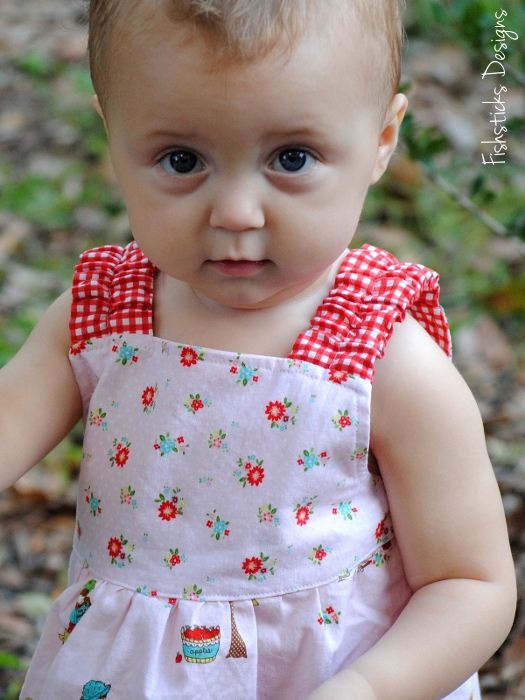 The knotted strap dresses the jumper up a little and adds a bit of modern style. The strap pulls through a loop that is attached to the bodice rather than through a button-hole. This gives the bodice a comfortable fit.
 There are two back choices for the jumper. The one-piece back on the basic jumper gives it a contemporary feel. (This pictures also gives you a good idea of where the basic jumper hem falls. It’s right at or just below the knee. )
 The gathered back is really just a repeat of the front bodice and skirt, and it gives the jumper a fuller, more traditional finished look.
 There are two reversible options for this dress, too! (You can peek at the second option in that picture just above.) The first reversible option is the basic reversible jumper. It’s a straight-forward reversible option that you can make with either back choice.
 The second reversible option is the Double-Layer Reversible Jumper. The Double-Layer Reversible Jumper is slightly longer than the Basic Jumper, falling about 2″ below the knee. The reverse side of this jumper is finished with a bottom band which peeks out under the hem on the main side.
 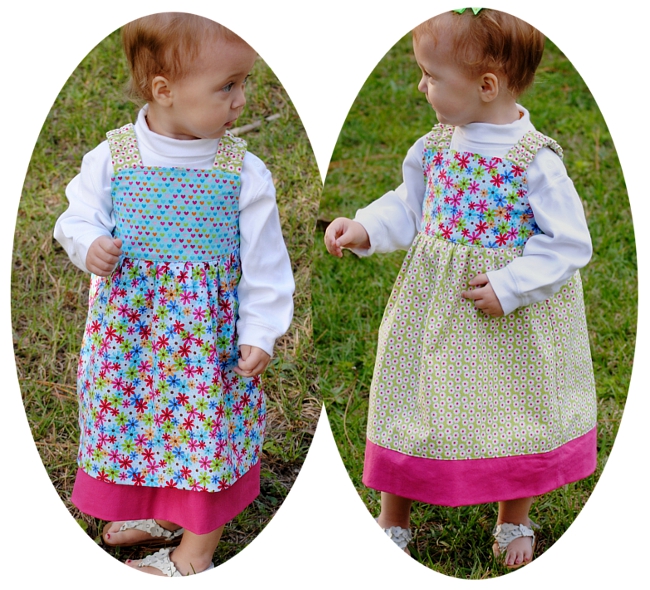 That wraps up the details on the Katie J. Jumper. You can find it right here: The Katie J. Jumper E-Pattern. I’ll be back in a bit to share more about the Mud Puddle Splashers and the Scrappy Sack!
A Few Spring Pattern Previews!
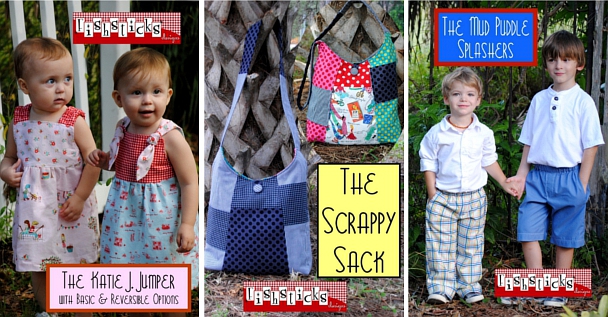
Three new Fishsticks Designs patterns are coming on Monday! It’s been a really long time, hasn’t it? I thought you might enjoy seeing a few little sneak peeks. First up the Mud Puddle Splashers!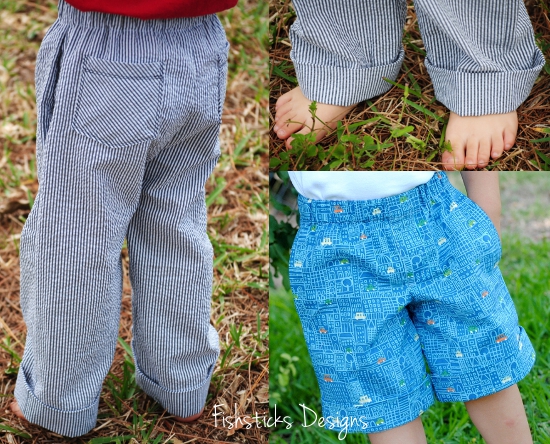
You may remember that the Mud Puddle Splashers was a shorts pattern that I created in a select group of sizes for last July’s Hopeful Threads Boys’ Shorts Month. I received so many great reviews and so many requests to put together a full pattern, and it’s finally almost done! I personally love this pattern for great basic little kid pants! The final pattern will include sizes from 12 months all the way to size 12. A portion of the profits from the Mud Puddle Splashers pattern will go to charity . . . more on that Monday.
The second pattern is my first girls’ release since the now-retired Emmy Dress. (I do have a granddaughter to sew for now. I can’t possibly leave her out, can I?) Take a little peek at the Katie J. Jumper!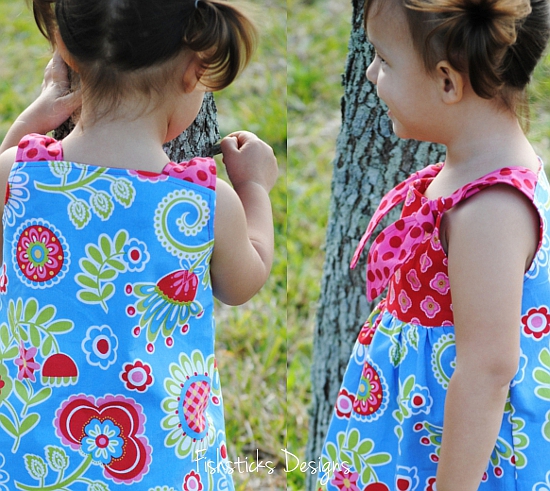 In sizes 6 months to 5, this jumper has so many options! There are two strap options, two basic jumper options and two reversible jumper options! I love giving you patterns with options!
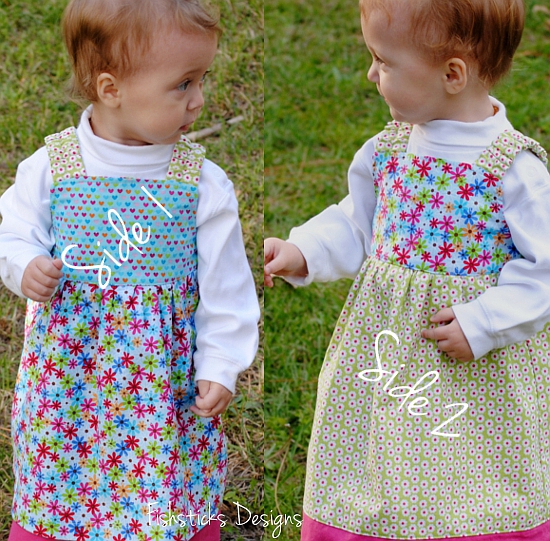 Finally, here’s the Scrappy Sack! If you read my blog posts at Christmas time, you’ve seen the prototypes of this bag. With the help of my amazing group of testers, I’ve added a some options that I think will make this a fun and funky bag that you and your teenage daughters (or granddaughters) will adore!
That is all for now, but I’ll have lots of pictures, more information and the patterns for you on Monday morning! In the meantime, be sure that you’ve entered the It’s a Snap Source Giveaway, AND don’t miss tomorrow’s post! I’m so excited to be a part of the blog tour for a new book. There will be another great giveaway and a discount code for the book author’s store!
Project Run & Play: Signature Style with Superhero Appeal

The final Project Run & Play theme is Your Signature Style. As the weeks have come and gone, I’ve pondered what my “signature style” is and wondered what I could sew that would show it. The whole series flew by, though, and as usual, it was the last minute. There was no time left to think, only time to sew! Yesterday was Charlie’s third birthday, and since he was the recipient of this week’s sewing, I let him make the major design decisions.
Is that a superhero hiding behind that palm tree? Could it possibly be Captain America?!
  Charlie loves superheroes, especially The Avengers, or “The Avengers Assemble” as he calls them. His current favorite happens to be Cap’n ‘Merica!
 As I mentioned, time was short, so I grabbed two patterns that I know are quick and trustworthy — for the top, my Charlie Tee & Hoodie and for the bottom, my soon-to-be-re-released Mud Puddle Splashers. I wondered aloud as I was tracing Captain America’s shirt design onto my Charlie Tee pattern, how I was going to spin this as my signature style. Suddenly, I realized, though, that this is my signature style! In creating this outfit, I followed my normal routine: grab a pattern that you know and love, evaluate the needs and desires of the wearer, choose a few little extras, use what you have available (fabric, time, equipment) and create something practical and fun.
 The shirt was pieced together using the colorblocking method that I mentioned in Week 2. It just took a few more pieces than usual. I cut the red and white stripes at the bottom longer than I needed them to be, pieced them together, then cut the curve at the top before cutting the matching top piece. I used the ringer sleeves and the hood from the Charlie pattern, partially to add some character to the top, but also because I broke my walking foot last week. (I managed the hems on the shirt and the shorts without a walking foot, but there was no way I was going to try topstitching a neckline without one!)
 It was nearing 10:15 on Monday evening, and I’d promised myself that I’d be in bed by midnight, so the shorts got the Naptime Knit Mud Puddle Splashers treatment. I did add back pockets, but rather than turn and topstitch them, I trimmed off the seam allowance and just folded them wrong sides together. It’s interlock knit, so the edges aren’t going to fray, and that raw-edge look works great for little boys. (Why, yes! Yes, I did make TWO pairs of red shorts for Charlie during this PR&P series! I wondered for about half a second if I should, but red works well for him, so they’ll get plenty of wear.)
 Happy Birthday, Charlie! Oh, those eyes. Of course I’m biased, but aren’t they amazing? (I considered virtually cleaning up the bruise between his eyes and removing the grass from his hair, but this is so very Charlie! He’s not quite ready to save the world, but he works hard at conquering his own backyard.)
 Before I wrap up this post, I have to share one more little thing. I mentioned in yesterday’s post that I had to clean up a cake disaster, and I’m a little bit impressed with how it turned out. You won’t find me posting pictures of cakes here very often. I can sew really well, but cake decorating is not my thing. HOWEVER . . . I think this one might be encouraging to other harried moms like me.
I tried out a new cake recipe yesterday, and it was incredibly yummy: Paleo Chocolate Birthday Cake. The problem arose when I realized that I’d failed to remember to put parchment paper in the pans before pouring the cake batter into them. This is what I found myself faced with:
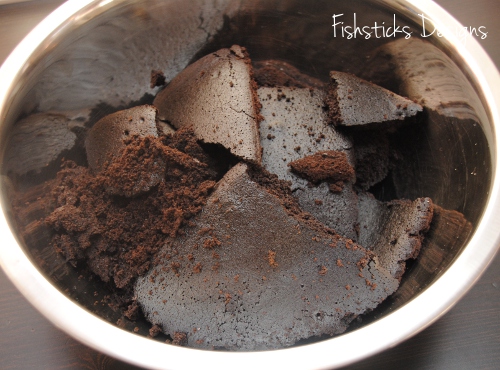 Not pretty, huh? Well, what’s a creative mother of a little boy who loves Captain America to do when she’s faced with a bowl full of broken cake? Why, build a cake mountain, of course! And, let everyone think that’s what she meant to do from the start!

Oh, the blueberries? Charlie not only loves Captain America, but he also loves blueberries. He’s been insisting for weeks that his cake had to be chocolate with chocolate frosting and blueberries. So there you go!


